Deighvid
Well-Known Member
- First Name
- Deighvid
- Joined
- May 25, 2021
- Threads
- 19
- Messages
- 672
- Reaction score
- 762
- Location
- Los Angeles
- Car(s)
- 2021 3.0 Supra Premium
- Thread starter
- #1
There's like 10 people in the US that have INGS fenders/kit and maybe 5 online lol so not a whole lot of documentation
I decided to share some measurements I made and methodology I used in deciding how to cut my fender-liner so that the fender vents are functional. Yes, this is probably way over-engineered but whatever. lol
Tools:
paint marker
measuring tape
1/2in drill bit
Dremel with sanding barrel
Methodology:
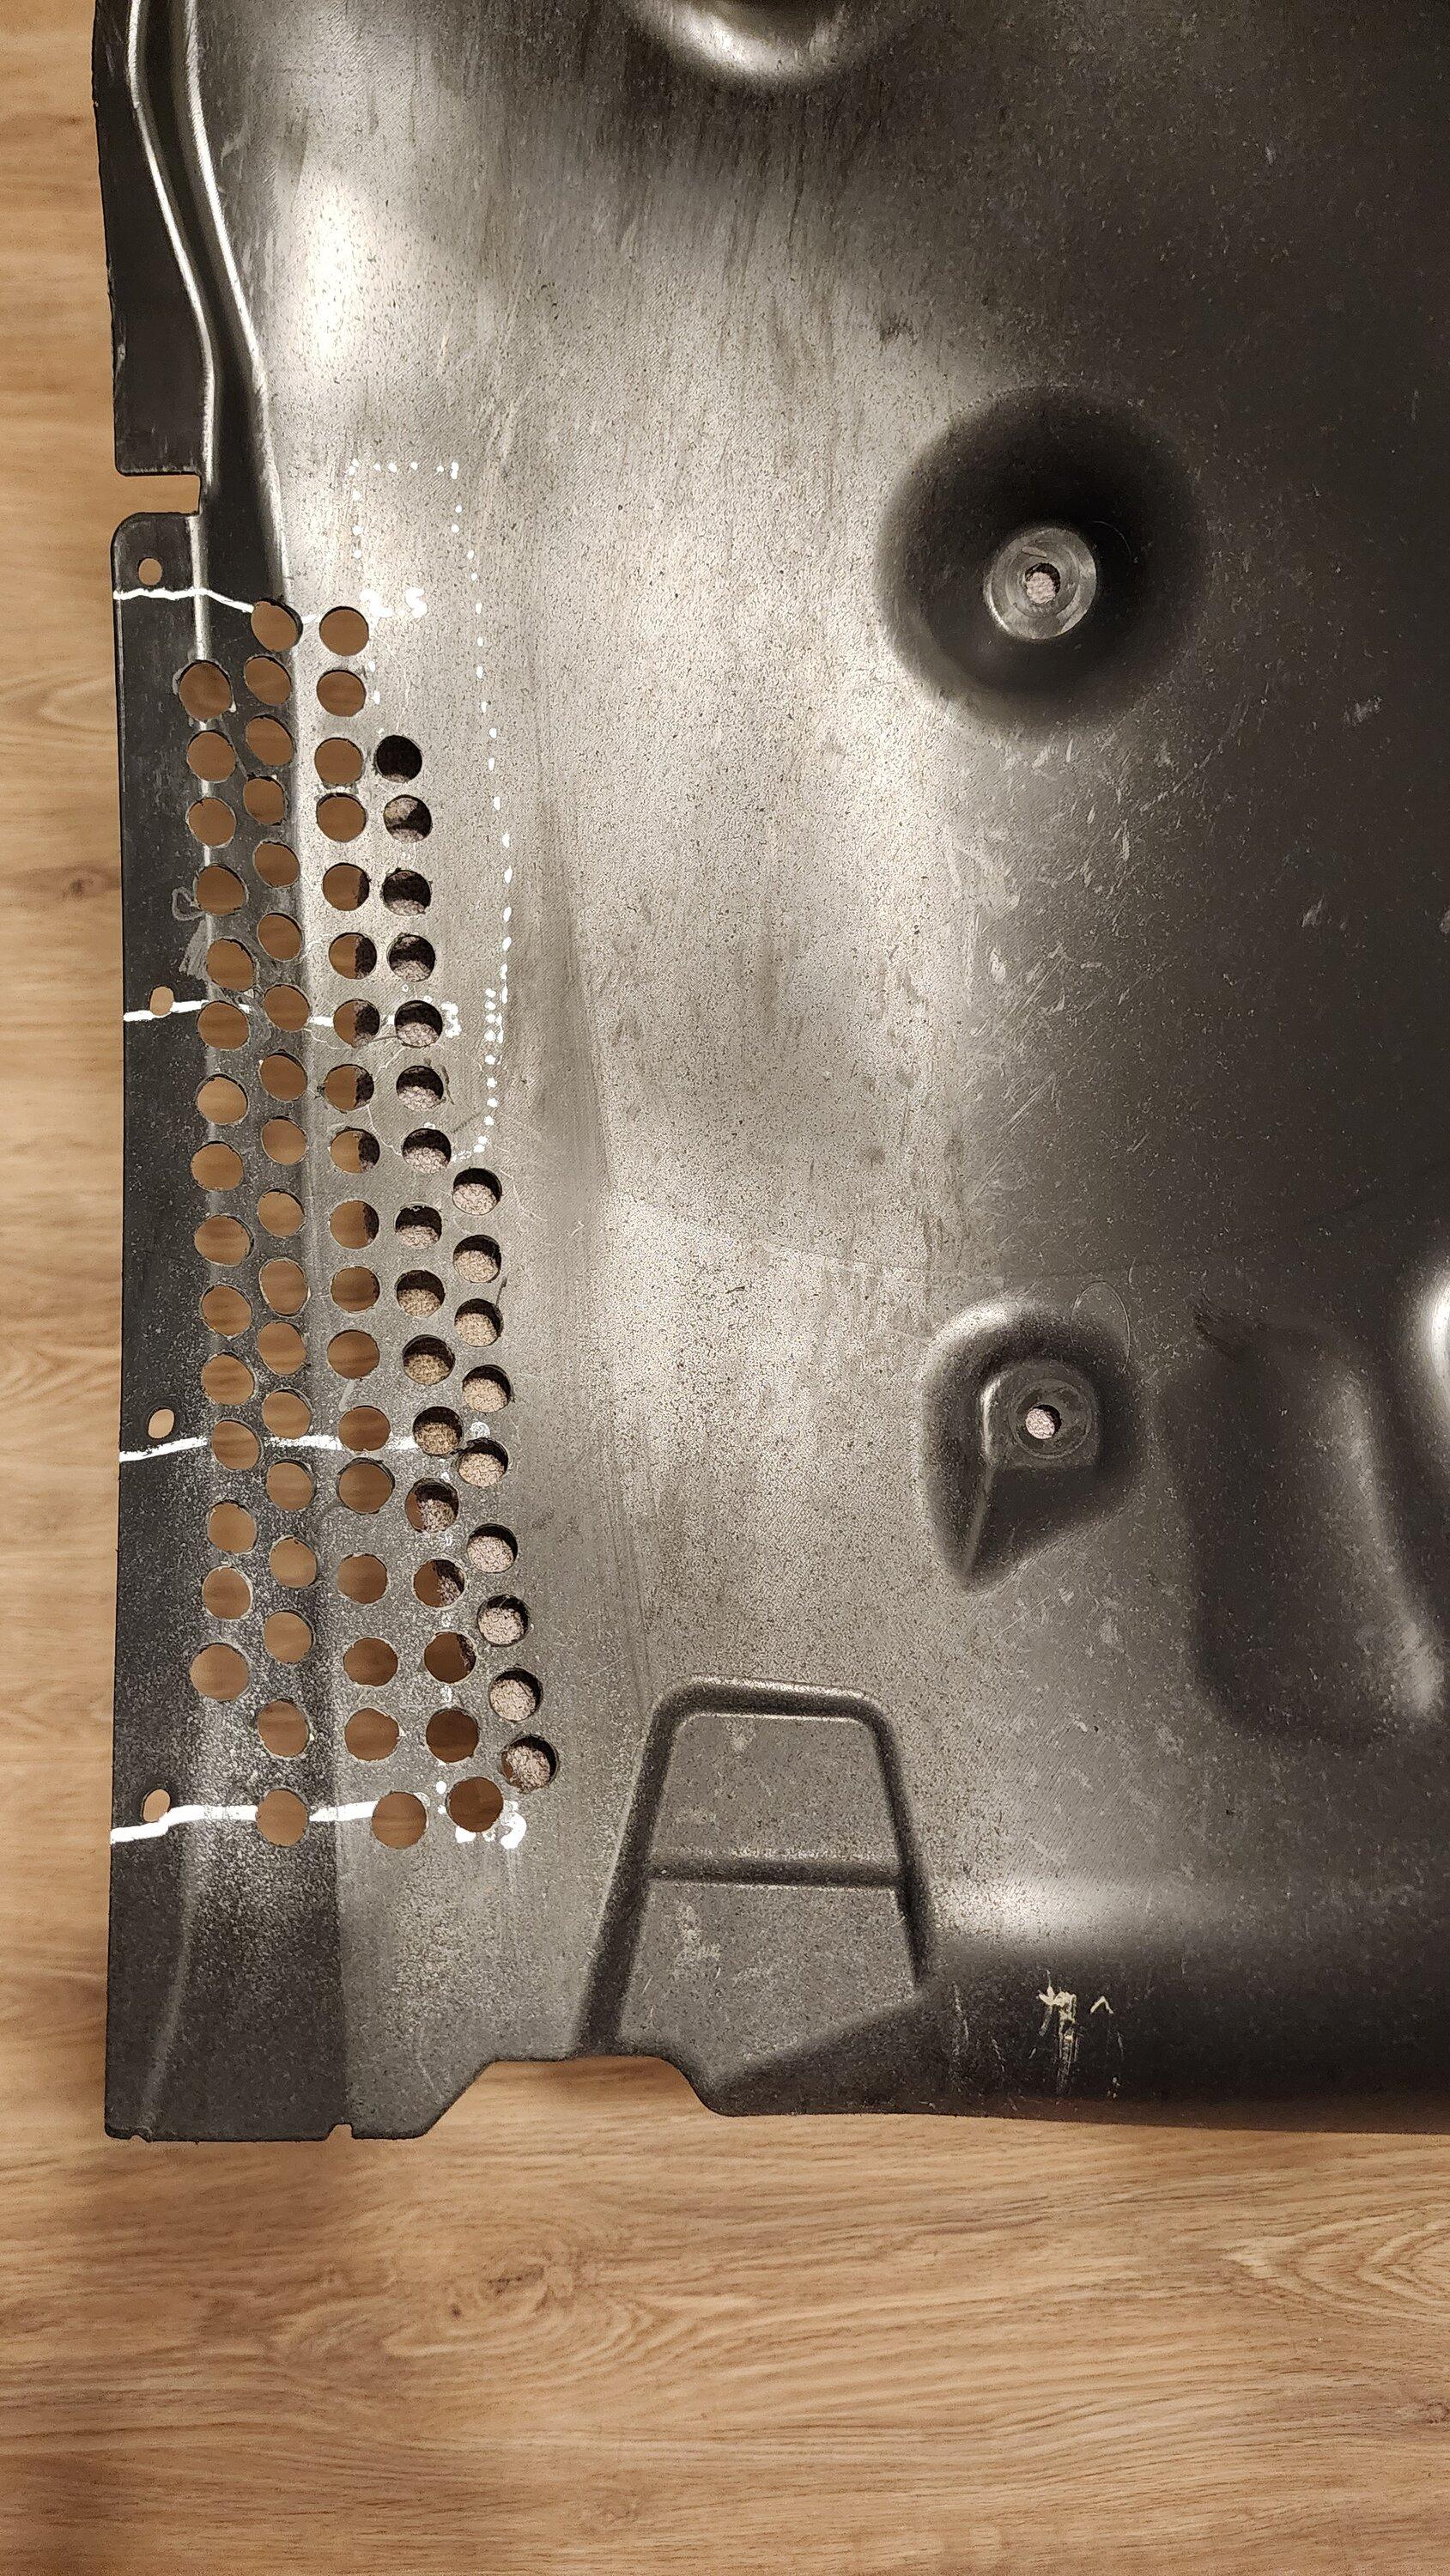
I didn't want to just cut giant holes and expose too much of the area behind the fender, considering that the vents aren't that deep and there are various wires and things, so I started by making some measurements to identify a conservative safe area to cut, leaving room to expand if needed. I also opted to drill holes instead of cutting slits, to retain structural integrity. I track this car and I don't need the fender-liner flapping around and/or ripping off.
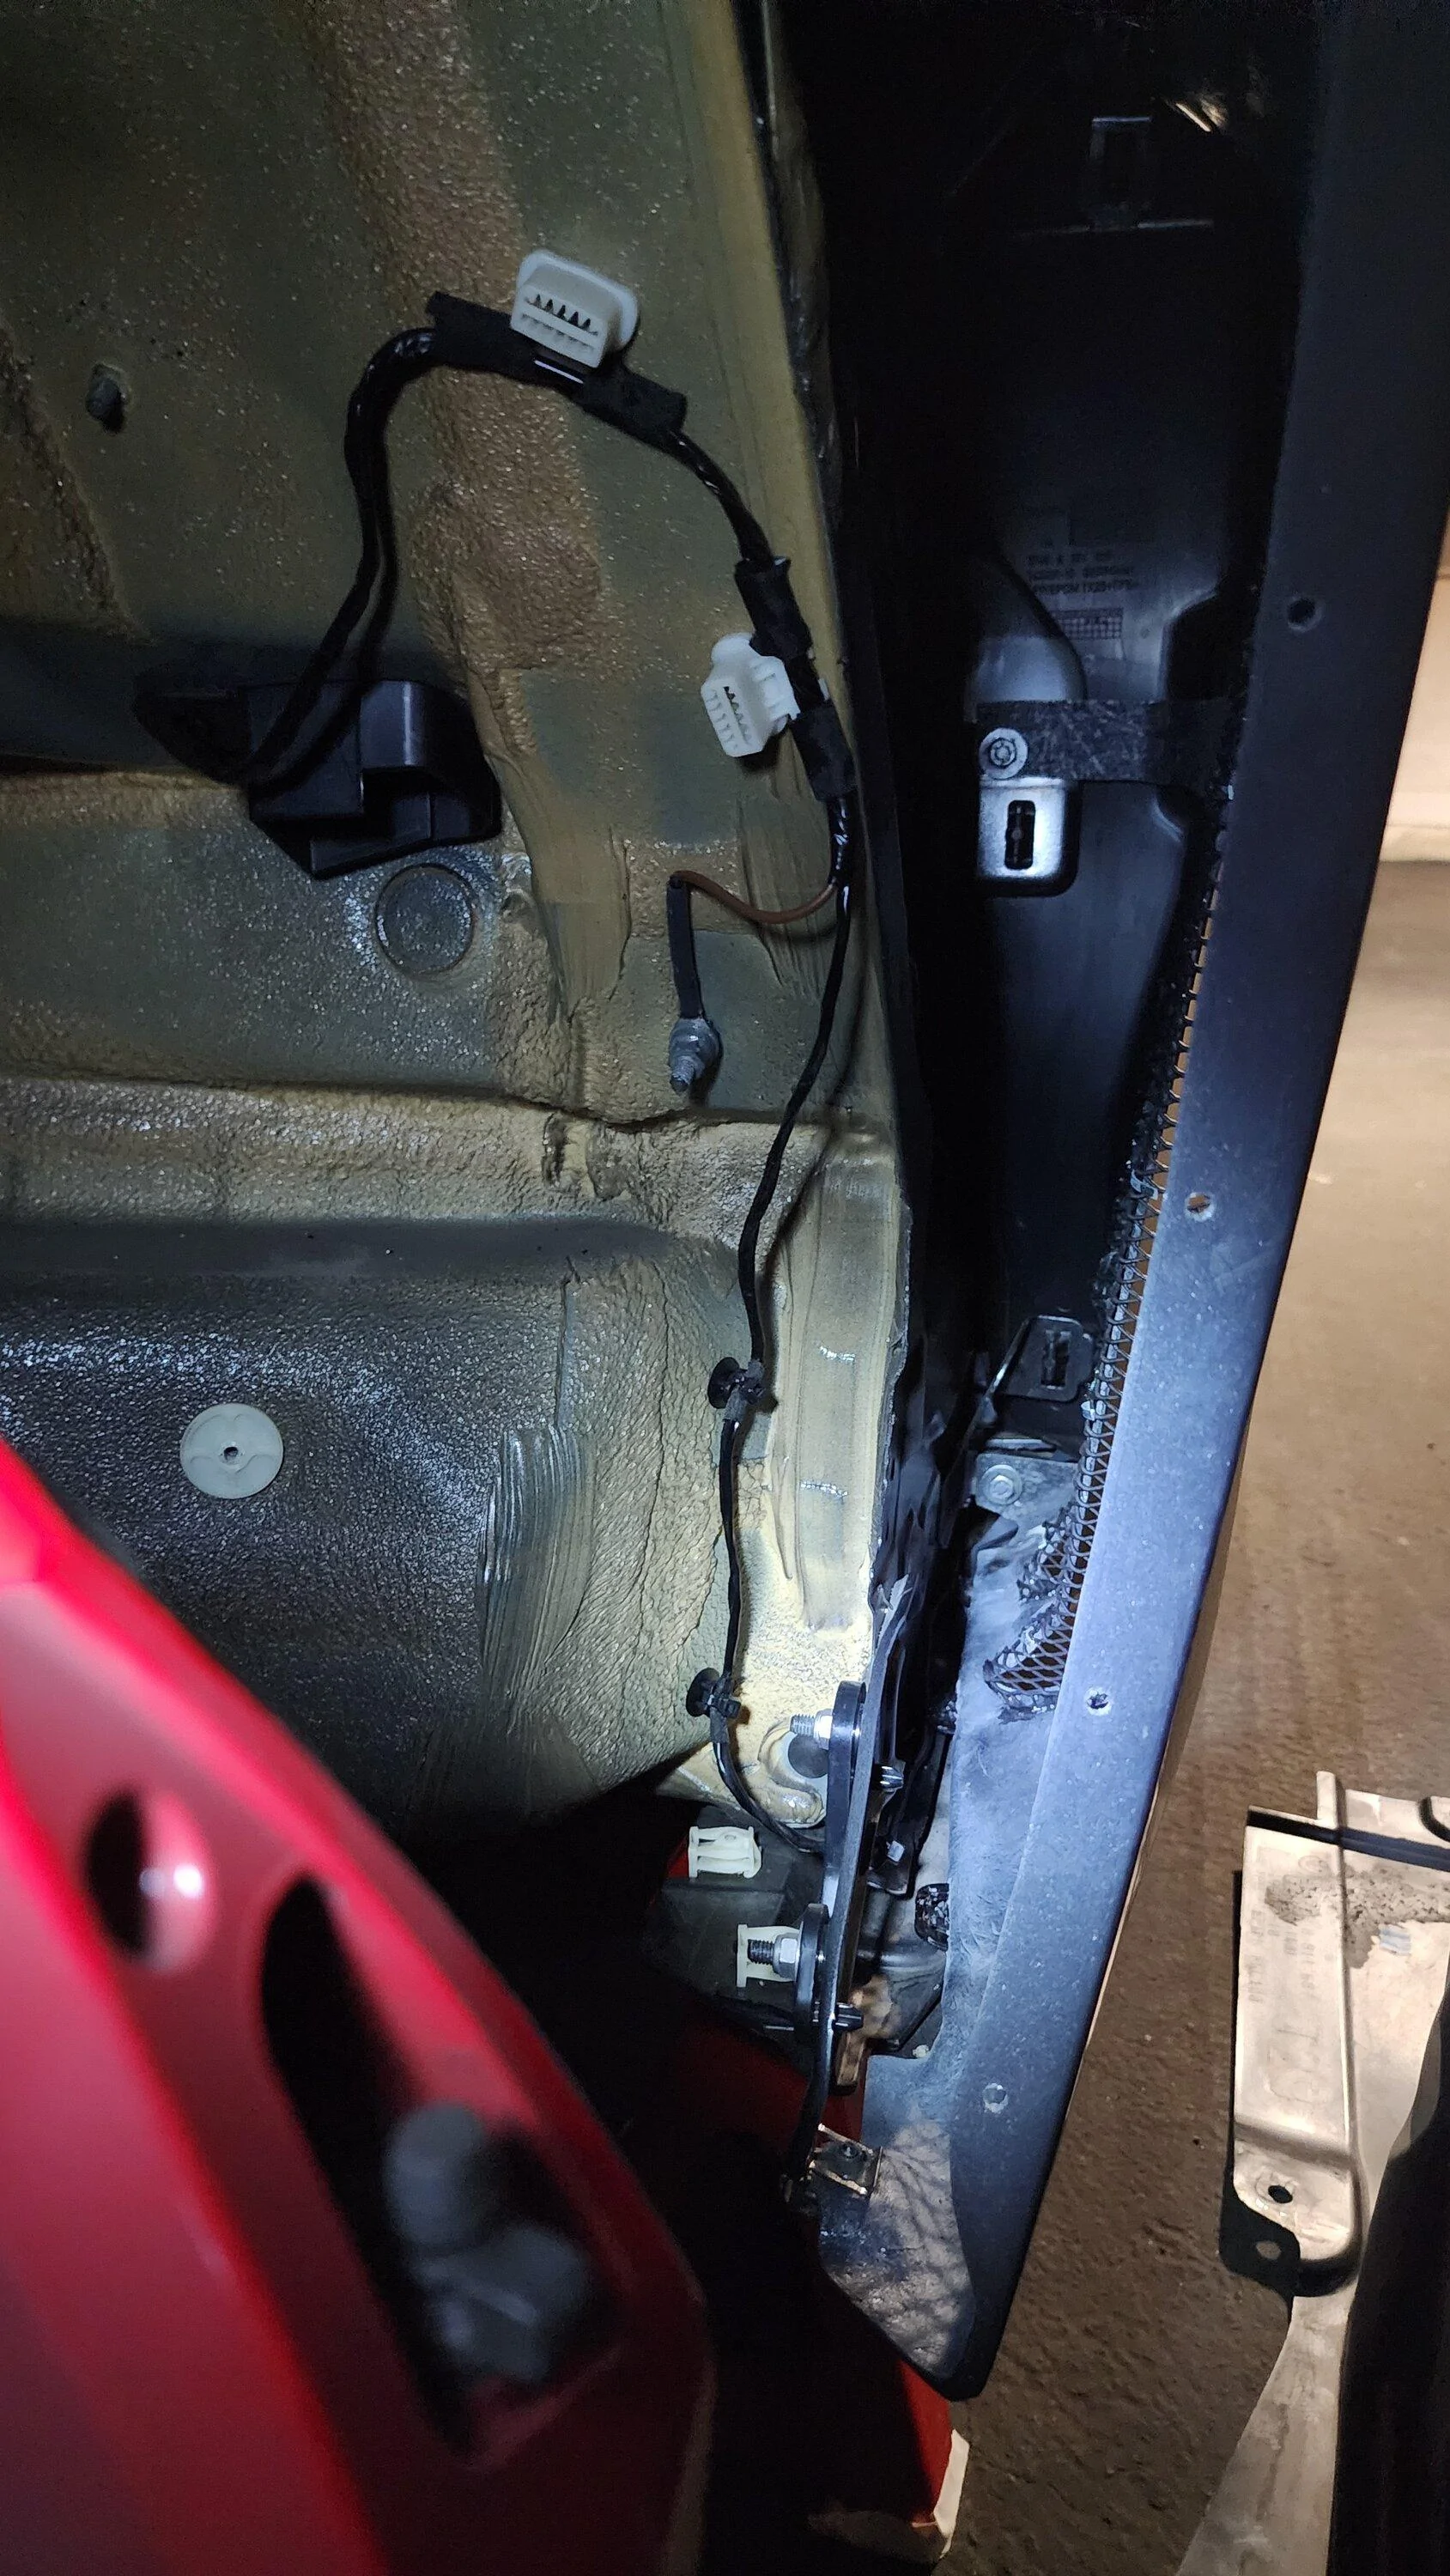
Also, it's worth noting that the passenger side area has a big ass washer fluid bottle in the way (which I documented in the photos below) due to this, you have to cut a little more conservatively. I wanted both sides to match as best possible, so I first mapped out where I would drill/cut on the passenger side and then more or less copied it on the driver's side (even though there's way more room available)
When I searched the internet I couldn't find a single helpful post or video about how to properly cut for these vents, so at the very least I hope that this serves as a good place to start when doing yours
Pics:
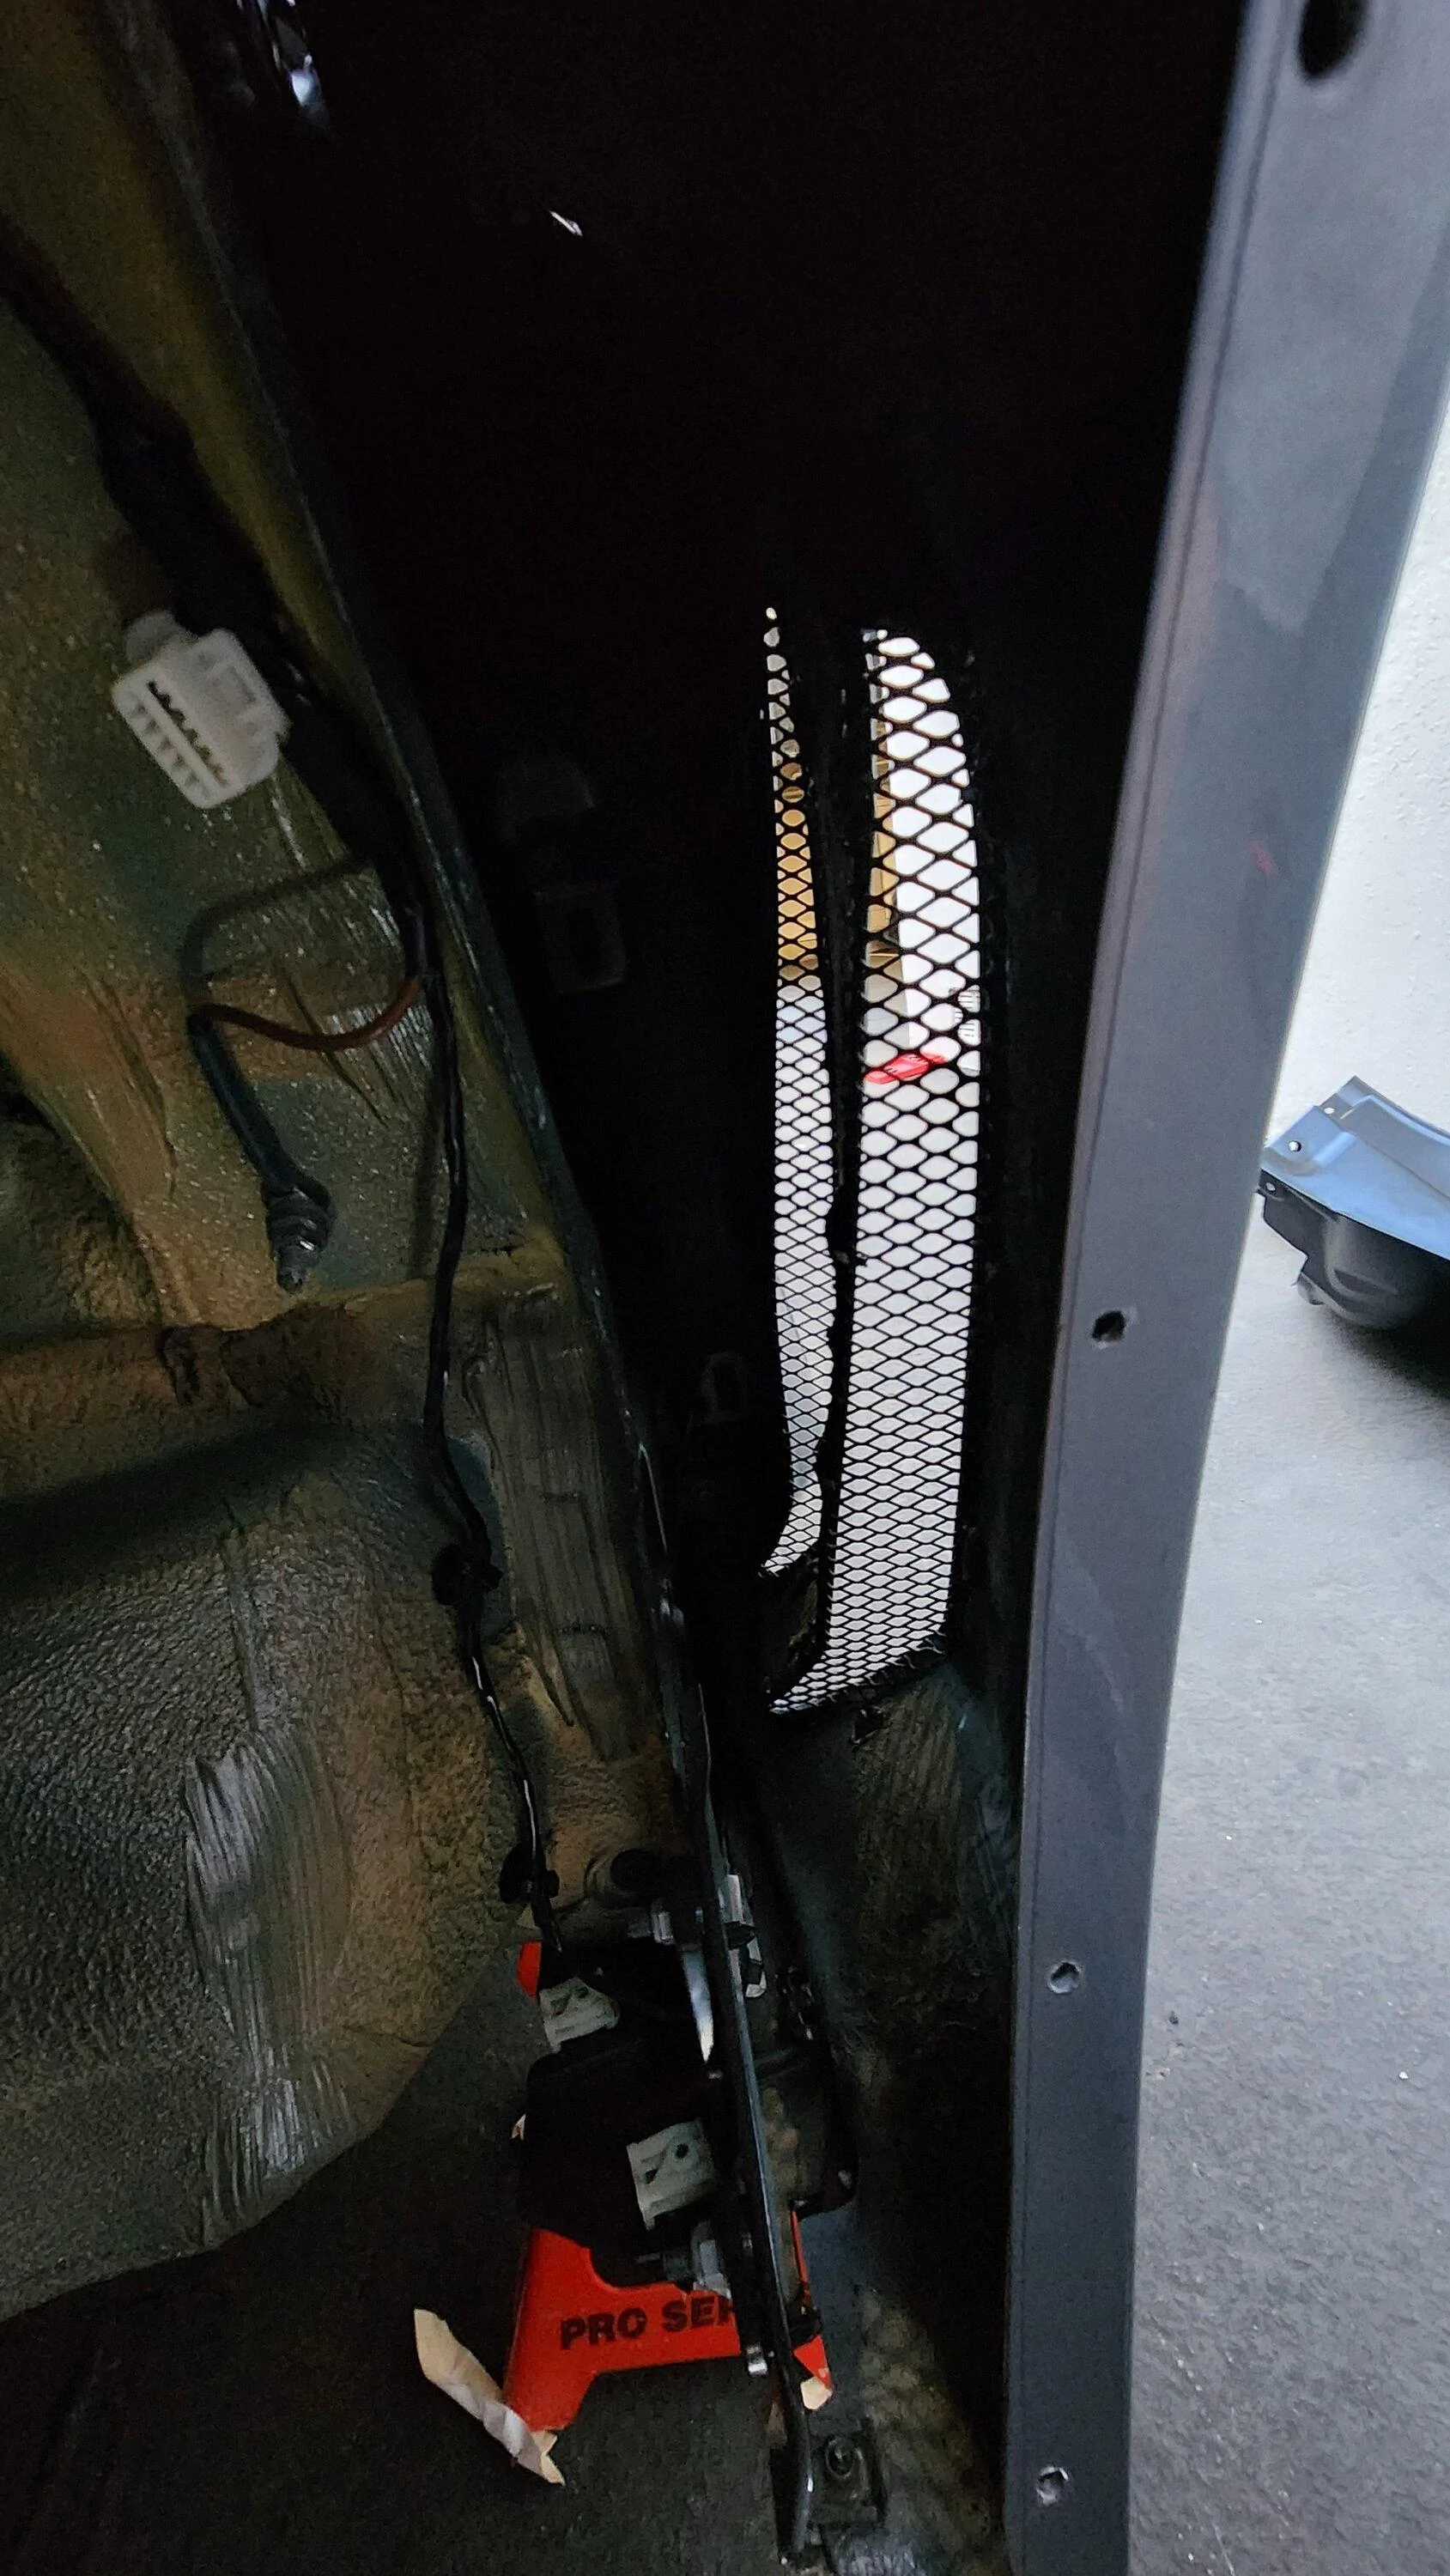
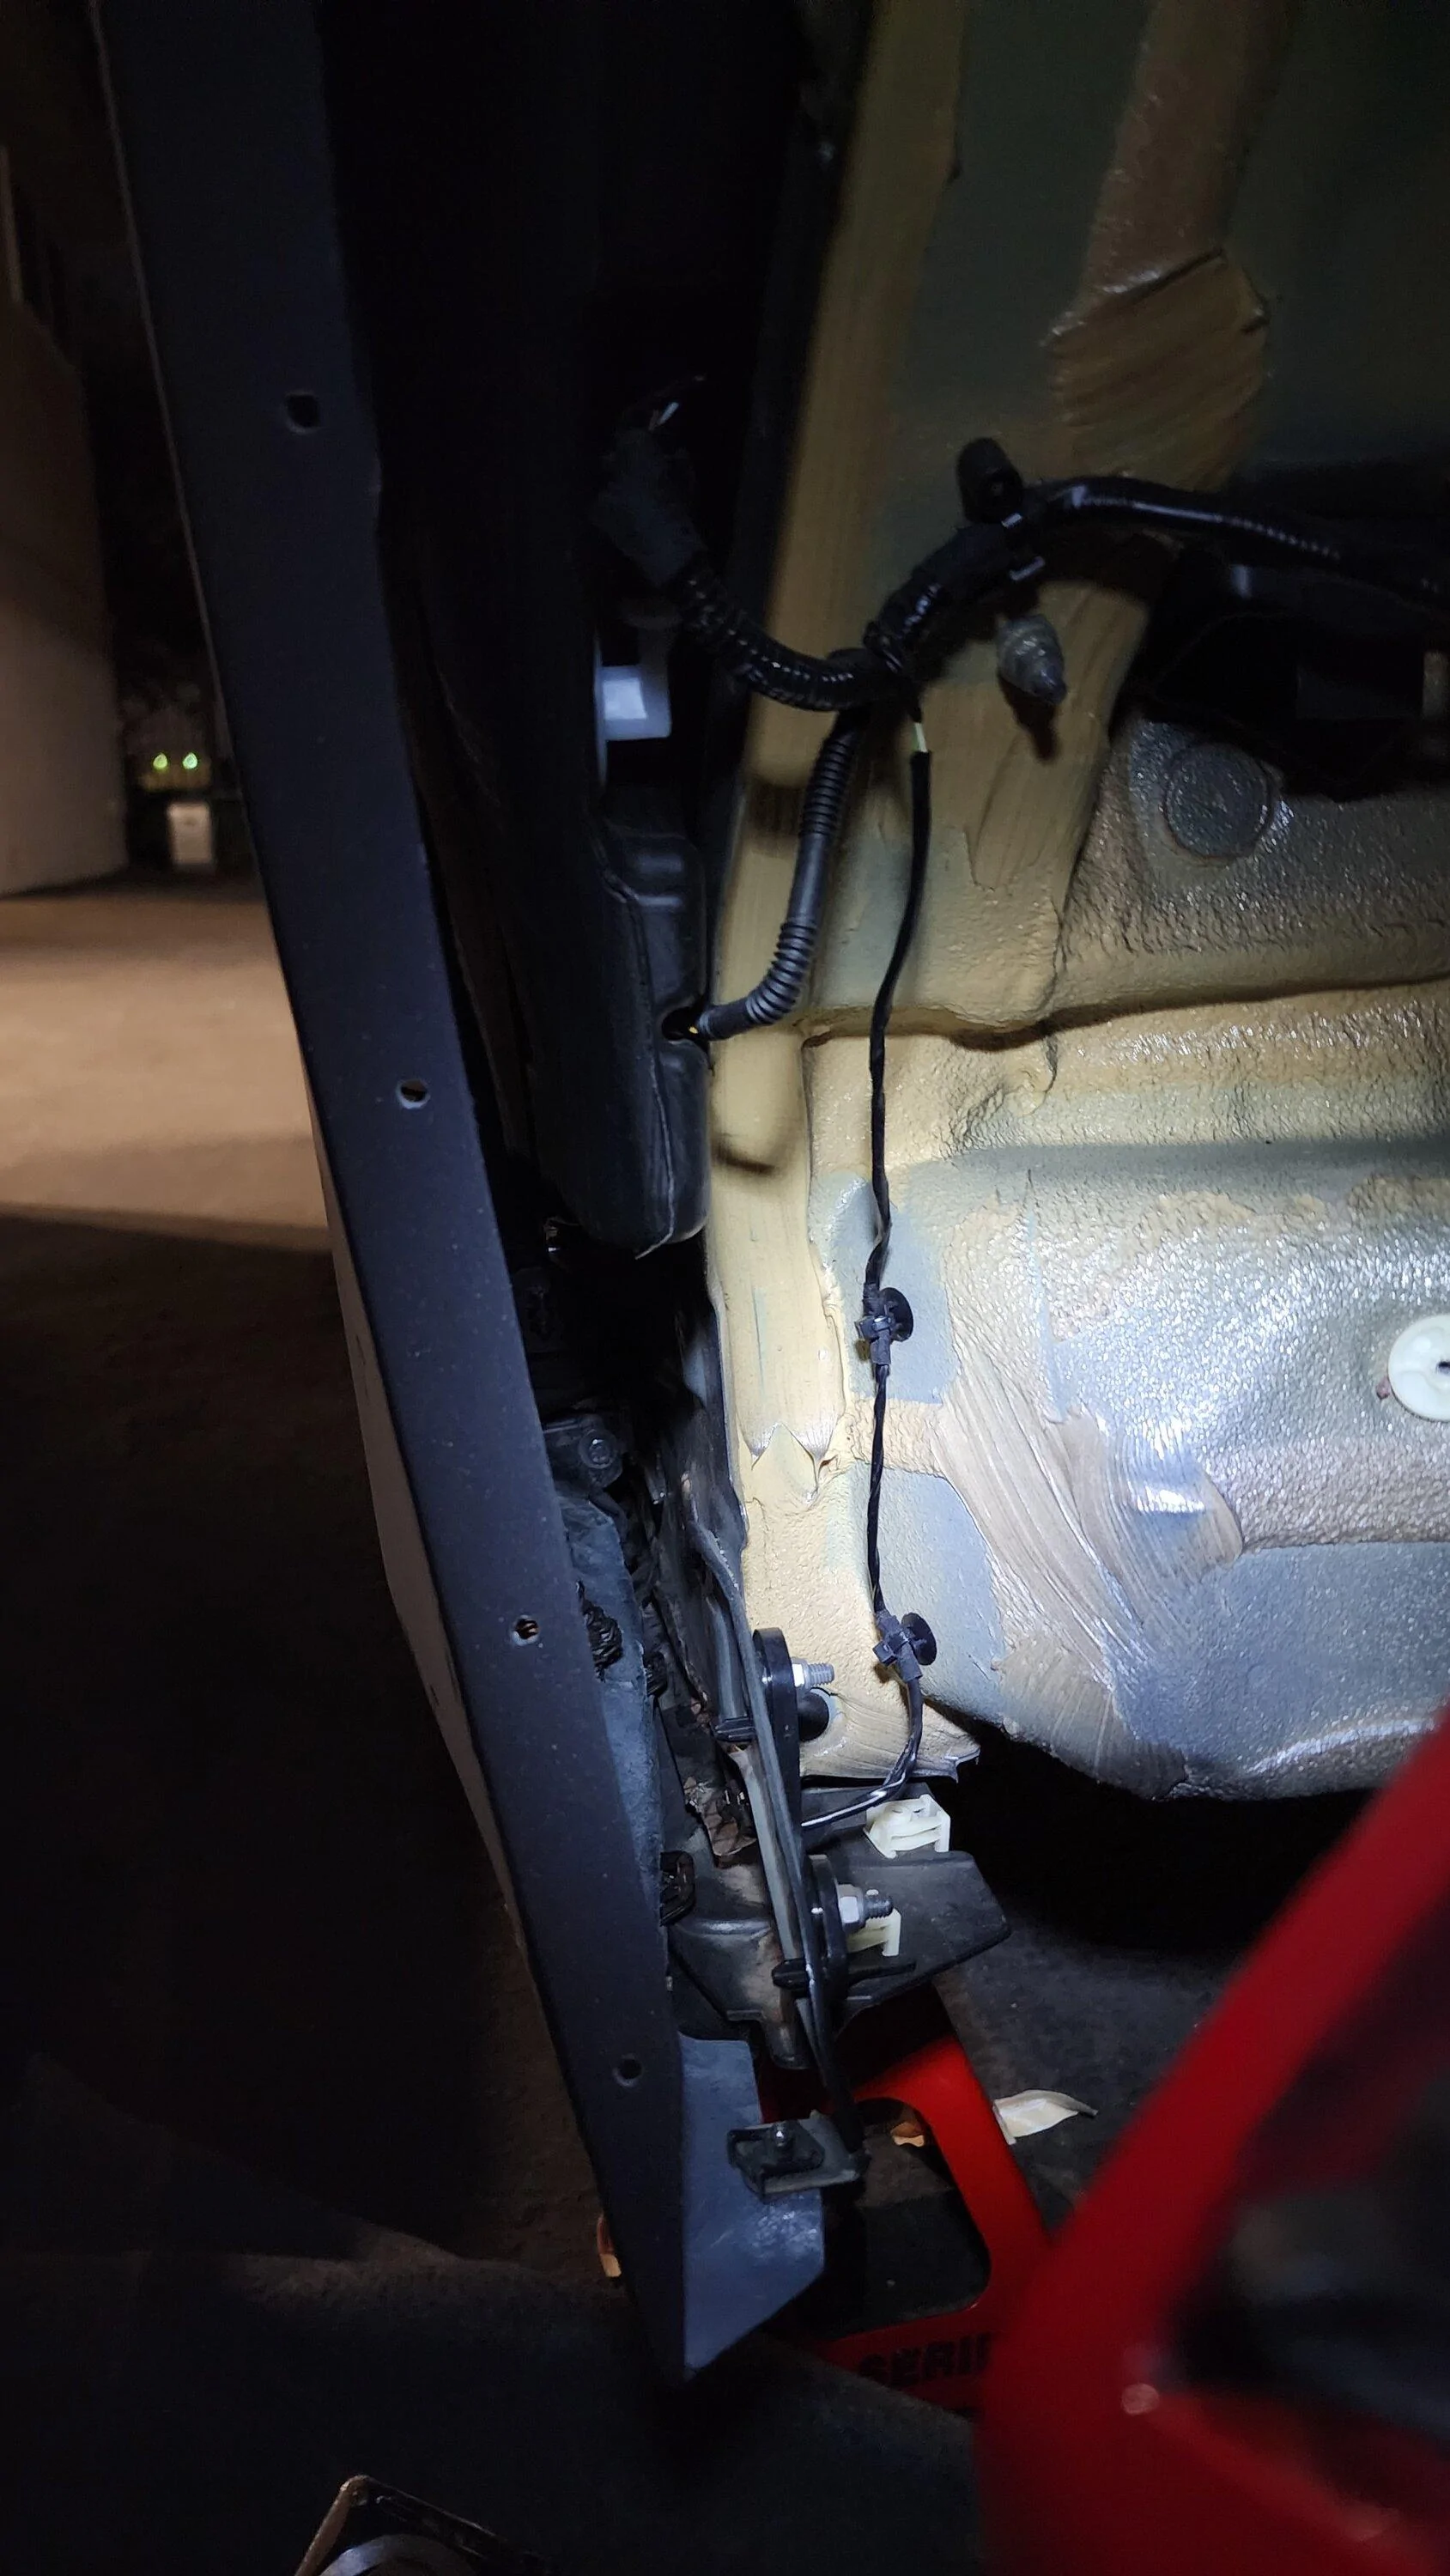
- Behind driver's side fender

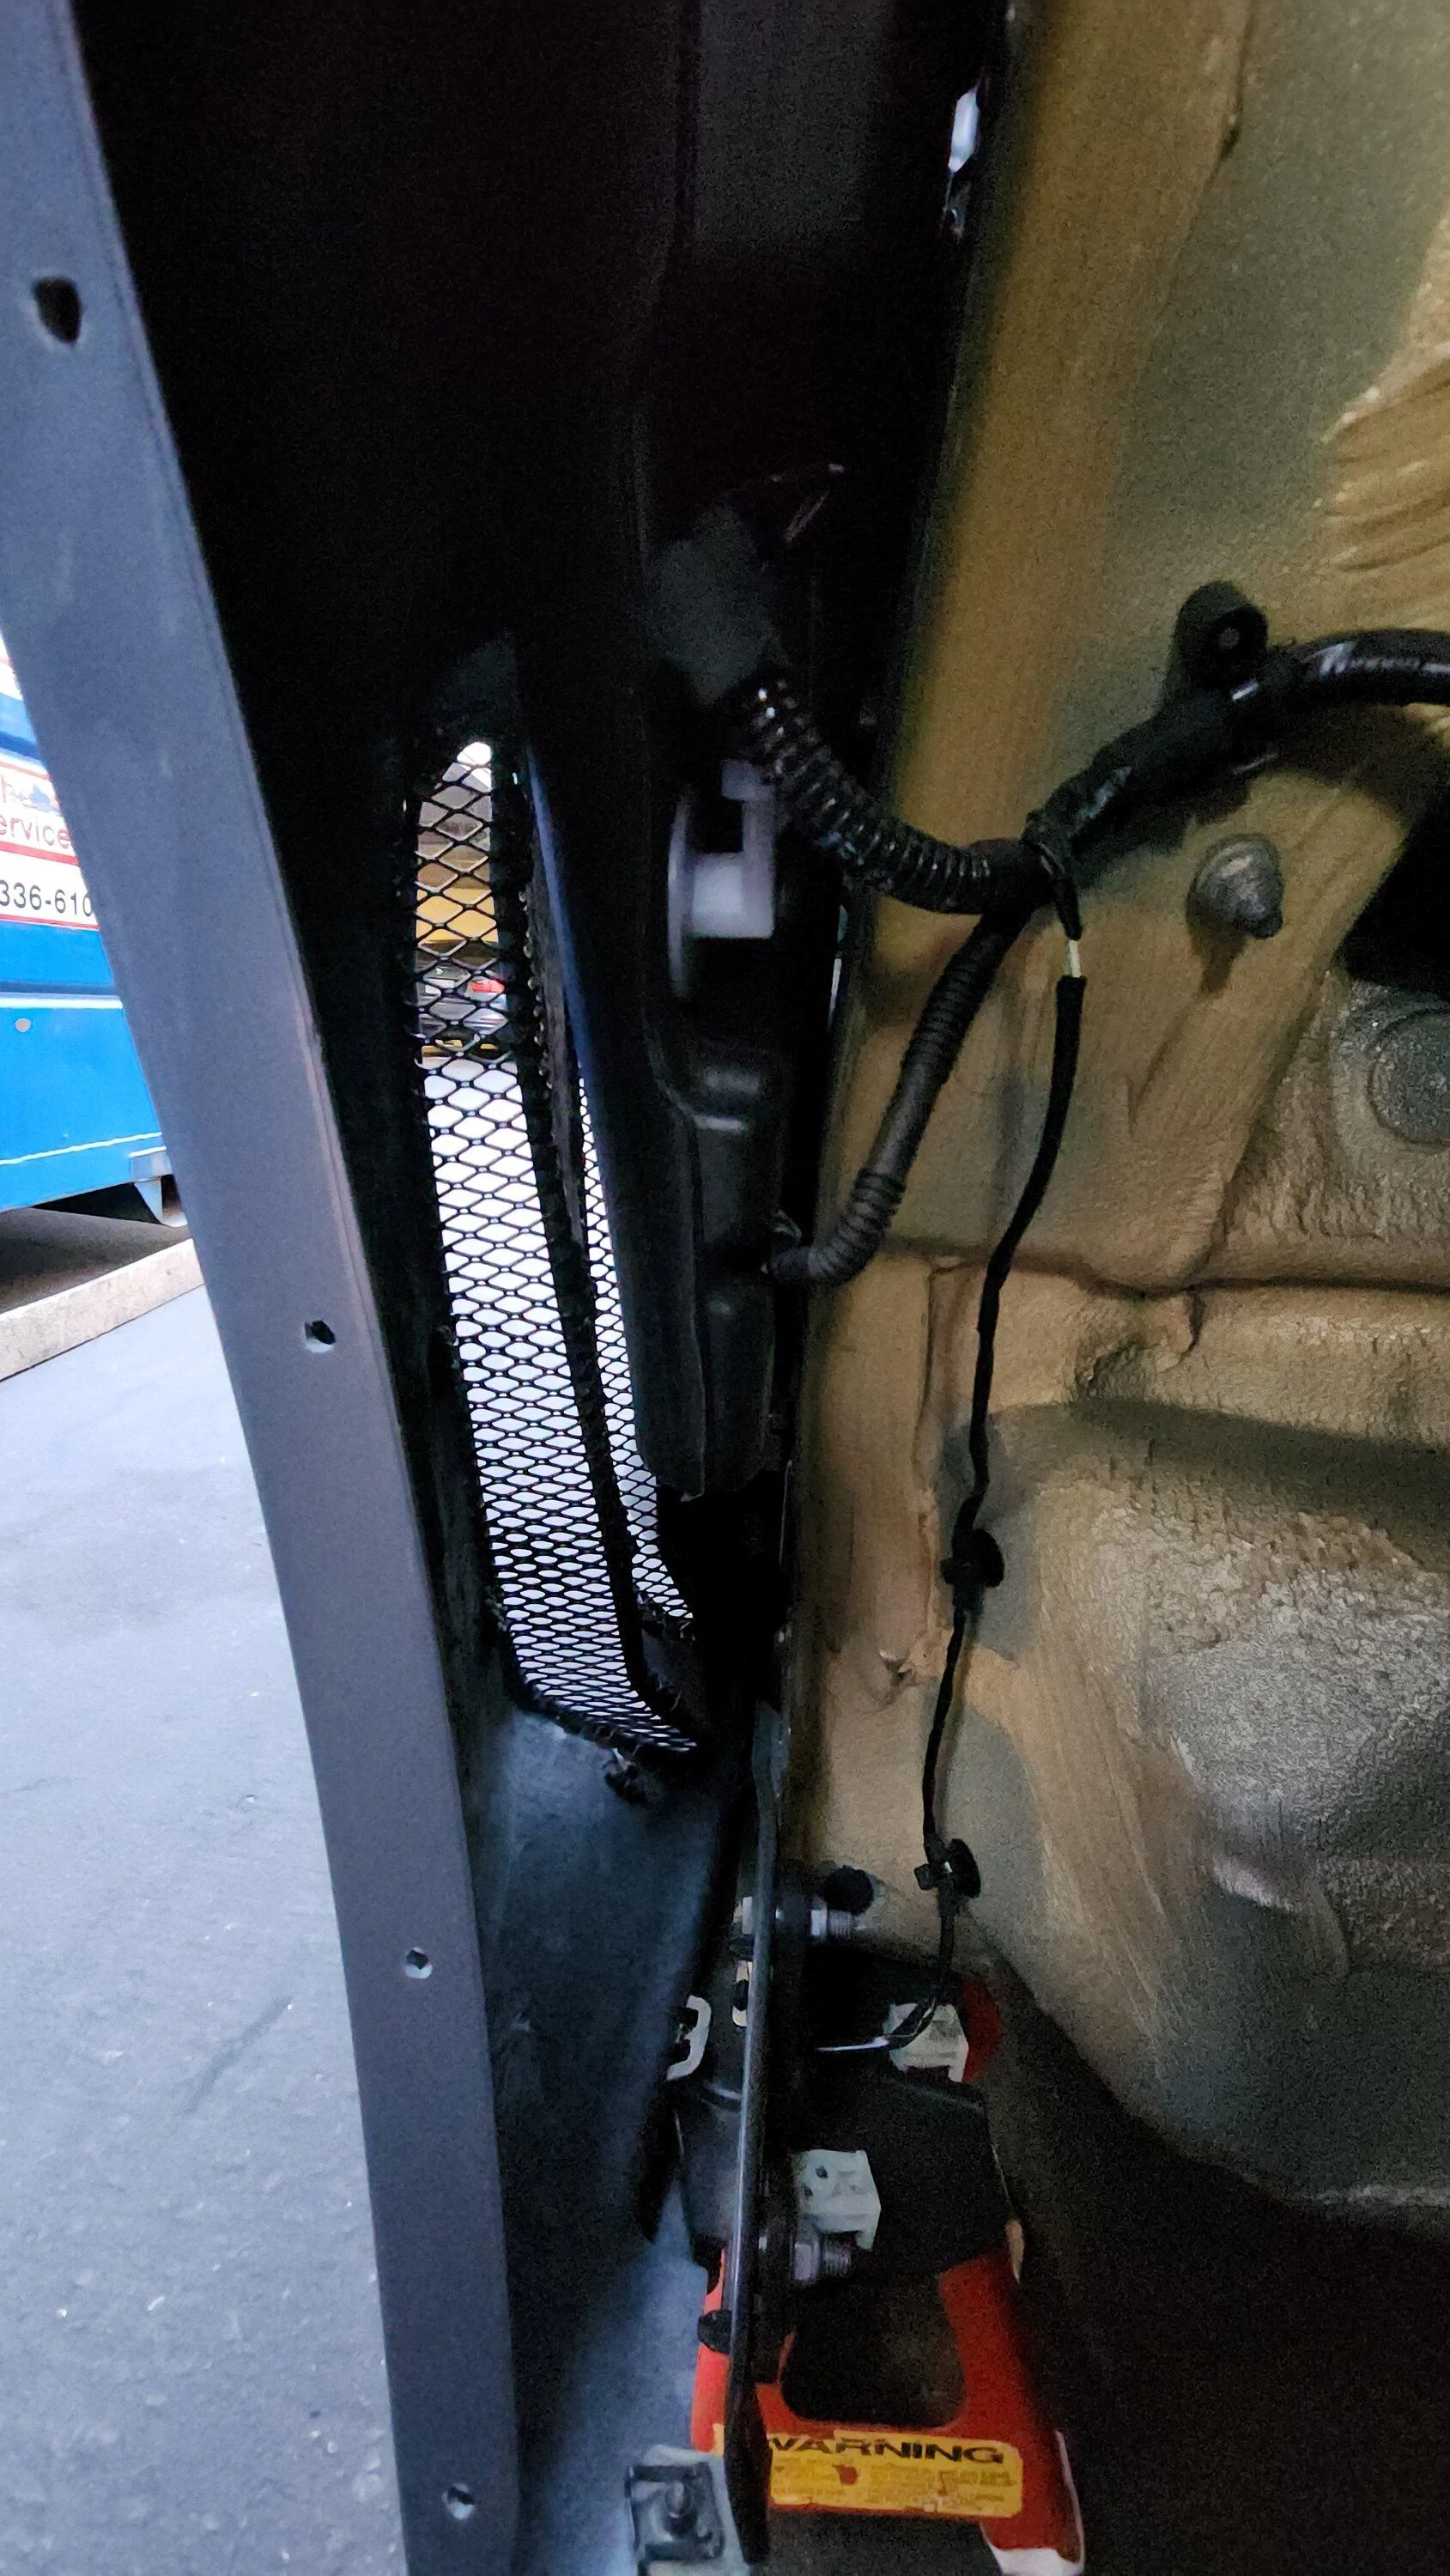
-Behind Passenger side fender
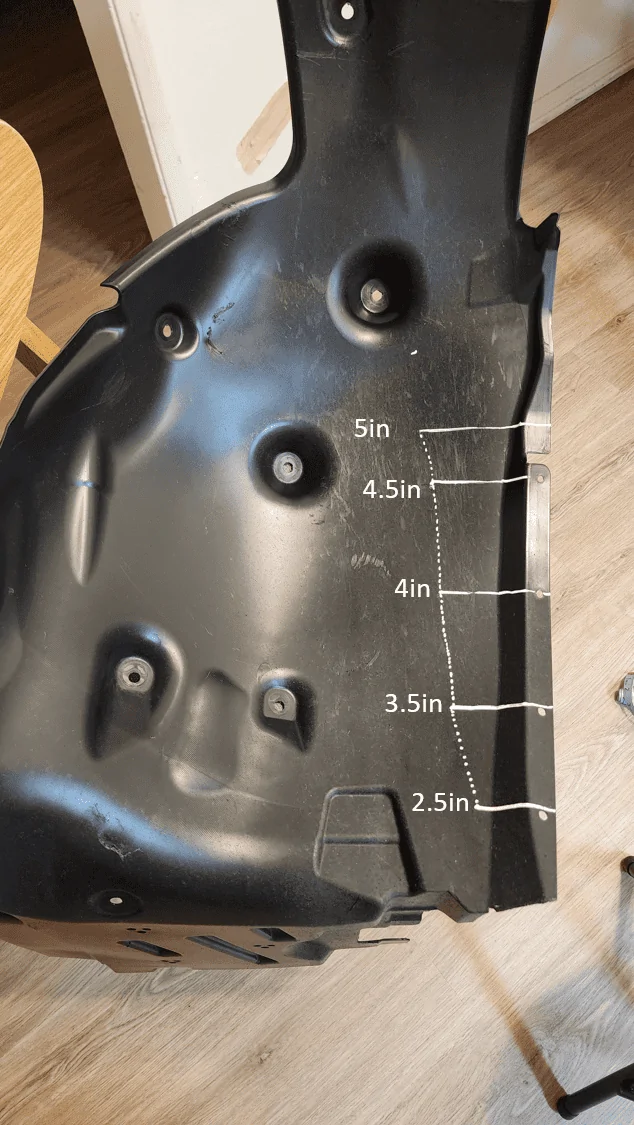
-Measurements of safe area (Driver's side)

-Measurements of safe area (Passenger side) note the phallic washer bottle outline for reference
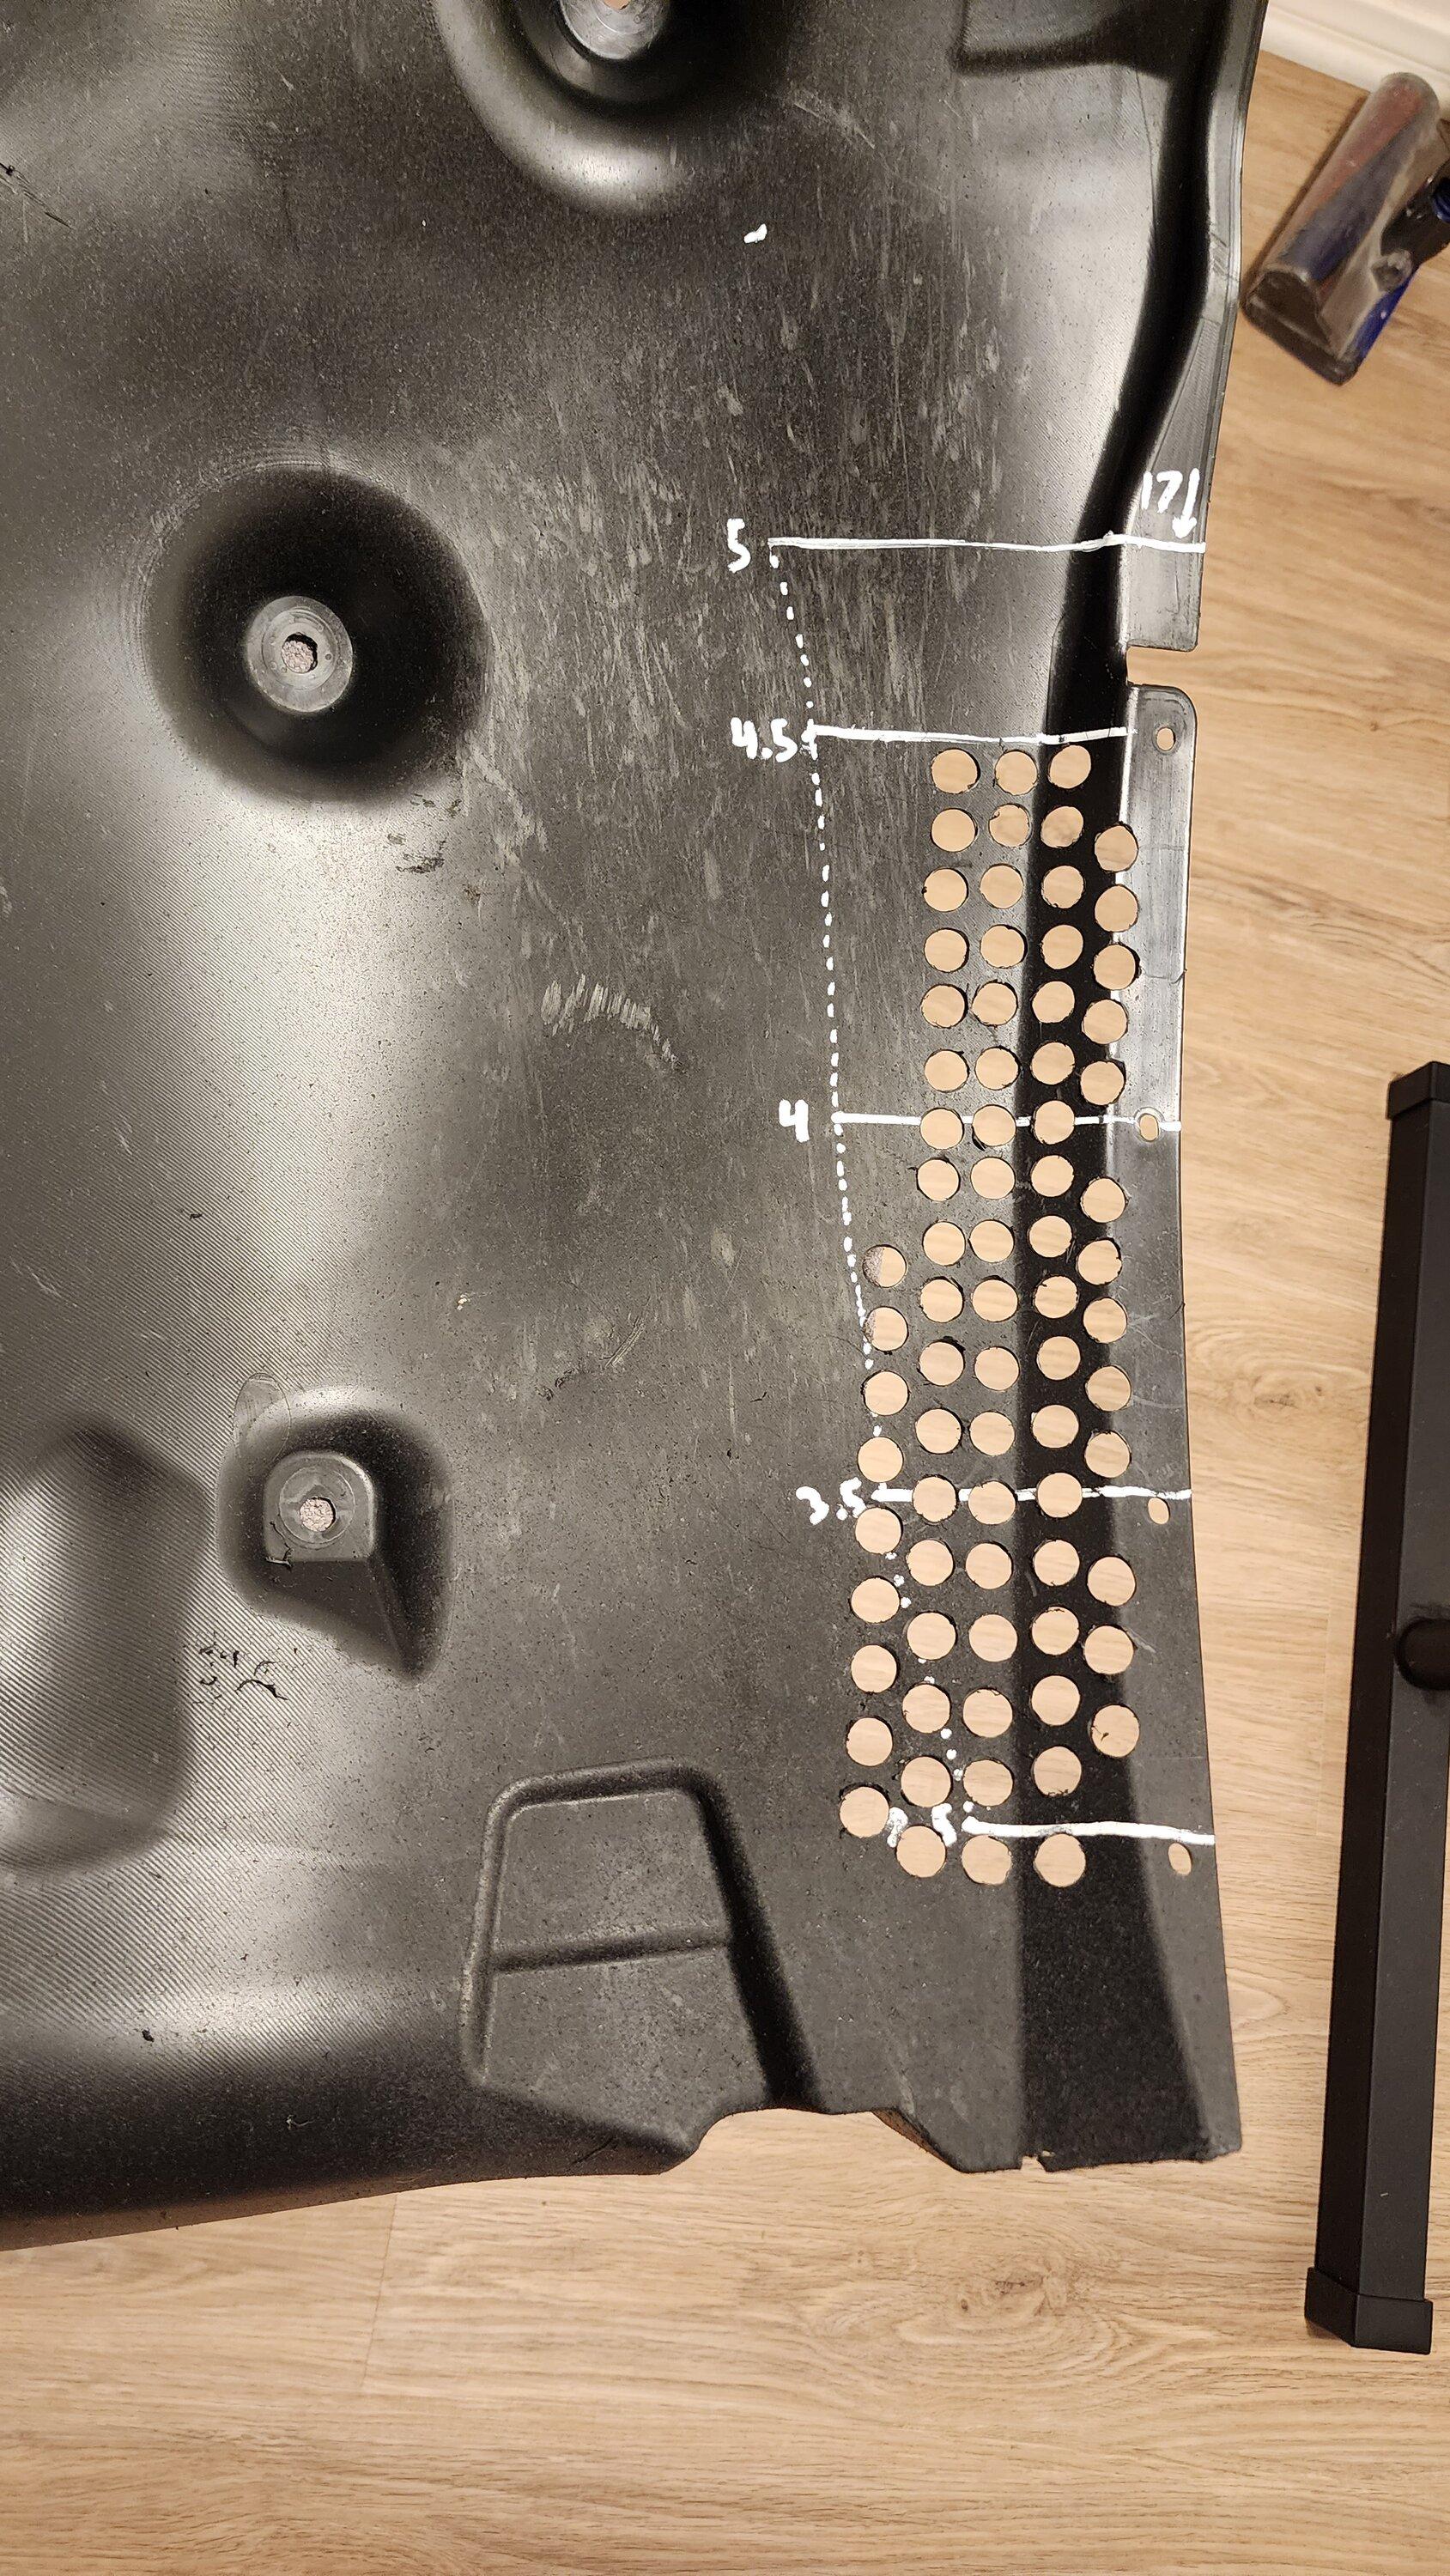
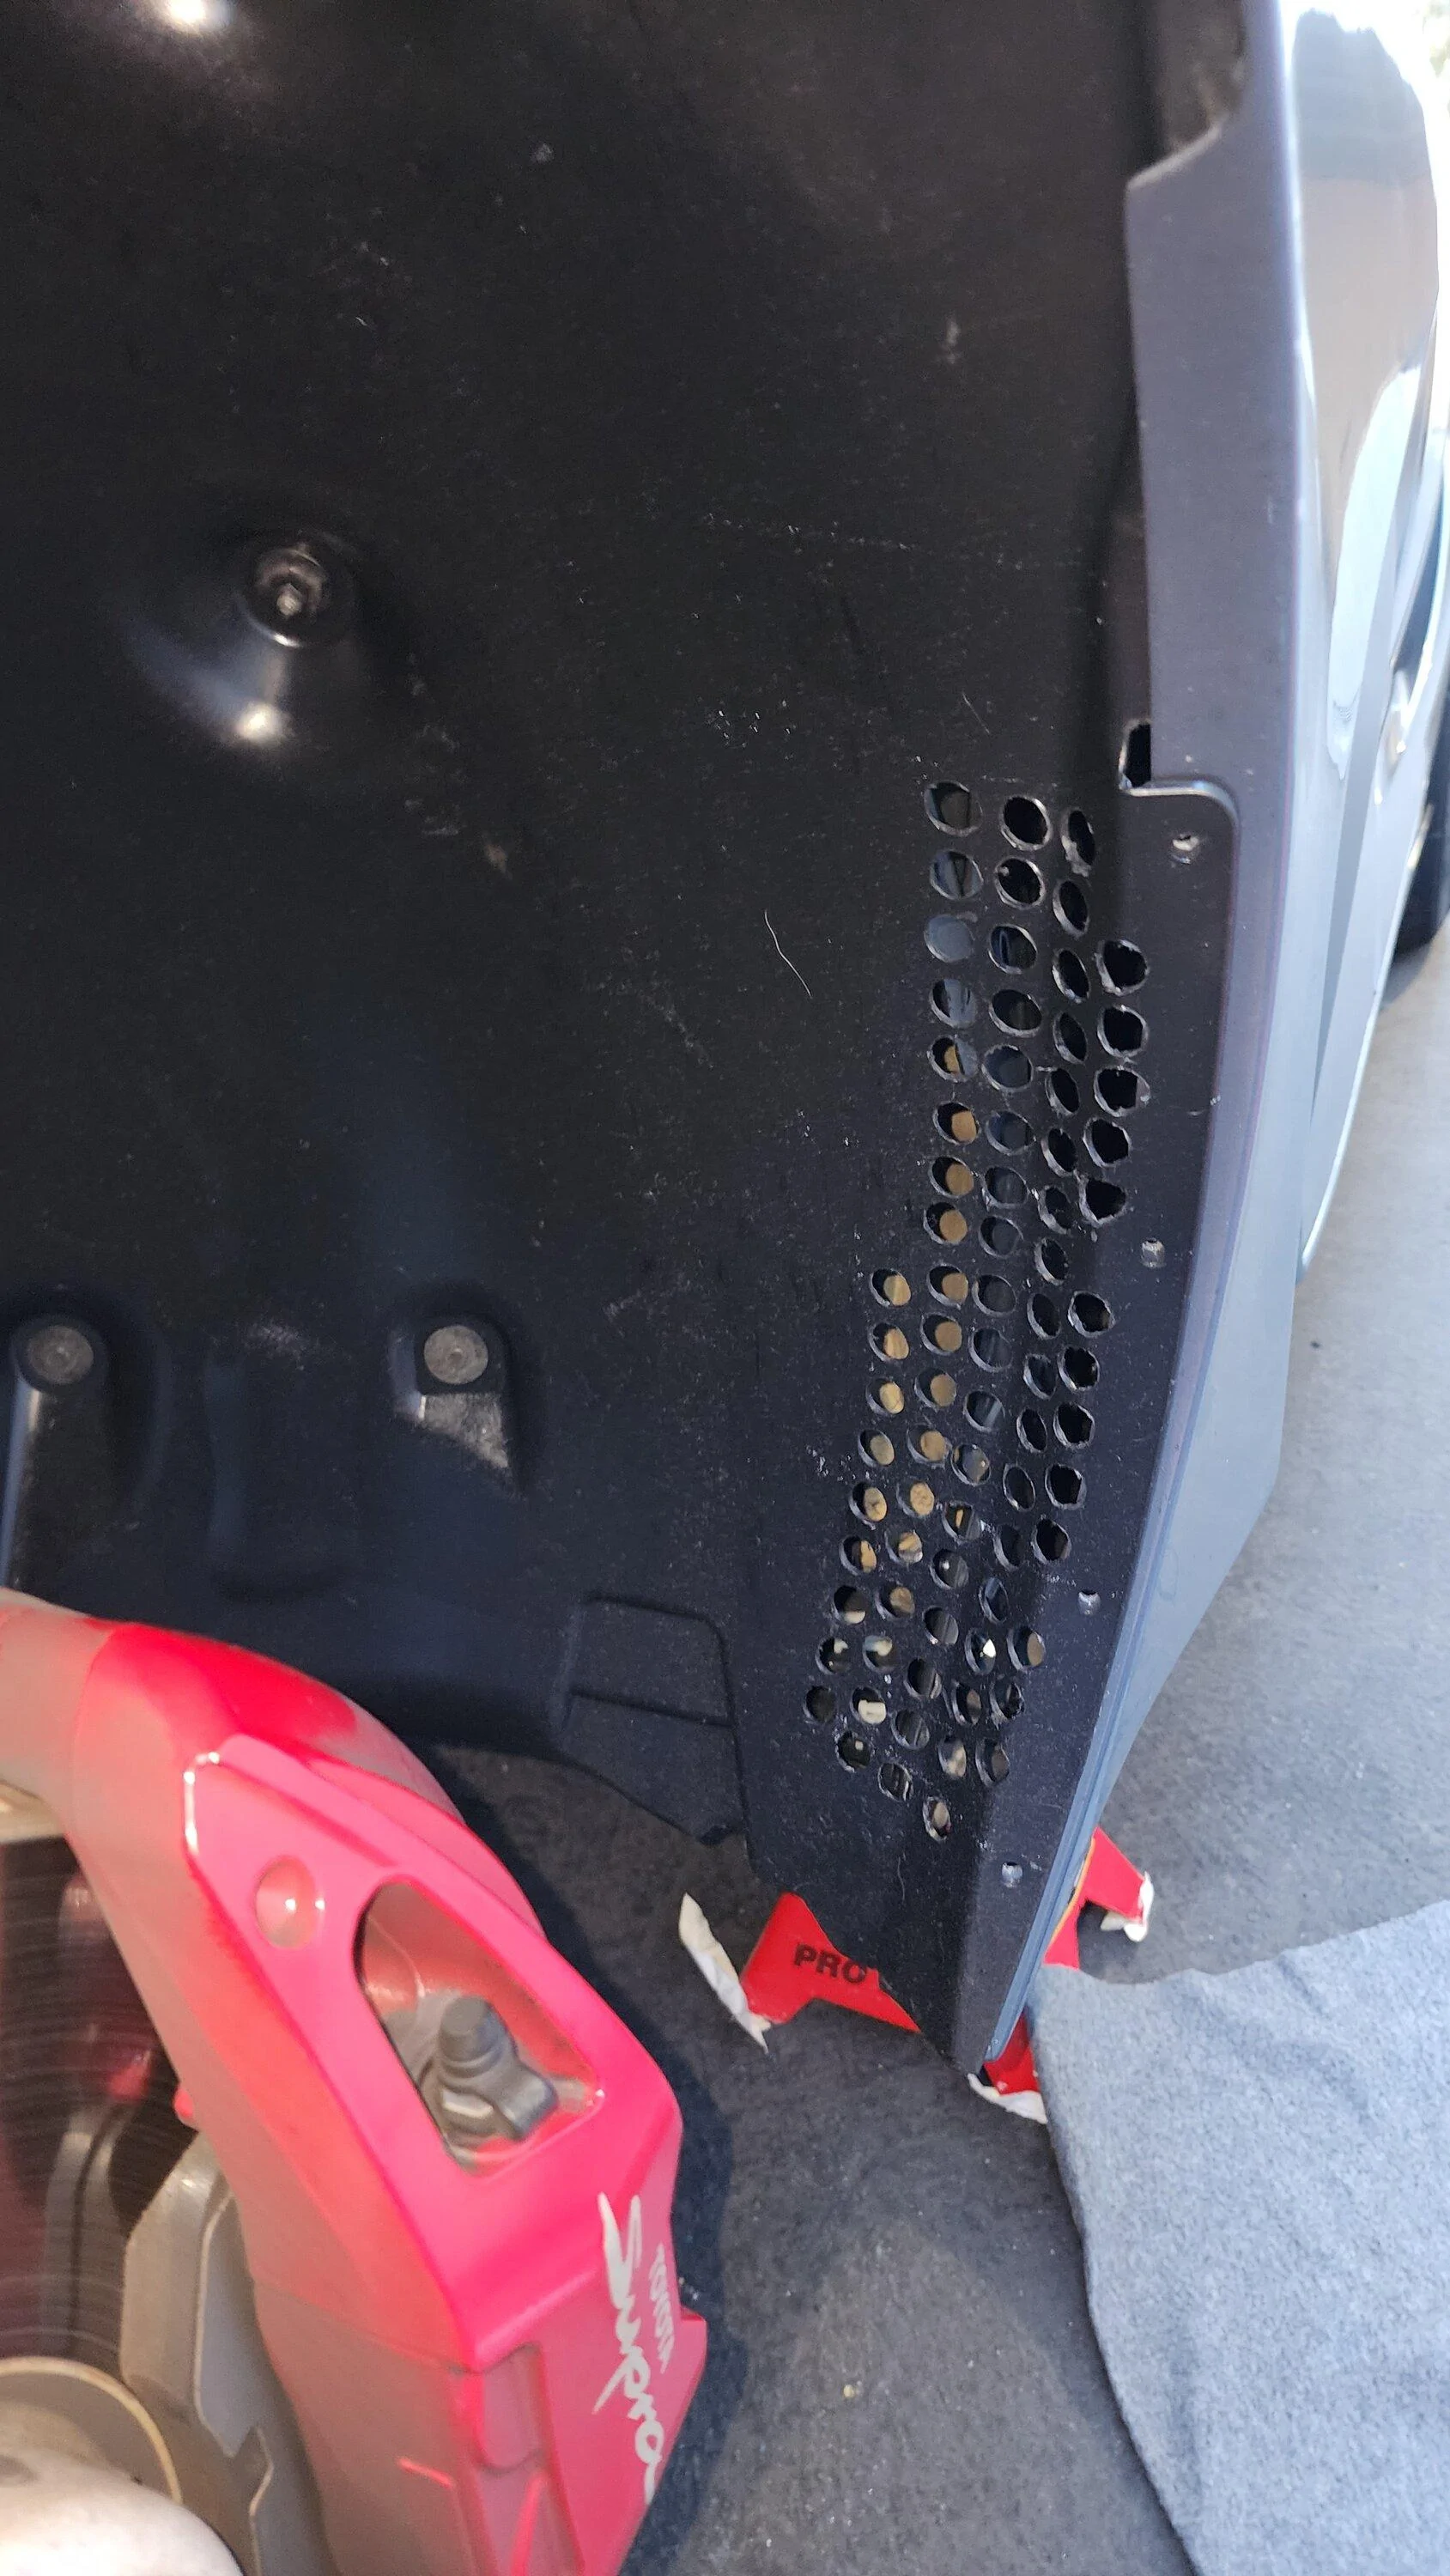
- Final product (Driver's side)
-Final product (Passenger side)
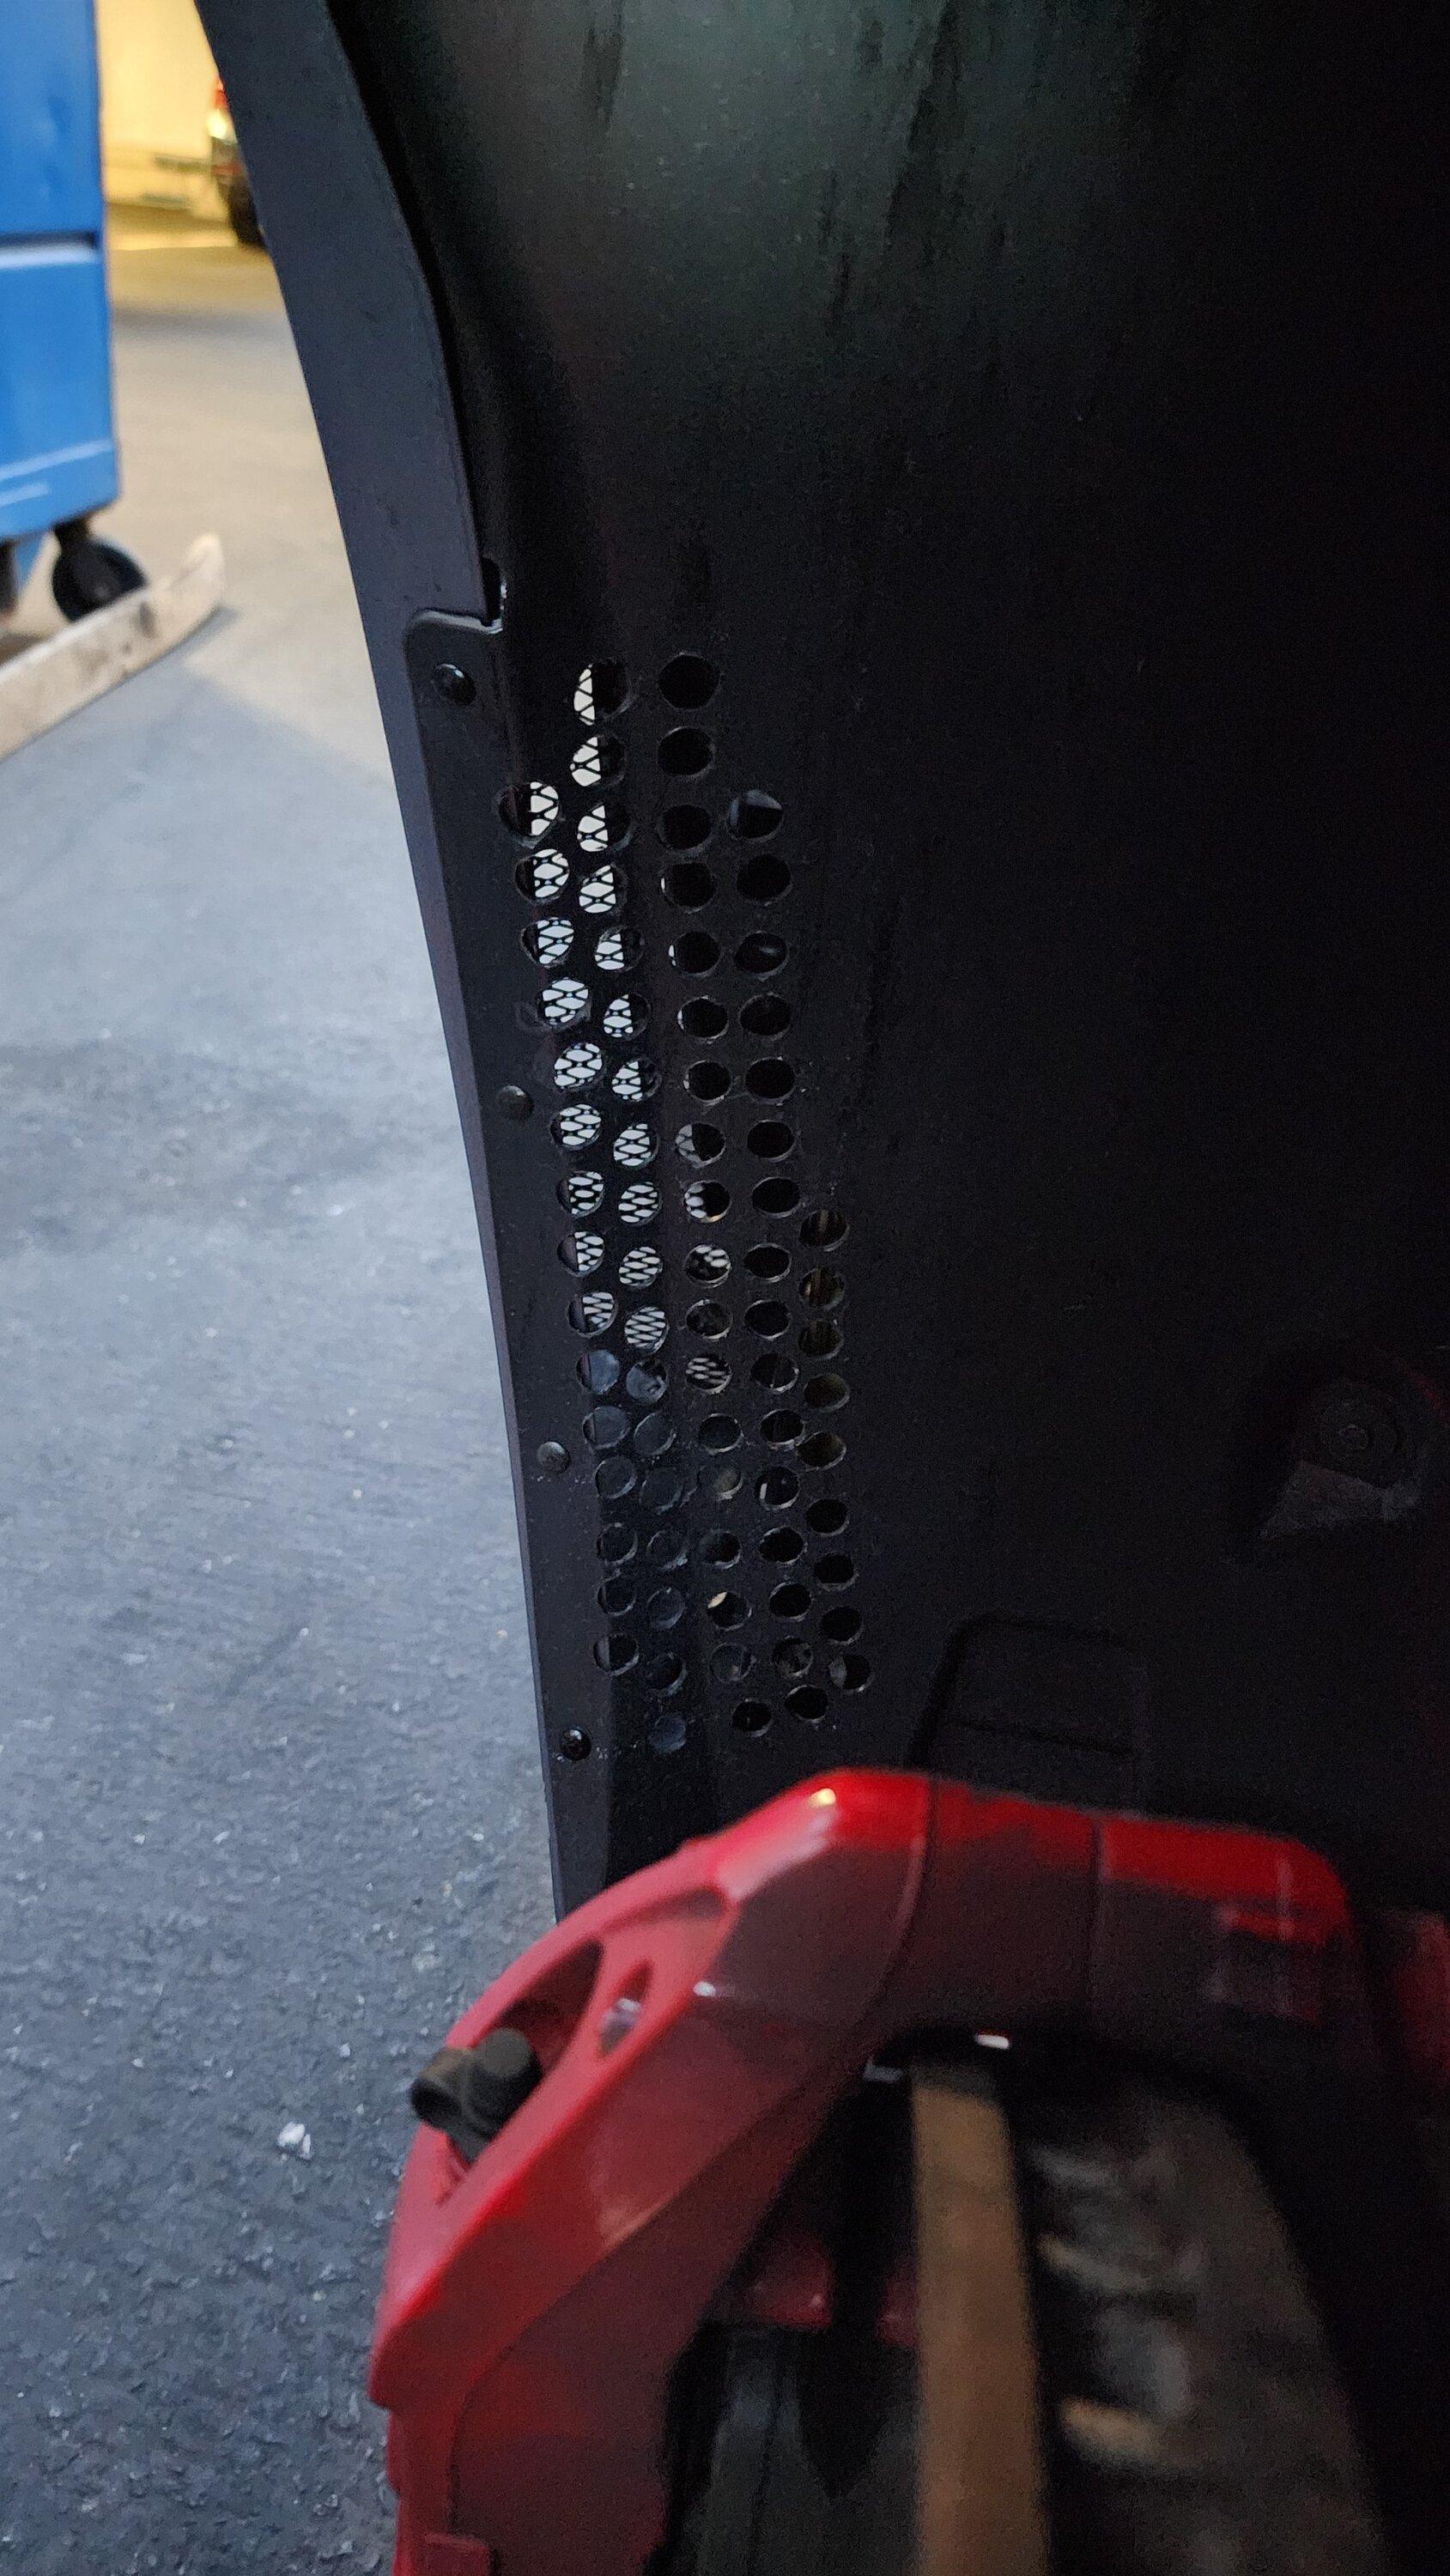
Installed:
-Driver Side (oops forgot the rivets lol)
-Passenger side
Let me know what you think!
I decided to share some measurements I made and methodology I used in deciding how to cut my fender-liner so that the fender vents are functional. Yes, this is probably way over-engineered but whatever. lol
Tools:
paint marker
measuring tape
1/2in drill bit
Dremel with sanding barrel
Methodology:
I didn't want to just cut giant holes and expose too much of the area behind the fender, considering that the vents aren't that deep and there are various wires and things, so I started by making some measurements to identify a conservative safe area to cut, leaving room to expand if needed. I also opted to drill holes instead of cutting slits, to retain structural integrity. I track this car and I don't need the fender-liner flapping around and/or ripping off.
Also, it's worth noting that the passenger side area has a big ass washer fluid bottle in the way (which I documented in the photos below) due to this, you have to cut a little more conservatively. I wanted both sides to match as best possible, so I first mapped out where I would drill/cut on the passenger side and then more or less copied it on the driver's side (even though there's way more room available)
When I searched the internet I couldn't find a single helpful post or video about how to properly cut for these vents, so at the very least I hope that this serves as a good place to start when doing yours
Pics:
- Behind driver's side fender
-Behind Passenger side fender
-Measurements of safe area (Driver's side)
-Measurements of safe area (Passenger side) note the phallic washer bottle outline for reference

- Final product (Driver's side)
-Final product (Passenger side)
Installed:
-Driver Side (oops forgot the rivets lol)
-Passenger side
Let me know what you think!
Sponsored
Last edited: