Sponsored

Verus camber plates install tips

kungfujedis

Well-Known Member
First Name
Greg
Joined
Nov 13, 2023
Threads
10
Messages
158
Reaction score
217
Location
Washington DC
Car(s)
2024 Supra MT, 2013 WRX
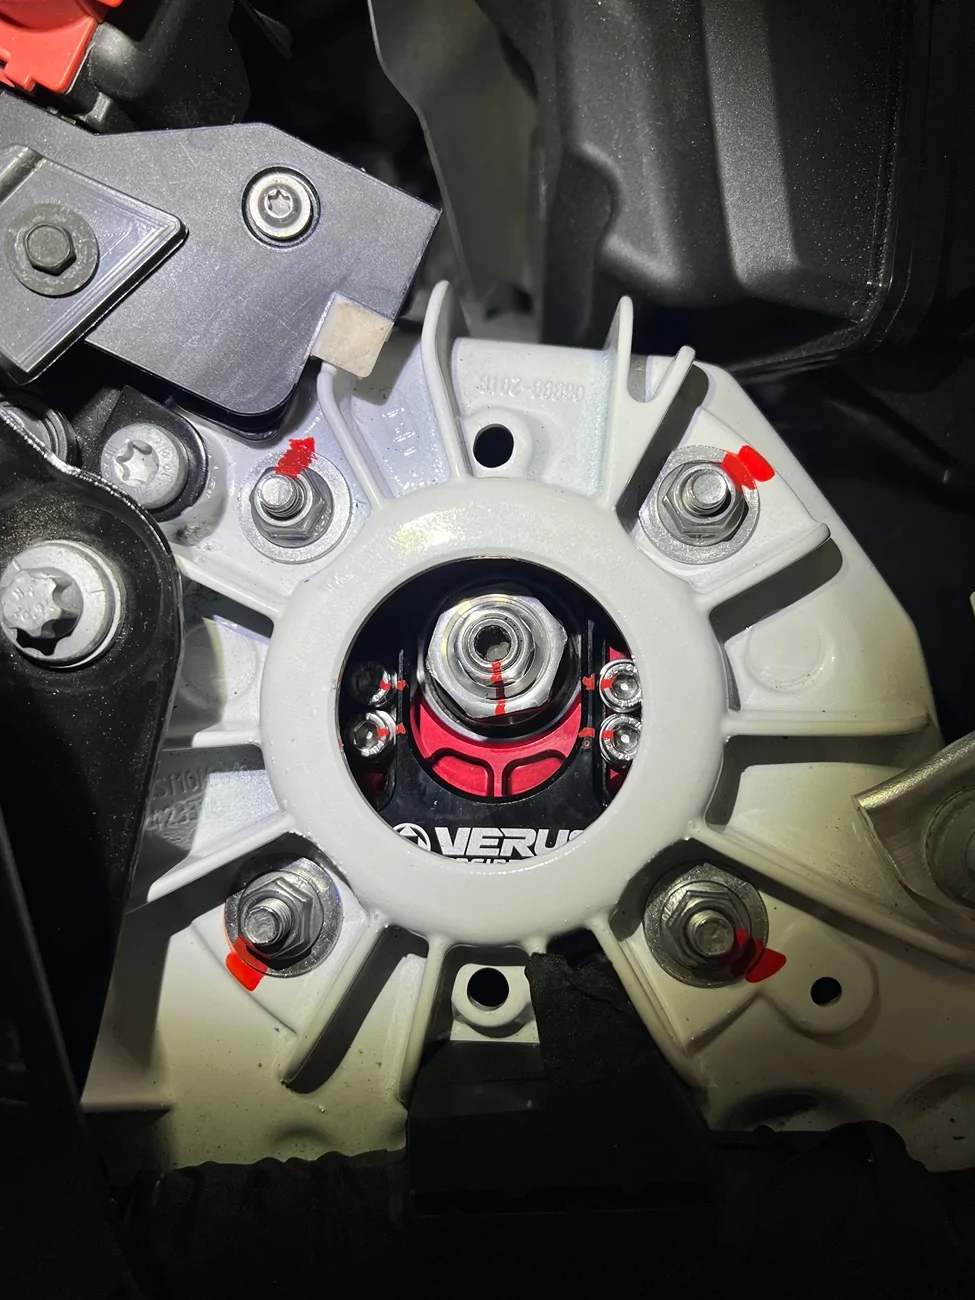
I just installed the Verus camber plates last night, and I think the directions are missing a couple details. To help anyone else doing this install following those directions, here are a couple additions:

1.) The only thing I didn't have on the tools list was a 27mm socket. I ordered one in advance. But, as it turned out, the socket walls were too thick to fit. I had to run out and get a thin walled 27mm mid install.

2.) The tools list is missing some things, which luckily I had on hand. Disconnecting the sway bar requires a pass through wrench and star/torx/bmw key. It will not come off with a regular socket, it just spins. Similarly, the lock nut on top of the damper needs a pass through and allen key. It also just spins and cant be removed without.

3.) My plates shipped in the fully cambered position. I installed them and realized after putting the damper/spring up that I would not be able to tighten the top lock nut. Also, the shipping location of the m6 nuts in the plate were such that I could not adjust them when installed. So i had to remove the whole plate, reposition the m6 nuts and put the plate in least camber position before reinstalling. I would recommend doing this before installing.

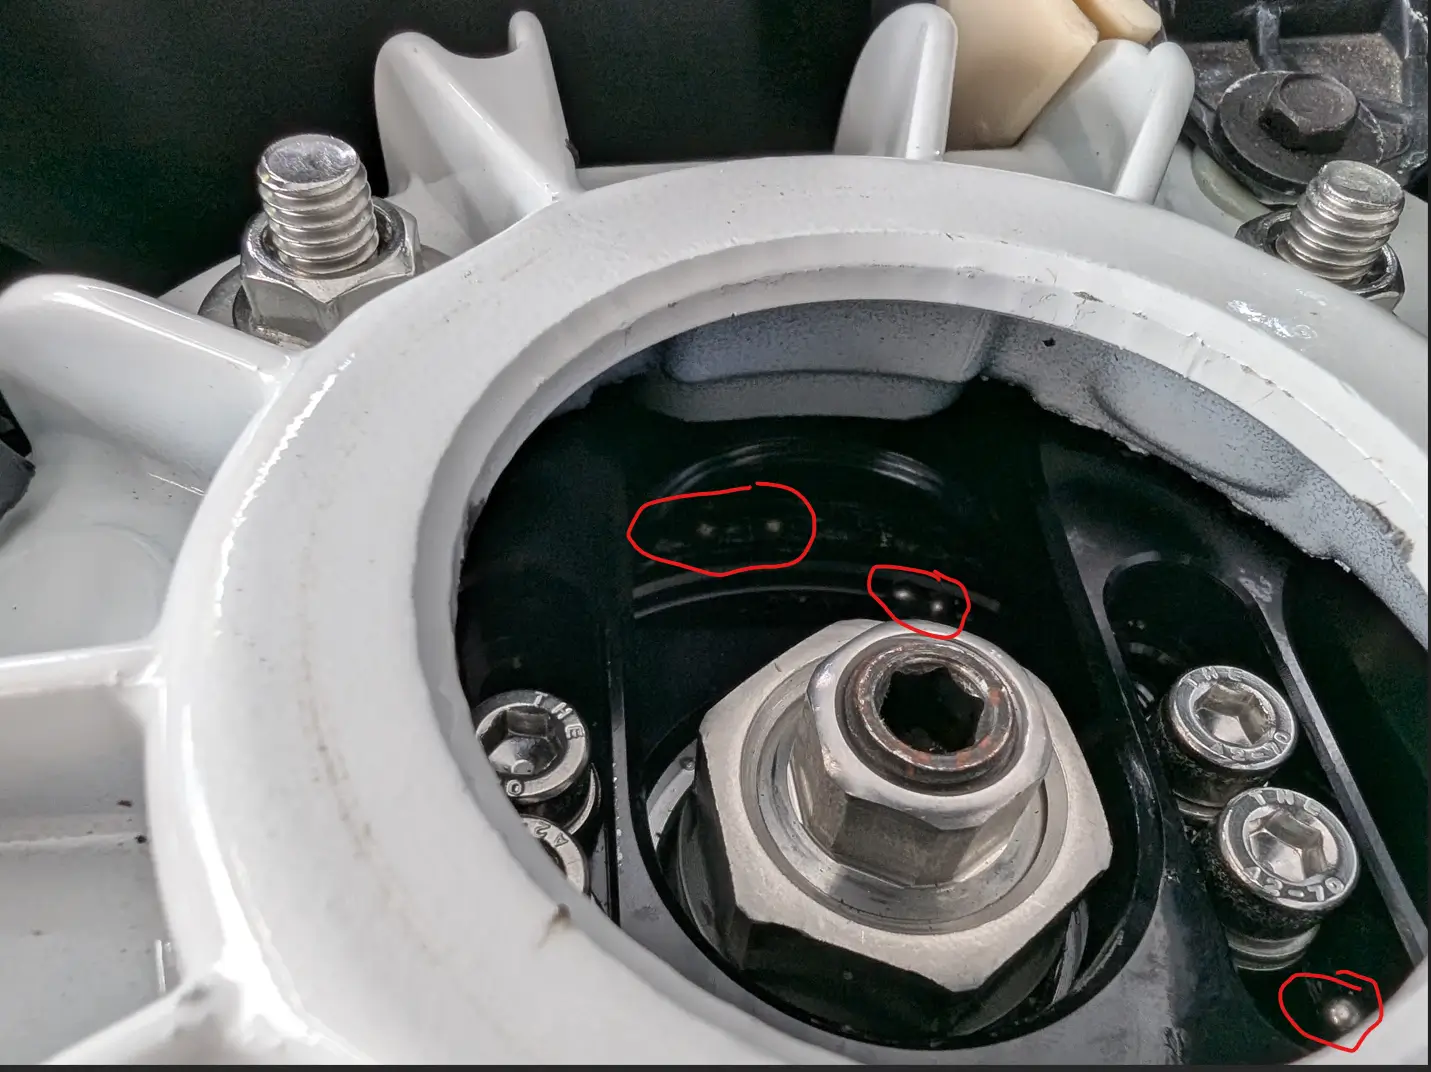
4.) Even with the thin wall 27mm socket, i couldn't get the socket on the lock nut with the plate 100% in the least camber/stock position. I had to take the plate out and move it in just a little bit so that I had enough clearance to fit the socket and tighten. If you move it too far over, then the top of the strut tower will be in the way of your socket. After the nut is on, you can adjust however you want.

5.) While I had an allen key to adjust the screws in the plate, I couldn't actually insert them when the plate was installed. I had to take an angle grinder to one of my allen keys to shorten it so that i could fit it in. I'm new to camber plates, so maybe there is some kind of special allen tool im supposed to know about, but the install doc doesn't mention it.
Sponsored


licklobster

Well-Known Member
First Name
Chris
Joined
Mar 22, 2025
Threads
11
Messages
238
Reaction score
220
Location
Phoenix, AZ
Car(s)
23 Supra. V8 Exocet
Ball end allen as mentioned. My normal 27 socket fit fine, idk. it's a 12 point so maybe not as thick? For 3) are you talking about the smaller strut top nut?
 
OP
OP
kungfujedis

kungfujedis

Well-Known Member
First Name
Greg
Joined
Nov 13, 2023
Threads
10
Messages
158
Reaction score
217
Location
Washington DC
Car(s)
2024 Supra MT, 2013 WRX
Ball end allen as mentioned. My normal 27 socket fit fine, idk. it's a 12 point so maybe not as thick? For 3) are you talking about the smaller strut top nut?
Yeah, I ordered some ball end allens based on the tips here.

The one that wouldn't fit was 6 point, and the one that would was 12 point, so you might be right about that.

The smaller nut goes on before passing through the plate, so that was fine. After passing through, you can't reach the larger nut that goes on top of the smaller nut with a socket if the plate is cambered too much.
 

MoreIceTea

Well-Known Member
Joined
Dec 4, 2024
Threads
6
Messages
48
Reaction score
13
Location
HI
Car(s)
Supra 3.0
Also did my installation this weekend. For the 27mm socket, the instruction they provide is a harder way. If you look at the PDF instruction close enough, the final photo they have also shows the damage on the top plate made by 27mm socket.

I took off all 4 M5s then installed the bottom sliding part onto the damper first with the 27mm nut. This allows me to jack up the assembly and use any 27mm socket to tighten it without the plate in between. Lastly lower the assembly again, install the top plate on to the body, then jack it up to finish with 4 M5s.

This is a much easier approach and I could have the 27mm nut torqued with factory spec (~70NM/50lbft iirc) instead of just impact wrench… but soon it turns out to be impossible. The center screw (hex? Torx? in between?) won’t hold up the torque required by BMW. ISTA didn’t give out the pattern, instead it says there is a special tool required. Ended up thread lock + impacting wrench all the way.

BTW what’s your camber measurement with adjuster pushed all the way in? With everything else factory I’m getting -2.8 deg R / -2.6 deg L. Was expecting something closer to -3.
 
Last edited:
OP
OP
kungfujedis

kungfujedis

Well-Known Member
First Name
Greg
Joined
Nov 13, 2023
Threads
10
Messages
158
Reaction score
217
Location
Washington DC
Car(s)
2024 Supra MT, 2013 WRX
I'm waiting for my alignment tools to be delivered, but I'll post my measurements once i get them.
 

licklobster

Well-Known Member
First Name
Chris
Joined
Mar 22, 2025
Threads
11
Messages
238
Reaction score
220
Location
Phoenix, AZ
Car(s)
23 Supra. V8 Exocet
Also did my installation this weekend. For the 27mm socket, the instruction they provide is a harder way. If you look at the PDF instruction close enough, the final photo they have also shows the damage on the top plate made by 27mm socket.

I took off all 4 M5s then installed the bottom sliding part onto the damper first with the 27mm nut. This allows me to jack up the assembly and use any 27mm socket to tighten it without the plate in between. Lastly lower the assembly again, install the top plate on to the body, then jack it up to finish with 4 M5s.

This is a much easier approach and I could have the 27mm nut torqued with factory spec (~70NM/50lbft iirc) instead of just impact wrench… but soon it turns out to be impossible. The center screw (hex? Torx? in between?) won’t hold up the torque required by BMW. ISTA didn’t give out the pattern, instead it says there is a special tool required. Ended up thread lock + impacting wrench all the way.

BTW what’s your camber measurement with adjuster pushed all the way in? With everything else factory I’m getting -2.8 deg R / -2.6 deg L. Was expecting something closer to -3.
I can get -4 and -3.7 fully maxed out on stock springs. There is a little slop on the actual strut mounts too, so loosening/tightening the four nuts with the plate pushed to the inside will probably net some tiny amount also because you are moving it a mm or two.
 
Last edited:

MoreIceTea

Well-Known Member
Joined
Dec 4, 2024
Threads
6
Messages
48
Reaction score
13
Location
HI
Car(s)
Supra 3.0
I can get -4.1 and -3.7 fully maxed out on stock springs. There is a little slop on the actual strut mounts too, so loosening/tightening the four nuts with the plate pushed to the inside will probably net some tiny amount also because you are moving it a mm or two.
Wow that's a lot. I didn't intentionally push the camber plate in when tightening the 4 nuts on strut tower, but it seems like the red sliding plate/strut bearing is already touching the inner wall of the tower. So it's already at max.

One thing I figured is my front has 1+ degree toe out. Time to fix the alignment.

IMG_4812.webp
 
OP
OP
kungfujedis

kungfujedis

Well-Known Member
First Name
Greg
Joined
Nov 13, 2023
Threads
10
Messages
158
Reaction score
217
Location
Washington DC
Car(s)
2024 Supra MT, 2013 WRX
I was adjusting my camber and ran into another gotcha. I opened up one side to adjust, and was like, "what are these ball bearings doing in here?"

1757339875459-04.webp

I realized after inspecting the stock camber plates that one of them had the top of this ring stealthily stuck to it.
1757339972976-vr.webp

1757340007221-b8.webp

So, I had to pull the whole thing apart to reinstall the top half of the ring. Its two pieces, a top and a bottom with bearings in between. I managed to find all but two of the bearings, cleaned, regreased and put it back together. Just something to keep an eye out for.
 

MoreIceTea

Well-Known Member
Joined
Dec 4, 2024
Threads
6
Messages
48
Reaction score
13
Location
HI
Car(s)
Supra 3.0
I was adjusting my camber and ran into another gotcha. I opened up one side to adjust, and was like, "what are these ball bearings doing in here?"

1757339875459-04.webp

I realized after inspecting the stock camber plates that one of them had the top of this ring stealthily stuck to it.
1757339972976-vr.webp

1757340007221-b8.webp

So, I had to pull the whole thing apart to reinstall the top half of the ring. Its two pieces, a top and a bottom with bearings in between. I managed to find all but two of the bearings, cleaned, regreased and put it back together. Just something to keep an eye out for.
Exactly the same problem I ran into. My left was okay, but right one ended up to be two pieces with 15 of them falling out. Spent the whole night to pick them up from the garage floor. Make sure to clean and grease them before reassembly. They could get broken very fast if anything trapped in-between. Part number for new ones is 31306890656 BMB-G20F if you need a replacement. Non-OEM is ~$45, OEM ones only come with the silver top hat ~$80.
 
OP
OP
kungfujedis

kungfujedis

Well-Known Member
First Name
Greg
Joined
Nov 13, 2023
Threads
10
Messages
158
Reaction score
217
Location
Washington DC
Car(s)
2024 Supra MT, 2013 WRX
I'm glad you said that, because when I looked up your part number it made me realize my install is still wrong. I thought just that inner ring with bearings was supposed to come off, now i realize that that entire black part was supposed to stay together on top....doh. Guess i have to open it up again.... Both sides now, it was symmetrical, so I didn't realize something was wrong.

PXL_20250908_150221155.webp
 

MoreIceTea

Well-Known Member
Joined
Dec 4, 2024
Threads
6
Messages
48
Reaction score
13
Location
HI
Car(s)
Supra 3.0
I'm glad you said that, because when I looked up your part number it made me realize my install is still wrong. I thought just that inner ring with bearings was supposed to come off, now i realize that that entire black part was supposed to stay together on top....doh. Guess i have to open it up again.... Both sides now, it was symmetrical, so I didn't realize something was wrong.

PXL_20250908_150221155.webp
Yeah it's a pretty large one. I would take both top (from OEM hat) and bottom (from spring) out. Disassemble them, clean everything thoroughly using soap and water, dry them then apply new bearing grease. Make sure they can roll smoothly before putting them back.

One mistake I made was not doing the above after placing these 15 bearings back. Apparently some dust and sand got picked up from the grange floor, creating frictions and noise when turning the steering wheel. Ended up opening it up again to clean.

Also if in doubt, always replace the entire bearing. IMO $45 is not too expensive compared to a failure in the future.

s-l1600.webp
 

i3igpete

Well-Known Member
Joined
May 16, 2022
Threads
44
Messages
1,255
Reaction score
1,486
Location
Chicago
Car(s)
2023 3.0L 8AT
I would just order the entire assembly at this point. Even losing one of the ball bearings seems kind of sketchy.

Thinking out loud now, I wonder how many shock failures are from people failing to swap over the bearing, so the shaft is spinning inside of the shock seals.
 

Ryan P

Active Member
First Name
Ryan
Joined
Feb 26, 2025
Threads
1
Messages
30
Reaction score
9
Location
NE Ohio
Car(s)
20 Supra Premium, 22 Tundra Platinum
BTW what’s your camber measurement with adjuster pushed all the way in? With everything else factory I’m getting -2.8 deg R / -2.6 deg L. Was expecting something closer to -3.
That's all I was able to get out of them as well. All stock suspension otherwise.
Sponsored


Top