European license plate holder

B54

Well-Known Member
First Name
Bas
Joined
Feb 26, 2020
Threads
8
Messages
140
Reaction score
119
Location
Belgium, Europe
Car(s)
Supra Jarama Racetrack Edition
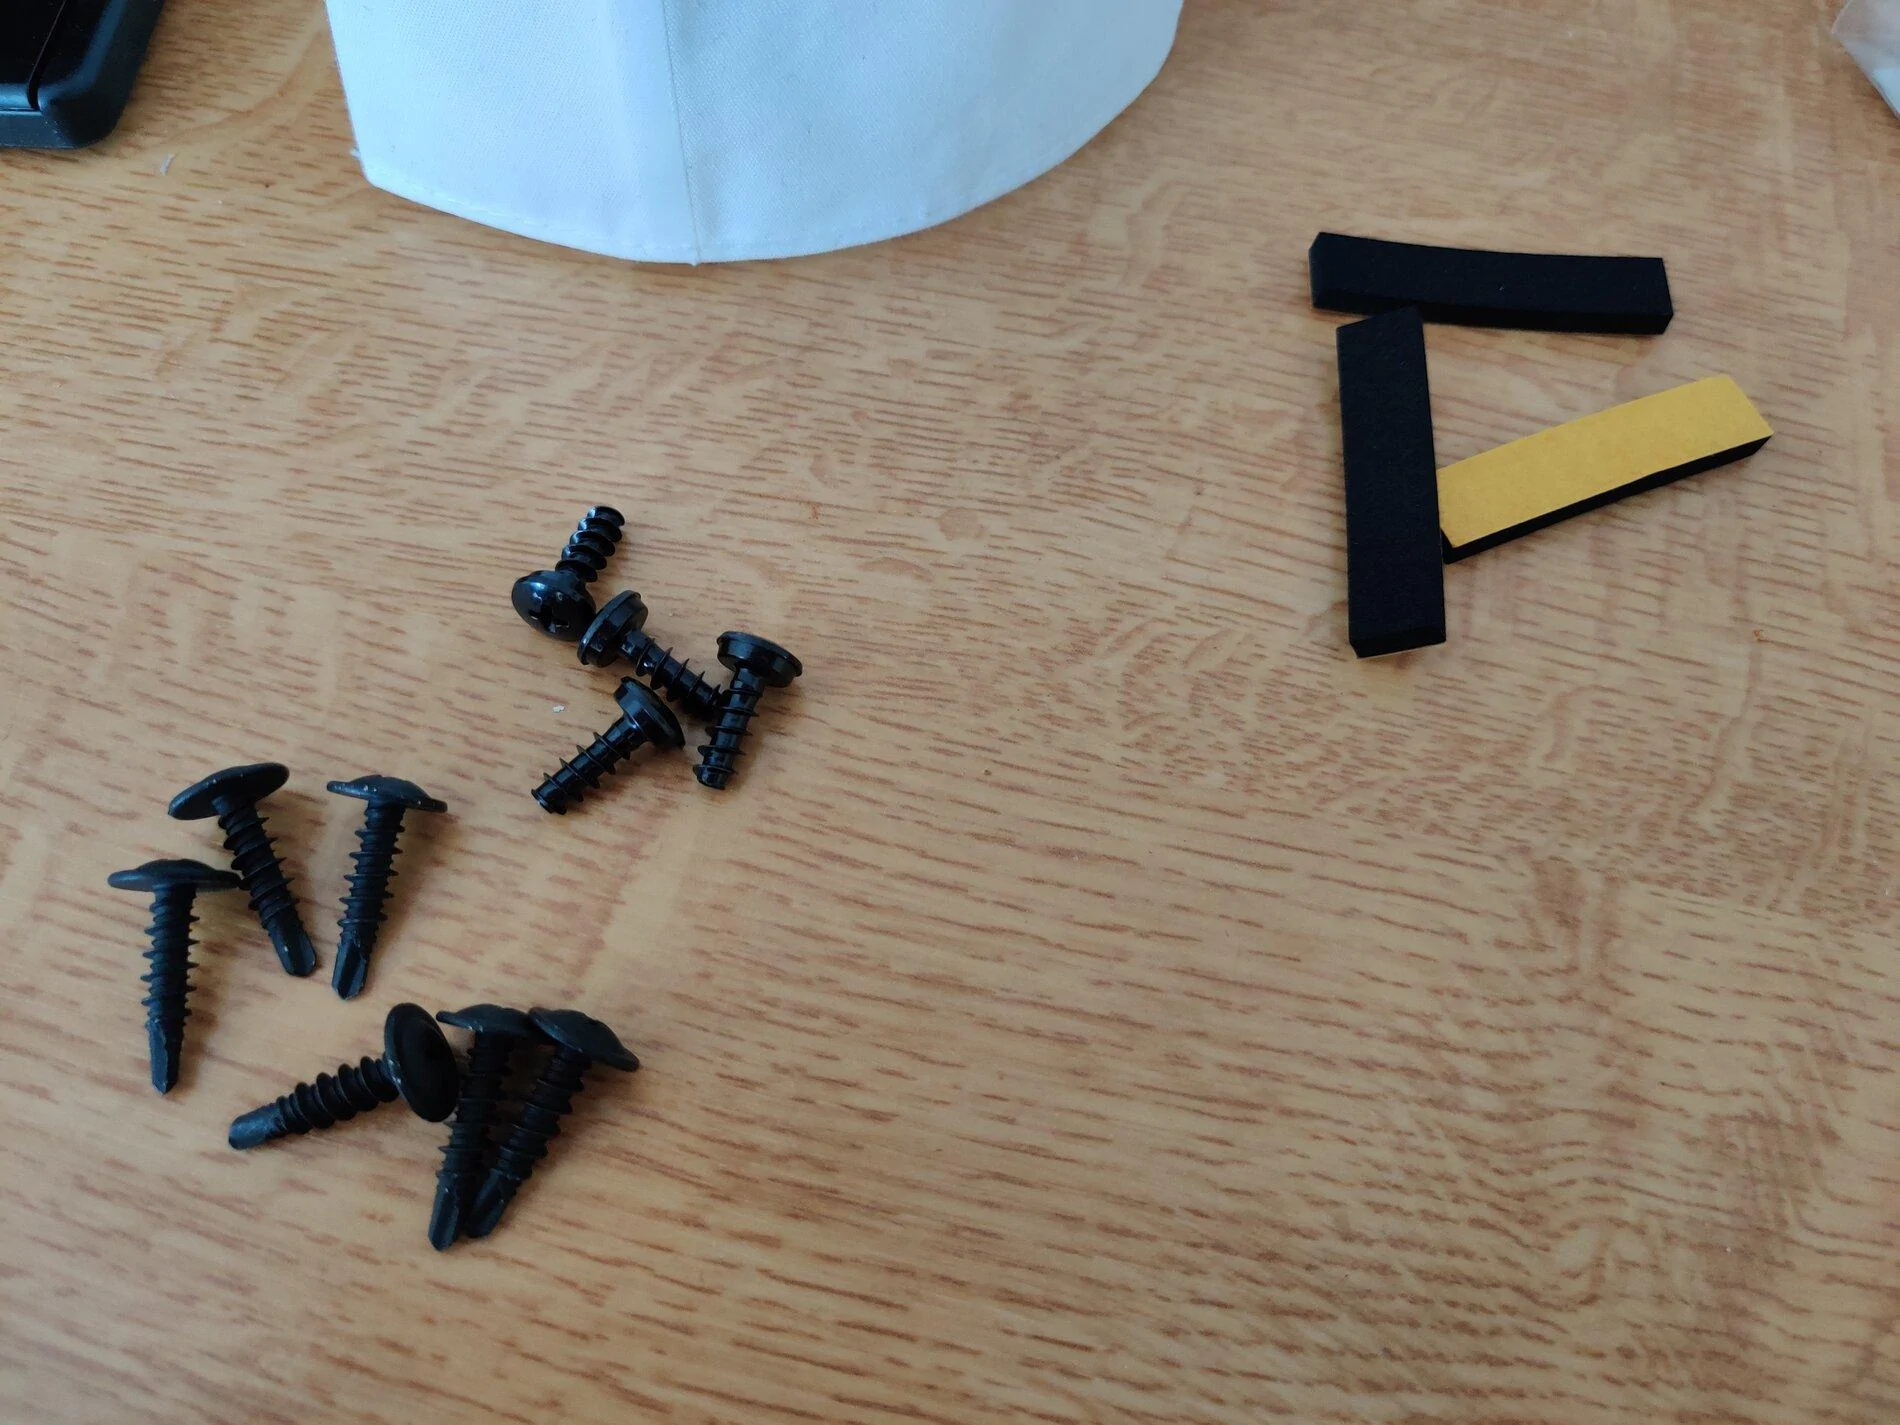
EDIT: All 3 cushions were installed on the bumper were there was a possibility of the middle ridge of the license plate (see top ridge of the license plate holder picture) could dig into the bumper.
I believe the cushions were actually provided for the rear license plate holder. In my case that holder was already installed safely with use of some gummy/putty.


When I took delivery of my vehicle, the garage did not install the front license plate holder because it requires drilling in the front bumper.
I will most likely still install it myself.

Are there any European Supra owners that can tell me where the foam cushions are supposed to be placed?
I can't seem to find any information about it in the workshop manual.
IMG_20210704_154907.jpg


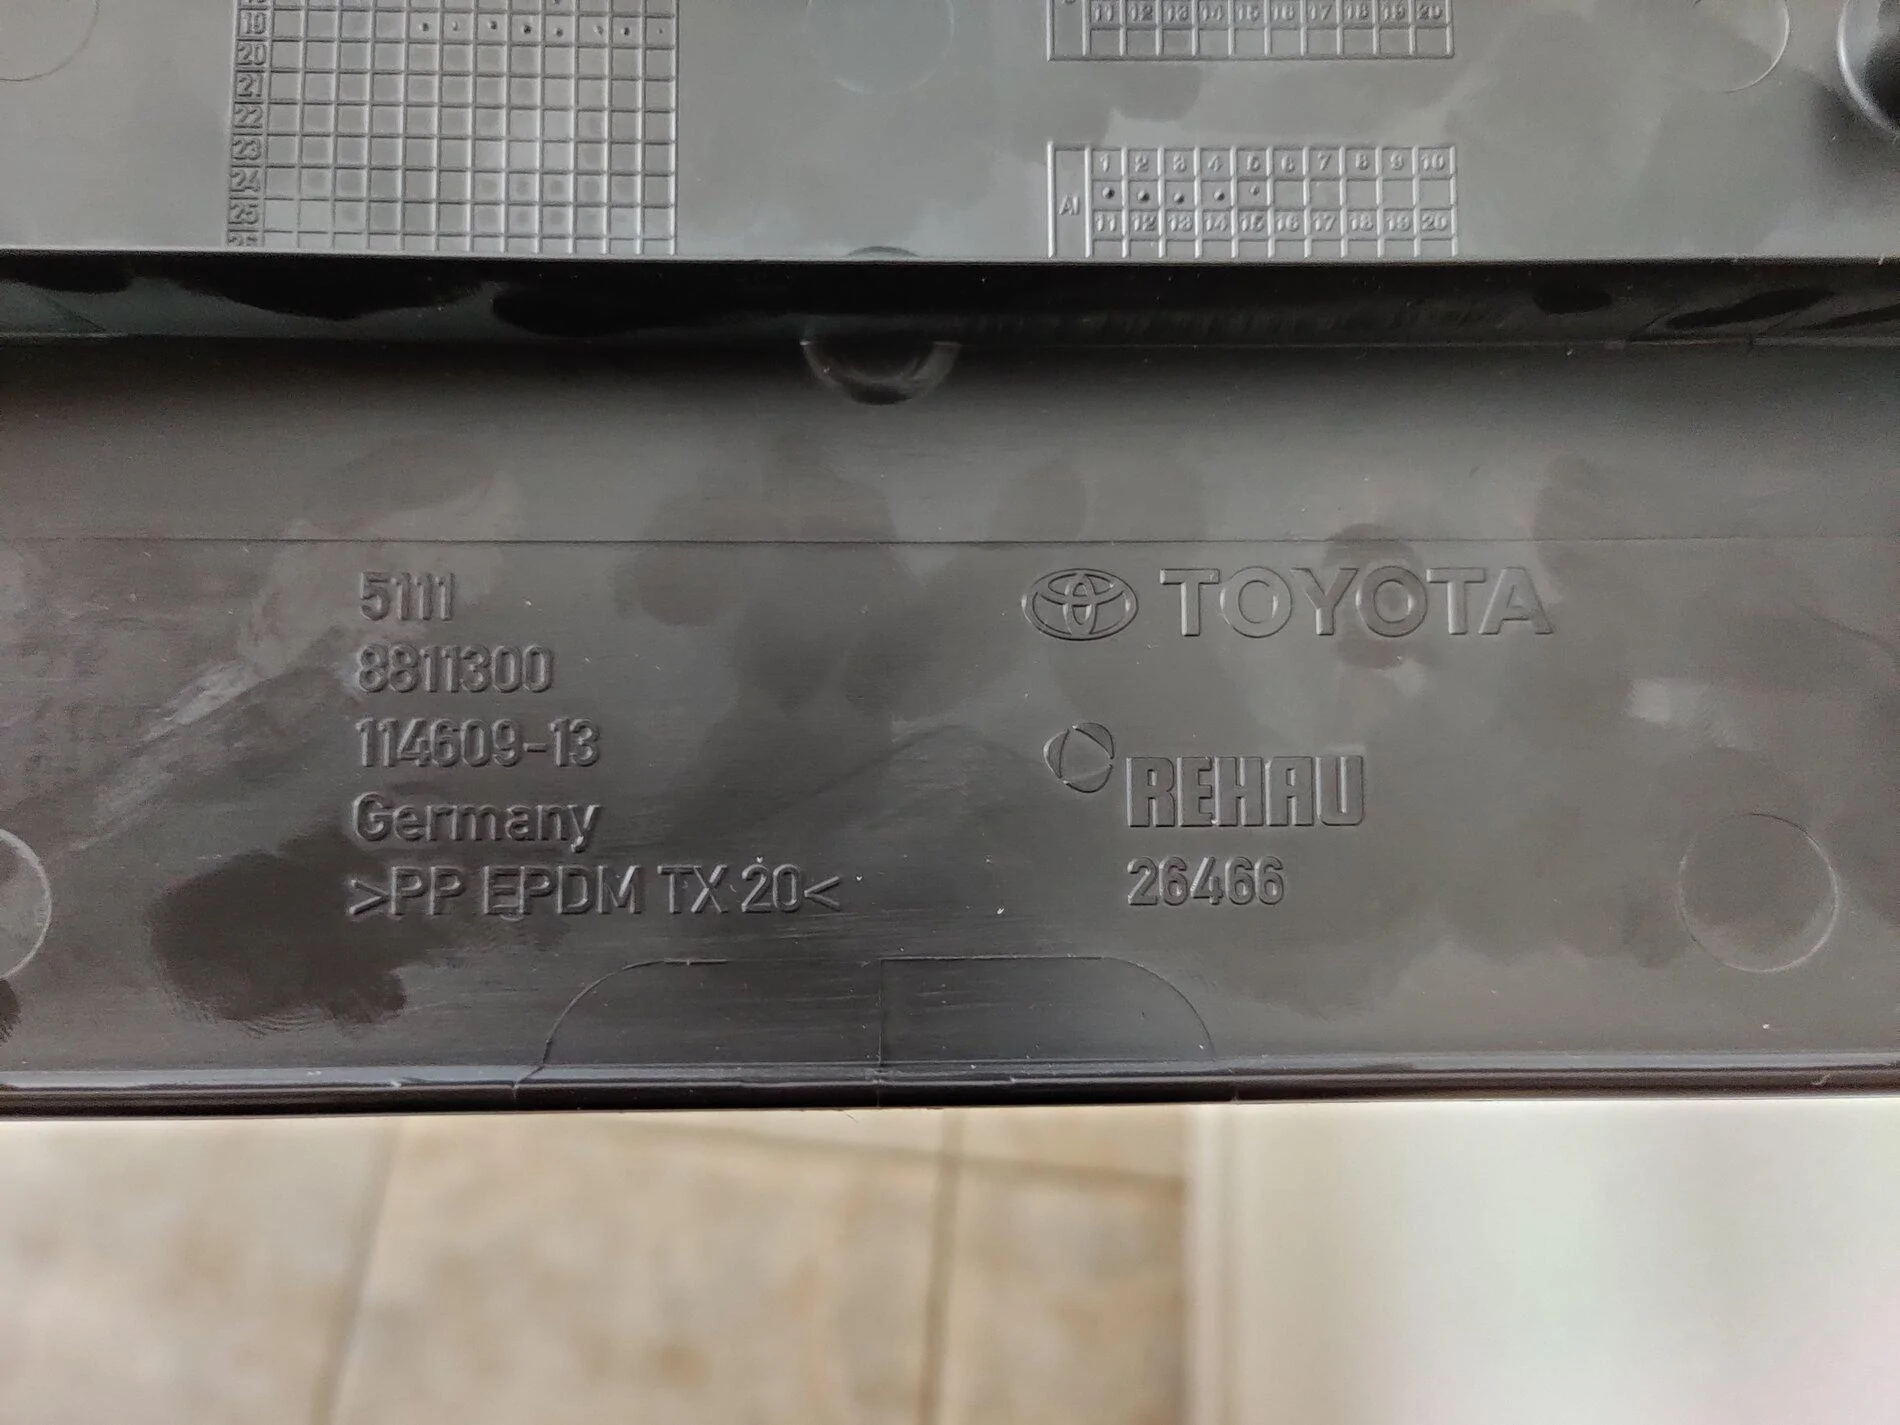
For future owners/searchers in this forum:
The European license/number plate holder/bracket part number seems to be: 51118811300
Other part number mentioned on the plate: 114609-13, made in Germany
IMG_20210704_154759.jpg
Sponsored

 
Last edited:

Gerbel

Member
First Name
Gerbel
Joined
Jul 22, 2021
Threads
1
Messages
6
Reaction score
2
Location
Germany
Car(s)
Supra 2.0
Can you send a full picture of the license plate holder?
 

BG500

Well-Known Member
First Name
Thomas
Joined
Jun 1, 2021
Threads
8
Messages
232
Reaction score
221
Location
Norway
Car(s)
2019 Supra
I just removed mine (I actually managed to get an approval from the Norwegian DMV to use a small front plate, which is in it self amazing) and there were no foam pads on mine, are you sure they are part of the kit ?
 
OP
OP
B54

B54

Well-Known Member
First Name
Bas
Joined
Feb 26, 2020
Threads
8
Messages
140
Reaction score
119
Location
Belgium, Europe
Car(s)
Supra Jarama Racetrack Edition
Can you send a full picture of the license plate holder?
Sorry, the plate holder is already on the car. I forgot to update the start post about what I did ;)

I just removed mine (I actually managed to get an approval from the Norwegian DMV to use a small front plate, which is in it self amazing) and there were no foam pads on mine, are you sure they are part of the kit ?
Cool they allow you to do that. We have the option to get a motorcycle-esque plate for bigger vehicles. But those plates need to be larger than a real motorcycle license plate.

I had no other option then to drill in the front bumper. Sticker license plates are also illegal, and with the rarity of Supra's where I live, it is bound to happen to have an overarchieving cop look the wrong way at me.

Looks like the pads weren't necessary for the frontal plates. I placed them as mentioned now in the original/first post.
 
Last edited:

BG500

Well-Known Member
First Name
Thomas
Joined
Jun 1, 2021
Threads
8
Messages
232
Reaction score
221
Location
Norway
Car(s)
2019 Supra
Too bad you had to drill holes in your bumper :oops: is there really no option to go smaller in Belgium?
I know Norway isn't part of the EU but we adhere to all the EU rules so if the plates are approved here they should be available in the EU as well ?

here is what mine looks like now, it took me a few hours to fix the holes and paint over them..
I've been keeping an eye on the temp gauge, but so far (29 degrees yesterday) it looks to be coping OK with the air intake obstruction.
 

Attachments

  • Love
Reactions: B54

Yves

Member
First Name
Yves
Joined
Jul 20, 2021
Threads
1
Messages
8
Reaction score
1
Location
Belgium
Car(s)
Supra, S13 200sx
The car I bought last weekend has the front license plate mounted to the tow hook (I think) in the grill below the drivers side headlight. However I prefer the normal spot like in this picture.

Is this the same one you ordered with part no. 51118811300 ?
 

Attachments

f22bub

Well-Known Member
Joined
Jan 17, 2021
Threads
7
Messages
84
Reaction score
166
Location
Germany
Car(s)
2021 GR Supra Jarama Racetrack Edition
Too bad you had to drill holes in your bumper :oops: is there really no option to go smaller in Belgium?
I know Norway isn't part of the EU but we adhere to all the EU rules so if the plates are approved here they should be available in the EU as well ?

here is what mine looks like now, it took me a few hours to fix the holes and paint over them..
I've been keeping an eye on the temp gauge, but so far (29 degrees yesterday) it looks to be coping OK with the air intake obstruction.
How did you do it if I may ask? When I got my Supra it also had the wholes already drilled and I want to fix it but don't know how. Would love to hear your process :)
 

SupraYYJ

Well-Known Member
Joined
Jan 28, 2020
Threads
4
Messages
305
Reaction score
706
Location
Victoria, BC, Canada
Car(s)
2021 Toyota GR Supra 3.0
The car I bought last weekend has the front license plate mounted to the tow hook (I think) in the grill below the drivers side headlight. However I prefer the normal spot like in this picture.

27013951_366471228177851_1502932150774842179_n-jpg.jpg
But you're Belgian? And you want your Supra to have a Hitler mustache?? What is even happening???
 

Yves

Member
First Name
Yves
Joined
Jul 20, 2021
Threads
1
Messages
8
Reaction score
1
Location
Belgium
Car(s)
Supra, S13 200sx
But you're Belgian? And you want your Supra to have a Hitler mustache?? What is even happening???
Those long euro license plates really don't look good when mounted to the side imo.
I wish I could take a picture, but my car is still waiting for me at the dealership 200km away :p
 

geert.bieseman

Well-Known Member
First Name
Geert
Joined
Oct 4, 2019
Threads
2
Messages
253
Reaction score
274
Location
Belgium
Car(s)
Nissan GT-R R33 ; Toyota Supra MKV
But you're Belgian? And you want your Supra to have a Hitler mustache?? What is even happening???
It is the best place for the optimal airflow.
All other places in the front are blocking air towards radiators ;)
 
  • Like
Reactions: B54

BG500

Well-Known Member
First Name
Thomas
Joined
Jun 1, 2021
Threads
8
Messages
232
Reaction score
221
Location
Norway
Car(s)
2019 Supra
How did you do it if I may ask? When I got my Supra it also had the wholes already drilled and I want to fix it but don't know how. Would love to hear your process :)
It's not difficult but it takes time, and you need to know how to do paint corrections/detailing and have a polisher and compounds at hand
1) cut as much as you can of the plastic which is raised up by the mounting screws, using a sharp blade
2) fill the holes with a two-component plastic filler (either a boat or paint shop will have this)
3) sand down and repeat step 2 until you get a smooth surface
4) mask up around the 4 holes, i always try to mask in circles, it easier to get the new paint to blend in later. Get hold of plastic masking tape not the paper shit for the inner/first strip (any good paint shop should have them in different sizes)
5) one layer of plastic primer, two - three layers of base coat (mine is black metallic) then two layers of two-component clear coat. try to keep all of this as thin as you can, the thicker it gets the more work you will have later when blending the fix into the old paint surface
6) let everything dry and the top coat to cure (usually 48 hours for two-component top coats)
7) using 2000-2500 grid sandpaper (soaked in water) sand down the sharp edge between the newly painted area and the old surface, this is what really takes time
8) polish and repeat 7 until you are happy with the result

like I said not difficult, but you need to have a few hours for the last few steps, I rushed step 3 and the result isn't perfect, but I will redo it in the winter when I have more time ;)
 

f22bub

Well-Known Member
Joined
Jan 17, 2021
Threads
7
Messages
84
Reaction score
166
Location
Germany
Car(s)
2021 GR Supra Jarama Racetrack Edition
It's not difficult but it takes time, and you need to know how to do paint corrections/detailing and have a polisher and compounds at hand
1) cut as much as you can of the plastic which is raised up by the mounting screws, using a sharp blade
2) fill the holes with a two-component plastic filler (either a boat or paint shop will have this)
3) sand down and repeat step 2 until you get a smooth surface
4) mask up around the 4 holes, i always try to mask in circles, it easier to get the new paint to blend in later. Get hold of plastic masking tape not the paper shit for the inner/first strip (any good paint shop should have them in different sizes)
5) one layer of plastic primer, two - three layers of base coat (mine is black metallic) then two layers of two-component clear coat. try to keep all of this as thin as you can, the thicker it gets the more work you will have later when blending the fix into the old paint surface
6) let everything dry and the top coat to cure (usually 48 hours for two-component top coats)
7) using 2000-2500 grid sandpaper (soaked in water) sand down the sharp edge between the newly painted area and the old surface, this is what really takes time
8) polish and repeat 7 until you are happy with the result

like I said not difficult, but you need to have a few hours for the last few steps, I rushed step 3 and the result isn't perfect, but I will redo it in the winter when I have more time ;)
Amazing, thanks a lot for your detailed explanation!!! :)
Sponsored


Top