Mineral_///M
Member
- First Name
- B
- Joined
- Nov 16, 2025
- Threads
- 1
- Messages
- 5
- Reaction score
- 19
- Location
- Medford, Oregon
- Car(s)
- A91 Supra
- Thread starter
- #1
I tried researching on the forums before my brother and I did the install but seemed like there wasn't many DIY threads about it so I figured I would do one just incase anyone else is willing to do it on their own.
Full disclosure my brother and I both work at a body shop making this very easy to do with the proper tools and equipment but compare to other BMWs we've done carbon roofs on this was by far the easiest.
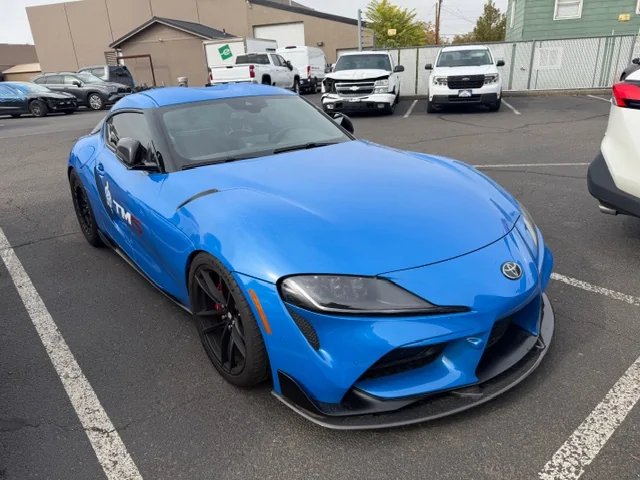
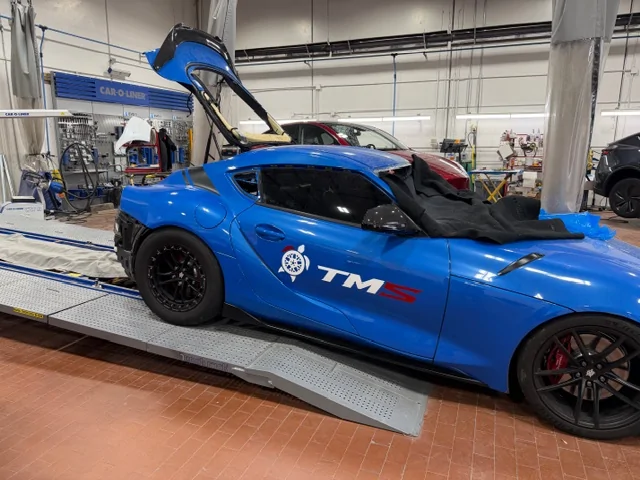
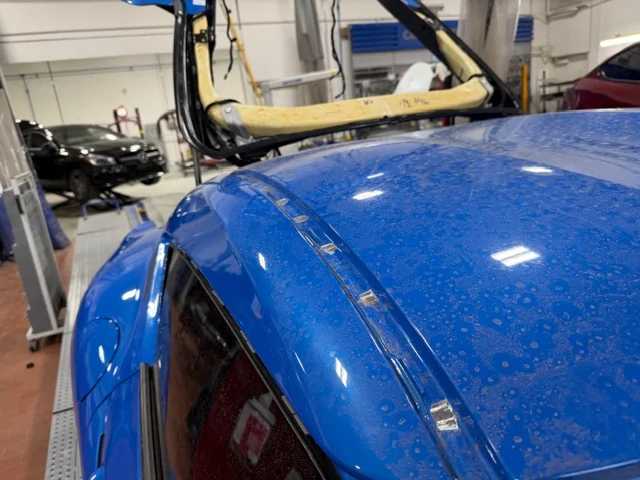
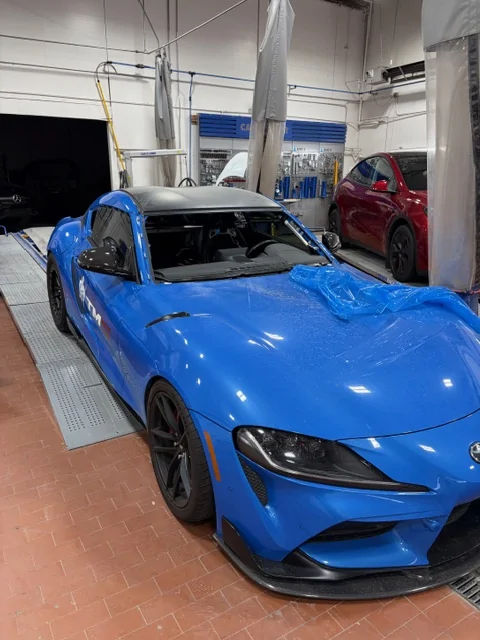
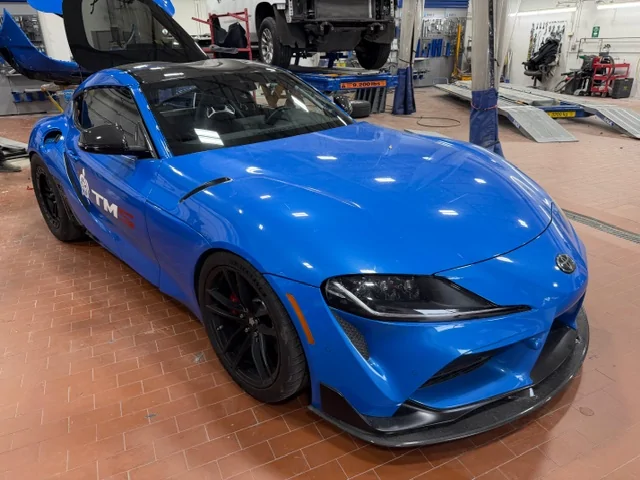
Here's the patient. Gorgeous Refraction Supra.

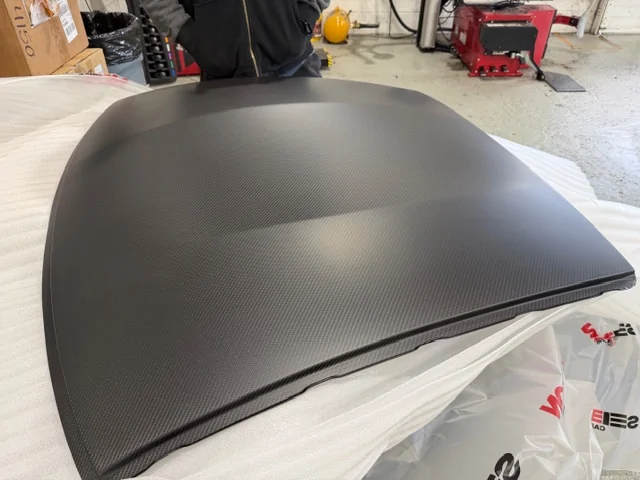
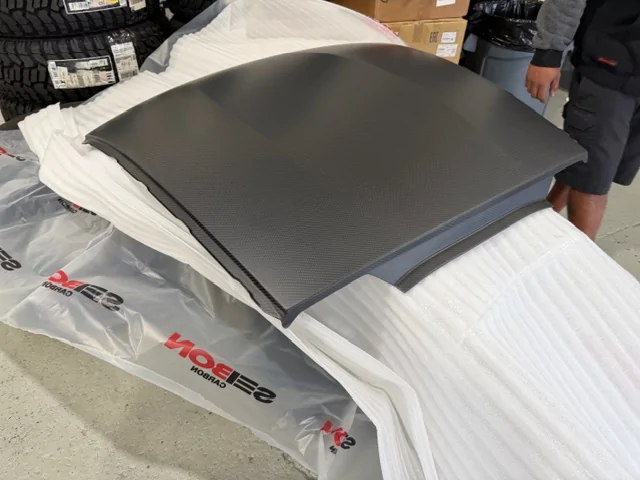
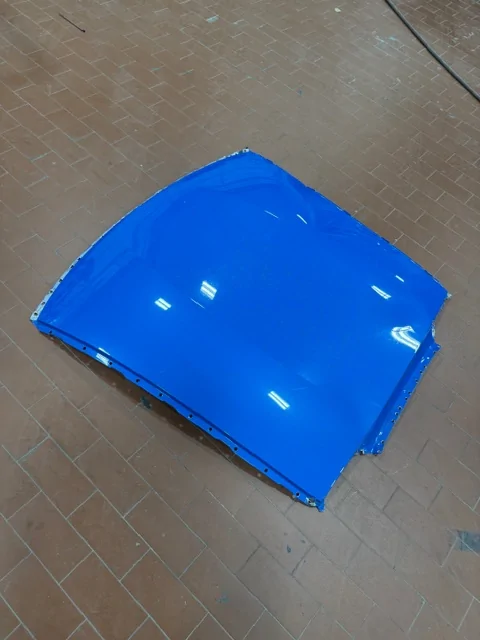
We went with the Seibon Dry Carbon roof. Very nice piece of carbon. I was really impressed with the quality. Would said it's OEM BMW levels of quality. Especially for a dry finish. Not an imperfection anywhere.
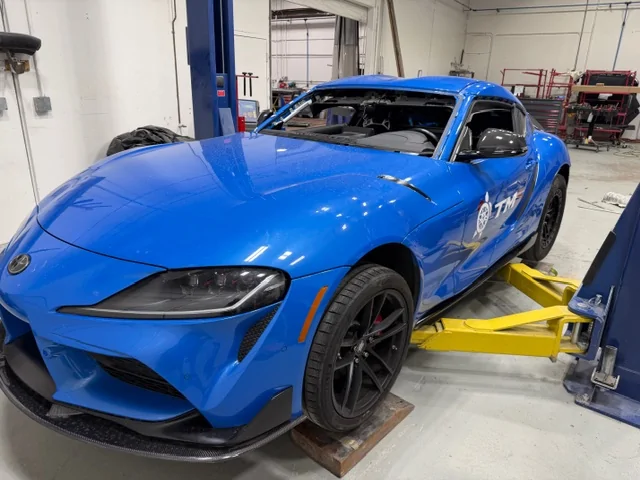
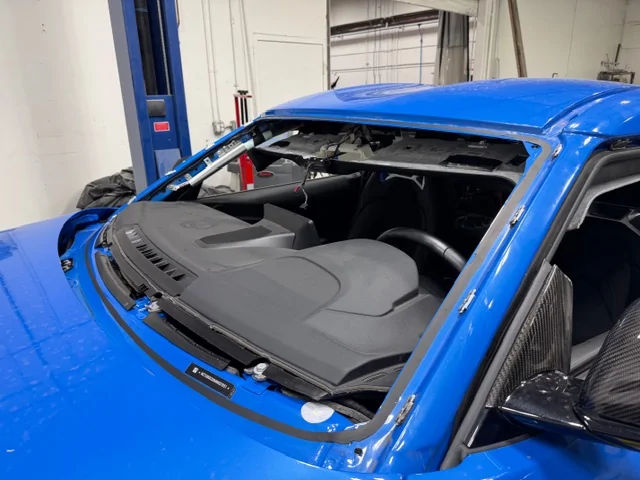
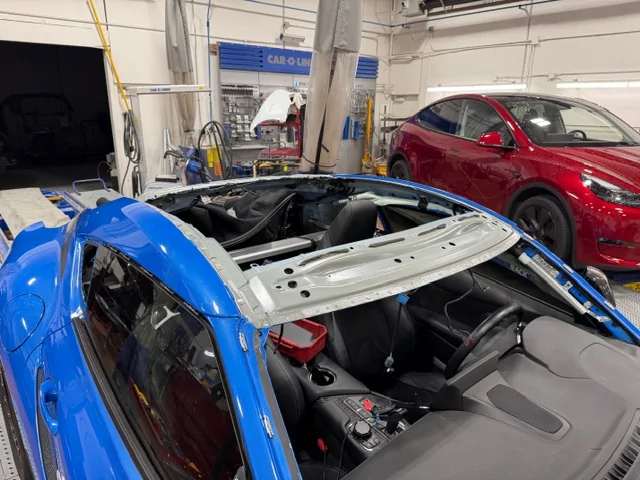
First step is to removed the windshield and the hatchback glass. Reason being that the only way to disconnect the hatch wiring is to pull it out. No disconnect from the main body harness and impossible to fish the wiring out with the glass still in. We didn't realize this at first and had to call the glass guy back out.
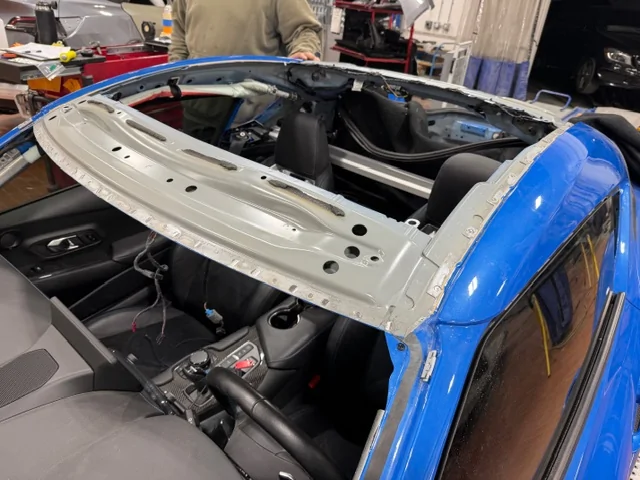
Now with the windshield out. you can fish out the headliner through the windshield opening. It is very tight but can be done without folding the headliner. Feed it out at a 45 degree angle.
With that out of the way now its time to cover up the interior to catch all the metal shaving.
I strongly recommend a band file. Makes quick work of the spot welds and no risk of going through the reinforcement with a drill bit. once those at all done. Lightly torch the front windshield edge, then slide a chisel between the roof skin and the reinforcement, and start lightly tapping it across. If it gets stuck and a good whack doesn't break it grab the band file again. Same thing down the sides. If all the spots welds are completely broken at this point you should be able to just heat the outer edge and start pulling on it.

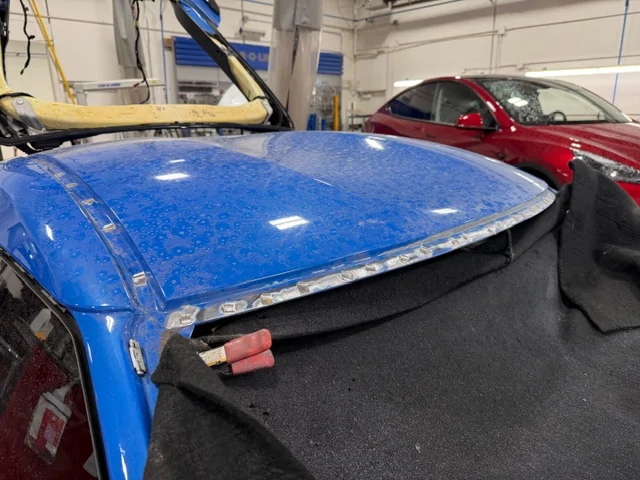
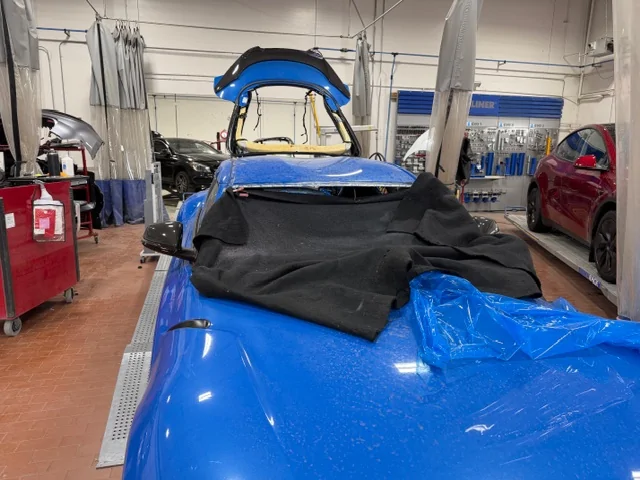
Tada roof skin off and as you can see not completely mangled. If it's fighting you spend more time on the spot welds and use some more heat. Now you have a bald supra. Time to start cleaning the mating edges of any burrs left over from the spot welds and old seam sealer down the sides and back
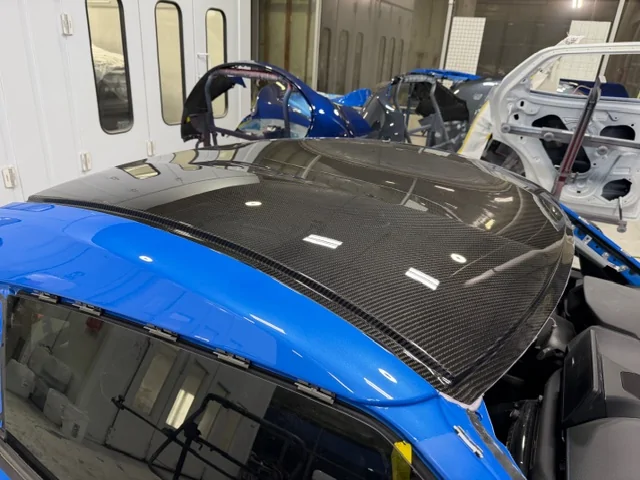
Quick test fit of the roof to see how far you have to clean and also make sure that your carbon roof is warped or anything. Again 10/10 fitment. Barely did any adjusting.
Time to glue the roof on. We used 3M 07333 Impact Resistant Structural Adhesive for the bonding and 3M NVH Dampening Material 04274 across the front reinforcement. You'll see were the factory stuff was. Just run a new bead across the old stuff.
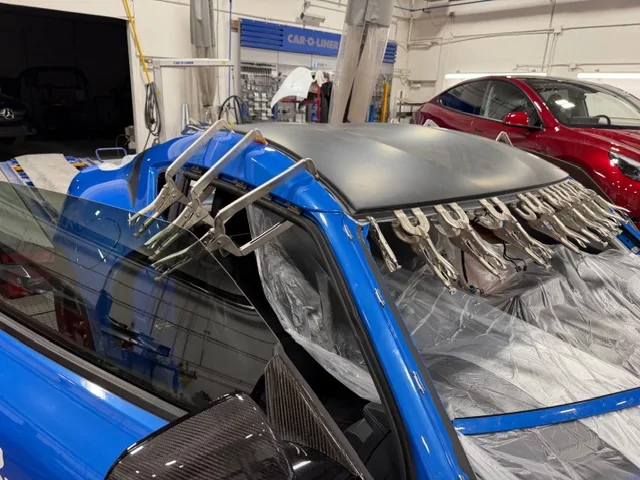
Since there was never a factory carbon roof supra there wasn't any OEM procedures. We used the procedures from an F80 M3 carbon roof as a guide. BMW does sell their own panel bond but it's just rebranded 3M stuff. Even comes in the same bottle. We used some plastic to cover the interior because you have to be really careful not to get any of this stuff on anything you care about because it will not come off. Paint included. Photos are going to be light on this section because it's hard to take photos and work at the same time. Flip the carbon roof upside down to prep the roof. Scuff up the edges all the way across and the roof area where the NVH foam will make contact on the underside. Once that's done you'll run a bead of panel bond across the entire mating surface. You'll want to run another bead on the car as well. Then with the small brush (usually comes with the tube) smooth out the bead on both the roof and the car. Then without touching the panel bond slide the roof on the car. Use the roof moldings as a guide along with the edge of where the old roof ended. Once you are happy with the fitment clamp it down. If I remember correctly you have an hour of work time before the panel bond starts curing but really you should to have it clamped down within 15 minutes of spreading it out.
You're done for the night. Now it has to stay clamped for 24 hours.
Once you unclamp it you'll have to seam seal the edges where the roof moldings go and across the back of it. You'll see where the factory seam sealer was and use that as a guide.
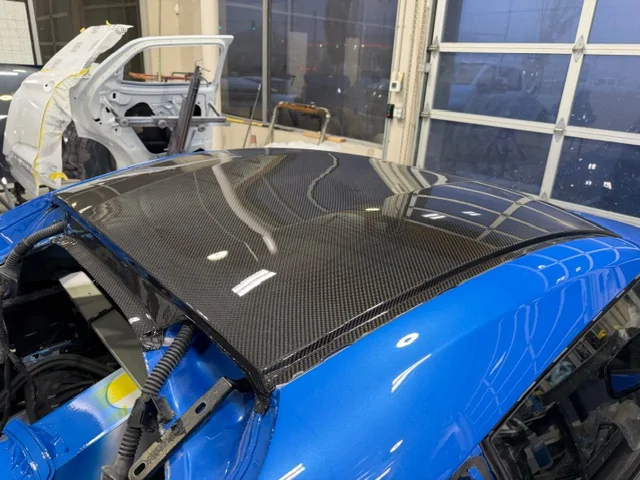
Now this step is completely unnecessary and while I do love the dry carbon look it doesn't match the rest of the glossy carbon on the car. The painter scuffed down the roof and reshot it with clear. Will also help with UV protection.
Look at that. Time for reassembly. Headliner goes in first. Do not forget to install the headliner before the windshield is reinstalled. It can't be installed otherwise.
That's a wrap. I will upload some better photos of the finished product later this week.
Let me know what you guys think and if you have any questions!
Full disclosure my brother and I both work at a body shop making this very easy to do with the proper tools and equipment but compare to other BMWs we've done carbon roofs on this was by far the easiest.
Here's the patient. Gorgeous Refraction Supra.
We went with the Seibon Dry Carbon roof. Very nice piece of carbon. I was really impressed with the quality. Would said it's OEM BMW levels of quality. Especially for a dry finish. Not an imperfection anywhere.
First step is to removed the windshield and the hatchback glass. Reason being that the only way to disconnect the hatch wiring is to pull it out. No disconnect from the main body harness and impossible to fish the wiring out with the glass still in. We didn't realize this at first and had to call the glass guy back out.

Now with the windshield out. you can fish out the headliner through the windshield opening. It is very tight but can be done without folding the headliner. Feed it out at a 45 degree angle.
With that out of the way now its time to cover up the interior to catch all the metal shaving.
I strongly recommend a band file. Makes quick work of the spot welds and no risk of going through the reinforcement with a drill bit. once those at all done. Lightly torch the front windshield edge, then slide a chisel between the roof skin and the reinforcement, and start lightly tapping it across. If it gets stuck and a good whack doesn't break it grab the band file again. Same thing down the sides. If all the spots welds are completely broken at this point you should be able to just heat the outer edge and start pulling on it.
Tada roof skin off and as you can see not completely mangled. If it's fighting you spend more time on the spot welds and use some more heat. Now you have a bald supra. Time to start cleaning the mating edges of any burrs left over from the spot welds and old seam sealer down the sides and back
Quick test fit of the roof to see how far you have to clean and also make sure that your carbon roof is warped or anything. Again 10/10 fitment. Barely did any adjusting.
Time to glue the roof on. We used 3M 07333 Impact Resistant Structural Adhesive for the bonding and 3M NVH Dampening Material 04274 across the front reinforcement. You'll see were the factory stuff was. Just run a new bead across the old stuff.
Since there was never a factory carbon roof supra there wasn't any OEM procedures. We used the procedures from an F80 M3 carbon roof as a guide. BMW does sell their own panel bond but it's just rebranded 3M stuff. Even comes in the same bottle. We used some plastic to cover the interior because you have to be really careful not to get any of this stuff on anything you care about because it will not come off. Paint included. Photos are going to be light on this section because it's hard to take photos and work at the same time. Flip the carbon roof upside down to prep the roof. Scuff up the edges all the way across and the roof area where the NVH foam will make contact on the underside. Once that's done you'll run a bead of panel bond across the entire mating surface. You'll want to run another bead on the car as well. Then with the small brush (usually comes with the tube) smooth out the bead on both the roof and the car. Then without touching the panel bond slide the roof on the car. Use the roof moldings as a guide along with the edge of where the old roof ended. Once you are happy with the fitment clamp it down. If I remember correctly you have an hour of work time before the panel bond starts curing but really you should to have it clamped down within 15 minutes of spreading it out.
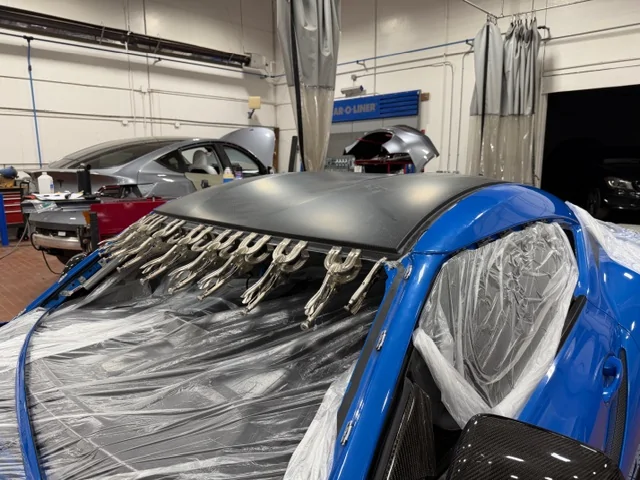

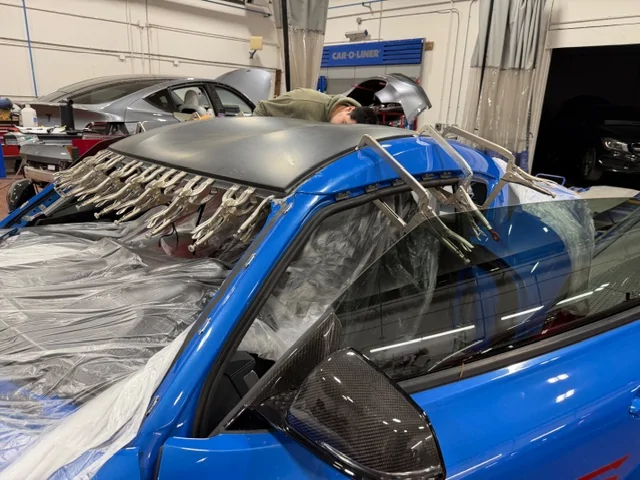
You're done for the night. Now it has to stay clamped for 24 hours.
Once you unclamp it you'll have to seam seal the edges where the roof moldings go and across the back of it. You'll see where the factory seam sealer was and use that as a guide.
Now this step is completely unnecessary and while I do love the dry carbon look it doesn't match the rest of the glossy carbon on the car. The painter scuffed down the roof and reshot it with clear. Will also help with UV protection.
Look at that. Time for reassembly. Headliner goes in first. Do not forget to install the headliner before the windshield is reinstalled. It can't be installed otherwise.
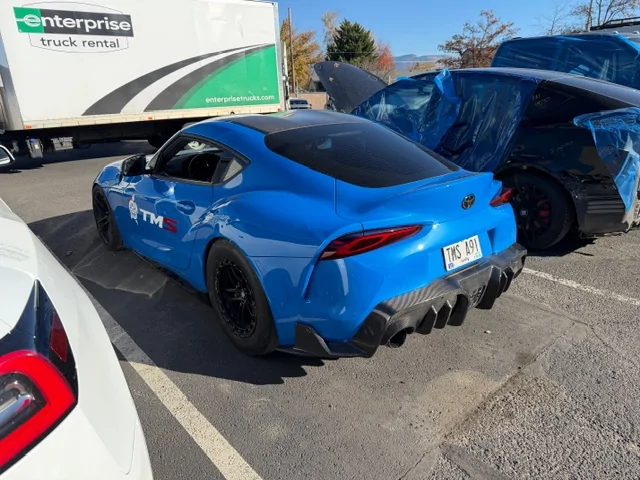
That's a wrap. I will upload some better photos of the finished product later this week.
Let me know what you guys think and if you have any questions!
Sponsored
