What did you do to your Supra today?

zrk

Well-Known Member
First Name
Zack
Joined
Apr 20, 2021
Threads
80
Messages
8,473
Reaction score
14,119
Location
Chicago, IL
Car(s)
2021 Supra - Nocturnal Black
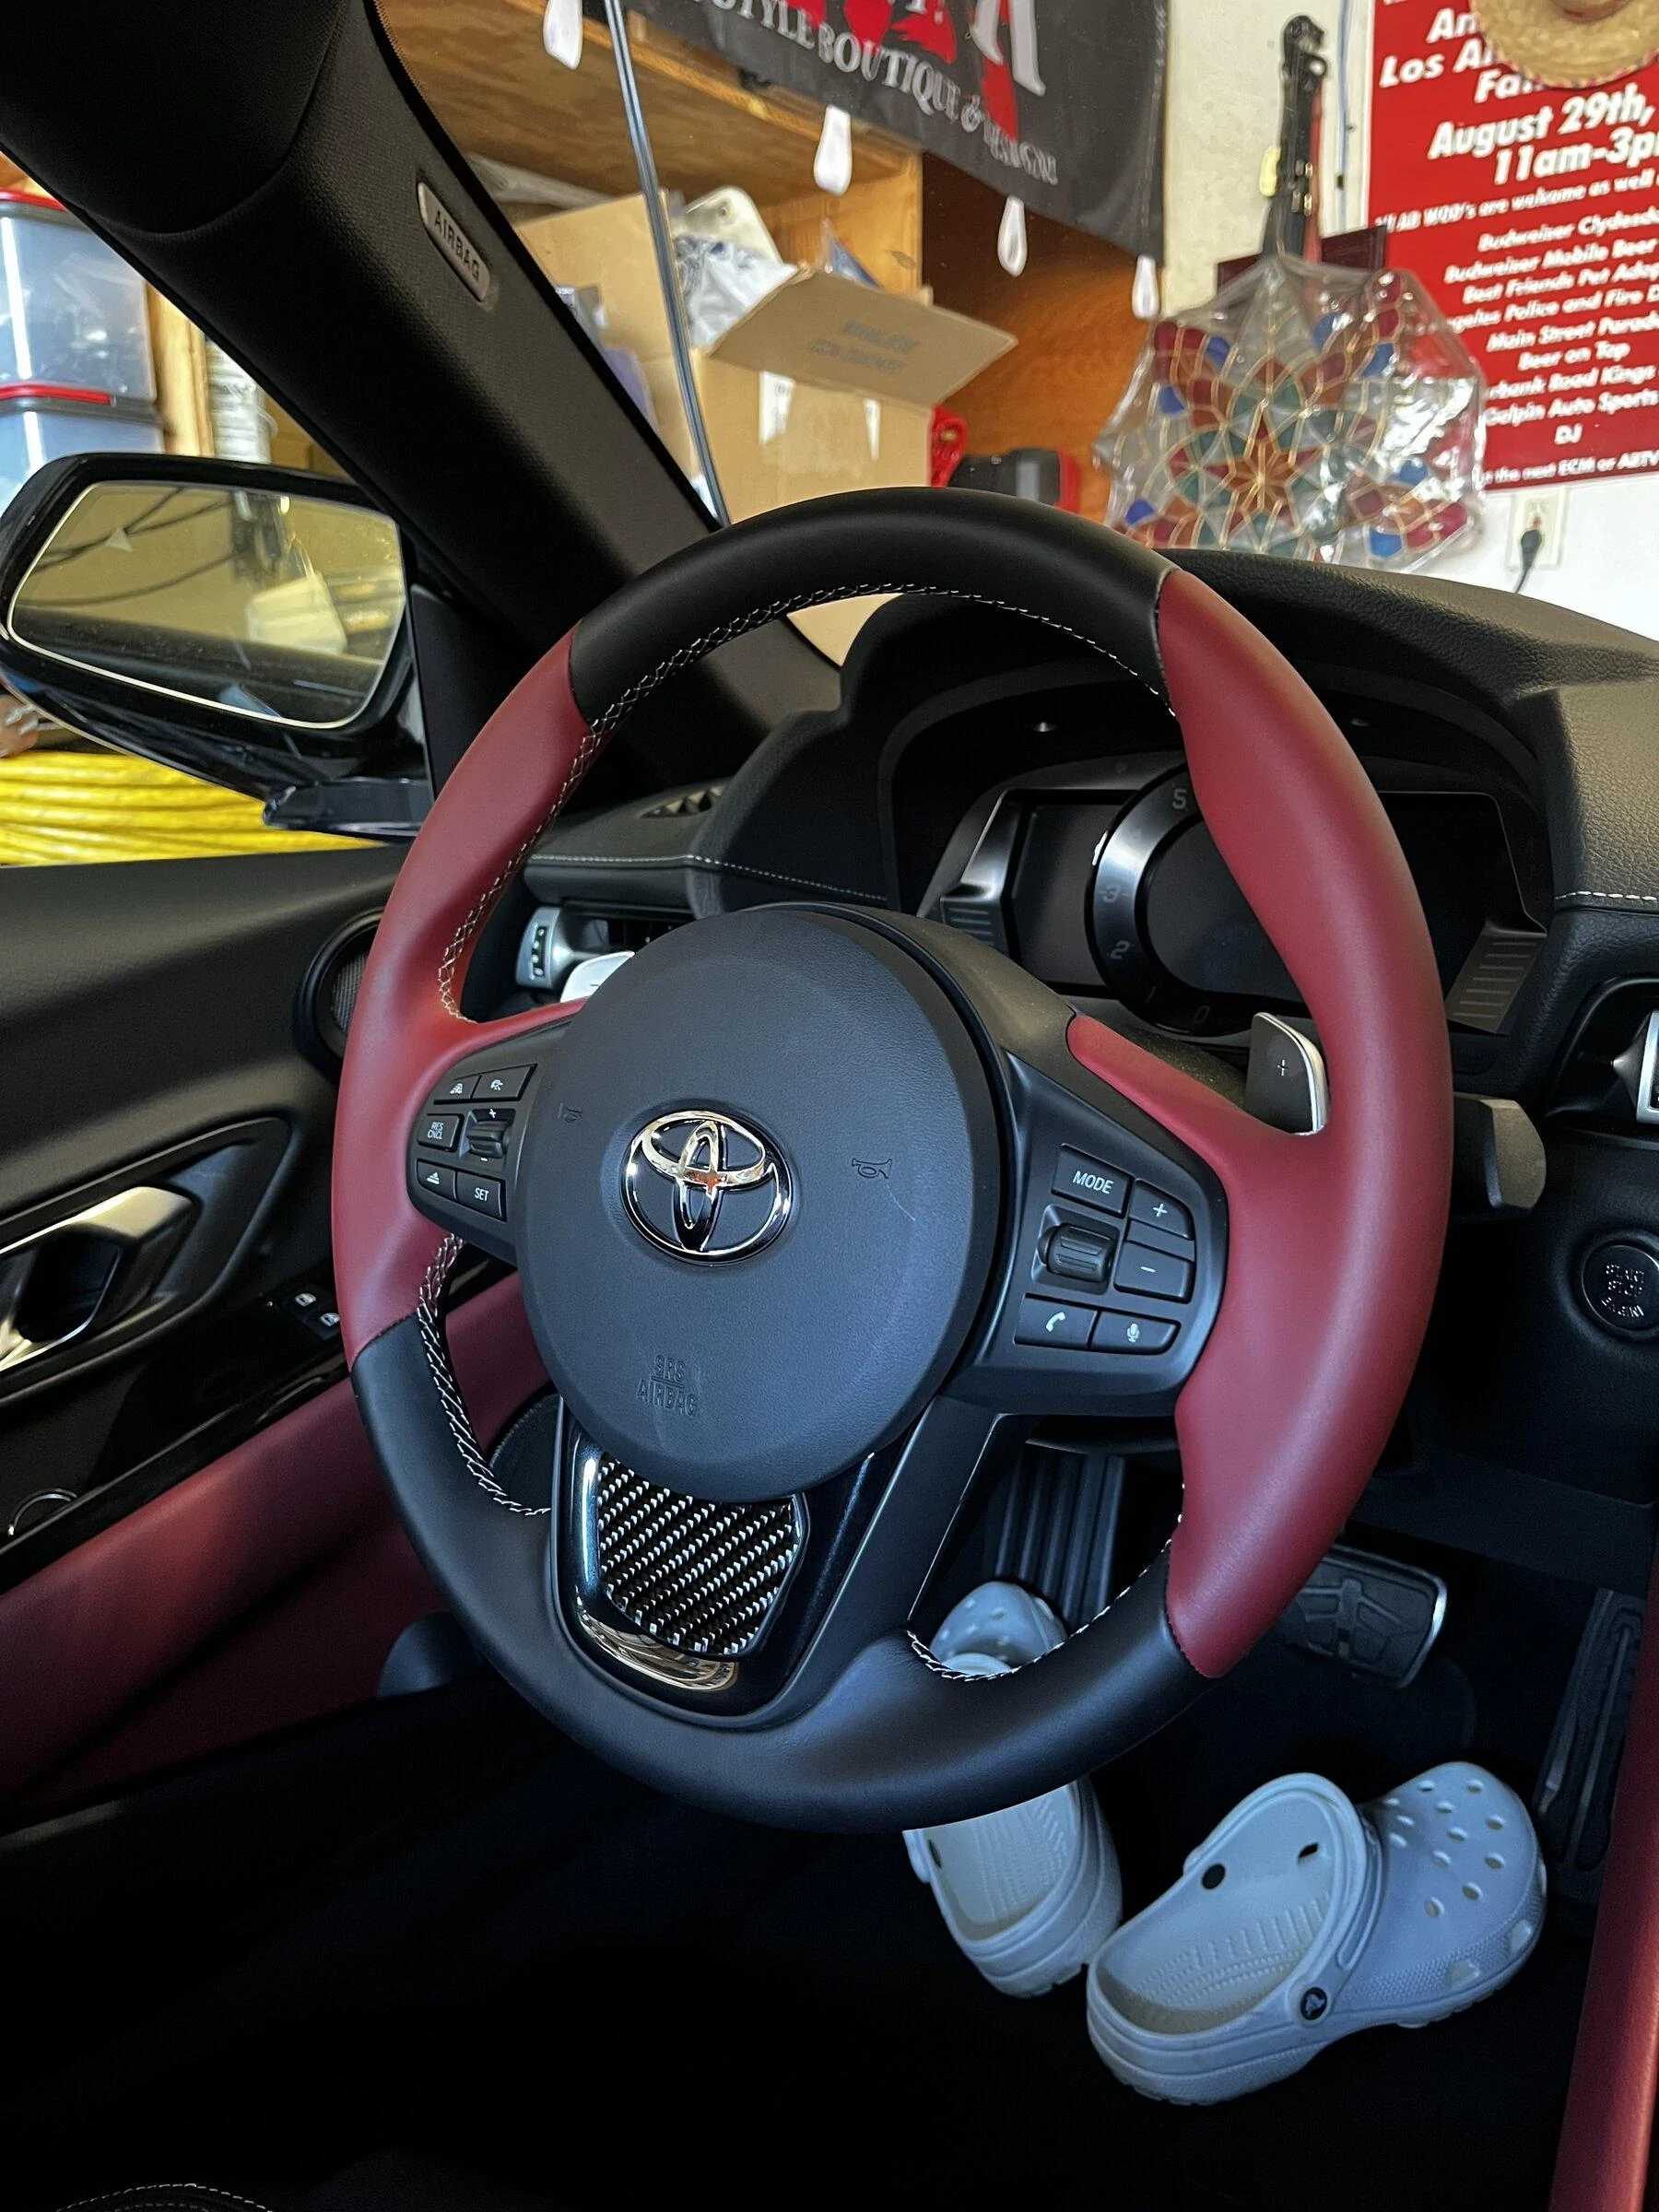
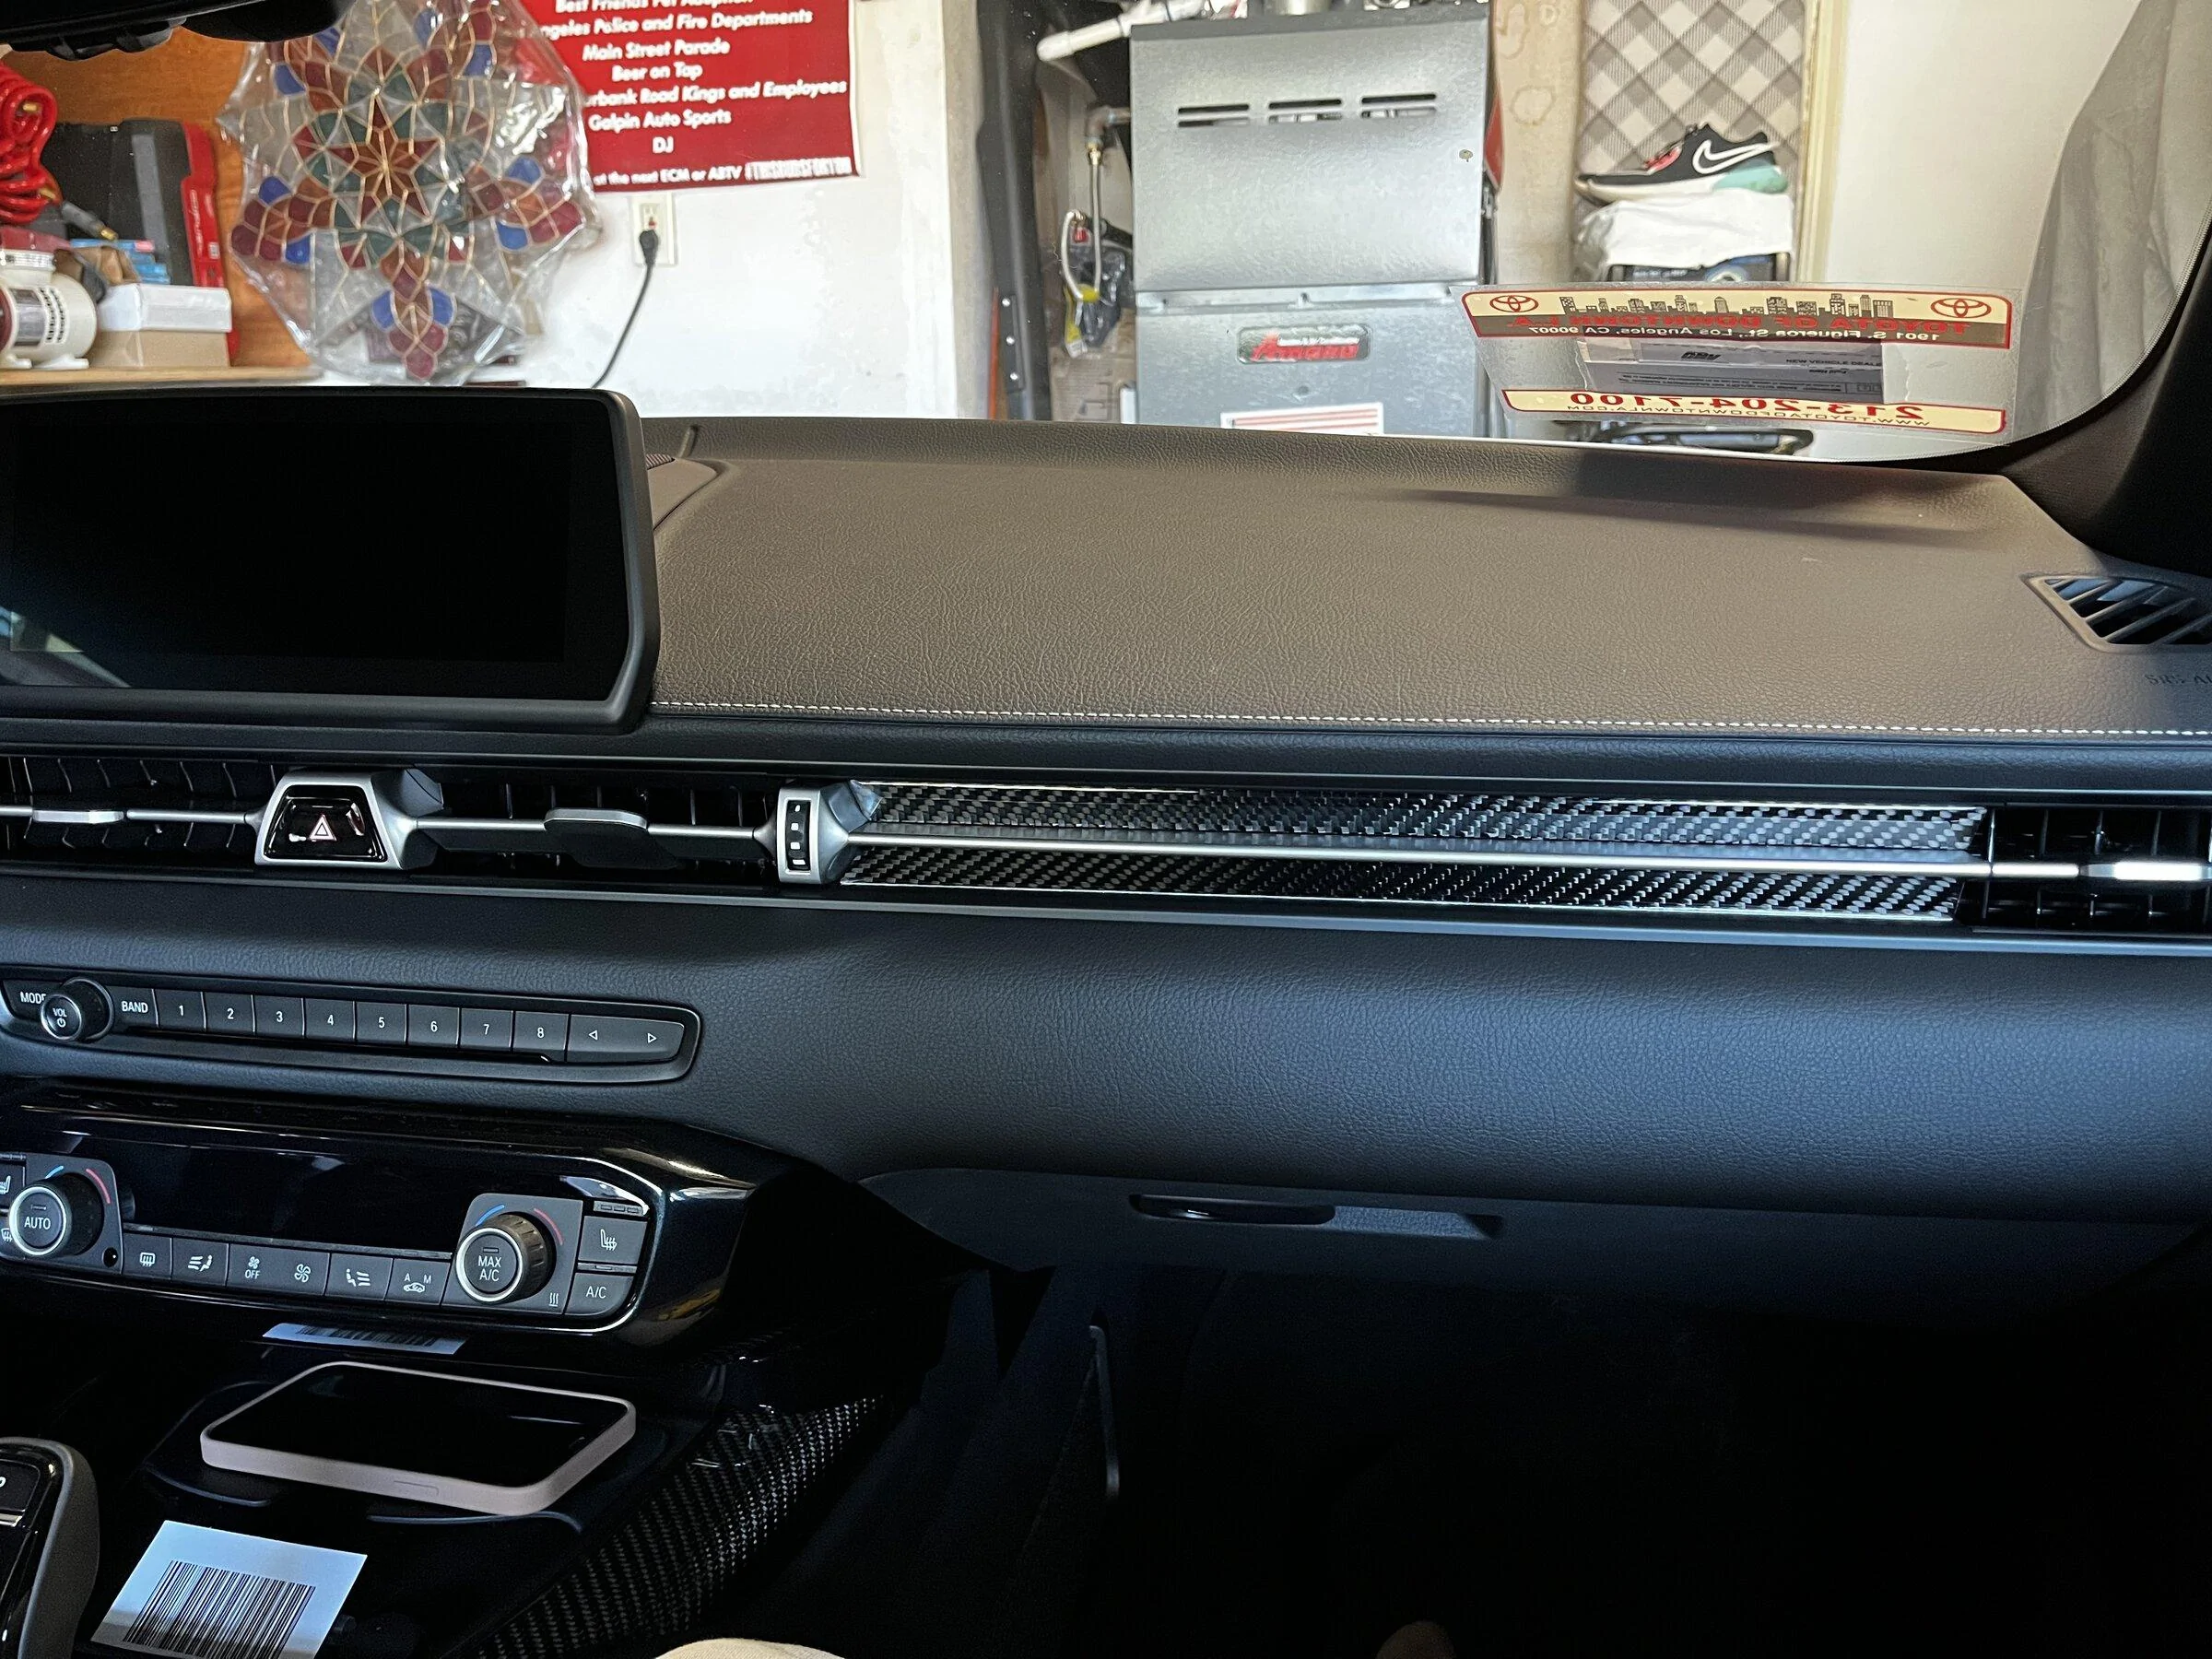
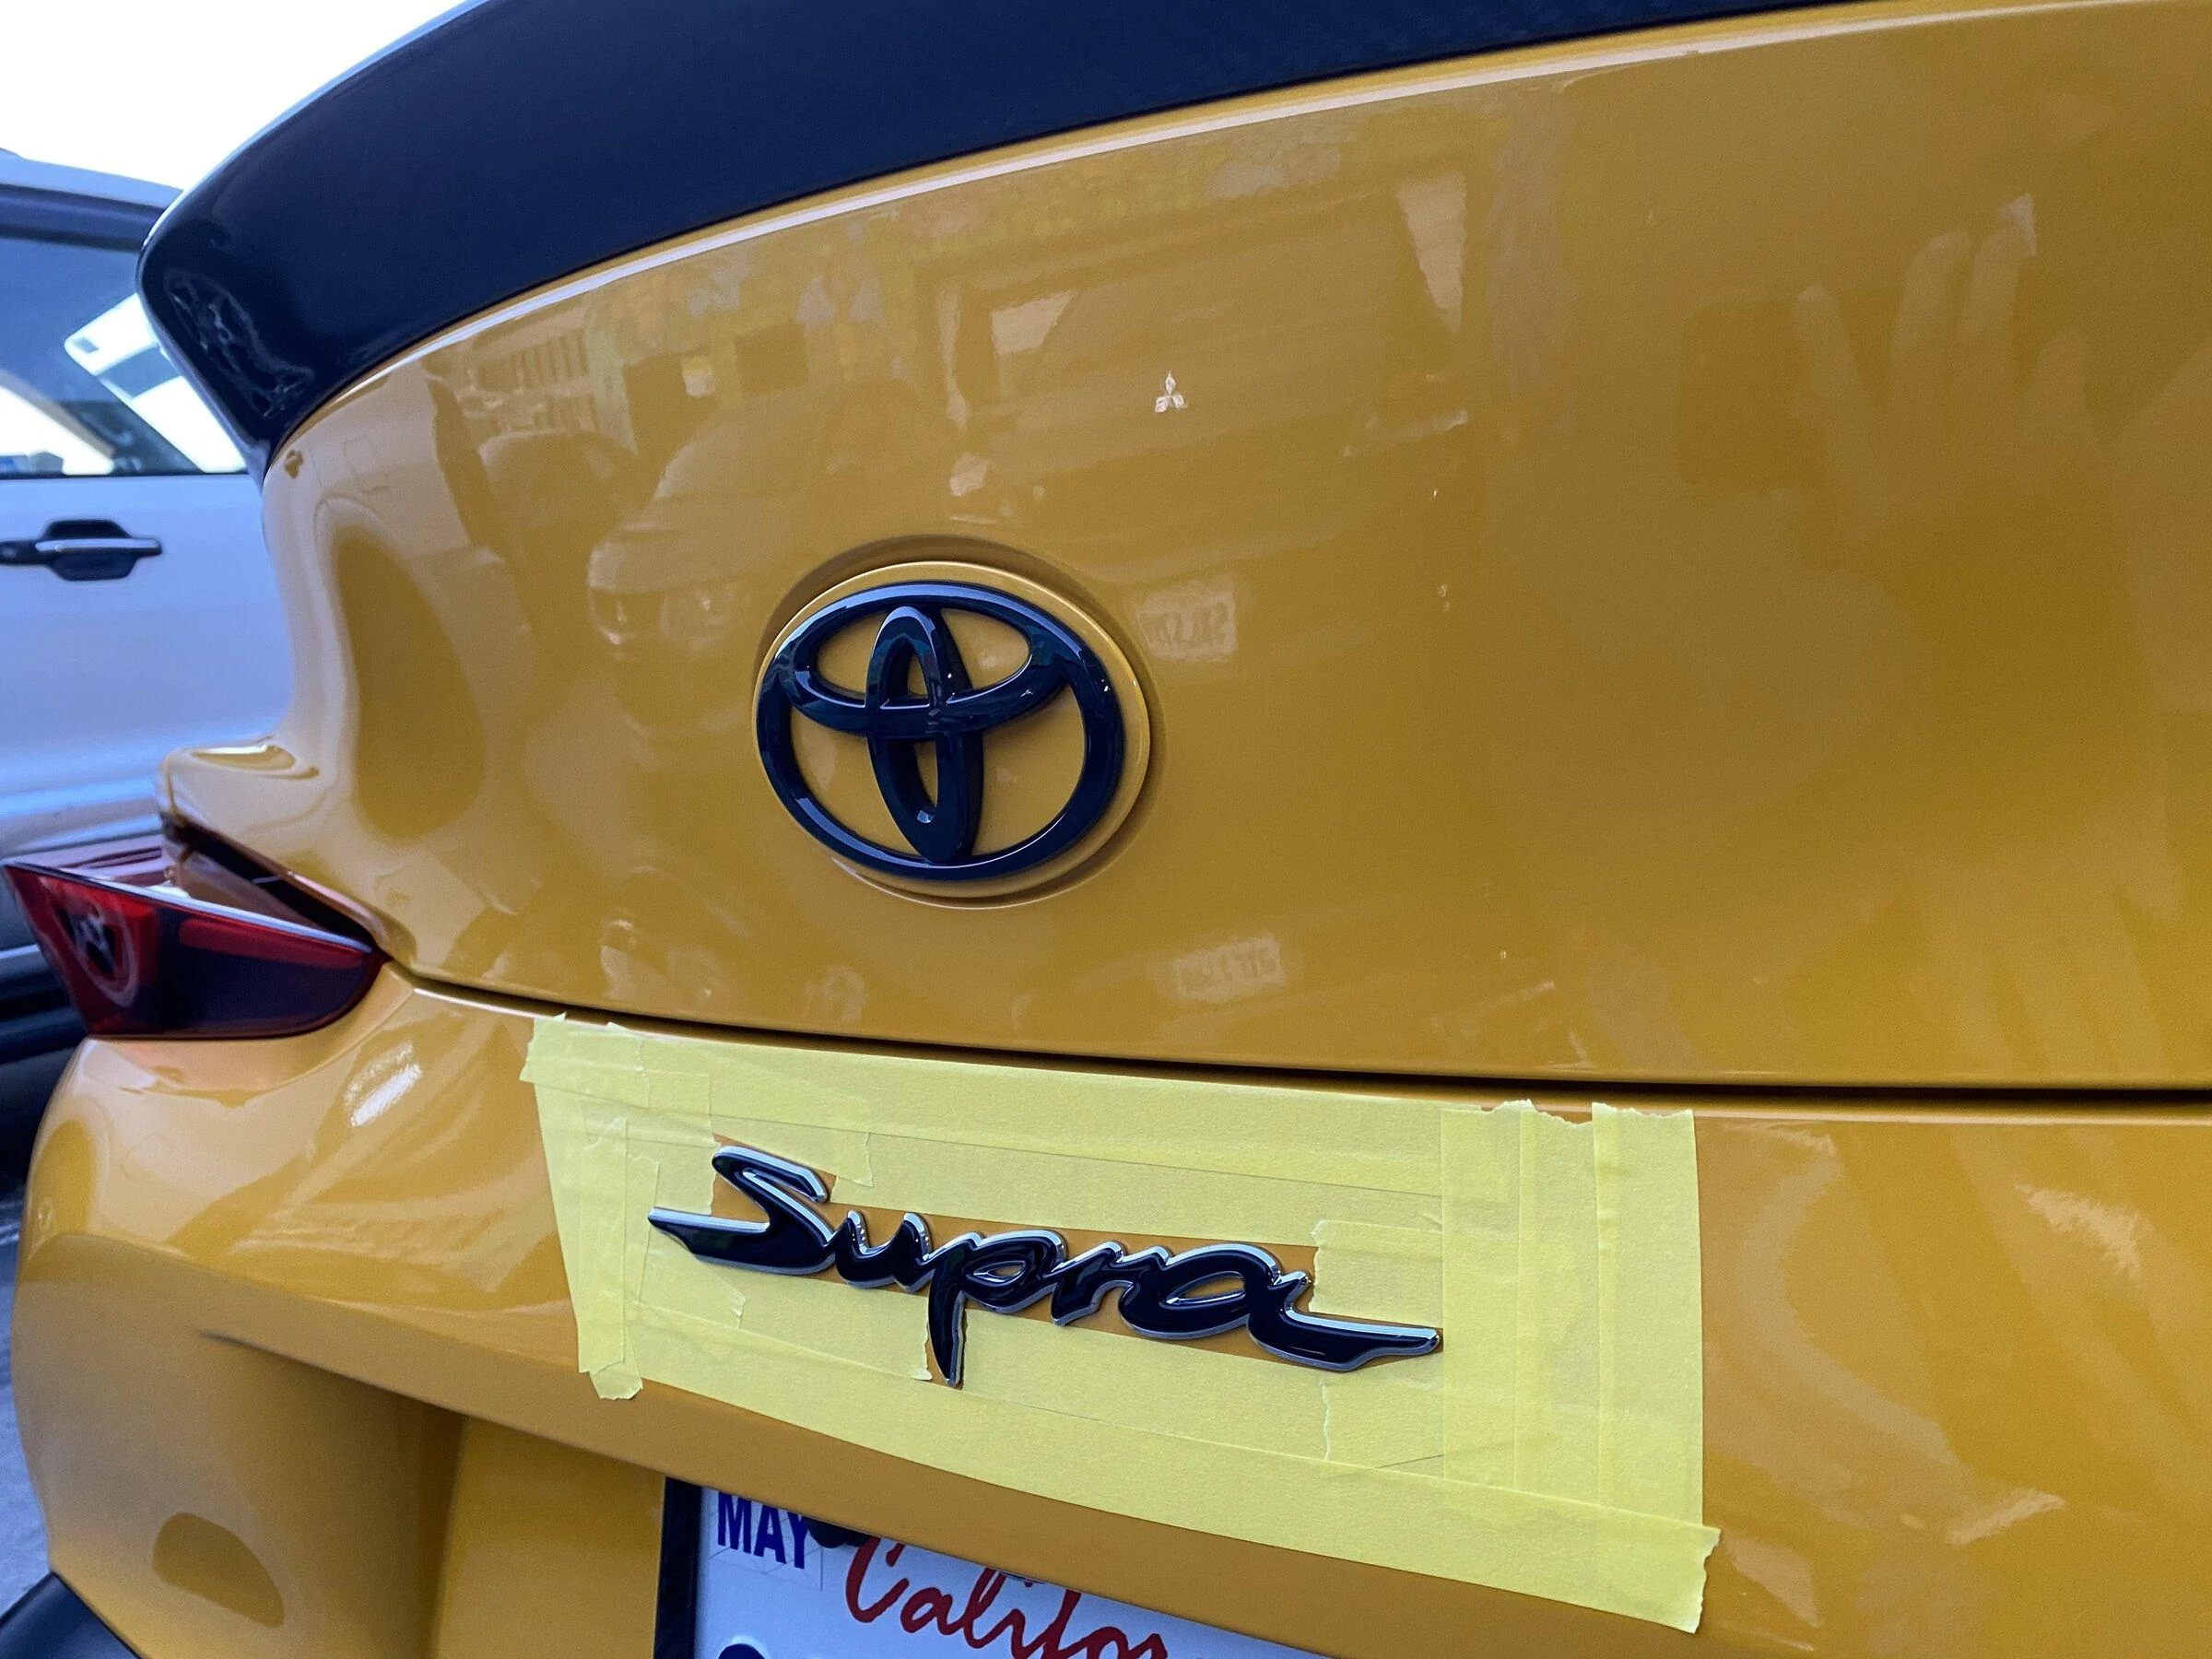
like what @zrk said. Take your time, do some measurements so you can put the new badges in the correct place.... OOOOOR if you ever take a trip to San Diego out of nowhere, i can meet up with you and install it lol.
8A349B6E-A059-4A61-8D3F-8CEC4BC4DEC6.jpeg

if you tackle it yourself, best advice is to mask around the badge to A: protect the paint when you remove the old badge B: mark the original location of the badge from factory. Remove the badge, goo gone the residue, rubbing alcohol, and stick on the new one. THEN remove the masking tape. ??
That's exactly how I did it.
 

Patina

Well-Known Member
First Name
Jeff
Joined
Feb 14, 2022
Threads
6
Messages
196
Reaction score
222
Location
Bay Area
Car(s)
'20 Nitro Yellow
like what @zrk said. Take your time, do some measurements so you can put the new badges in the correct place.... OOOOOR if you ever take a trip to San Diego out of nowhere, i can meet up with you and install it lol.
8A349B6E-A059-4A61-8D3F-8CEC4BC4DEC6.jpeg

if you tackle it yourself, best advice is to mask around the badge to A: protect the paint when you remove the old badge B: mark the original location of the badge from factory. Remove the badge, goo gone the residue, rubbing alcohol, and stick on the new one. THEN remove the masking tape. ??
That's exactly how I did it.
I don't have the patience for that kind of attention to detail. Too monke. Speaking of monke...
 
  • Like
Reactions: zrk

Patina

Well-Known Member
First Name
Jeff
Joined
Feb 14, 2022
Threads
6
Messages
196
Reaction score
222
Location
Bay Area
Car(s)
'20 Nitro Yellow
Got around to finally installing the MST v2 intake and Verus heat shield, stopped by my parents' place where all my tools were stored. Heat shield was pretty straight forward, but the confined space just made me give up on the bottom most screw for the plate. Intake was a nightmare in itself and broke the PCV pipe that multiple users had mentioned (that I had forgot in the moment of things). Immediately stopped what I was doing and leaving the entire intake disassembled while I tried to figure out what I just broke. Not exactly something you'd want to do on a Sunday at 5pm.

Thanks to @NitroYellowMKV and @zrk, they were both able to advise that I didn't just absolutely cripple my car. Apparently, it's something that's commonly broken when swapping out the intake and something that's just straight up deleted on big turbo builds, so that was a relief. Not sure if placebo, but it feels like the new intake has also helped with throttle response as well as being as noisy (if not noisier) than I expected.

PXL_20220411_023752865.jpg
 

djbilly

Well-Known Member
First Name
Billy
Joined
May 15, 2021
Threads
18
Messages
165
Reaction score
284
Location
Glasgow, UK
Car(s)
GR Supra 3.0 Pro
I'm soooooooooooooooo going to get in trouble.

In VA, I believe it is illegal to drive with colored interior on in the cabin.
Oddly enough it is legal in DC and MD and PA. If anyone living in these states knows differently, please let me know!

Anyway, for $30, free with Amazon points, 10 minute install and 2 minutes to remove it just made me laugh too much not to do it. Even if just for shows.

Does full color spectrum, syncs to music. Makes me smile.
BLue-Cropped.JPEG
Got a link?
 

Mimosa

Well-Known Member
Joined
Oct 12, 2020
Threads
20
Messages
853
Reaction score
2,203
Location
-
Car(s)
-
Finished the CSF cooling kit install this past weekend. I had a check engine light after I finished, but it was because I prematurely cancelled the built in bleeding process. So I cleared that out and everything has been great.

IMG_20220410_223908_085.webp
IMG_20220410_223908_031.webp
Aux Rad.webp


20220410_172445.webp


I used 50/50 mix of HT 12 Coolant from BMW and some of the finest distilled water that money can buy... Harris Teeter brand distilled water:

20220402_102959.jpg


Here's some pointers for people who are looking to do this on there own.

If you do not have a vacuum fill device, then you can use the built in bleeding process:

After filling bother reservoirs:

Low Temp Bleeding (can run this without the high and low temp caps on):
  • Press Start Button 3 Times for Diag mode
  • Turn lights on (it's the button to the right of the AUTO lights)
  • Set A/C temperature to Max
  • Set A/C fan speed to the lowest speed
  • Turn on Hazard lights
  • Hold the Gas pedal for 15 seconds
  • You should hear the pump click on
  • A message should display that service has started
  • You should see bubbles in both reservoirs after this
  • Run this at least 3 times. Should take a total of 30 minutes

High Temp Bleeding (for the Main rad/engine).
  • Make sure the caps are back on.
  • Close the hood
  • Press Start Button 3 Times for Diag mode
  • Set A/C temperature to Max
  • Set A/C fan speed to the lowest speed
  • Hold the Gas pedal for about 15 seconds
  • You'll hear the electric water pump turn on
  • Next turn on the car
  • You will received a status message on the dashboard saying that the service has started
  • The car will maintain about 1200 rpm throughout the process
  • It will continuously rev up to 3500 rpm during this time
  • If you receive a "Refill Coolant" message turn off the car. Let it cool down a little and CAREFULLY remove the high temp cap. Fill it back up and close it back up.
  • Run the process again.
  • The bleeding process will complete in 10 minutes as long as there isn't another refill message.

After all this:
  • Go for a short ride
  • Let the car cool down, check the high temp reservoir and fill the the max line if needed.
  • If you have a check engine light after this, just clear out the codes. It's probably from stopping the high temp bleeding to refill your reservoir.

For the Transmission oil cooler
  • I picked up a quart of fluid from BMW:
  • When unplugging the old cooler seal up the hoses as best as you can to prevent fluid loss. It's ok of a little comes out.
  • Remove the old cooler. It will be full of fluid so make sure to either have a drain pan ready or seal up both ends.
  • Next... seal up on end of the CSF transmission cooler and start the slow and painful process of filling it up with fluid. You will need a small funnel that will allow for air to escape while filling.
  • When done, seal it up.
  • Get it in position in front of the heat exchanger and unseal and mount each side as quickly as possible to prevent too much fluid loss. It's okay to lose a little bit.
This took me a while to do because I am not a mechanic and don't know shit about working on cars. But it was rewarding when I finished. There isn't much documentation out there on how to get the aux radiators out. It's pretty easy once you notice what needs to be done. There are 2 bolts that need to be removed at the top. Then remove both hoses and unmount them.

I did have an issue where the serrated thread insert became loose and I could not get the bolt out since the housing was spinning with the bolt. The best thing to do is to get a nut that will fit on the bolt protruding to the back side. Then lodge a wrech back there and torque it down with decent amount of force. This will help the teeth sink in all the way and you'll be able to get the bolt out.
 

Evolution

Well-Known Member
First Name
Sean
Joined
Mar 10, 2021
Threads
18
Messages
2,218
Reaction score
3,682
Location
CA
Car(s)
21 Supra
Got official confirmation that my Supra is pregnant and will be popping out a kid in the next 3-5 months. They say it looks to be a Pavement Gray GR86.

I gave up on getting a GR Corolla.... maybe next year.
 

J29DB03

Well-Known Member
Joined
Dec 14, 2021
Threads
4
Messages
2,290
Reaction score
4,665
Location
US
Car(s)
2021 3.0
Got official confirmation that my Supra is pregnant and will be popping out a kid in the next 3-5 months. They say it looks to be a Pavement Gray GR86.

I gave up on getting a GR Corolla.... maybe next year.
I’ve heard trying a different position can help with what comes out.
 

a91crbn

Active Member
First Name
Andrew
Joined
Apr 2, 2022
Threads
0
Messages
29
Reaction score
75
Location
Los Angeles
Car(s)
2022 A91 CF
AutoTecknic carbon steering wheel trim and interior vent trim installed. Wish the weave was more uniform for the vent trim, but good enough! Fitment is good otherwise.

3E07A1CE-803E-44B8-8FB0-9C2C6FDB3B0E.webp

61870A4D-2F8B-4CA6-8C96-7492748F2D45.webp
 
 
Top