B58_ hwAyaq
Well-Known Member
- Thread starter
- #1
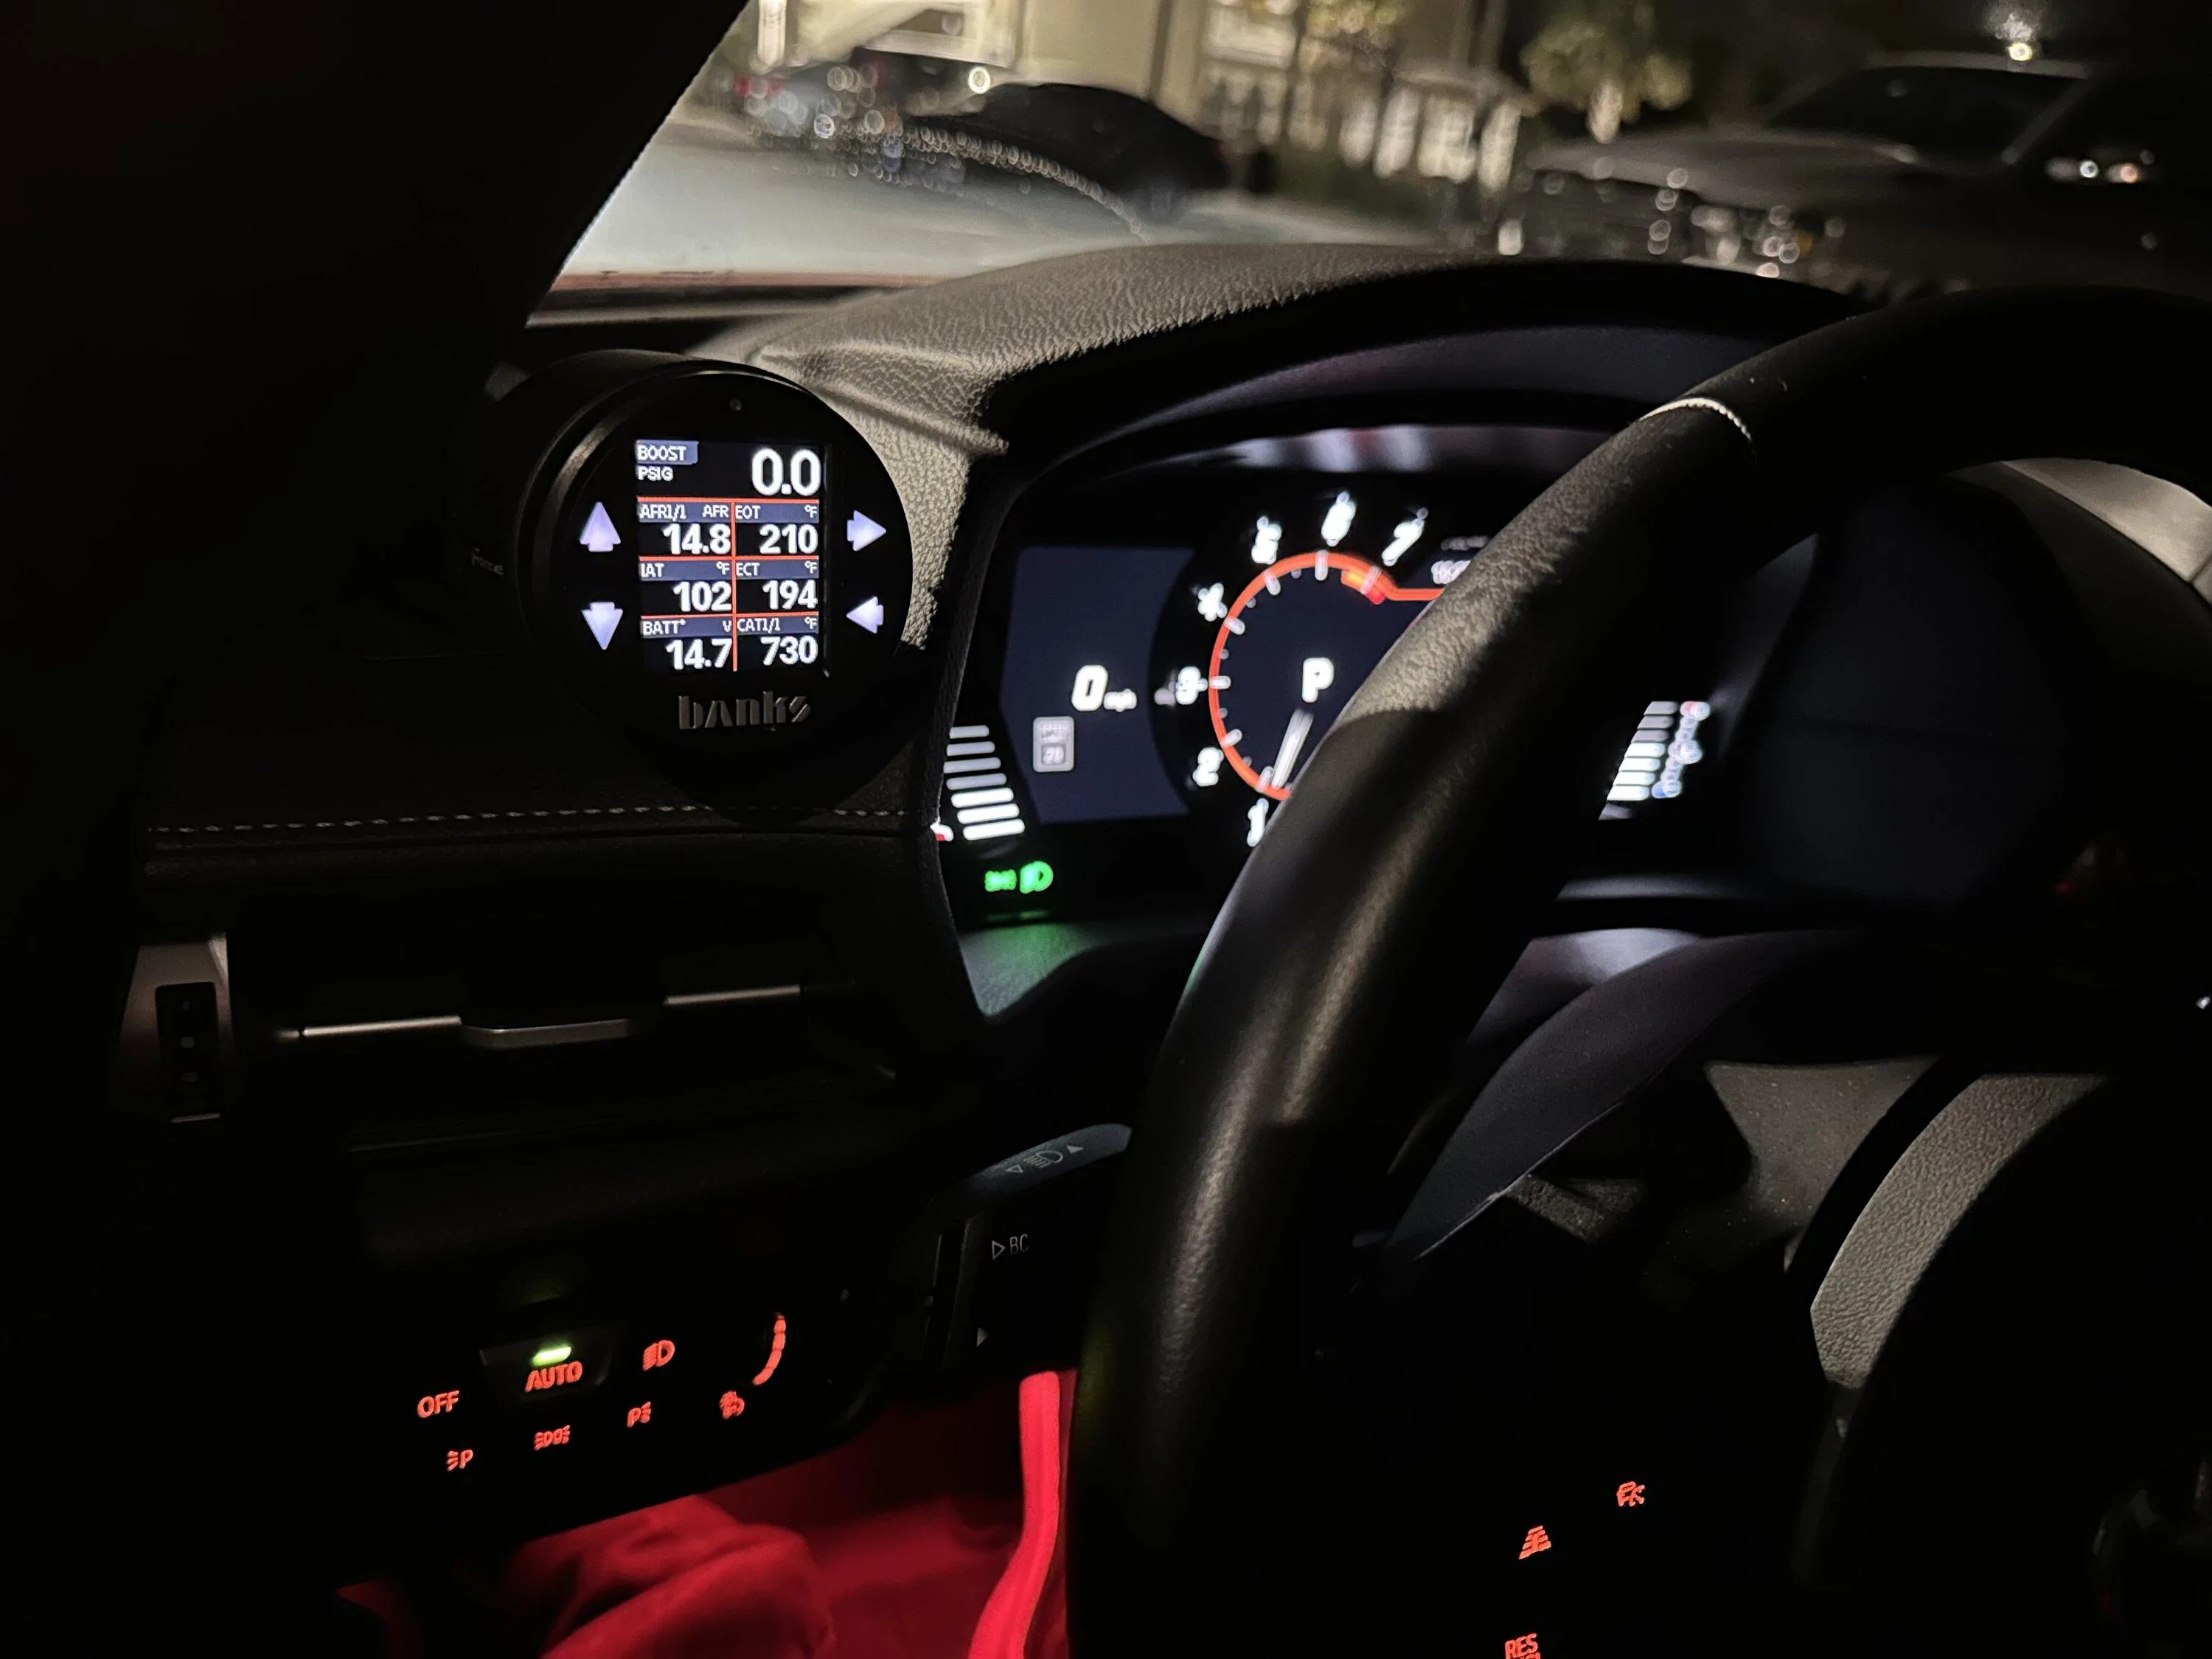
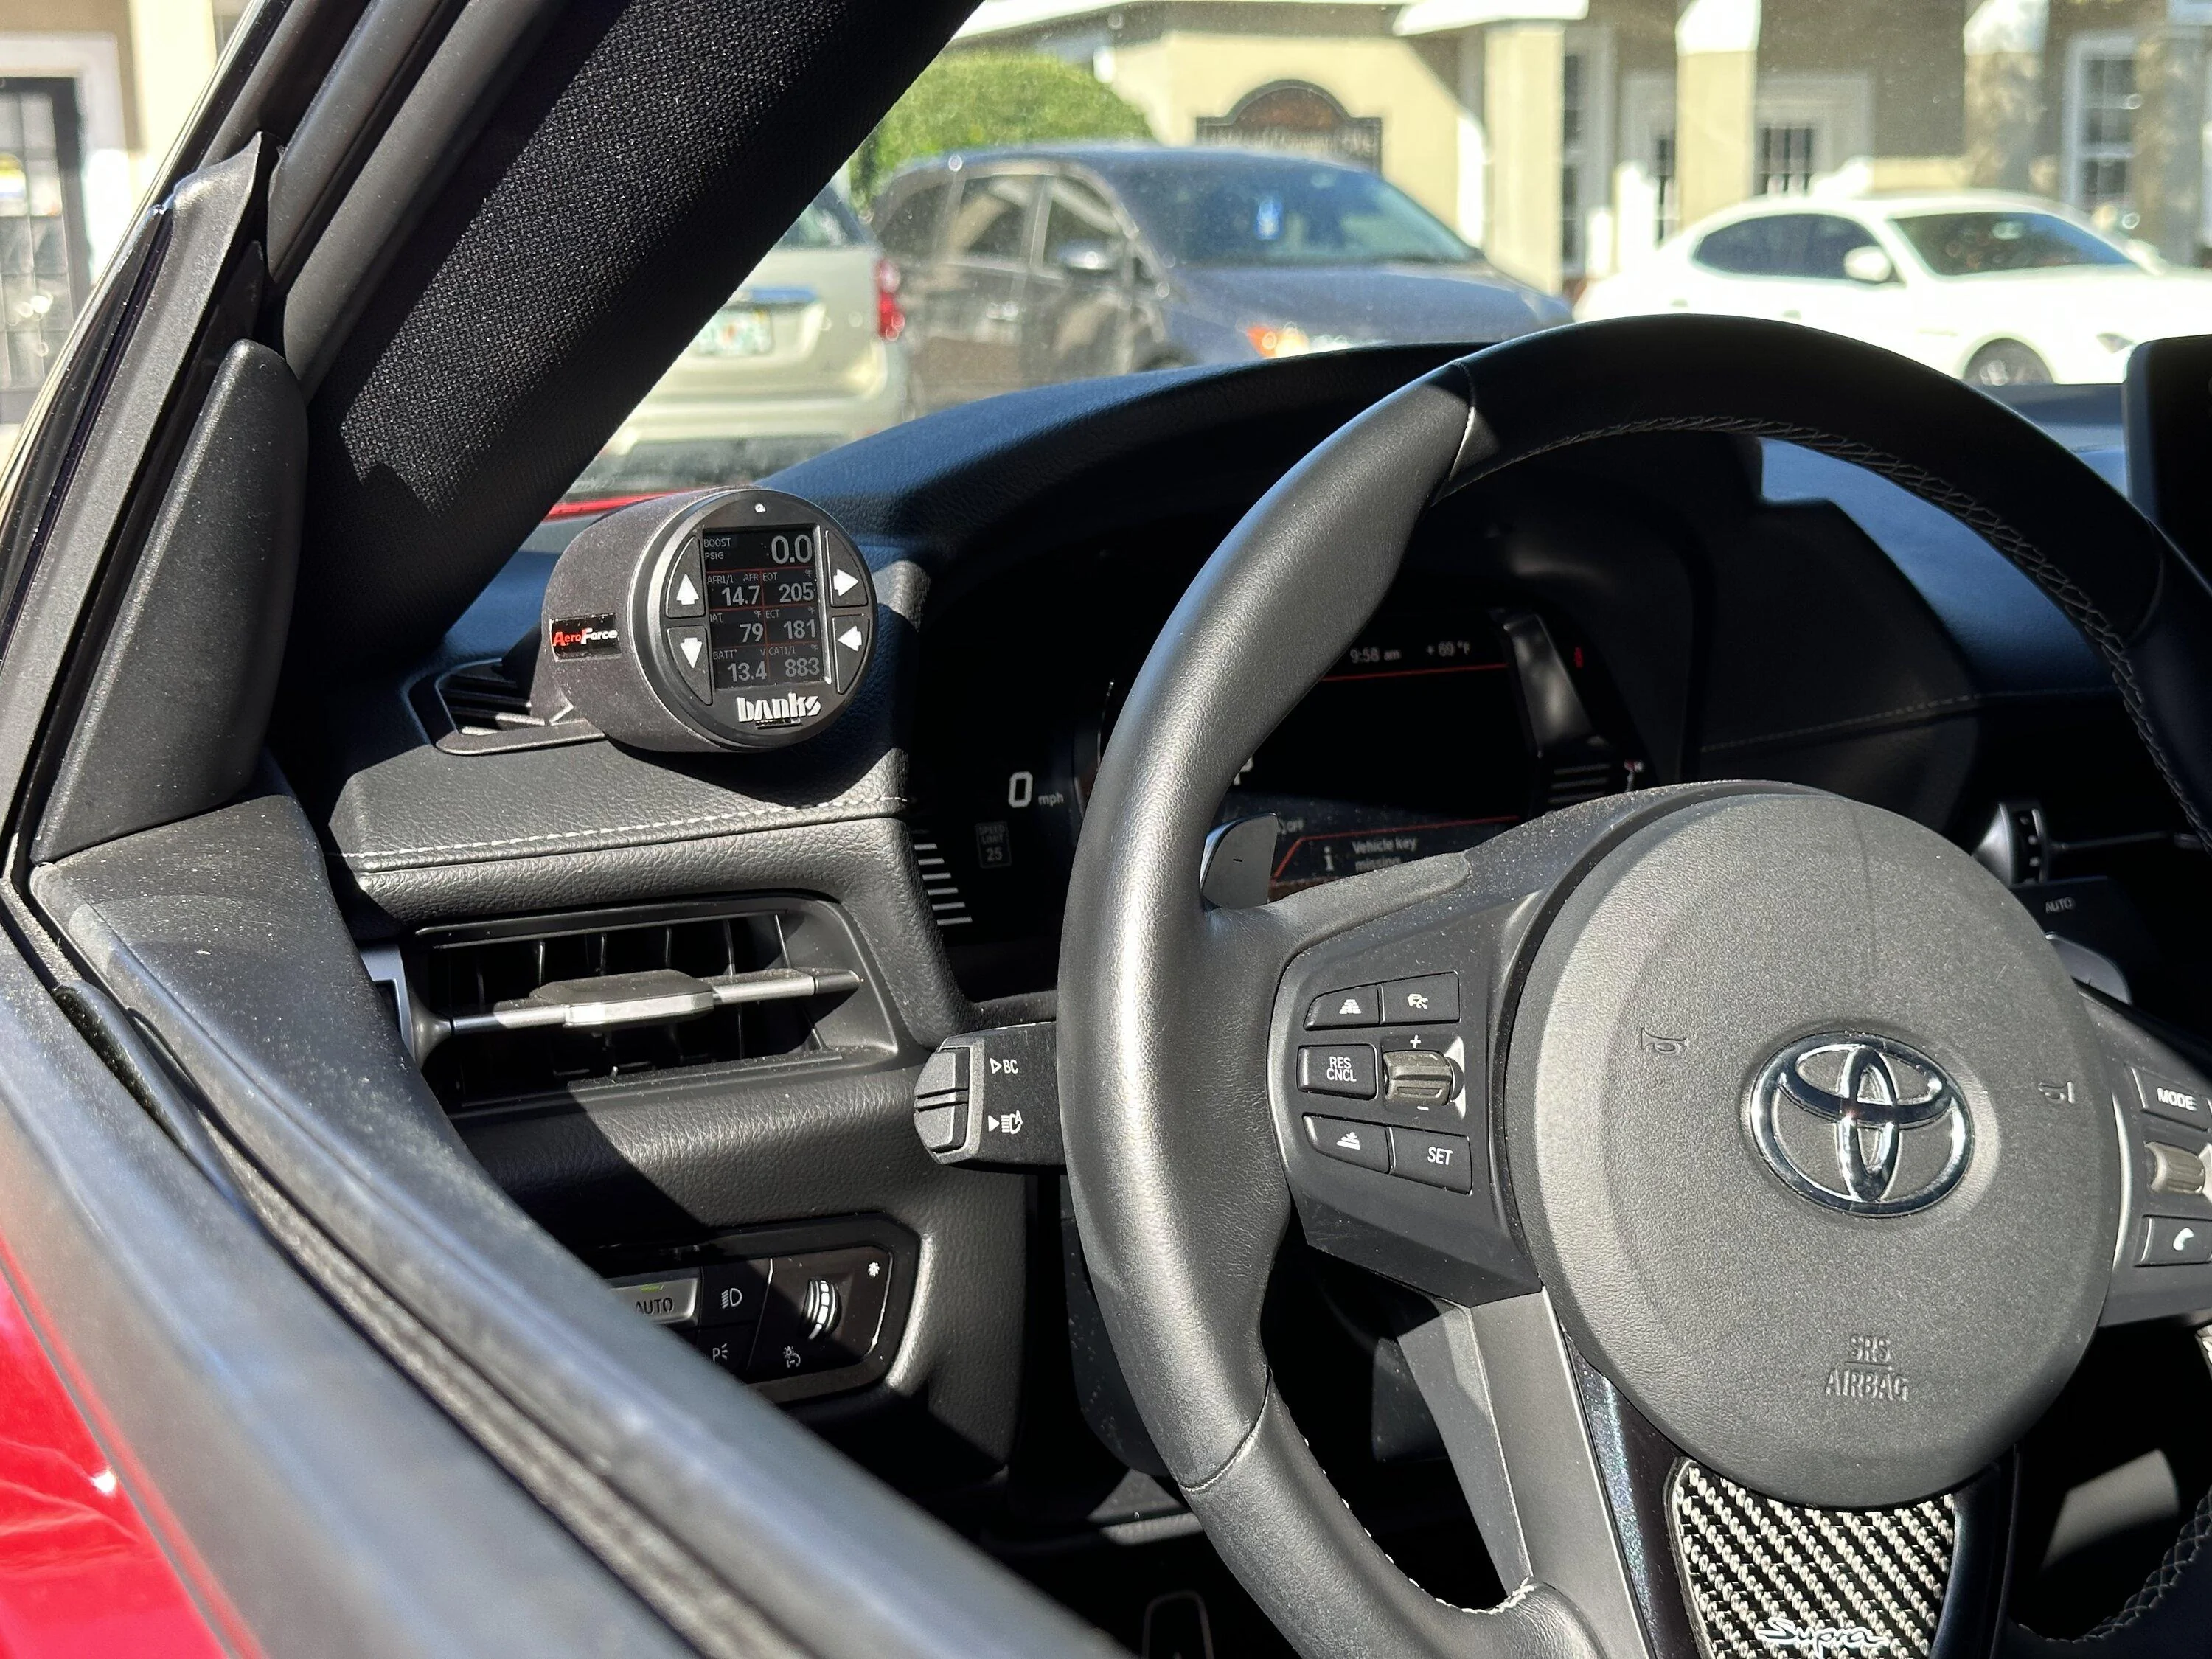
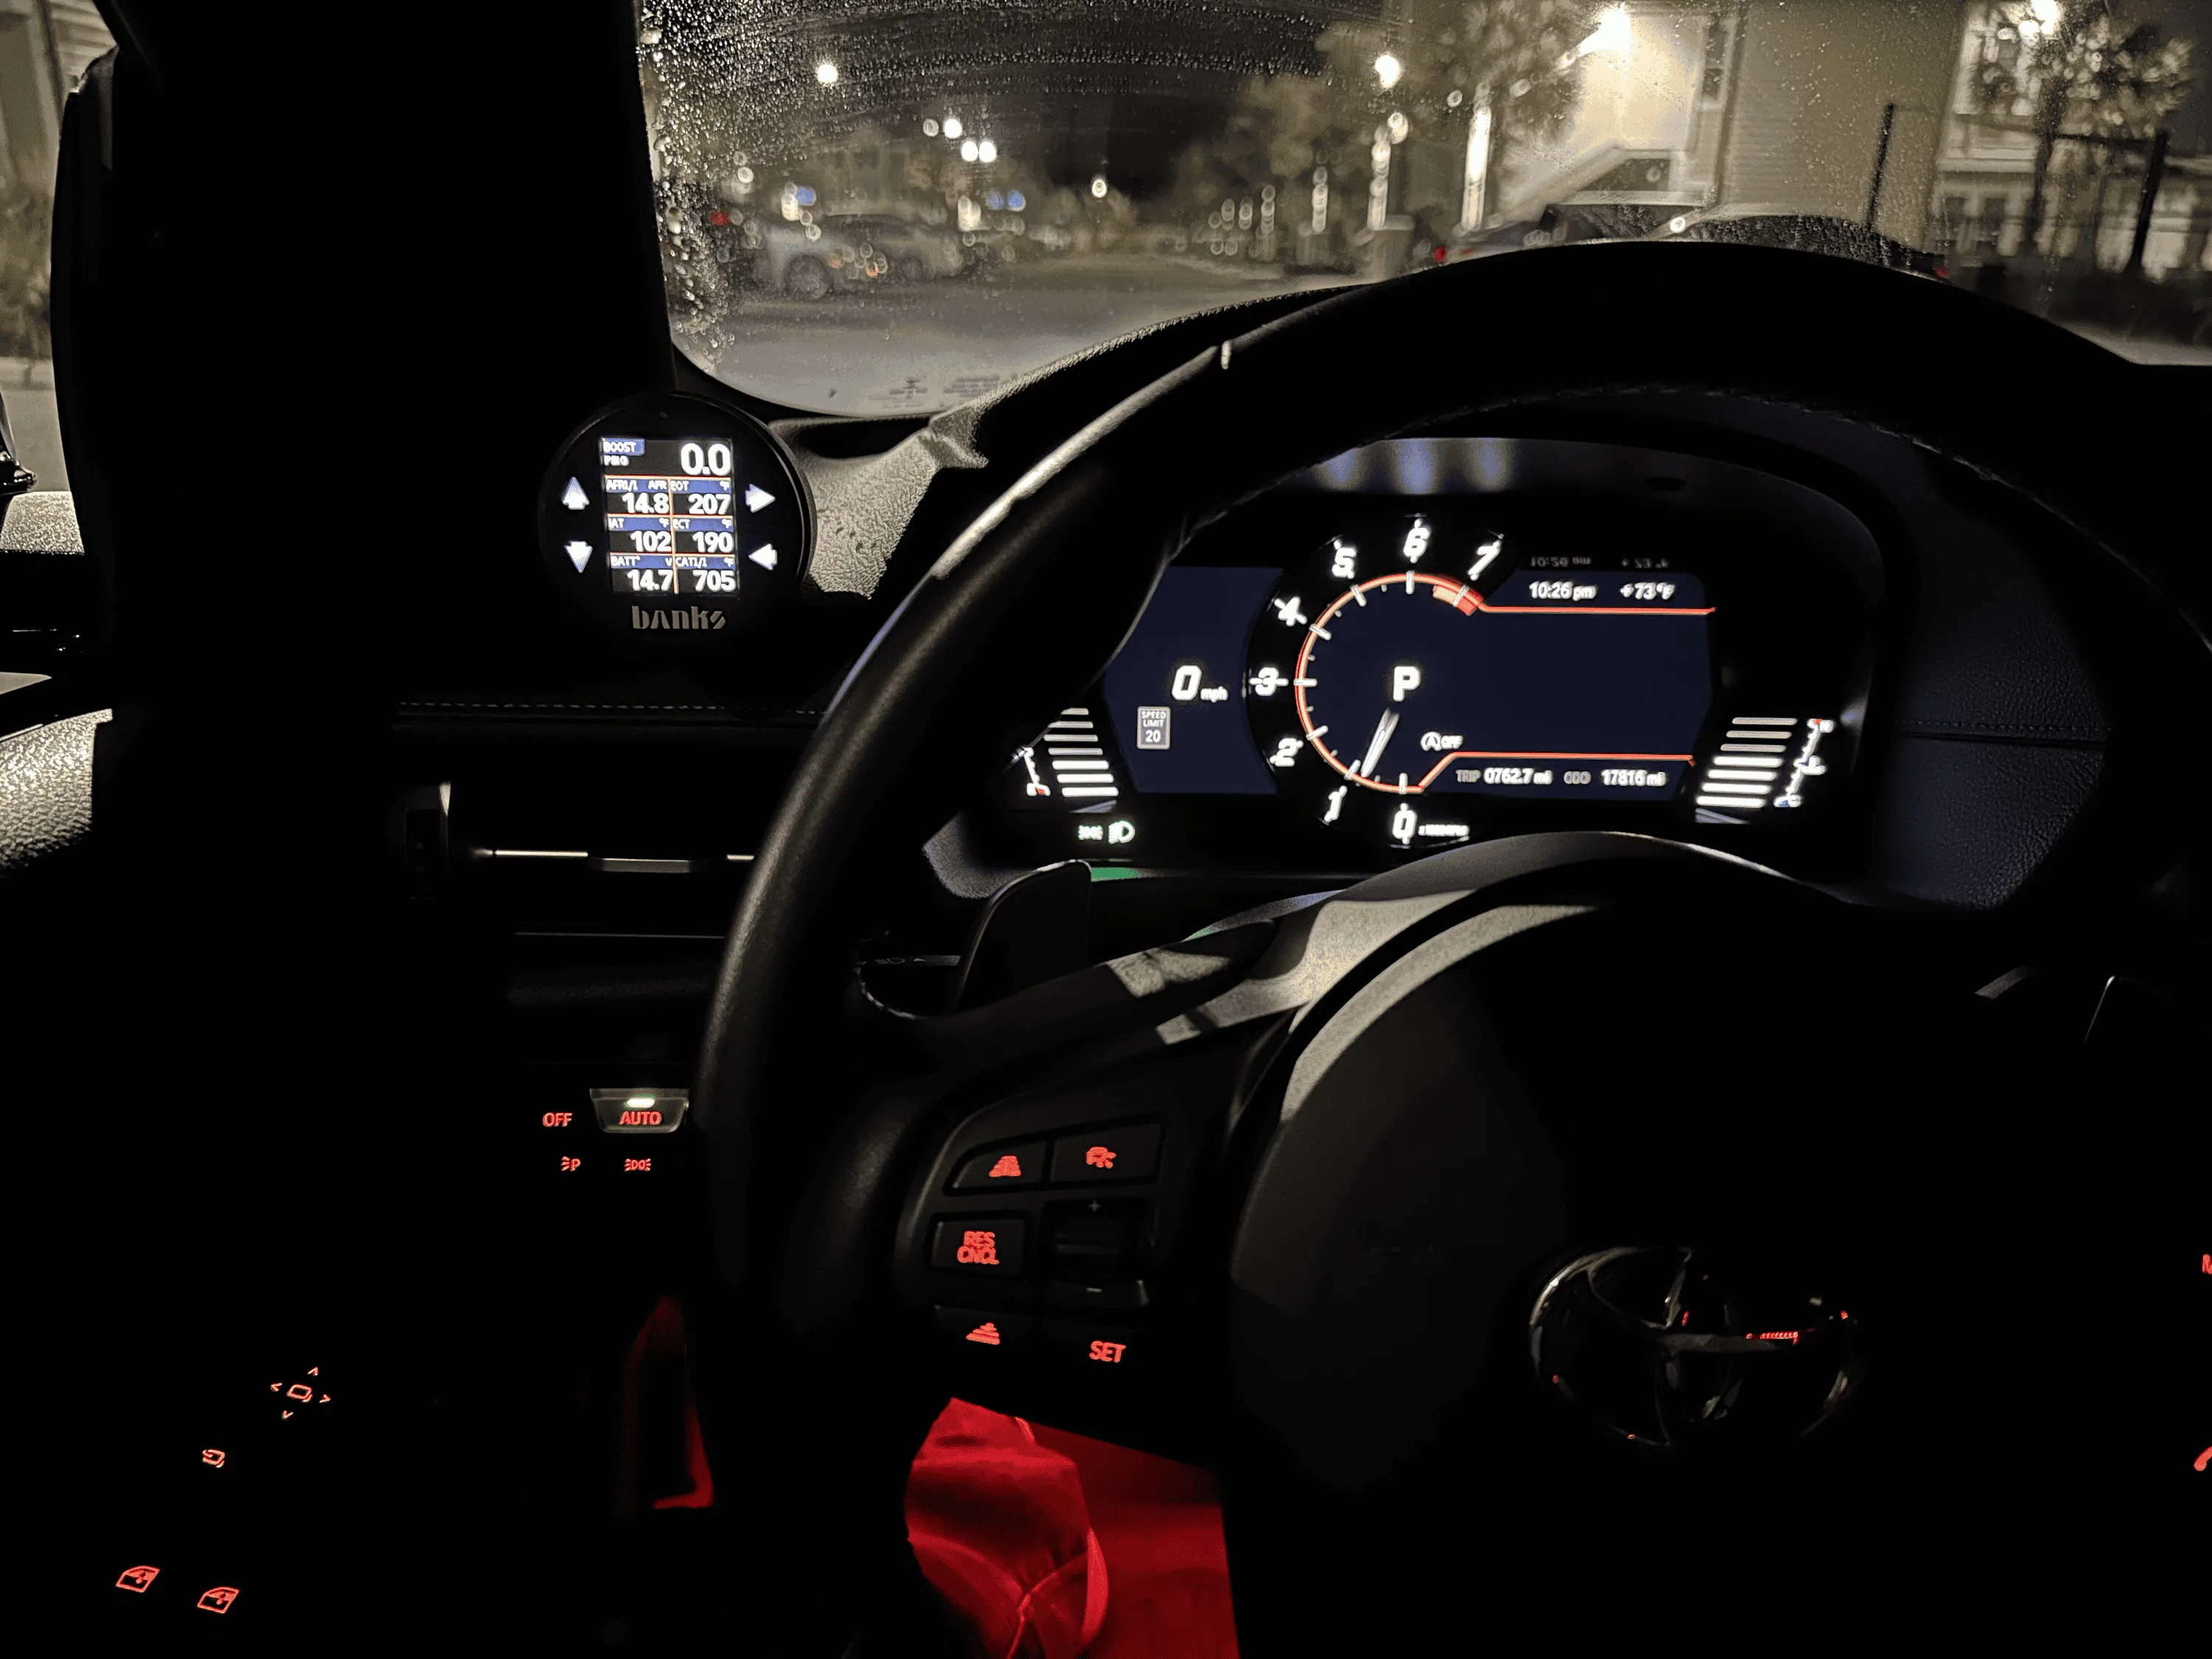
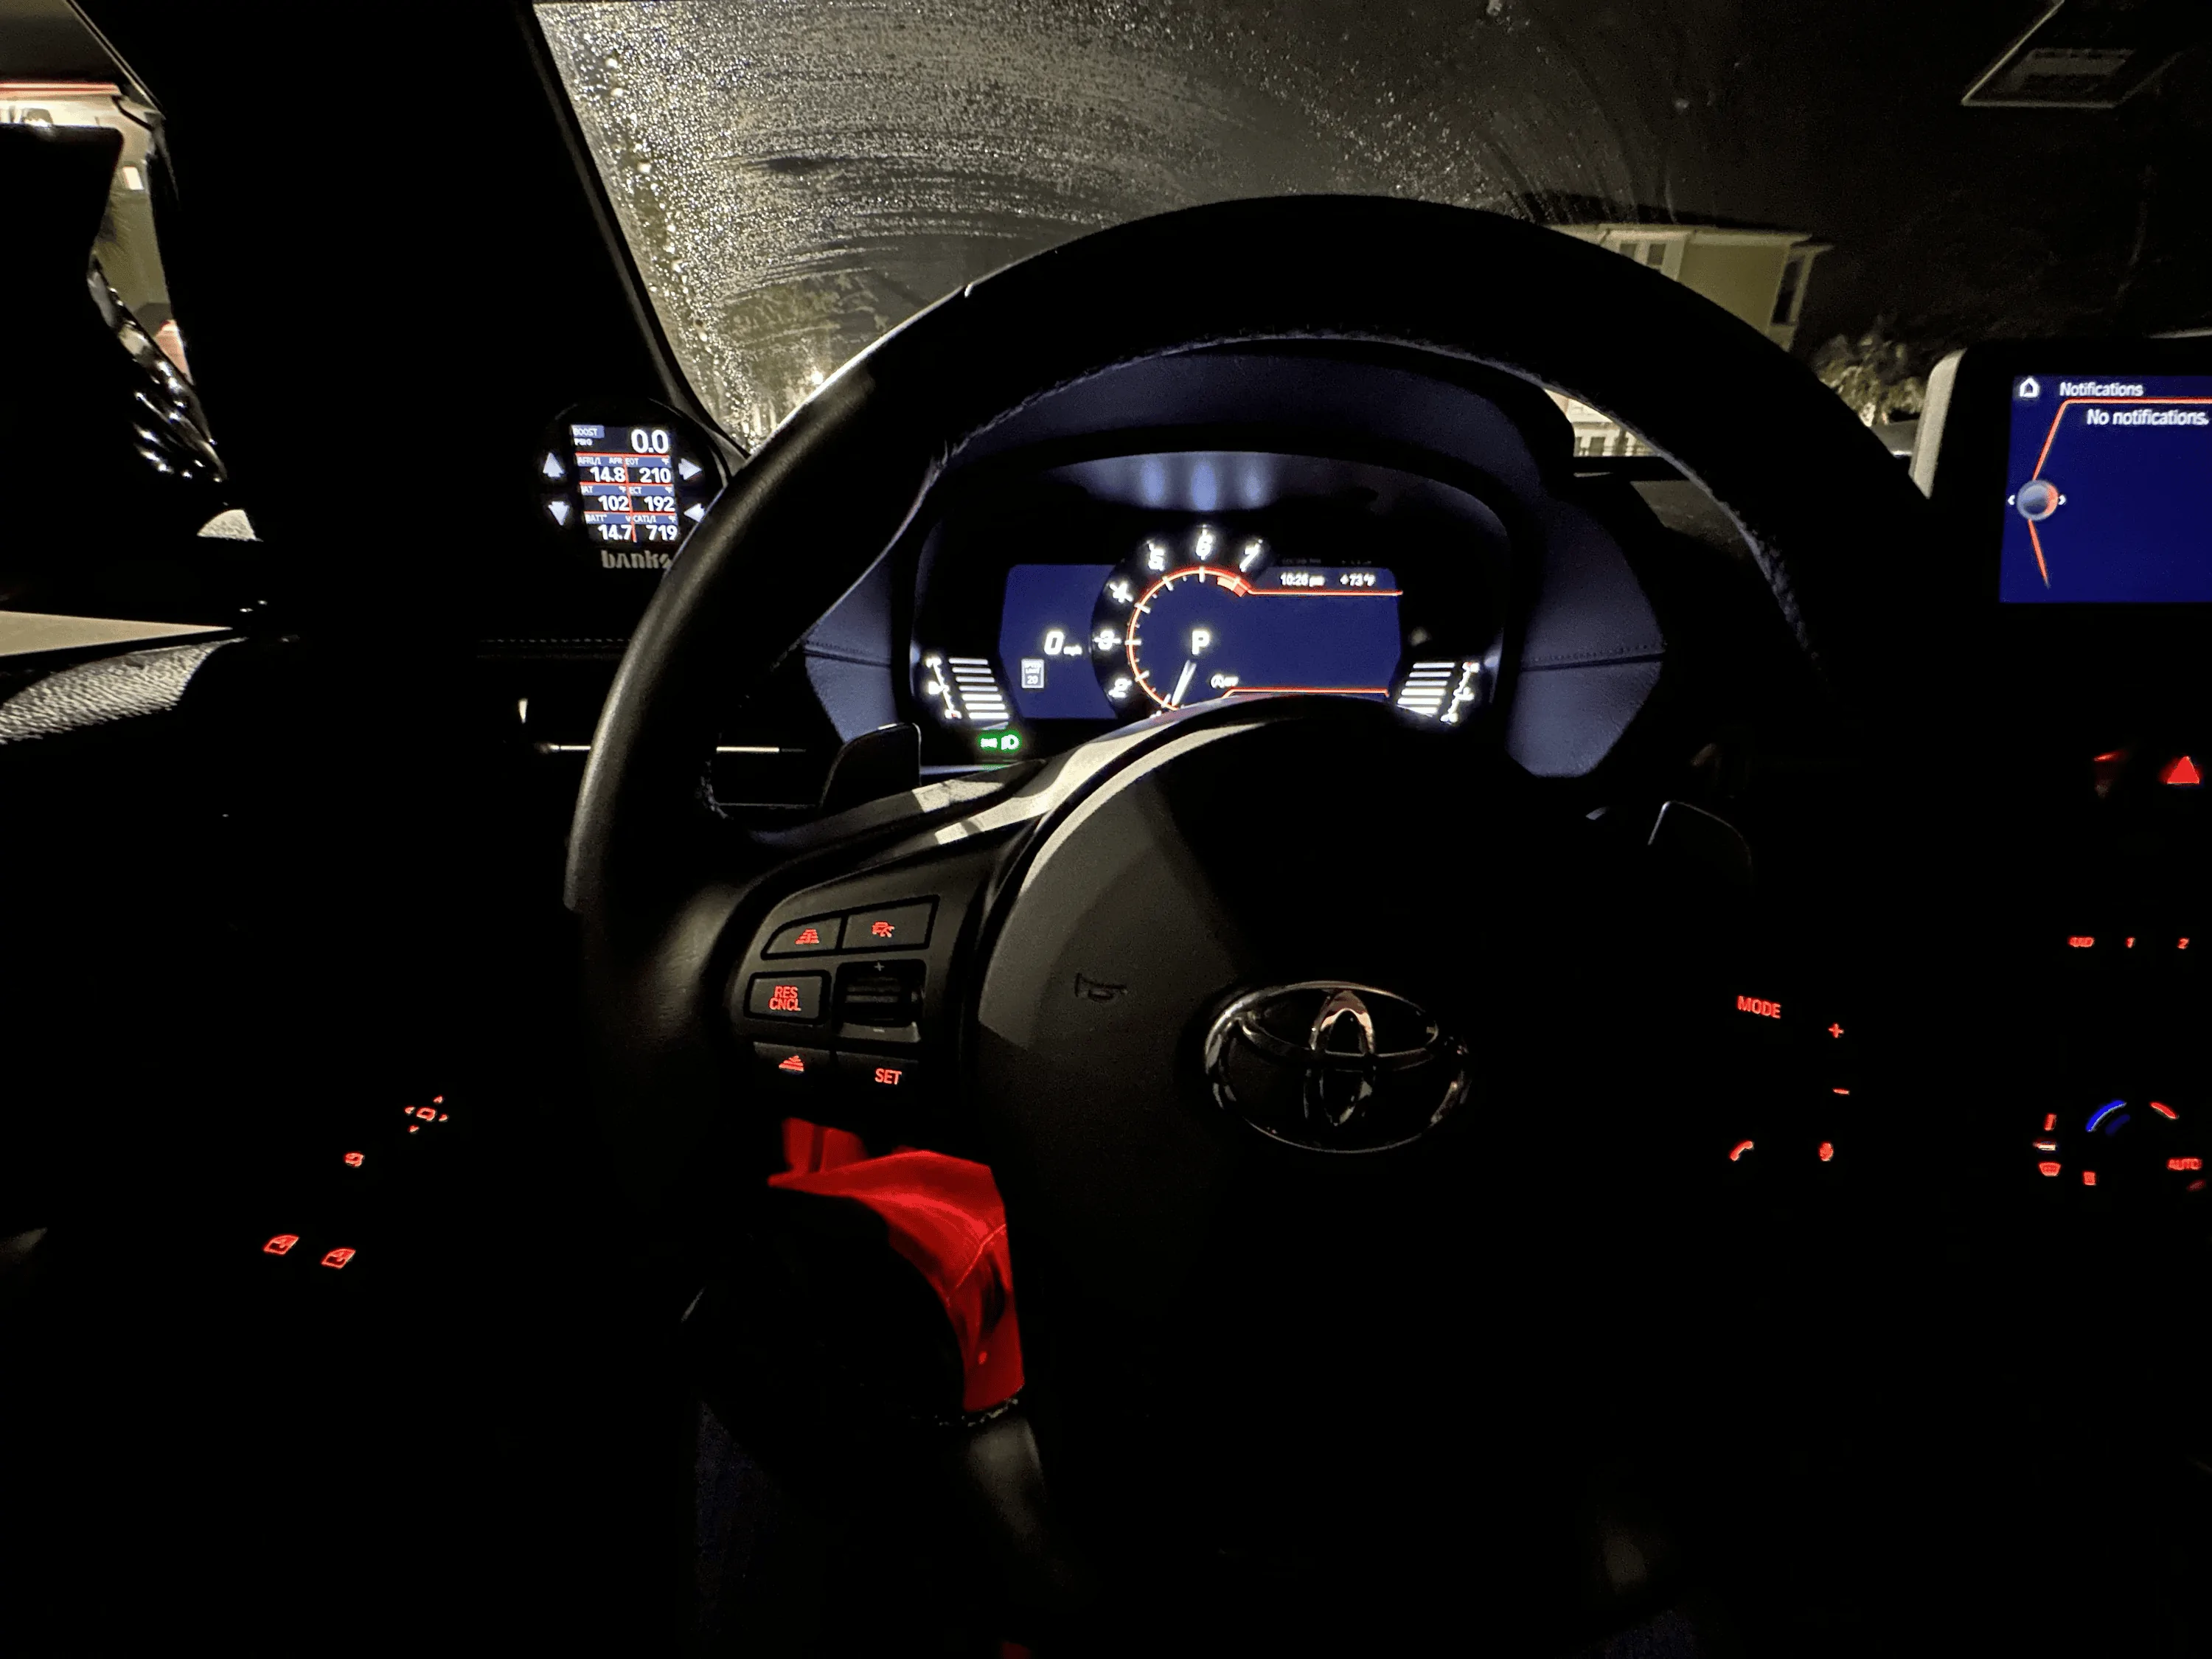
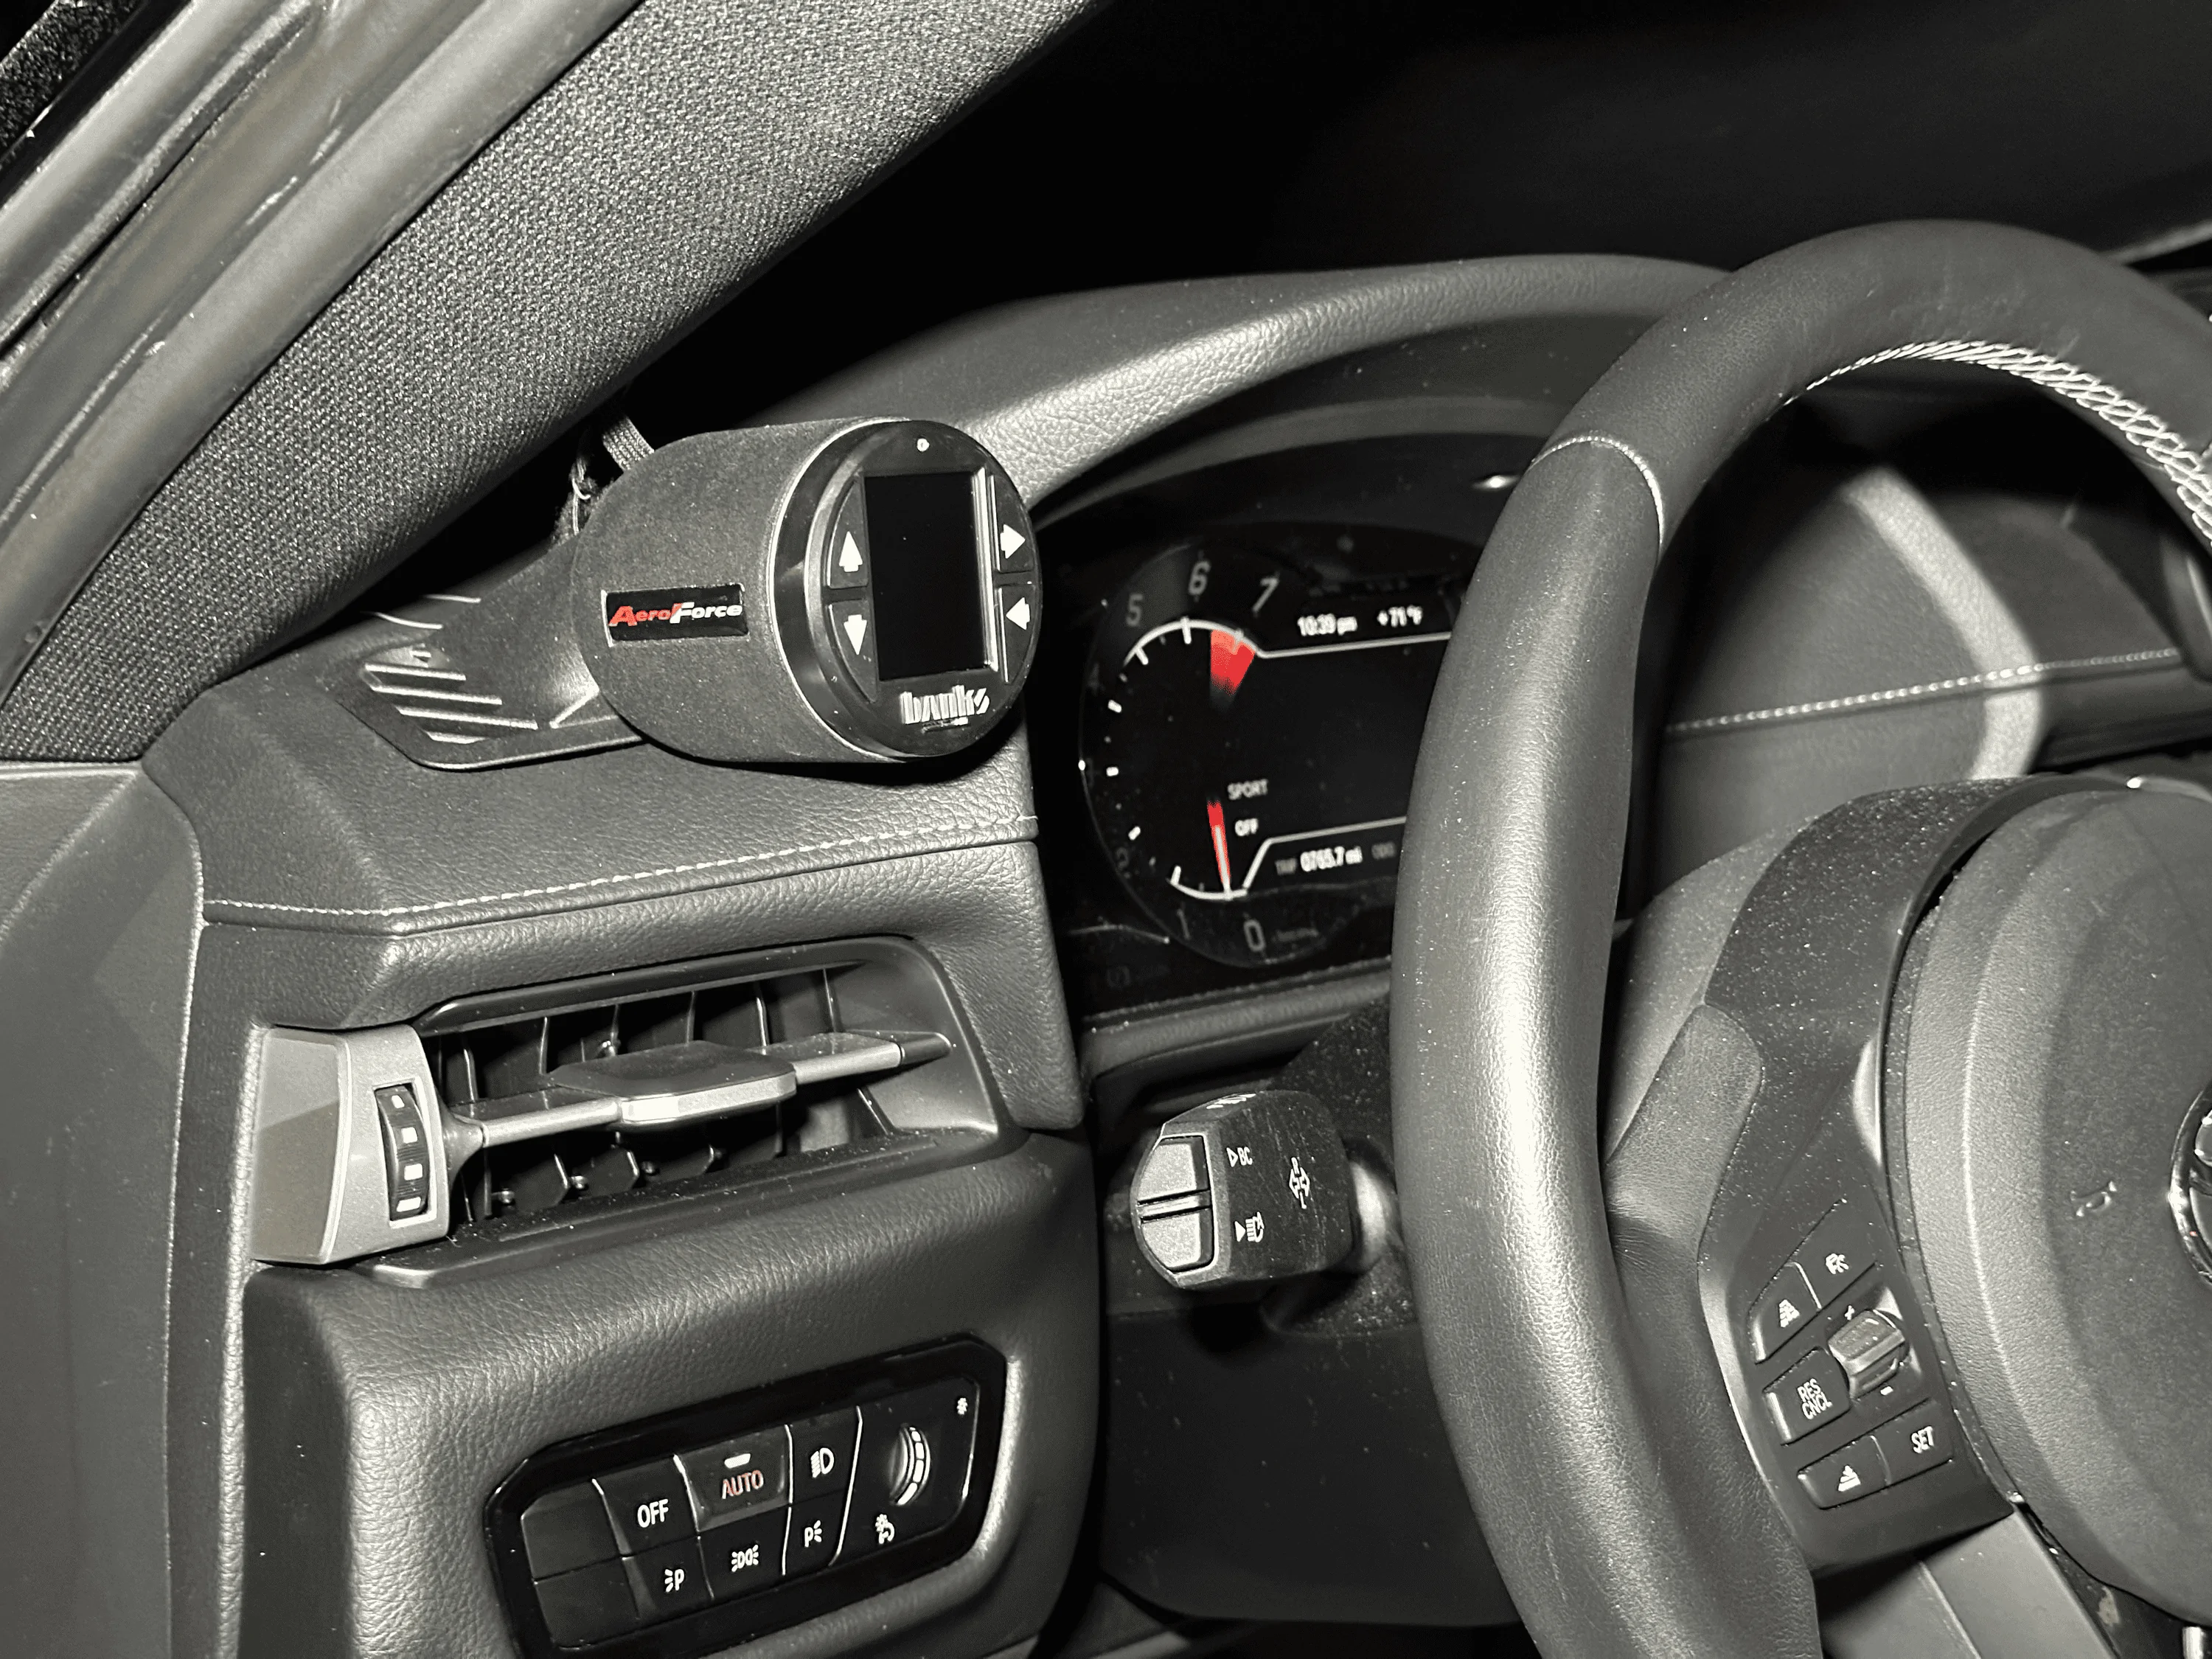
Just finished installing a Banks iDash Gauge and Scan Tool inside of an Aeroforce Single Gauge Pod (thanks for @Insomniac for pointing these pods out to me).
Why I picked this combo:
- I've been looking for both a non-tacked on single gauge pod as well as a gauge that displays multiple parameters at once.
- I tried making an OBDLink dashboard with my phone, but 1) I was having issues with a super slow refresh rate, and 2) this would require me to pull my phone out, mount it, connect, open app, etc. etc. every time I'm in the car (I often never remove my phone from my pocket due to wireless CarPlay).
- The P3 is a great looking gauge, but for the price, I would have liked a higher res screen and more than one parameter.
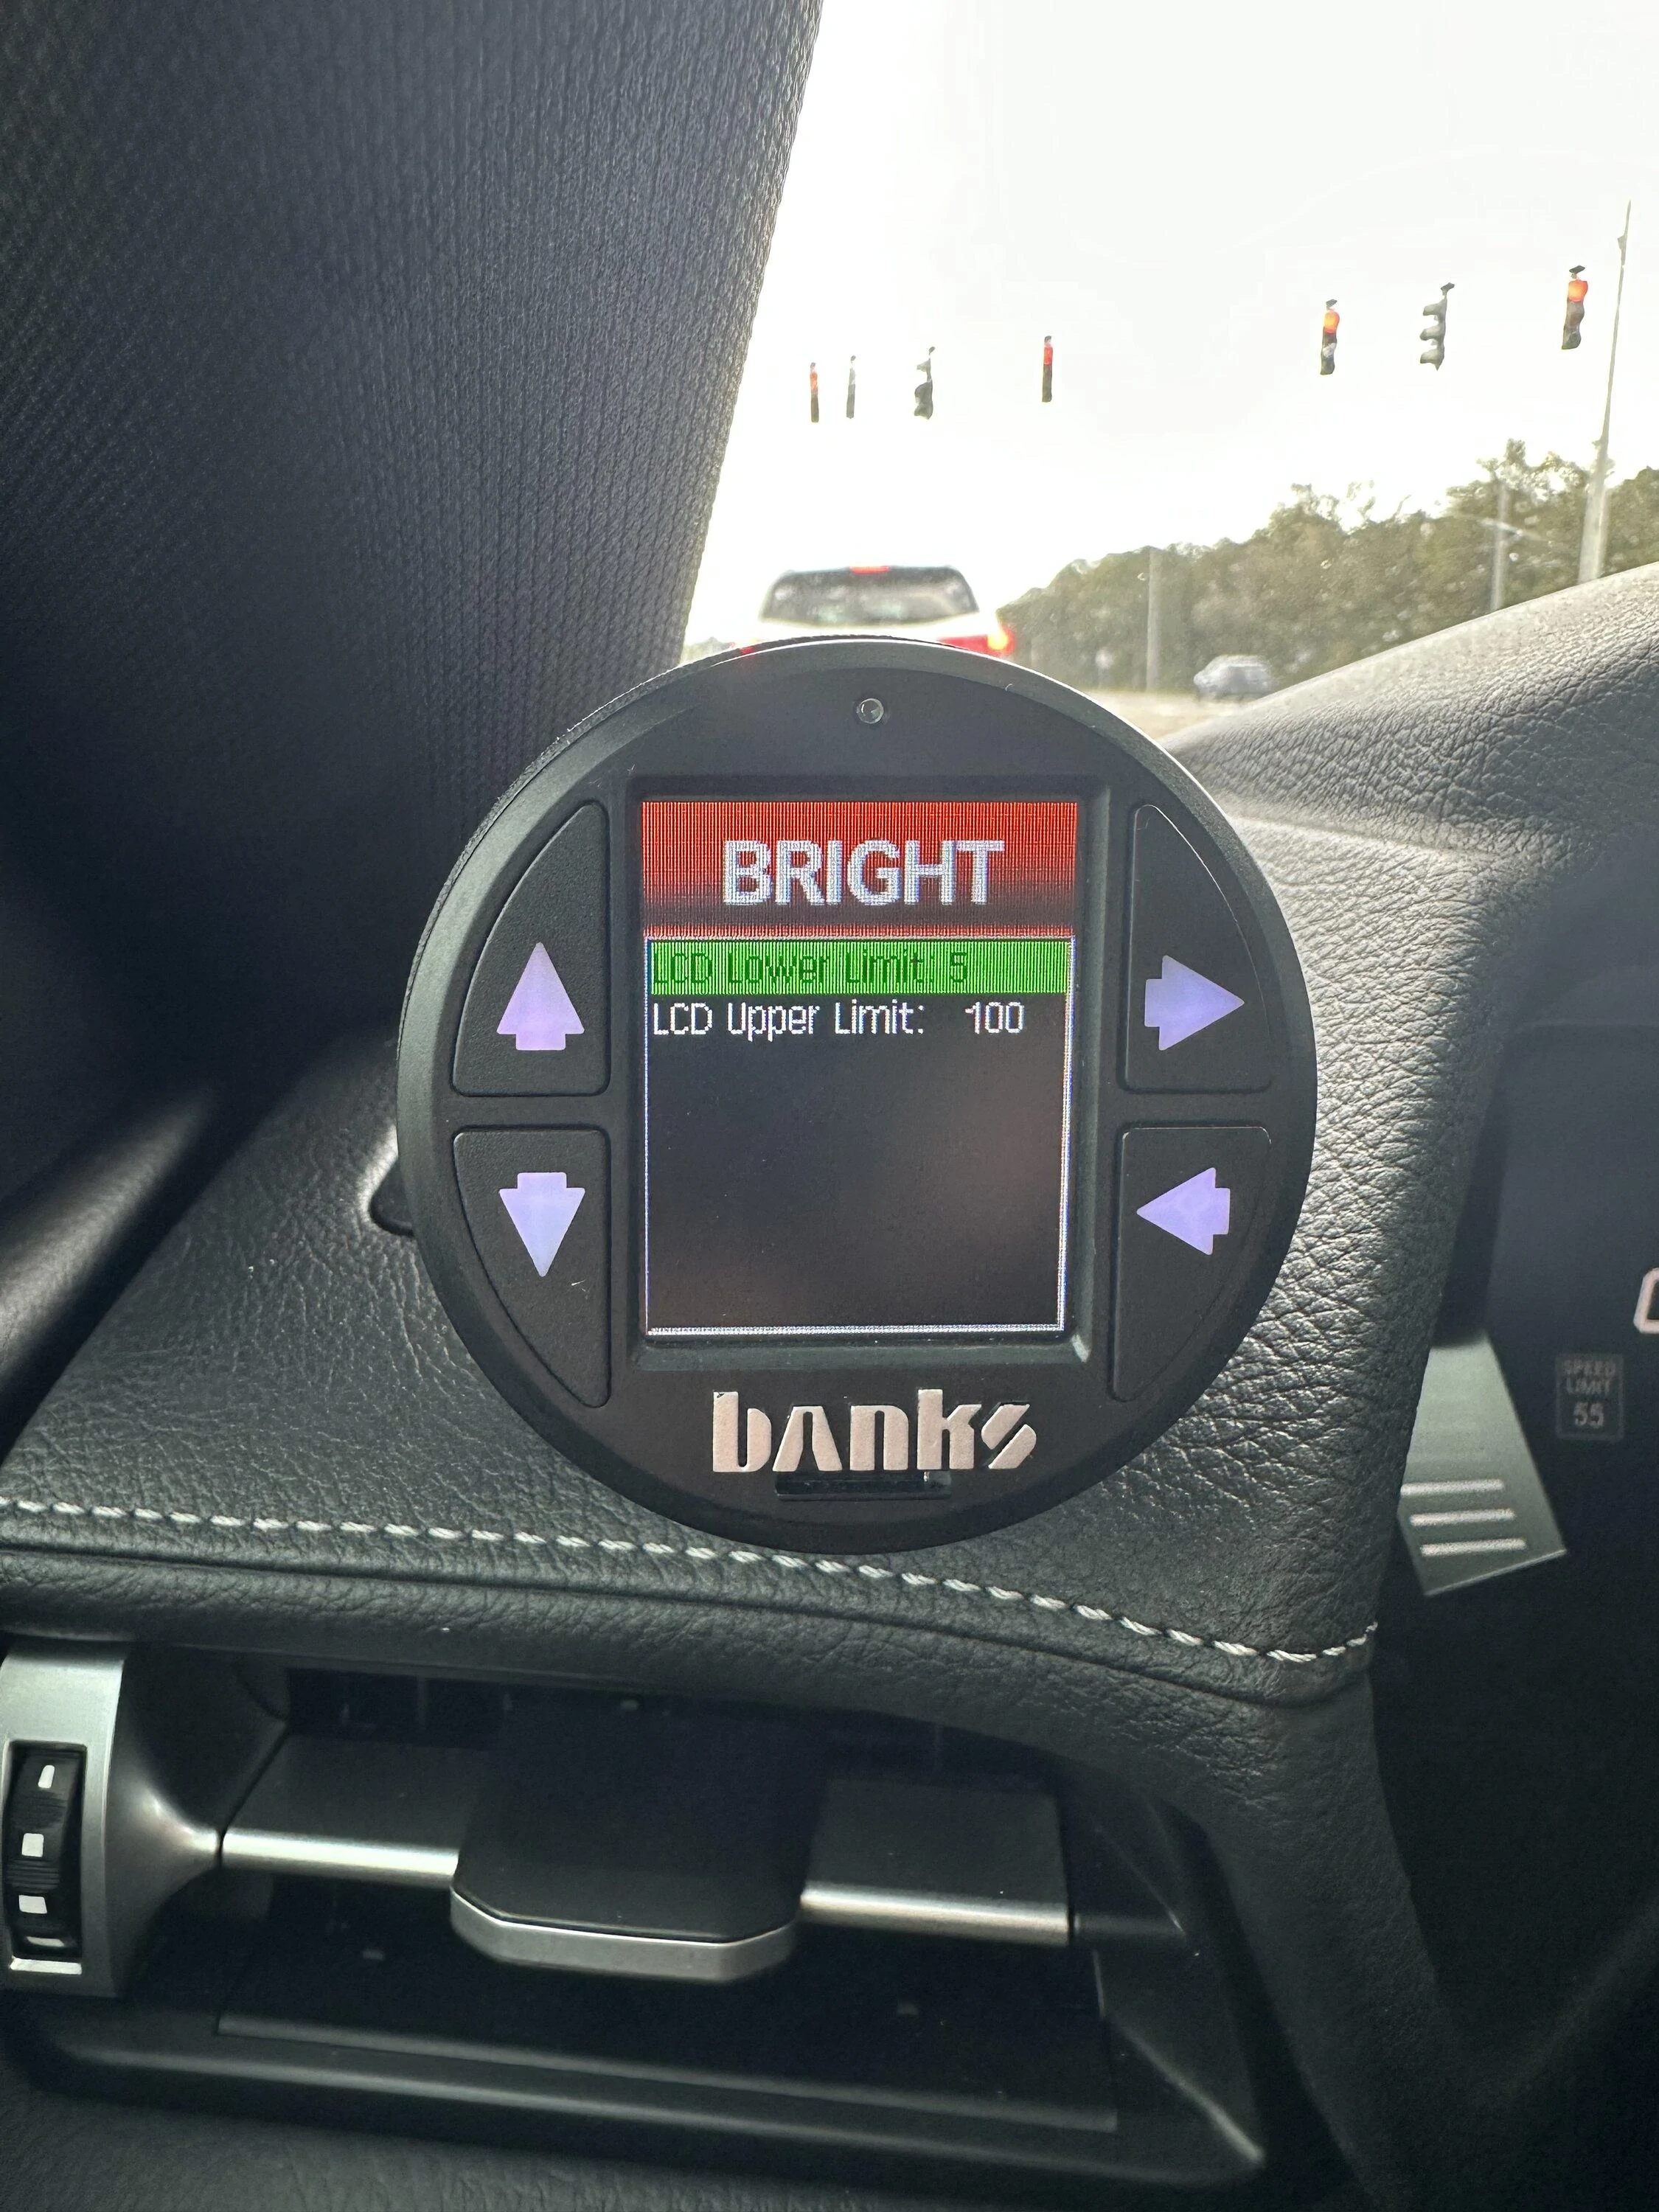
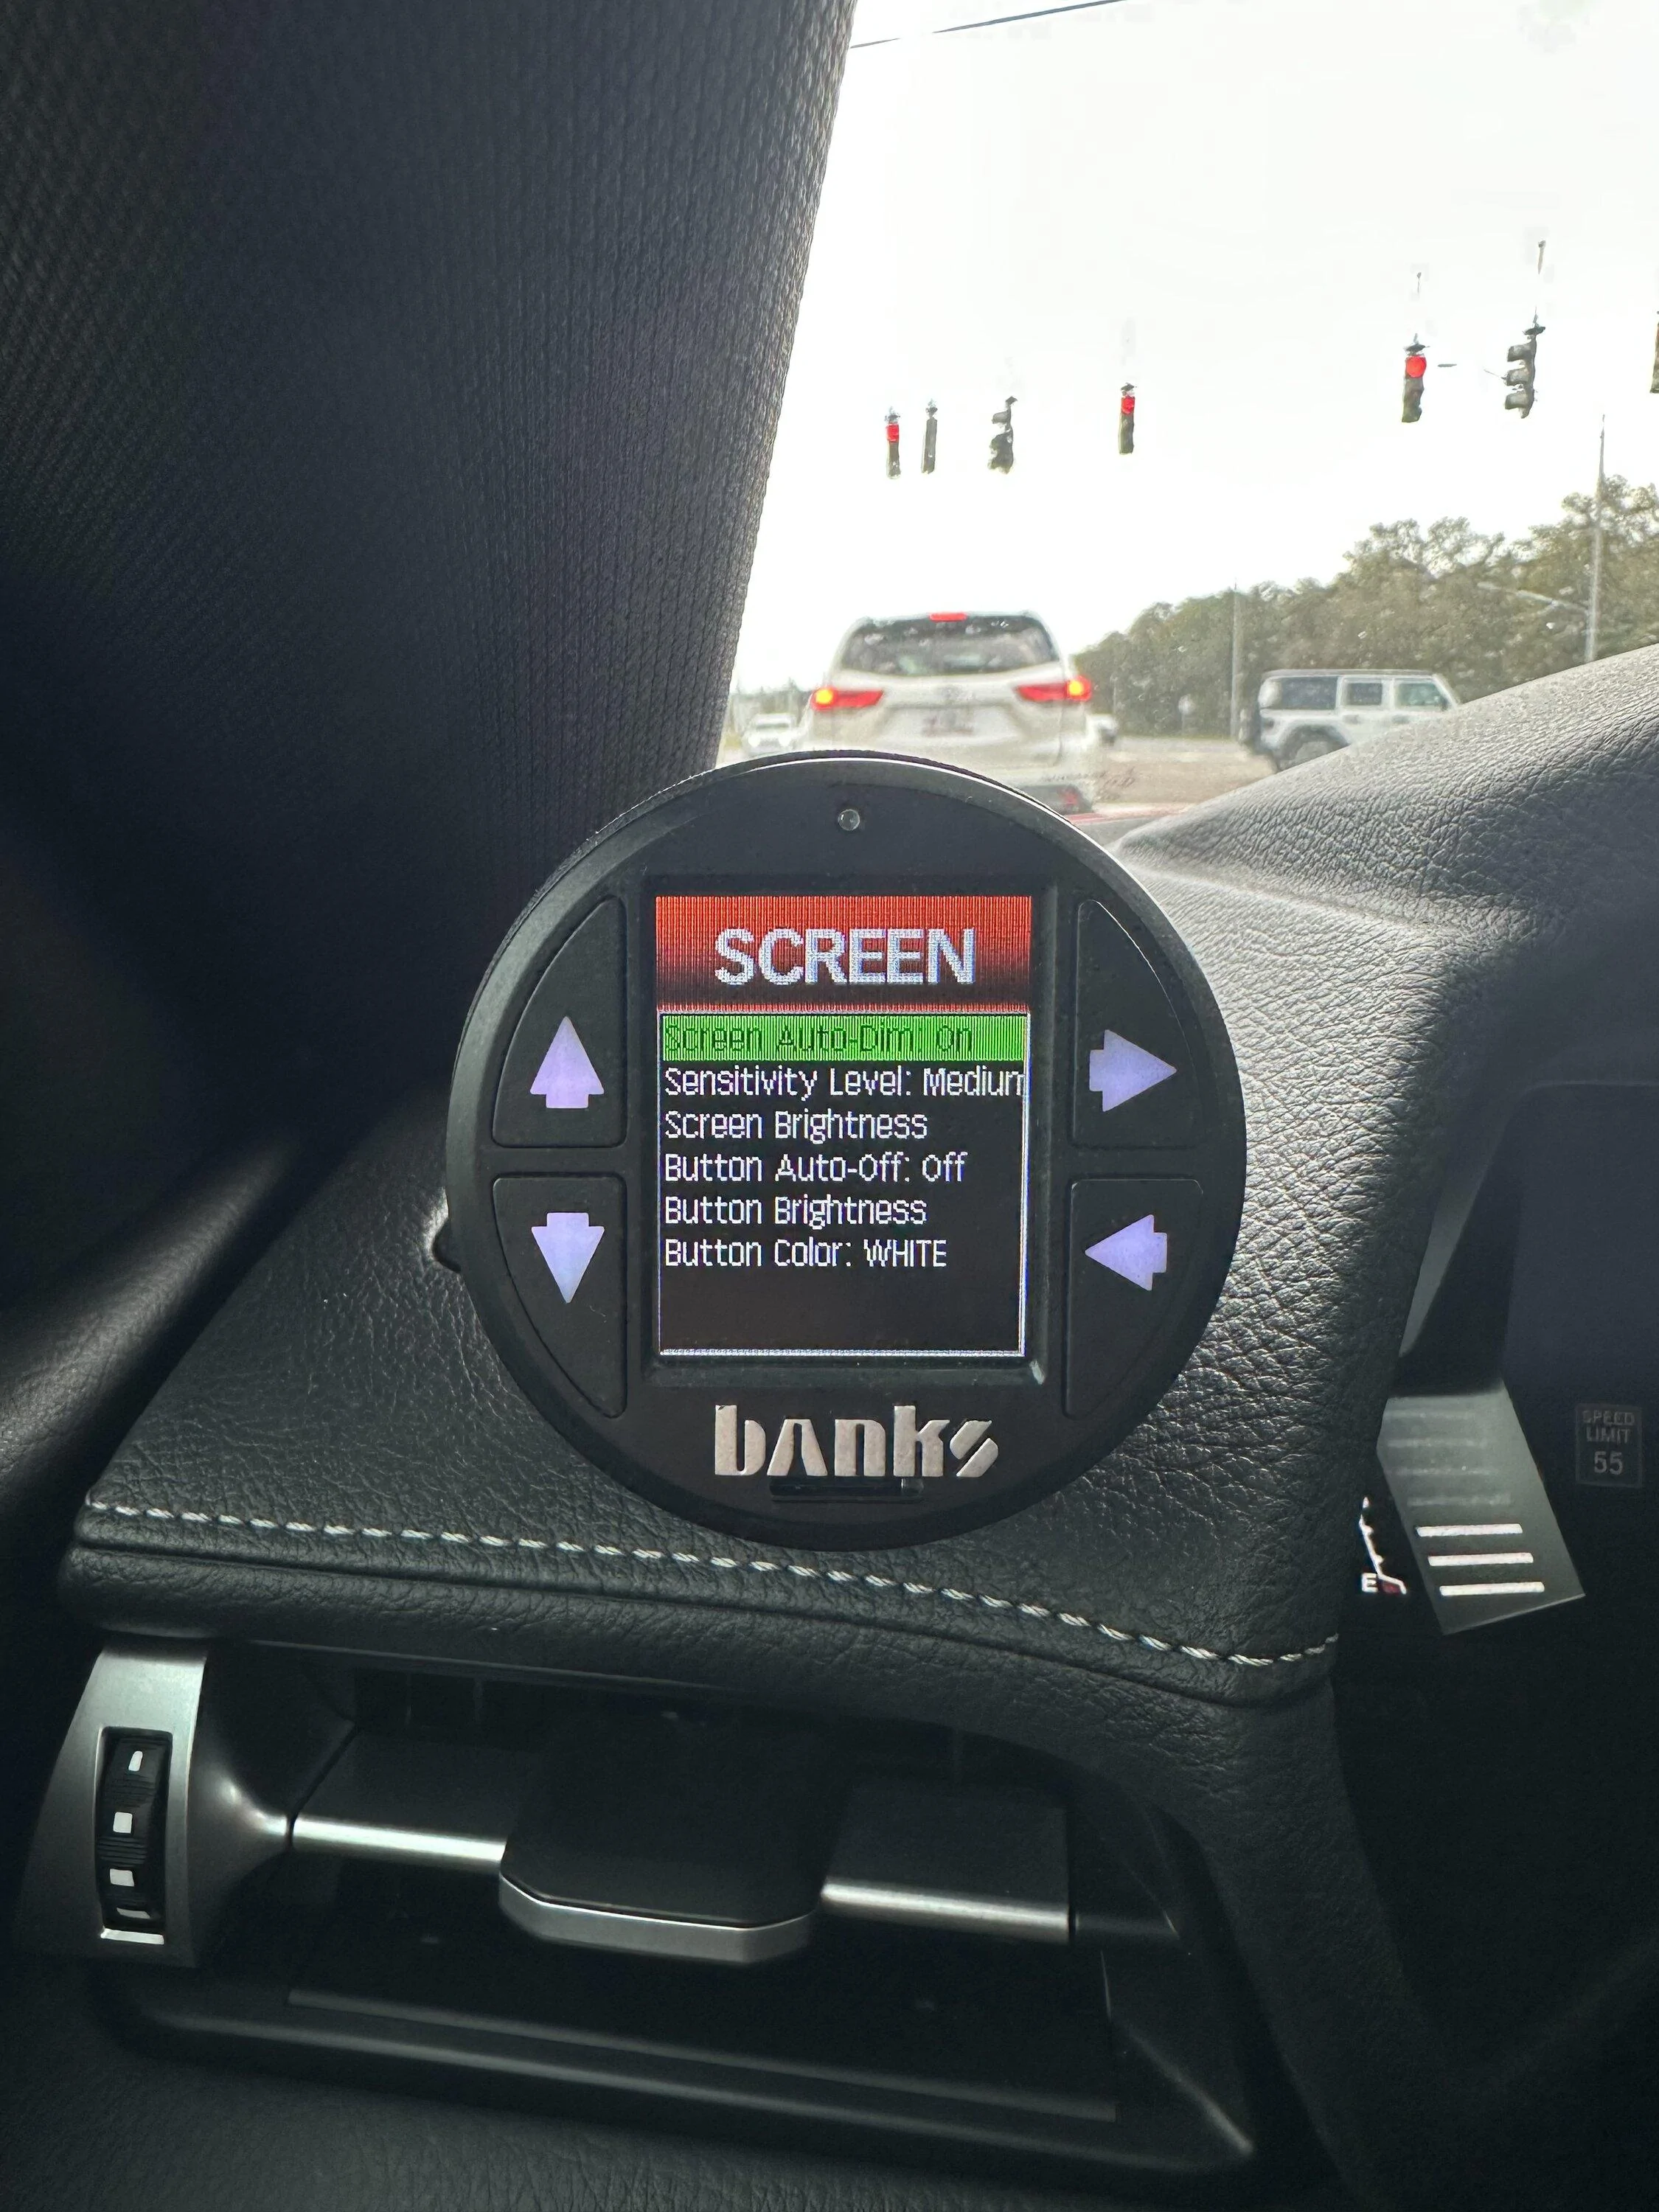
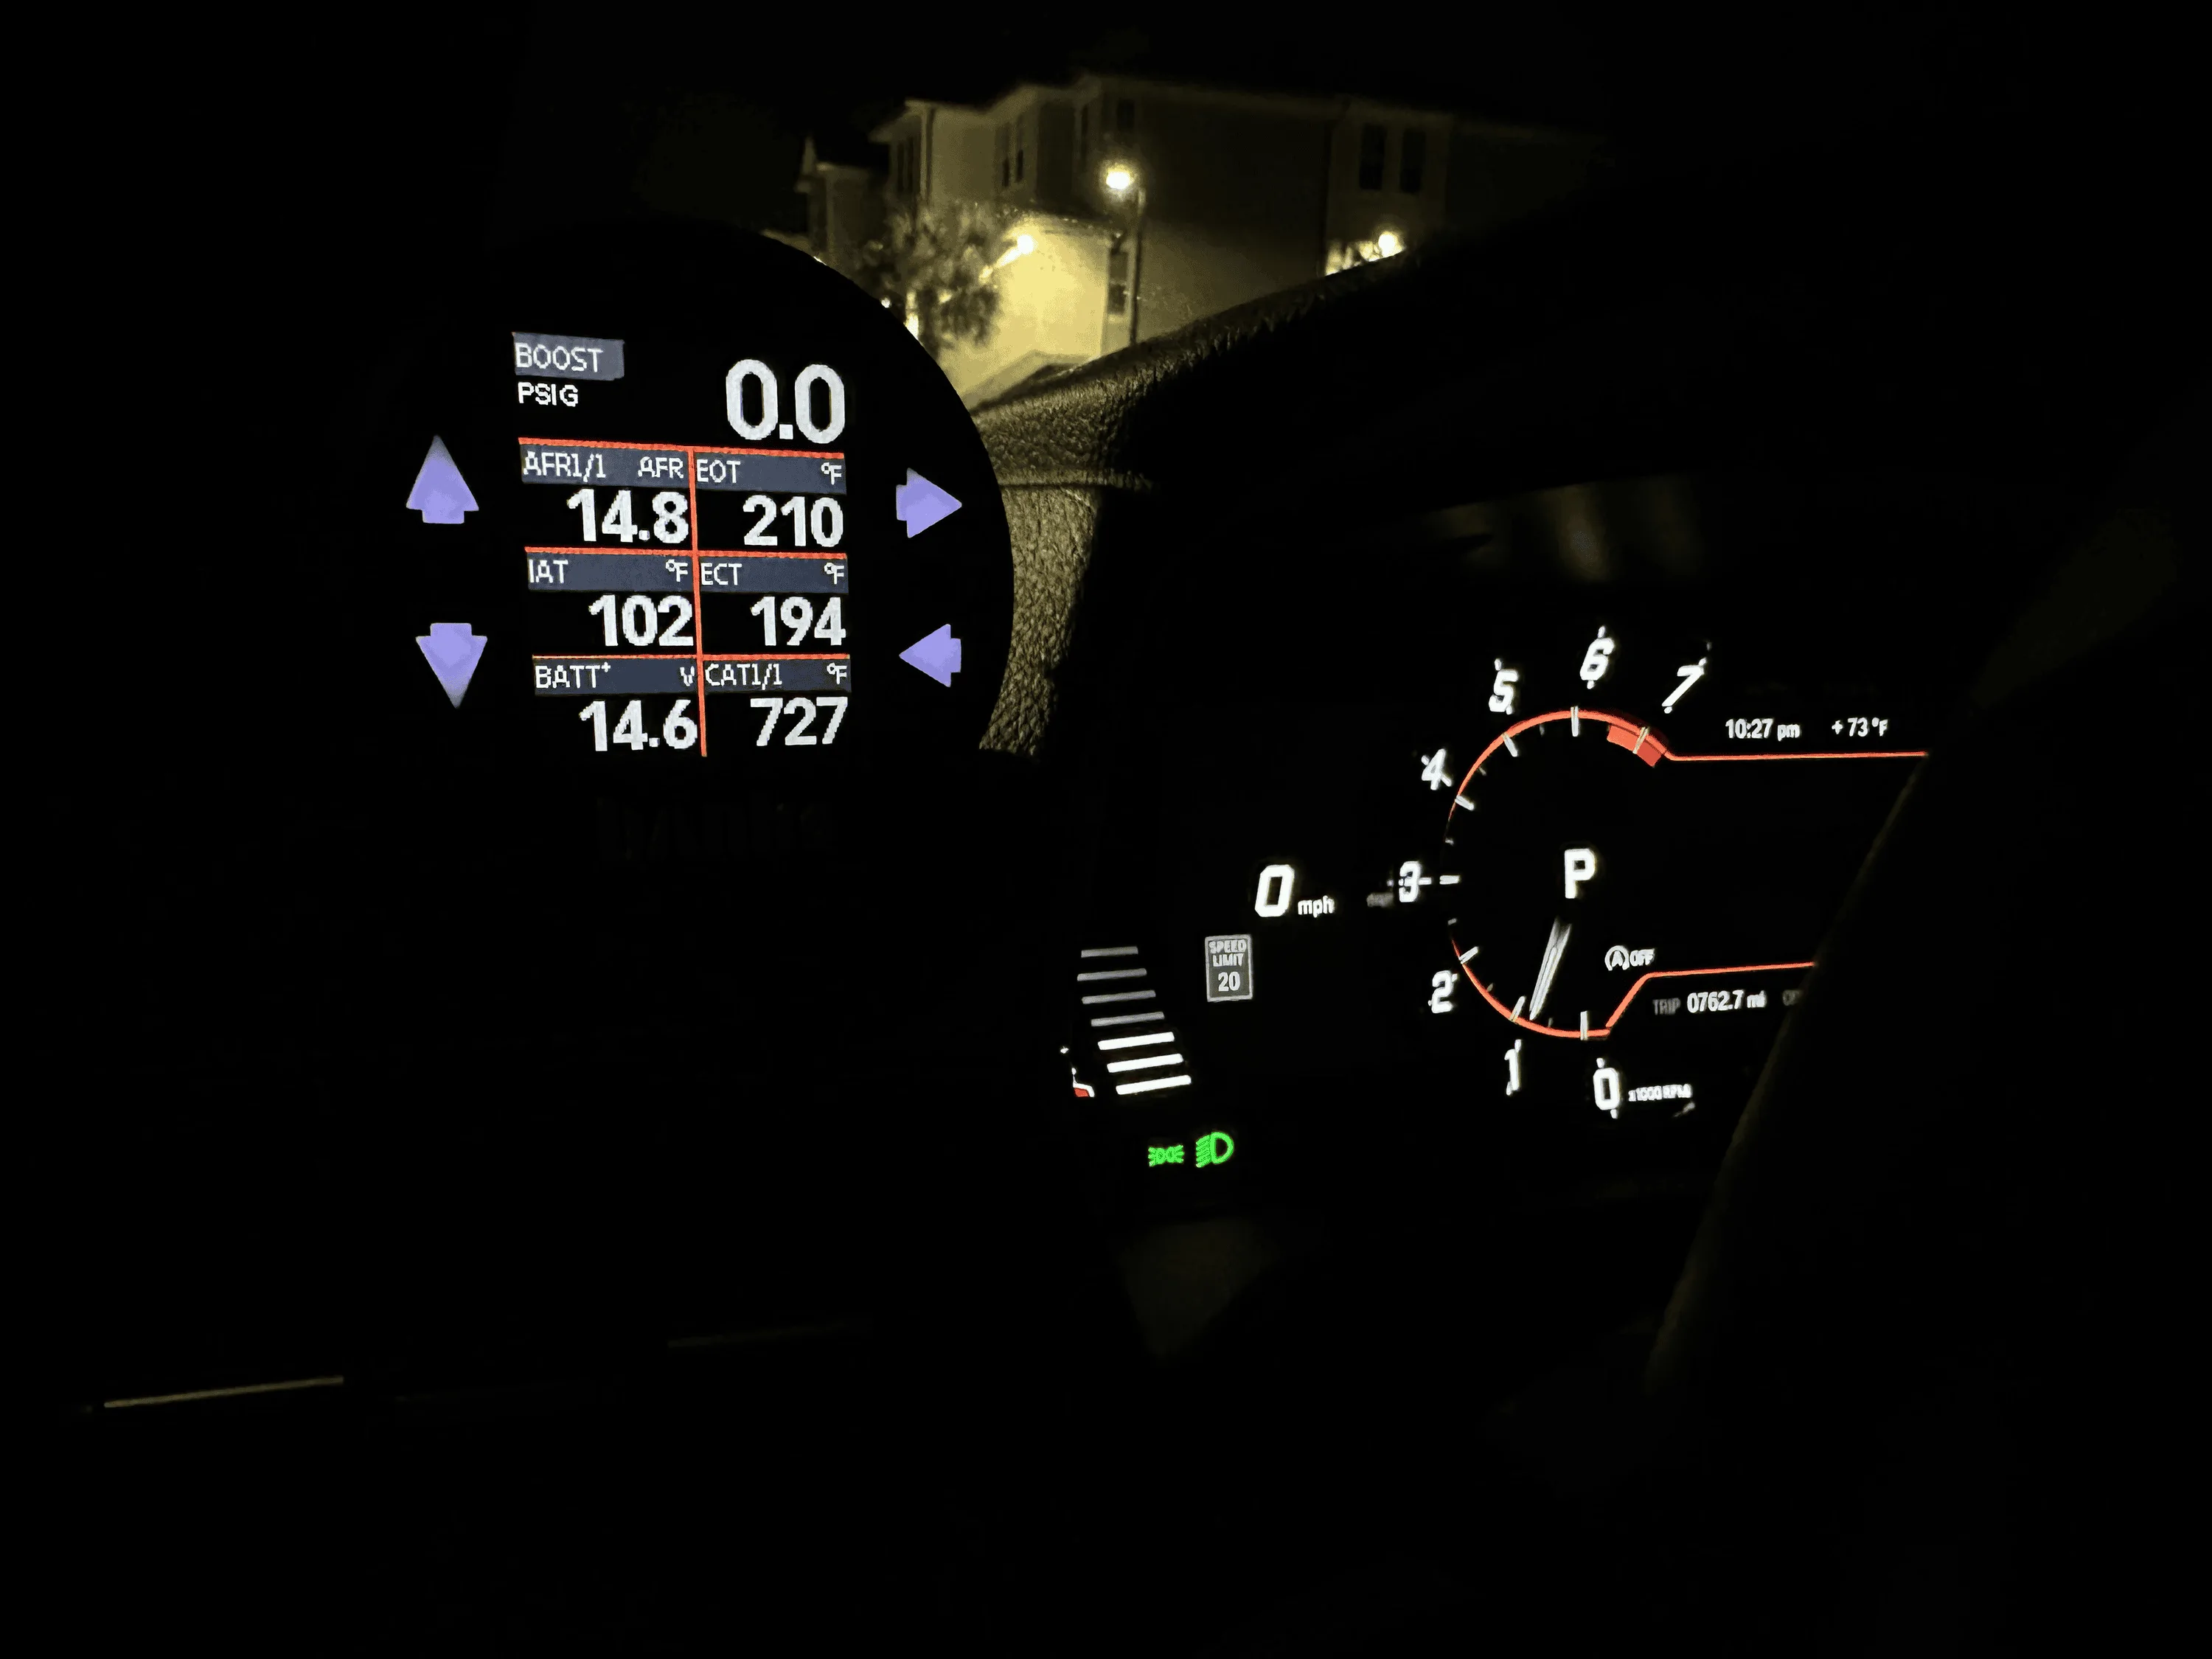
- The Banks gauge can display up to 8 parameters on a layout, and you can can save 5 layouts for switching on the fly.
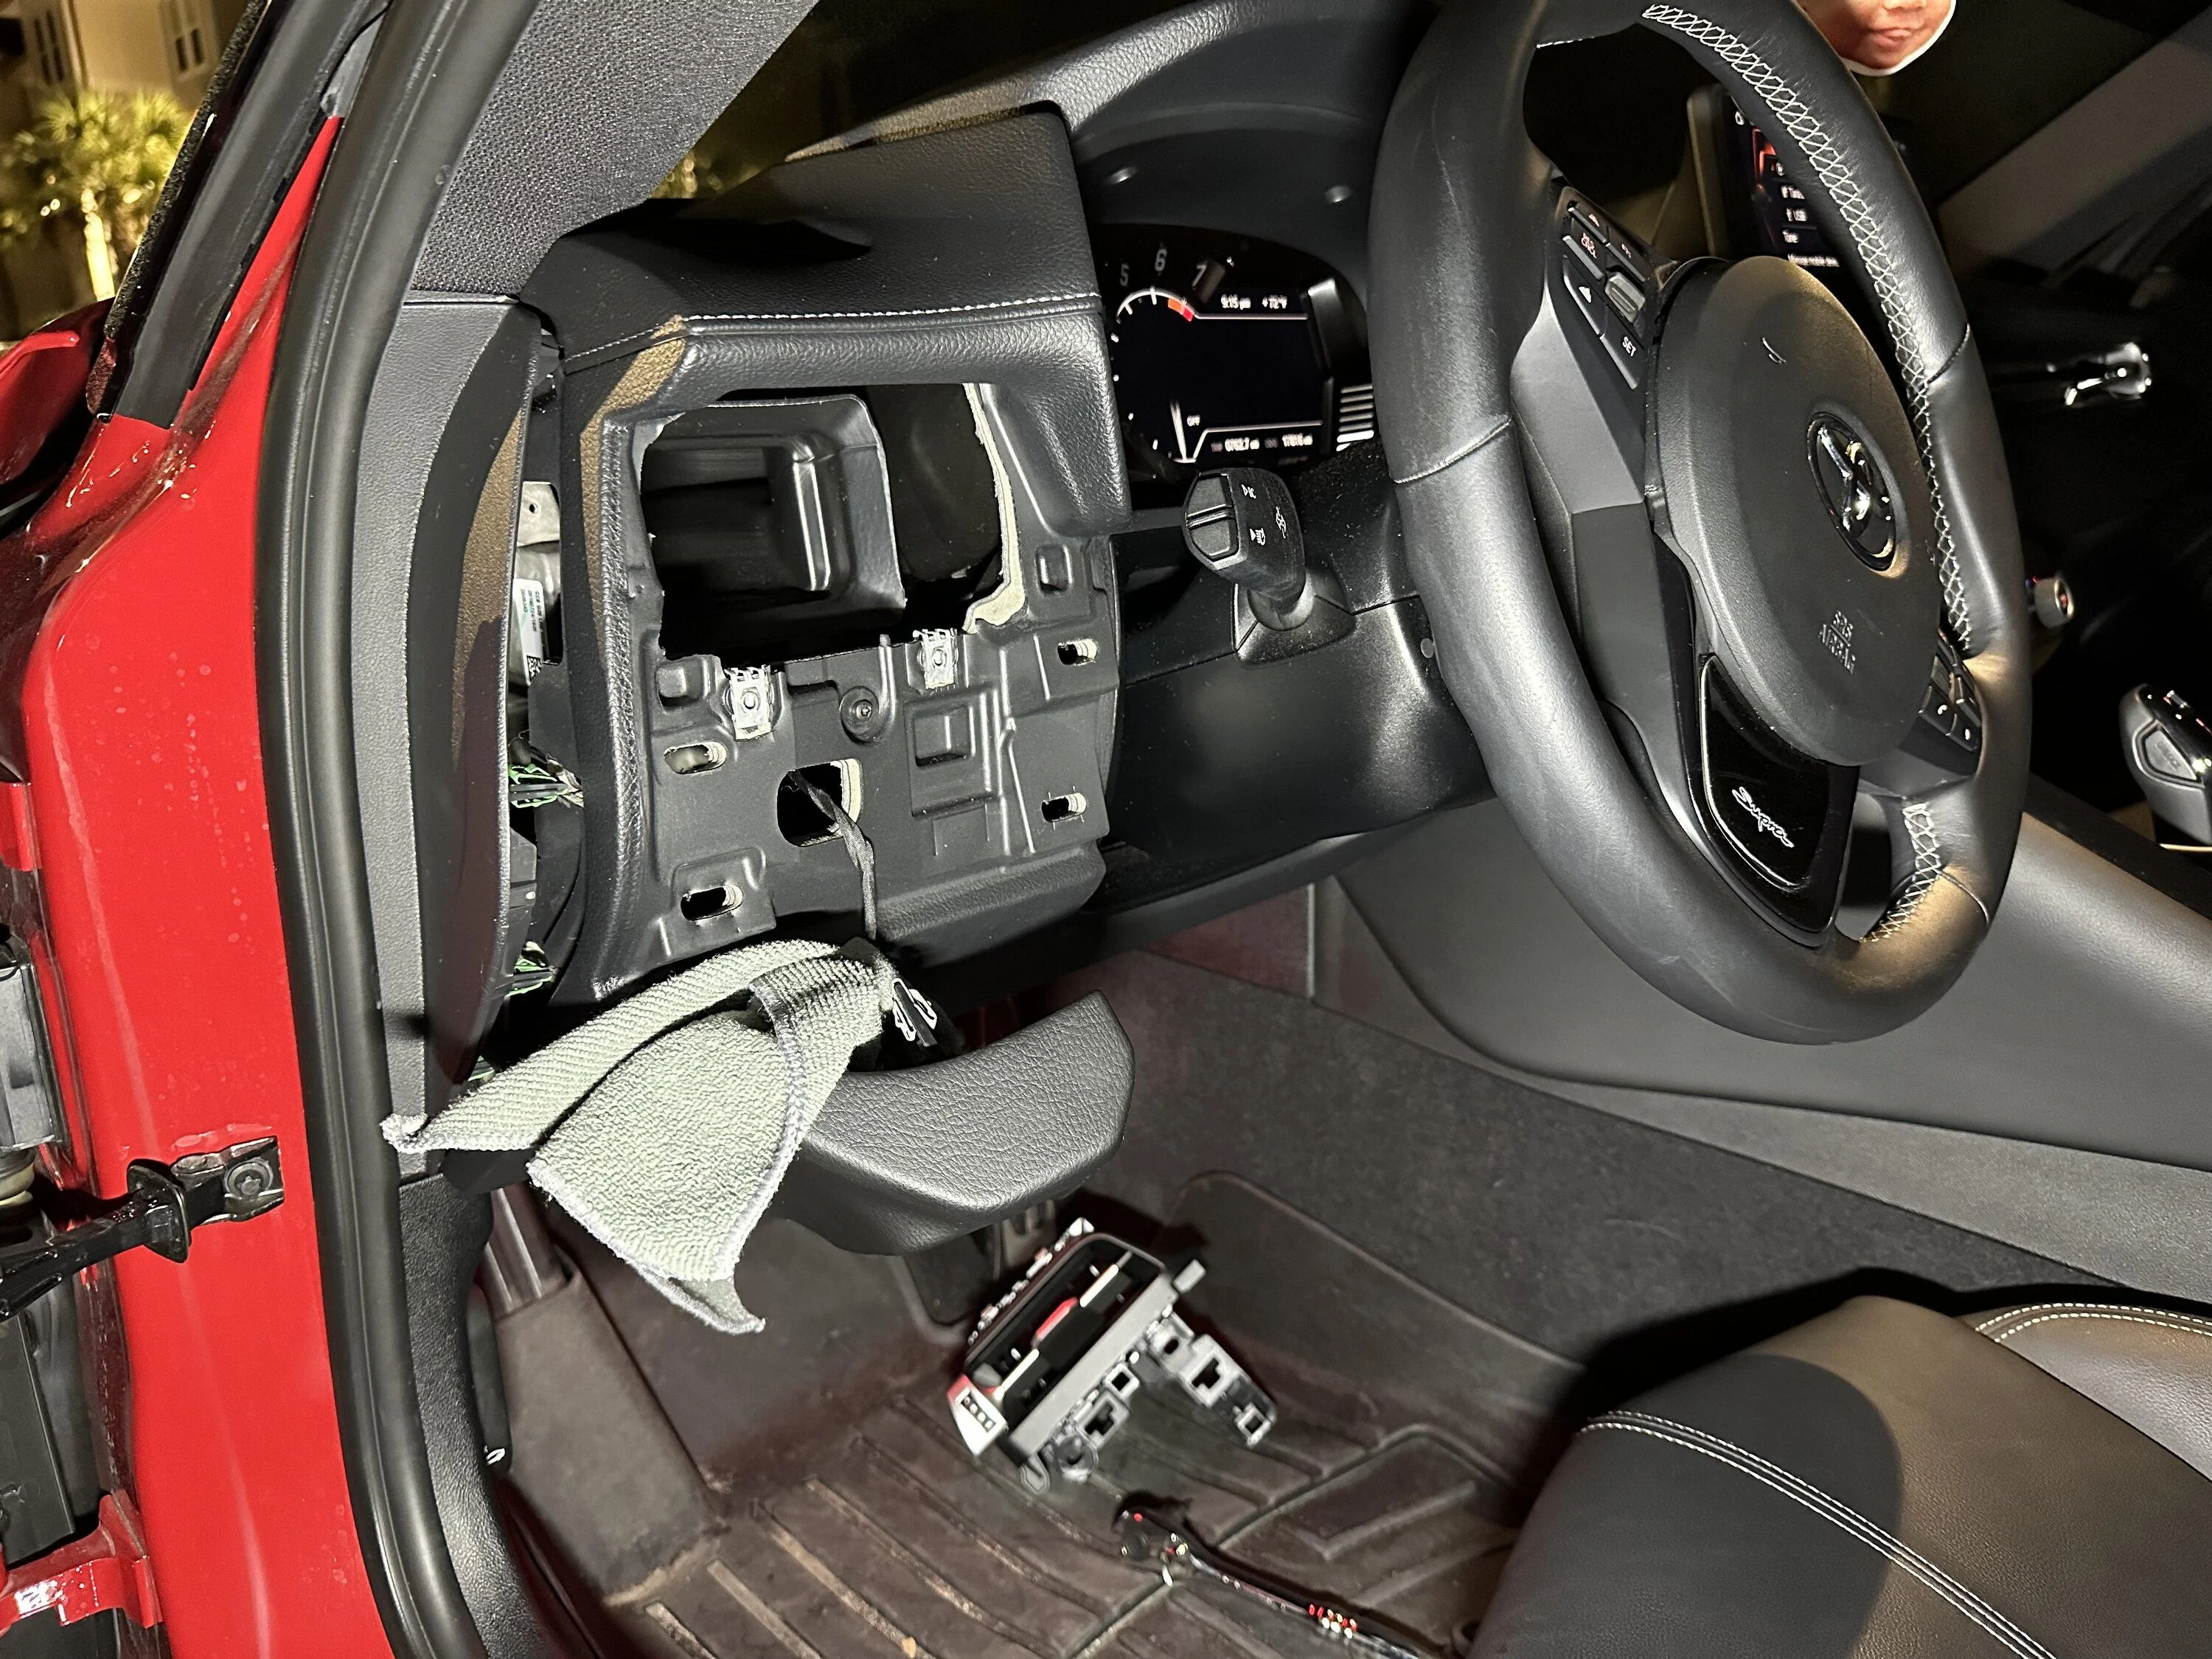
Install Notes:
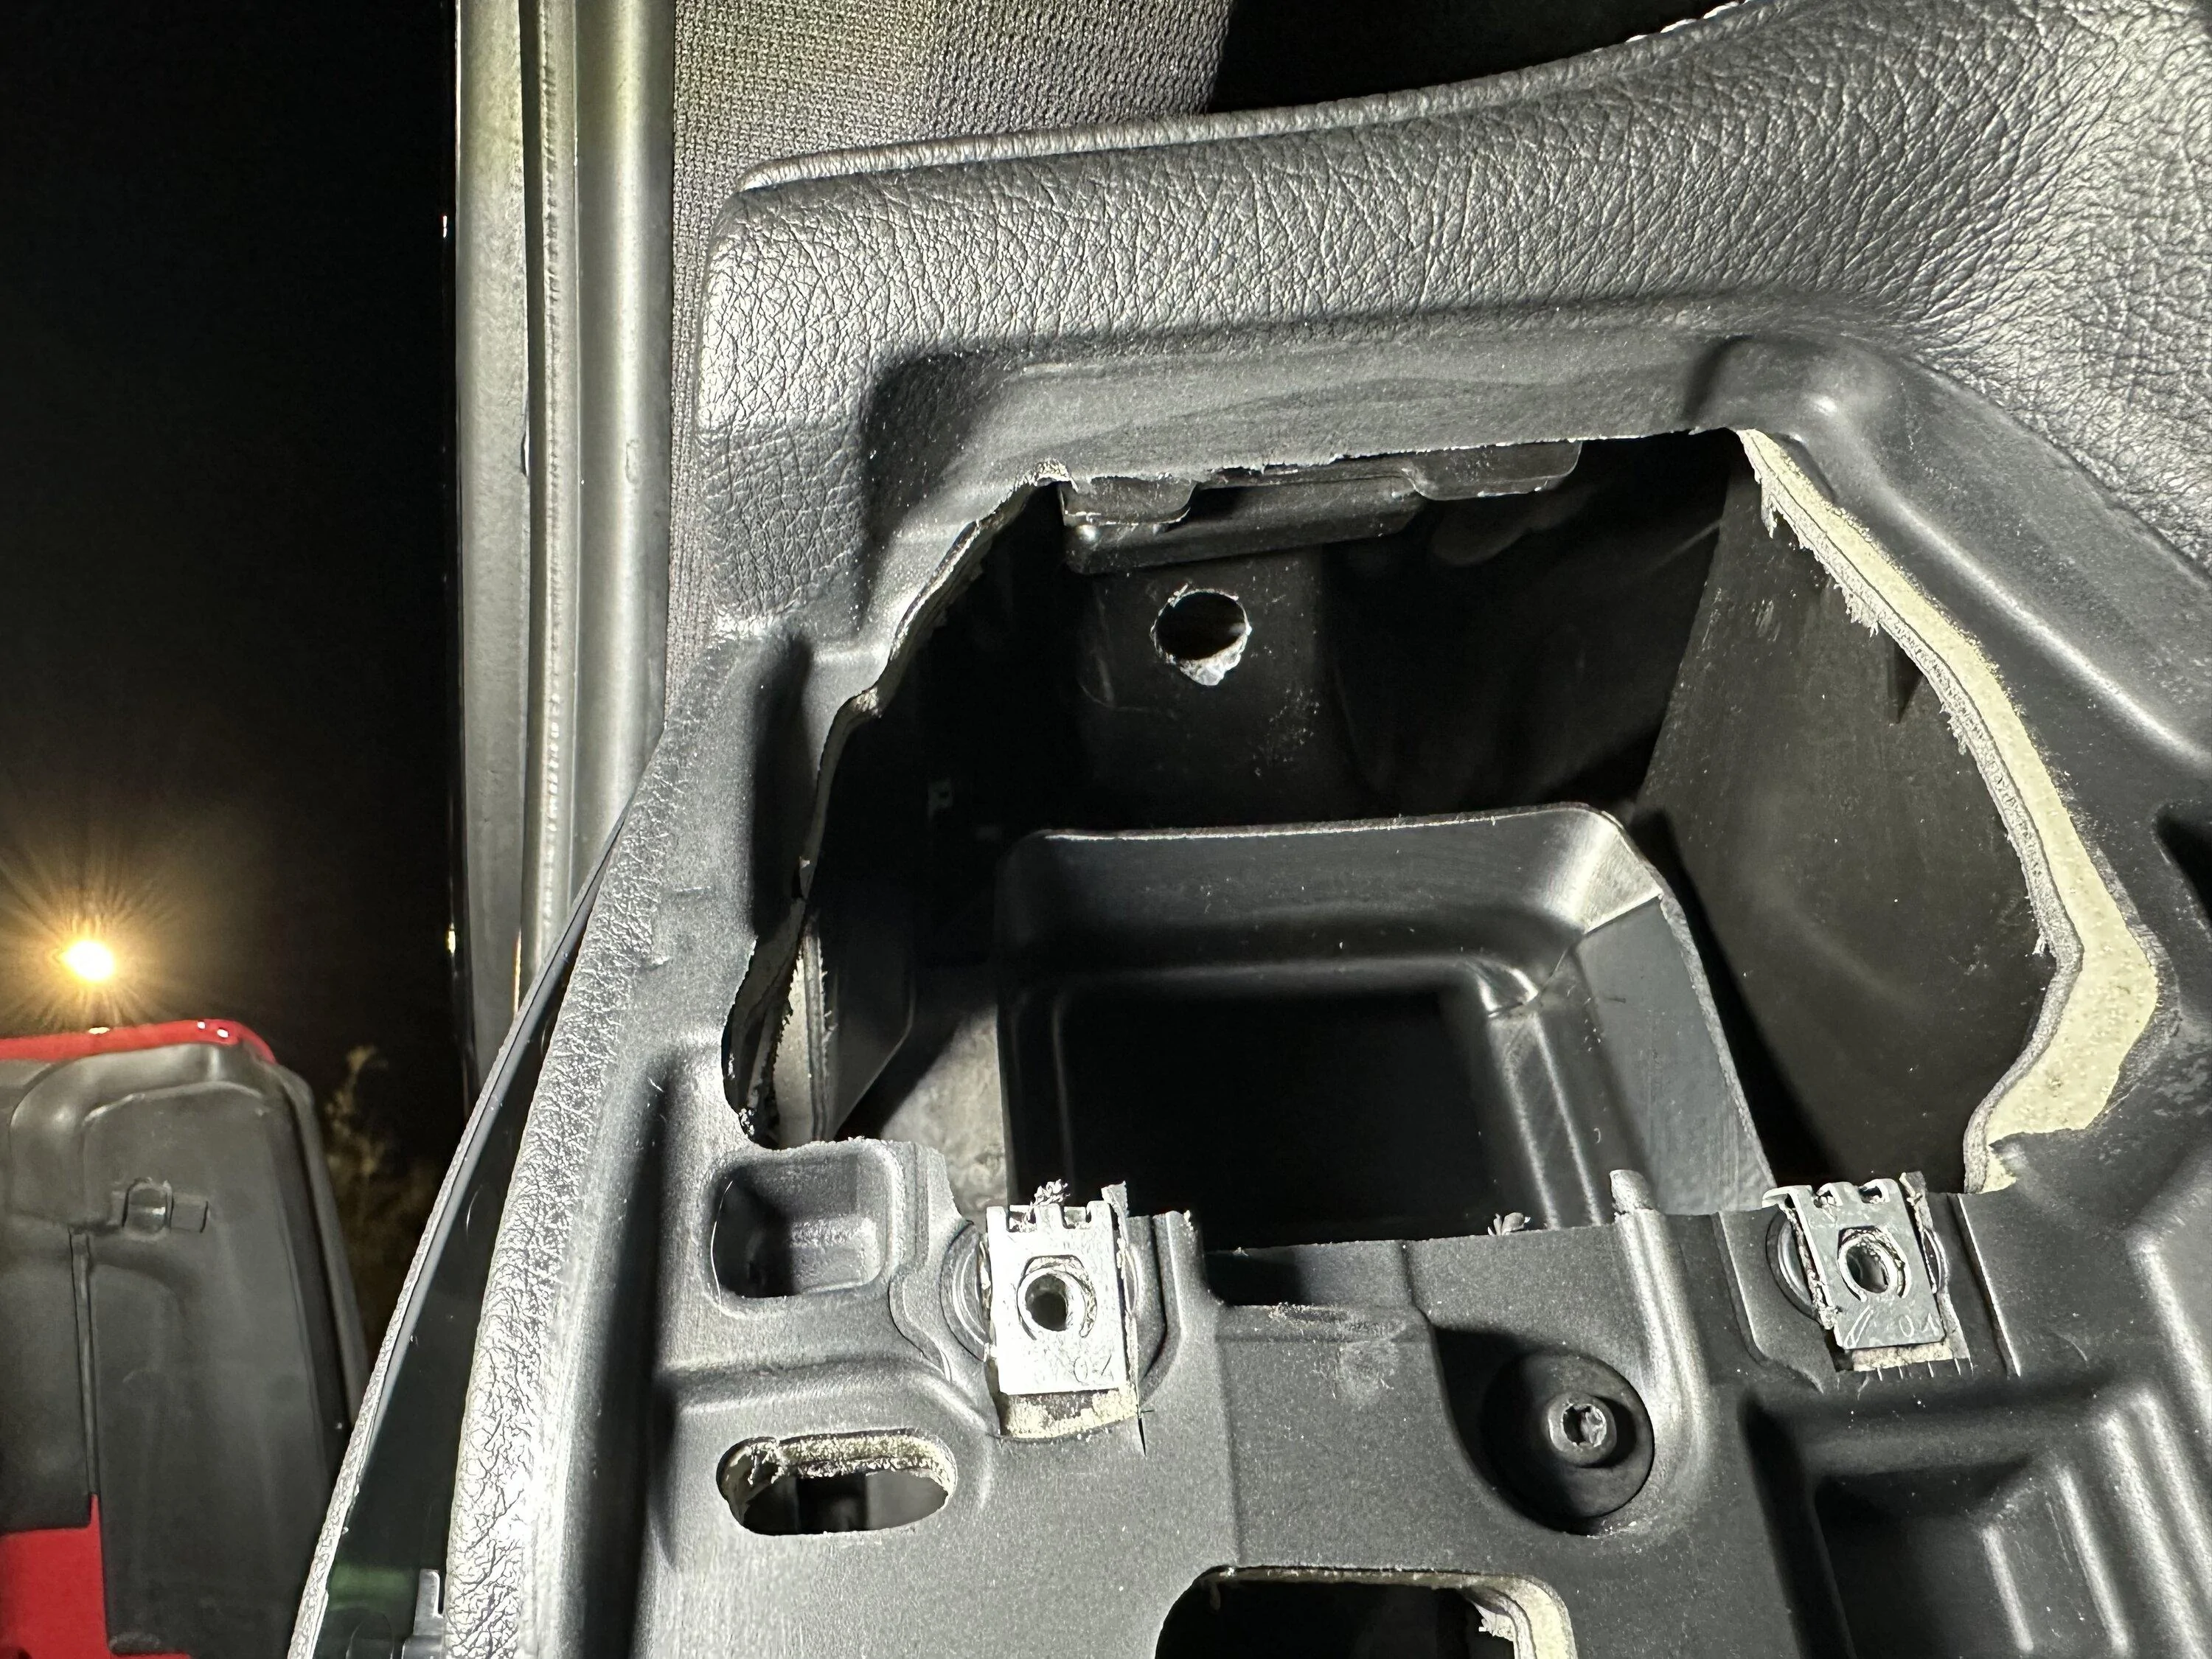
- The install is exactly like the P3 gauge install.
- I let the headlight switch panel hang instead of unplugging it (the connecter was very snug like the video mentions). I just put a microfiber on it to prevent scratches.
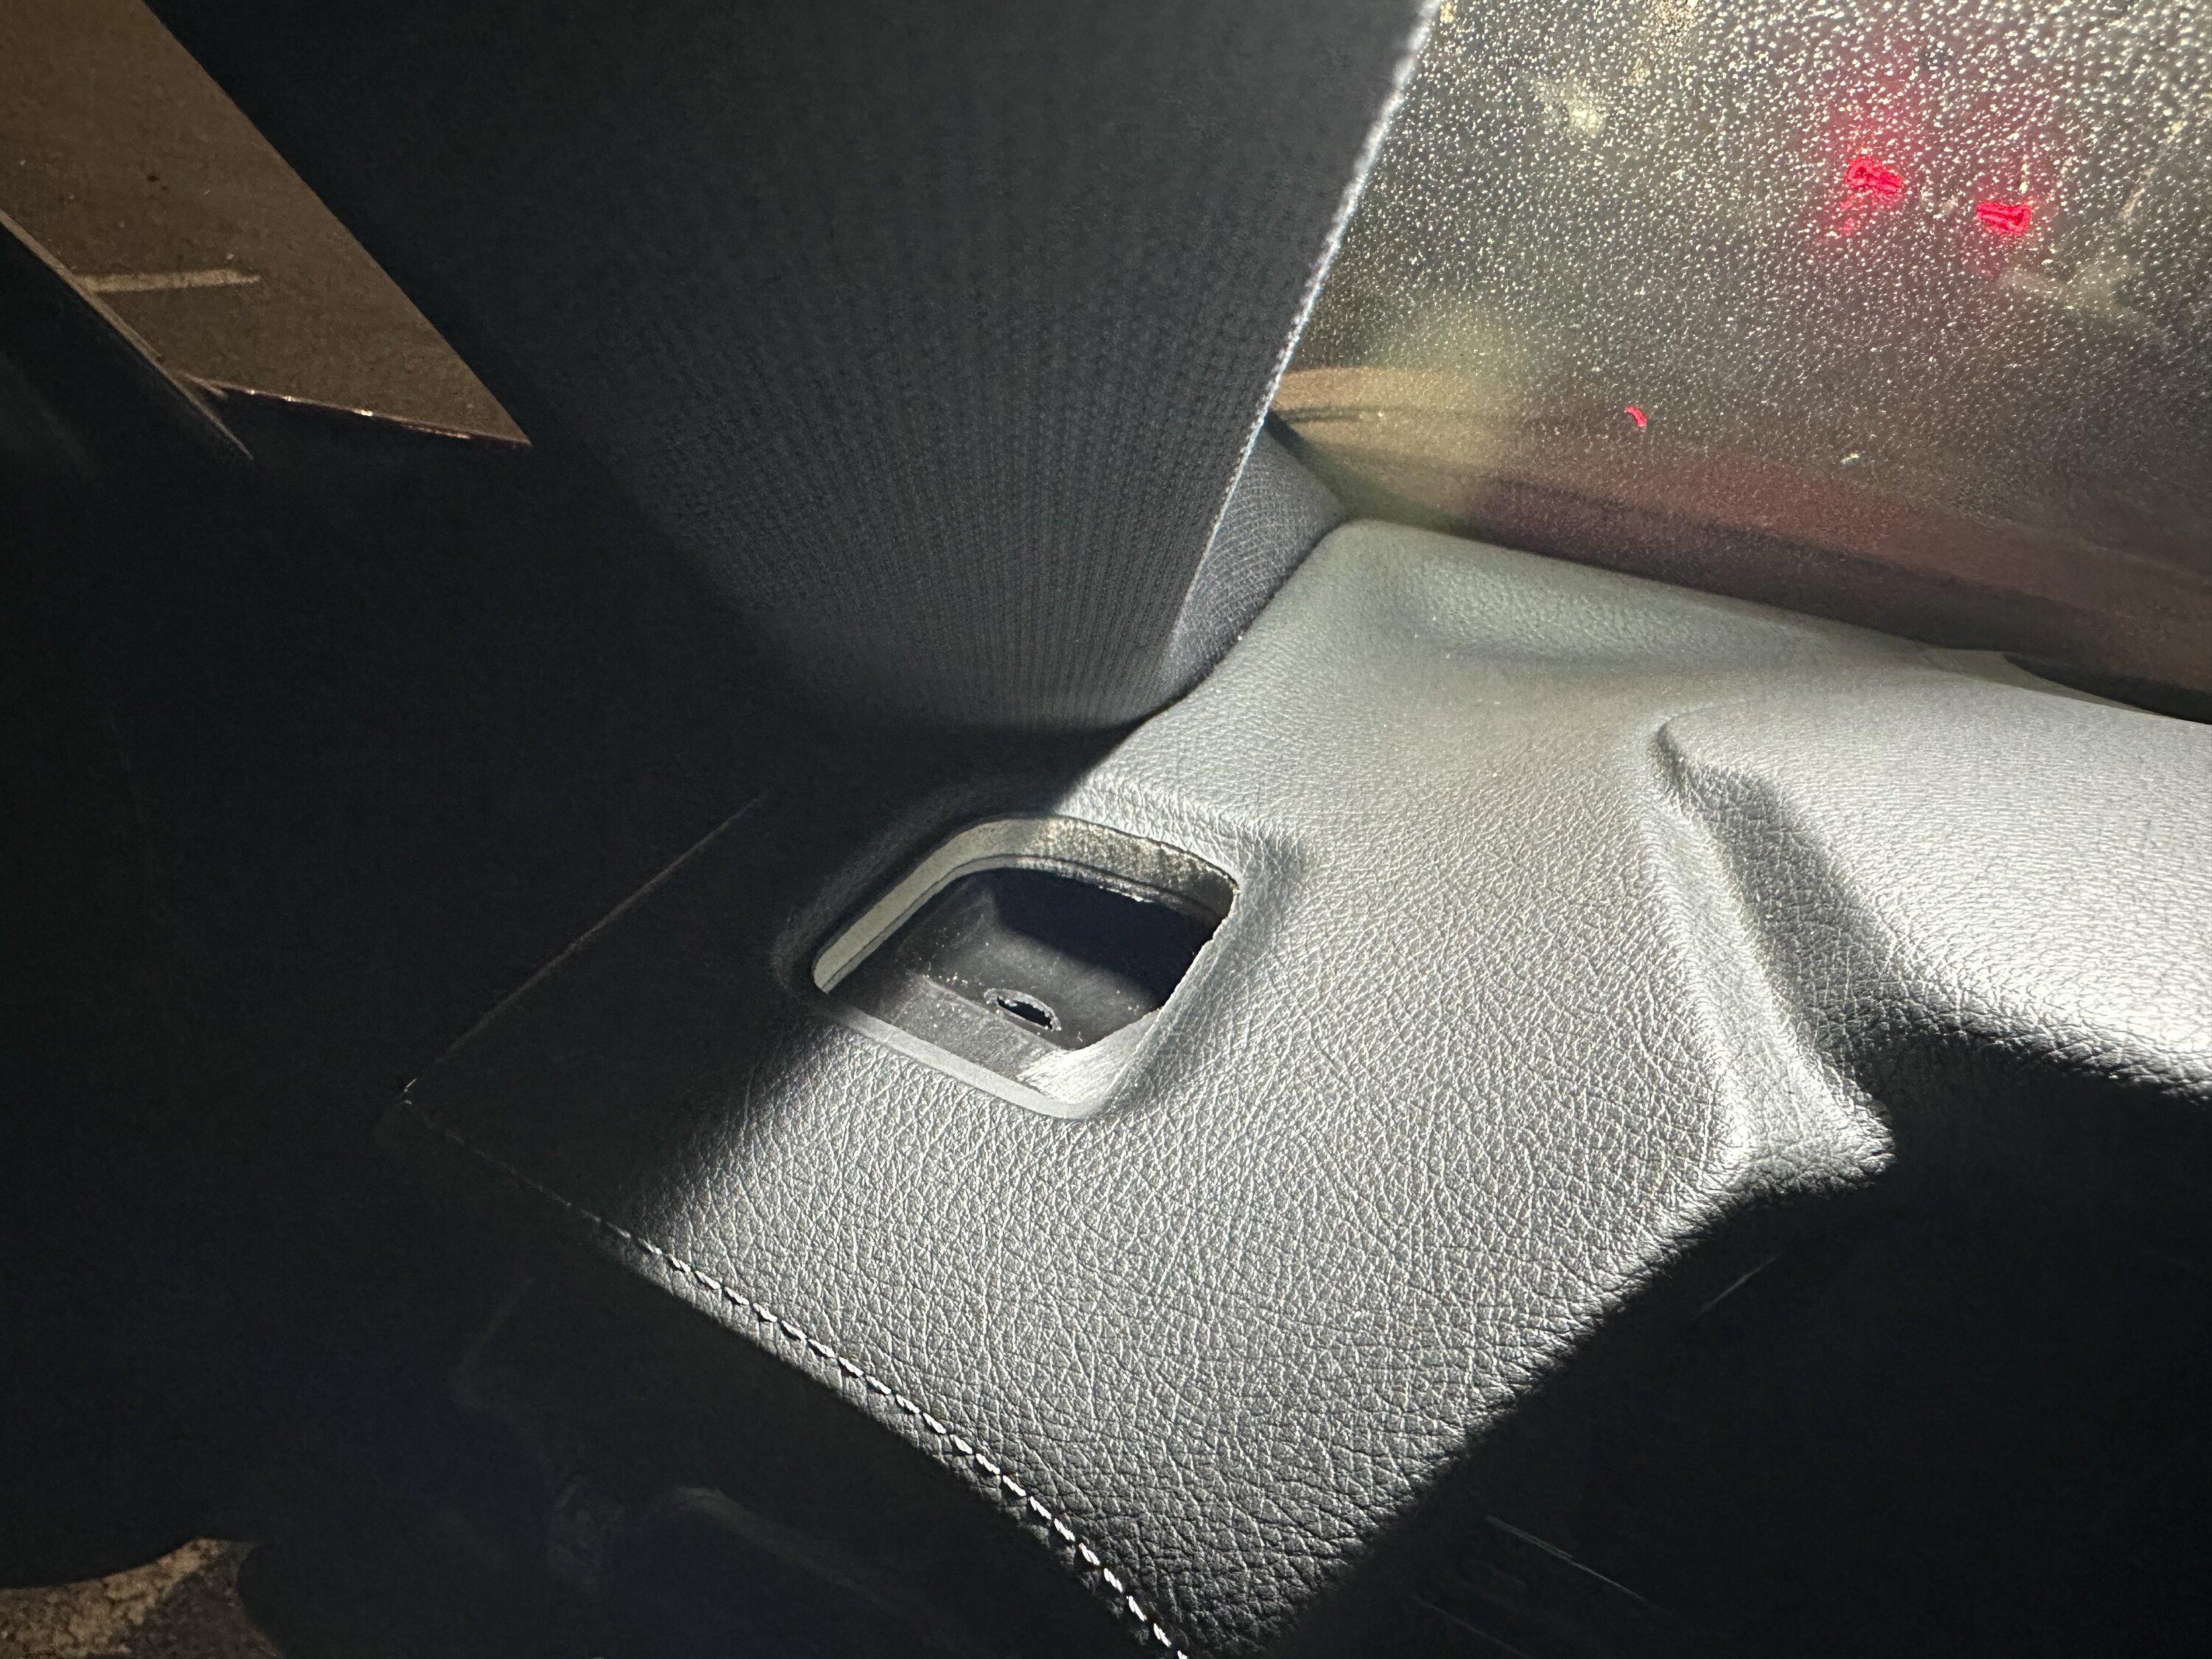
- The Aeroforce gauge pod fits 2 1/16" (52 mm) gauges, but the inner diameter is a bit wider than the outer diameter of the Banks gauge. It comes with adhesive putty which is a mess. The majority of my time on this install was cleaning this up. Plan how you'll secure the gauge in the pod before starting to prevent frustration.
- The Banks gauge does come with a backing plate and nuts to secure the gauge to other types of pods, but this does not apply to the Aeroforce pod given the nature of its shape.
- I placed a small, hard-ish tool case above the defroster vent to prevent myself from drilling into the a-pillar. (don't need to with a steady hand, but it's cheap insurance)
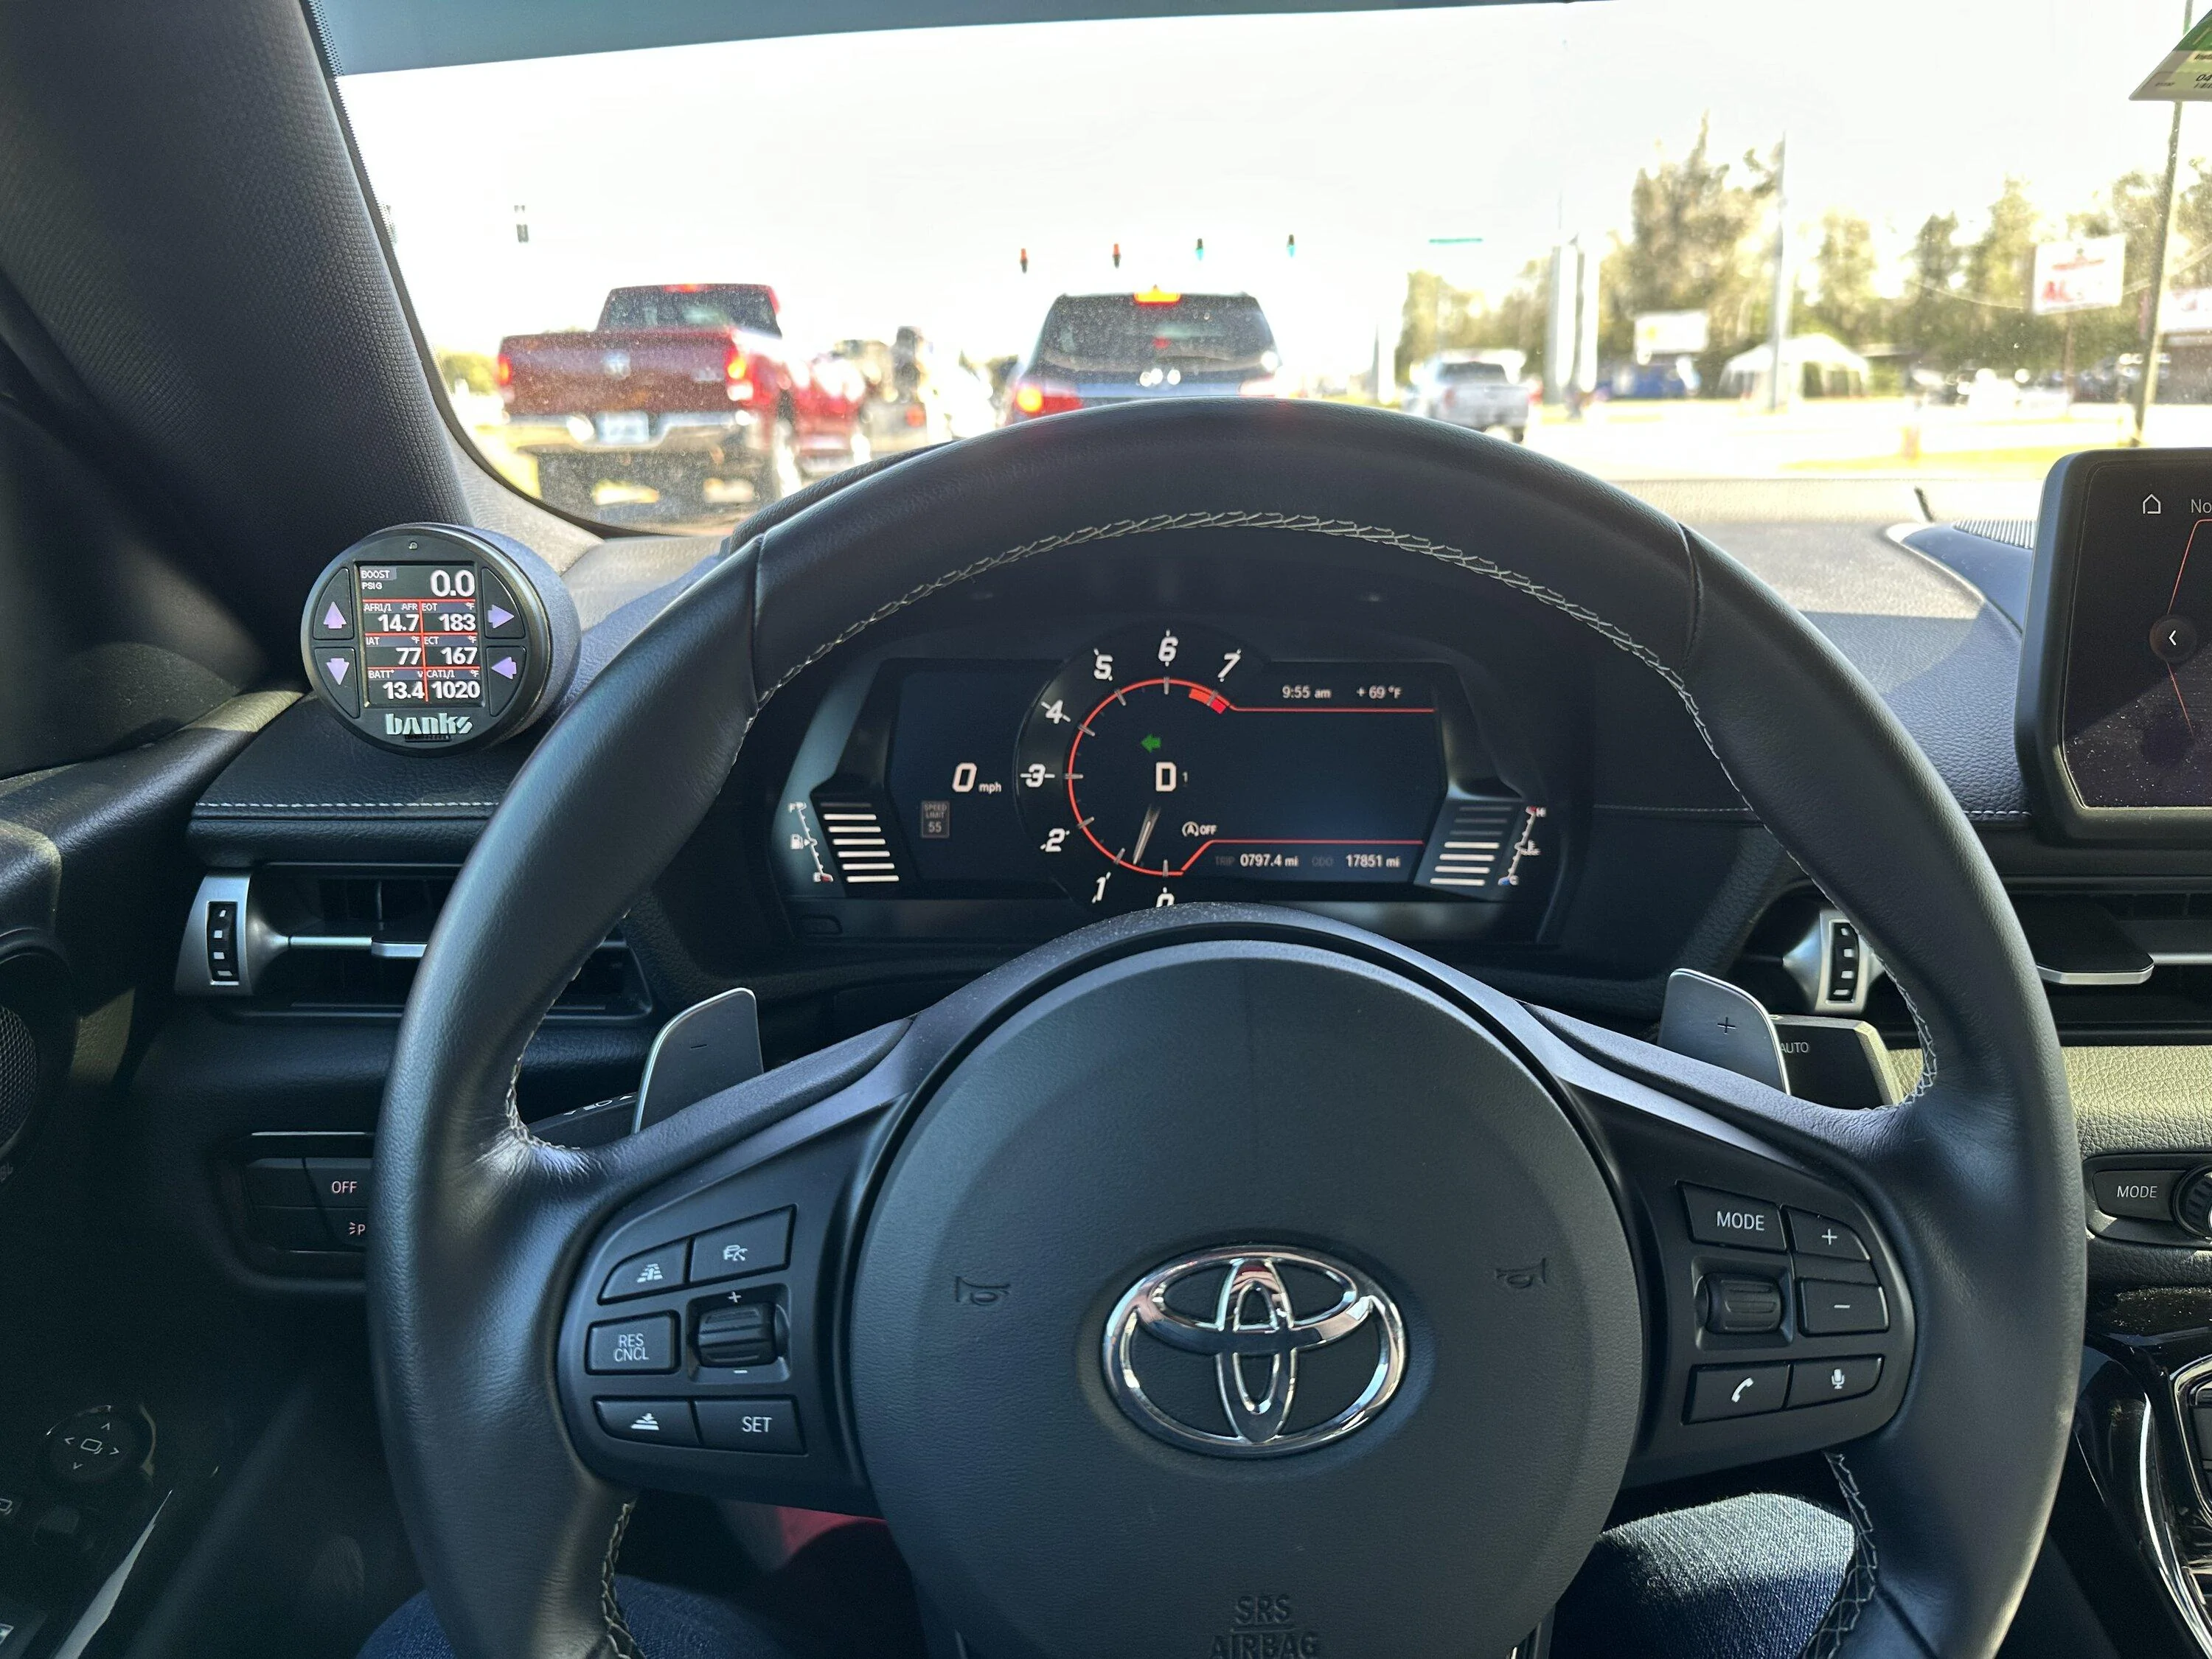
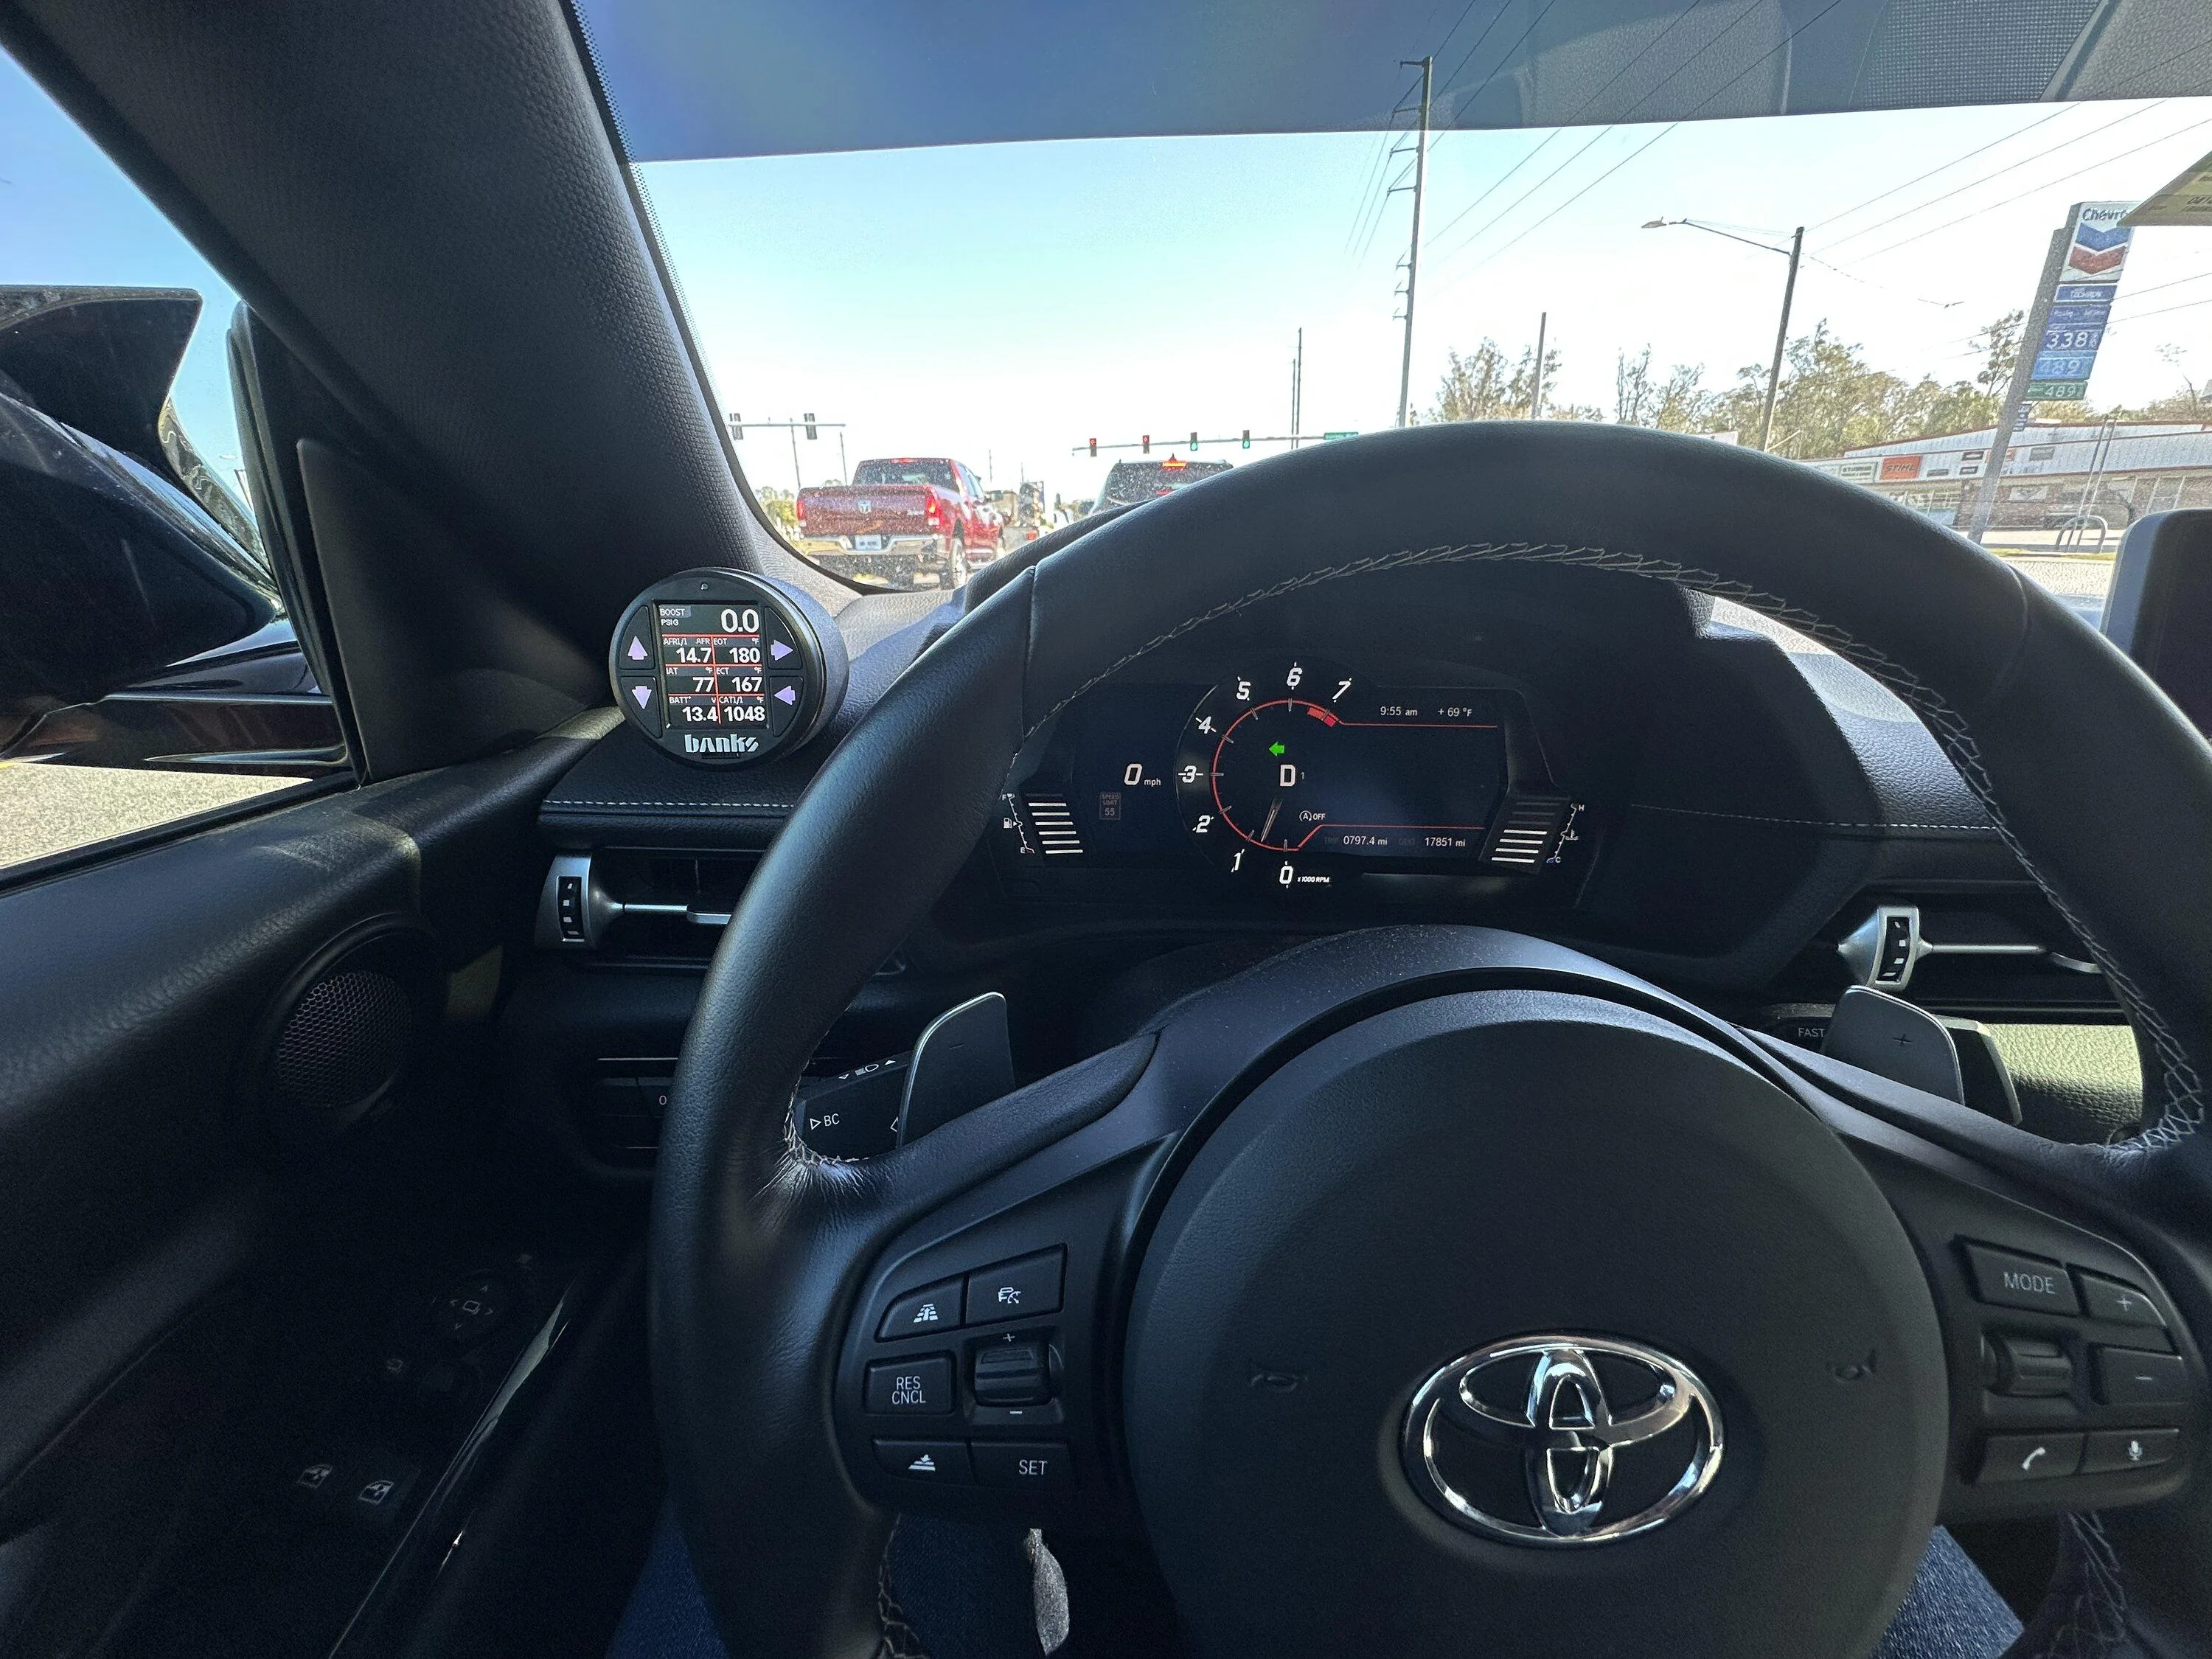
Fully Installed Pics Attached
Sponsored
Last edited:
 ?
?