Sponsored

Designing FT-1 inspired wing- Looking to see if there is demand as well as suggestions for improvement

rwense

Well-Known Member
Silver Sponsor
First Name
Evan
Joined
Dec 10, 2021
Threads
45
Messages
710
Reaction score
1,144
Location
Pittsburgh, PA
Car(s)
21 Nitro Yellow A90 Supra, 10 Honda Fit Sport 5spd
All good man, good luck with the prep and the upcoming season!


From what I’ve gathered with CFD, like you said, it’s just a simulation and results can vary. Now that I’ve figured out how to run it on a personal level, I’ll mainly use it as a tool to help guide design tweaks rather than make any performance claims.


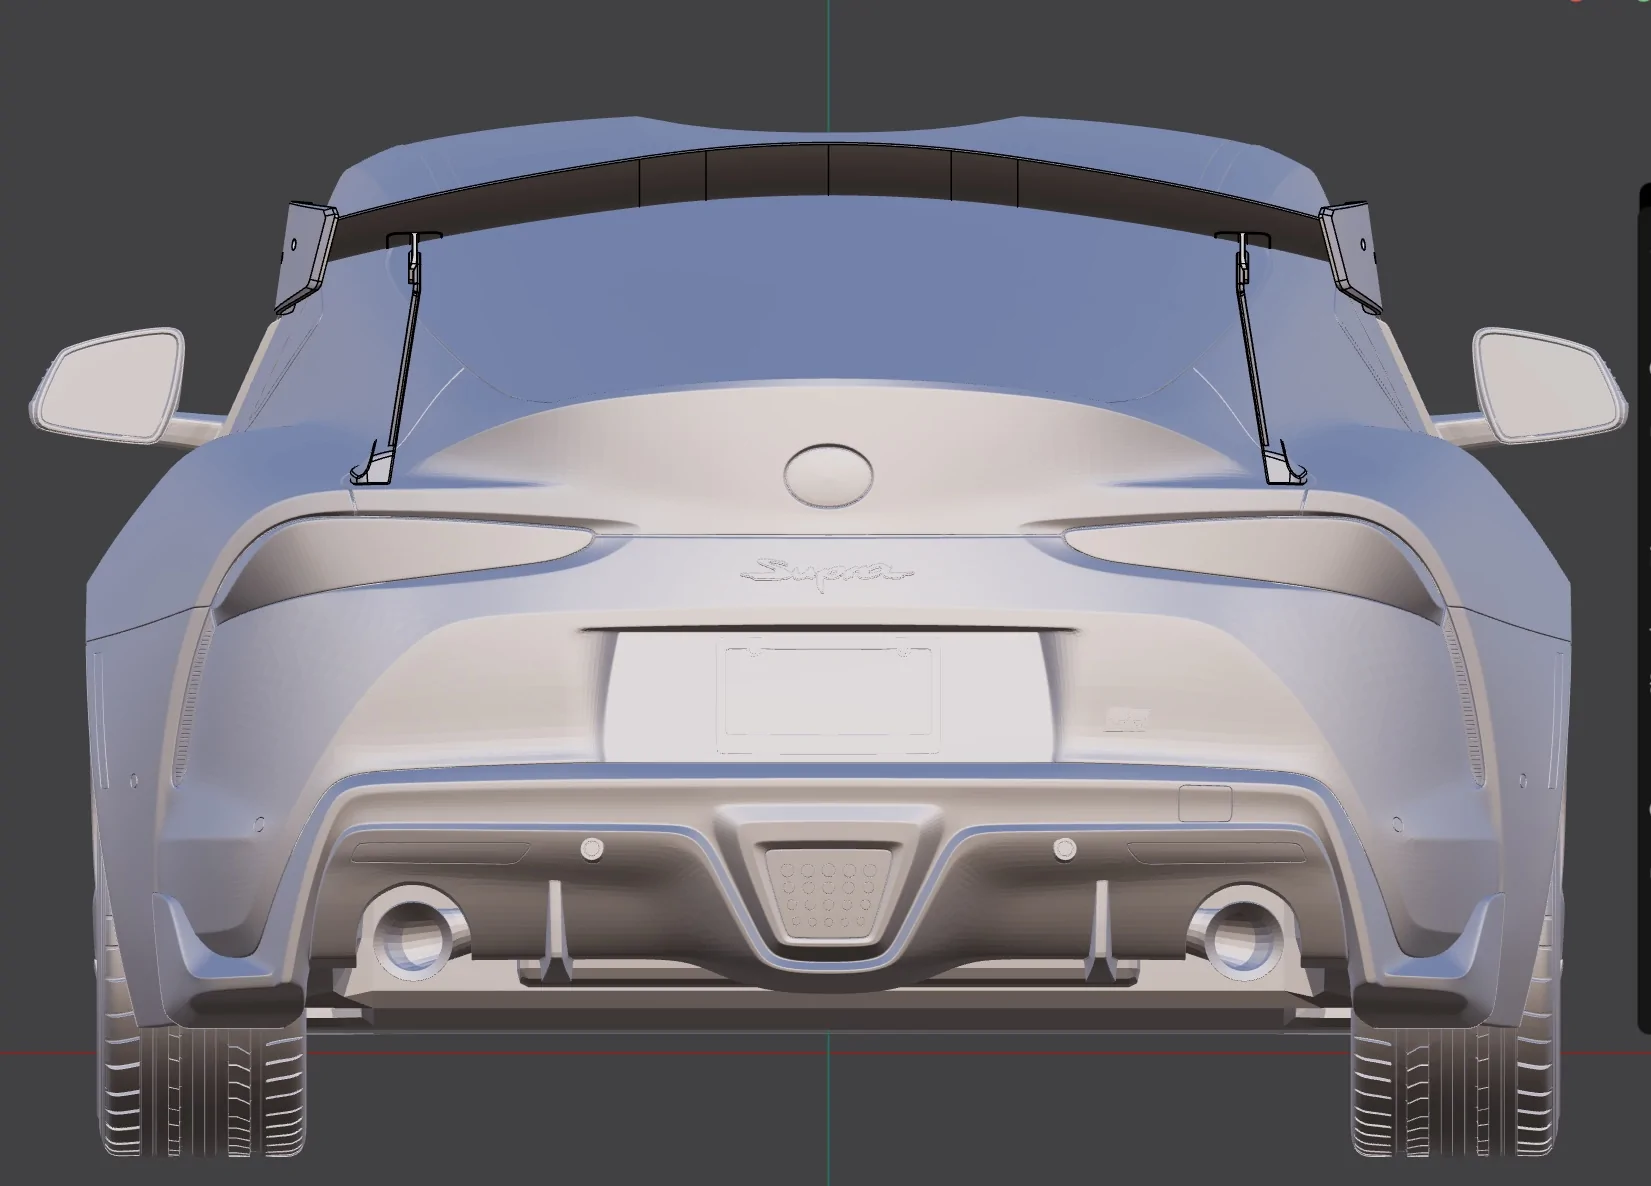
As for the wind tunnel, I never really expected to take it that far. The goal from the start was to create a well-designed street wing with some level of functionality, and I think it’s heading in that direction so far.


For the gurney, that can definitely be added (pretty easily). I wanted to keep the main profile as clean as possible, but a built-in or add-on gurney would help from a functional standpoint if/when I decide to include it.


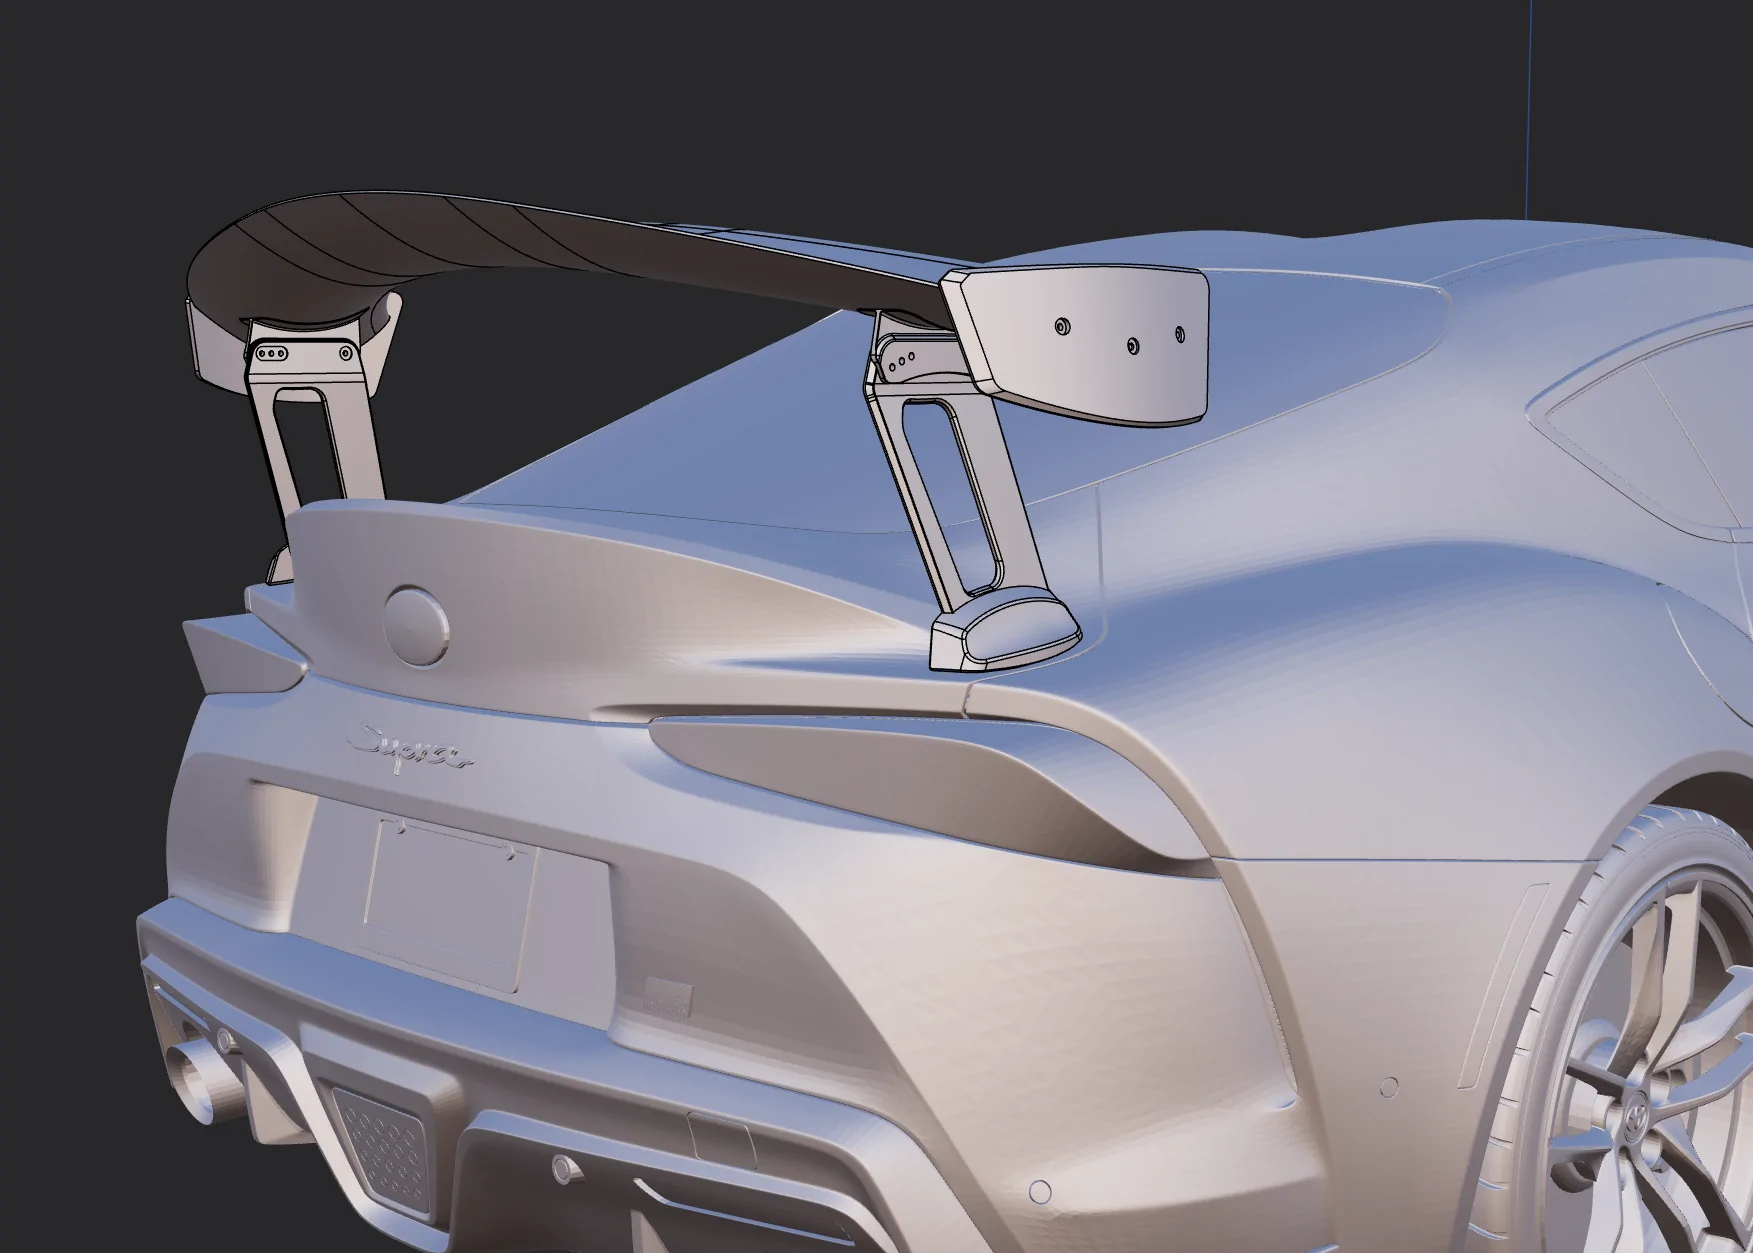
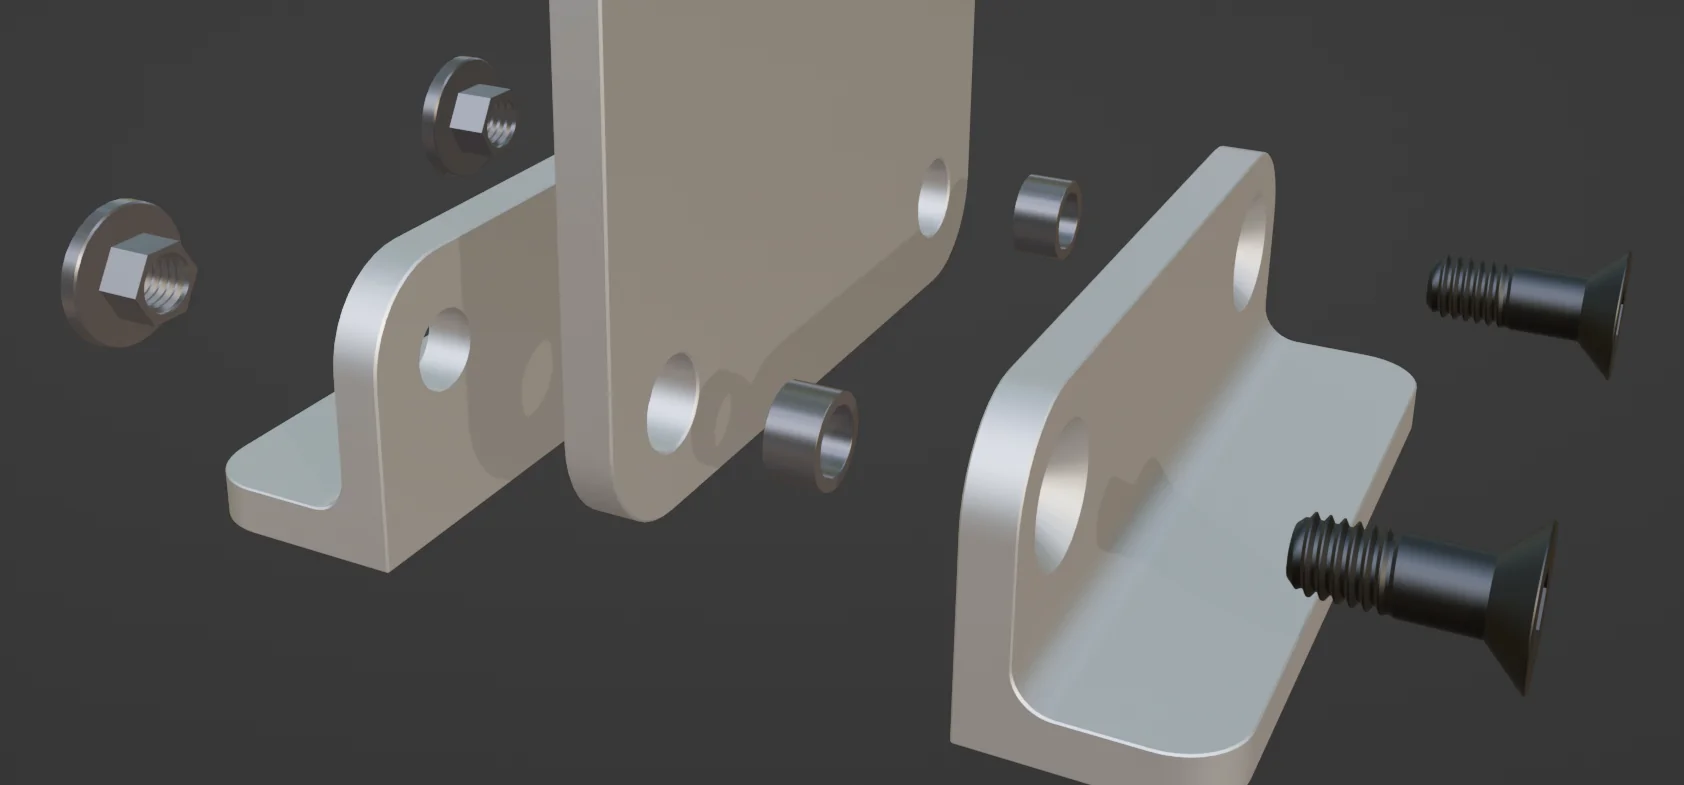
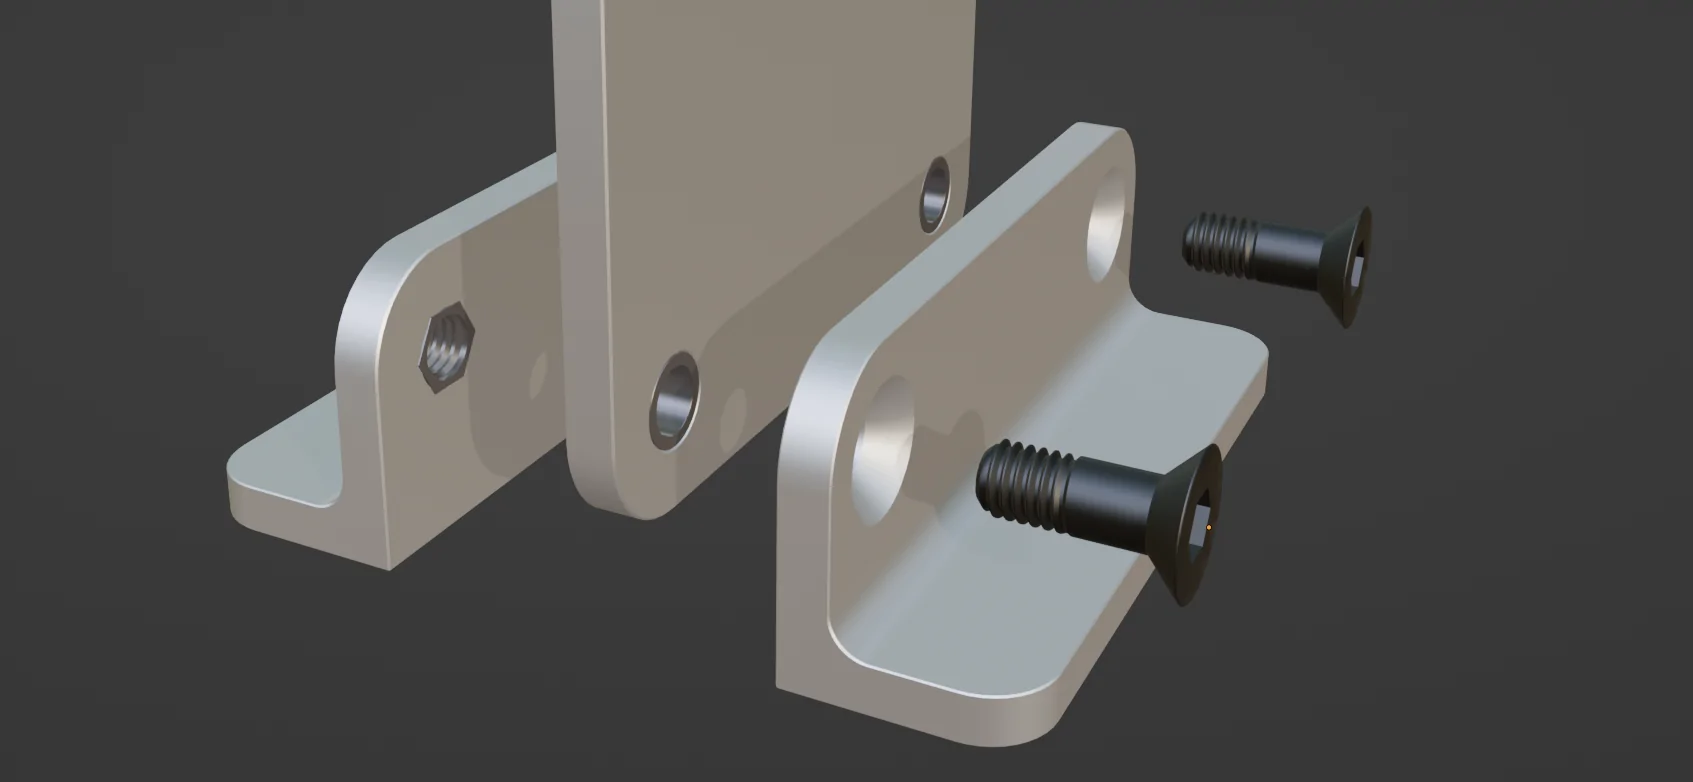
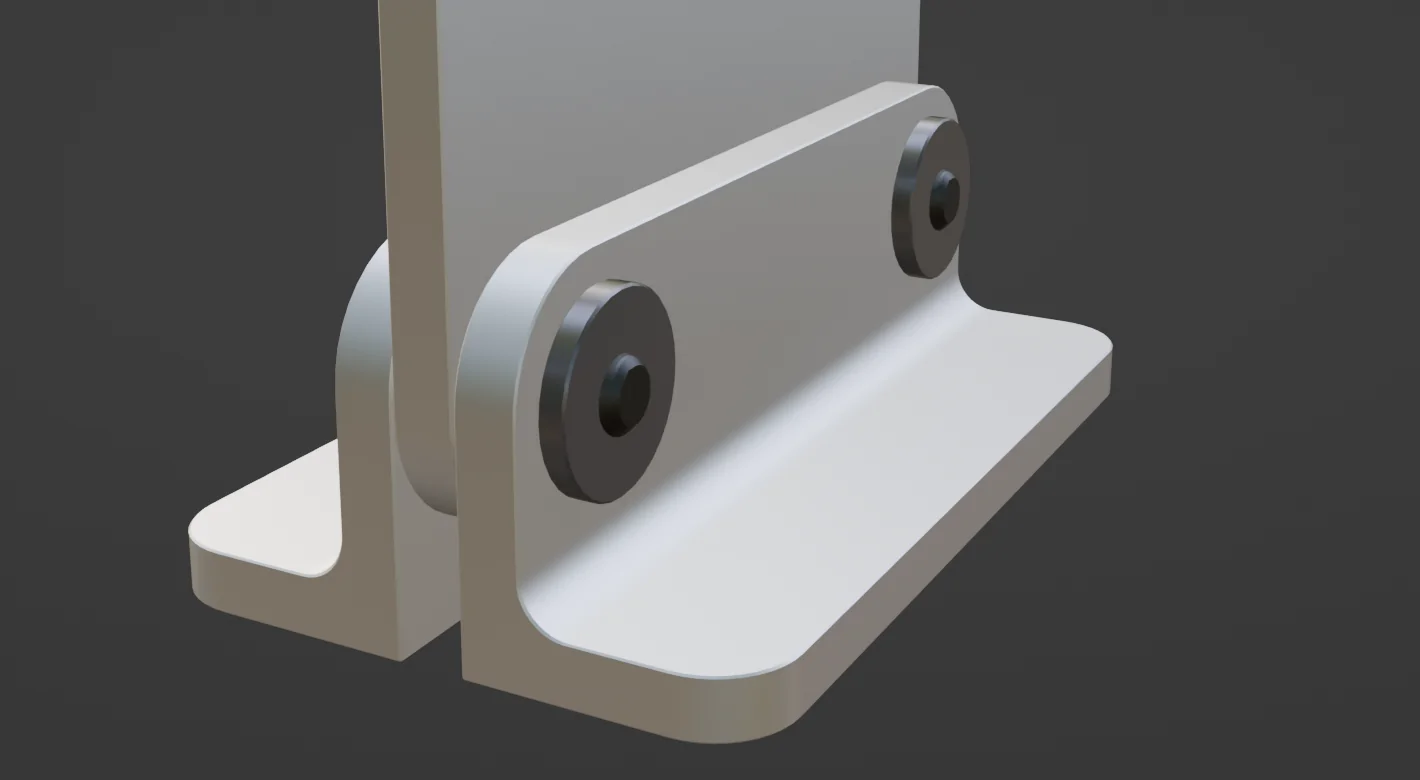
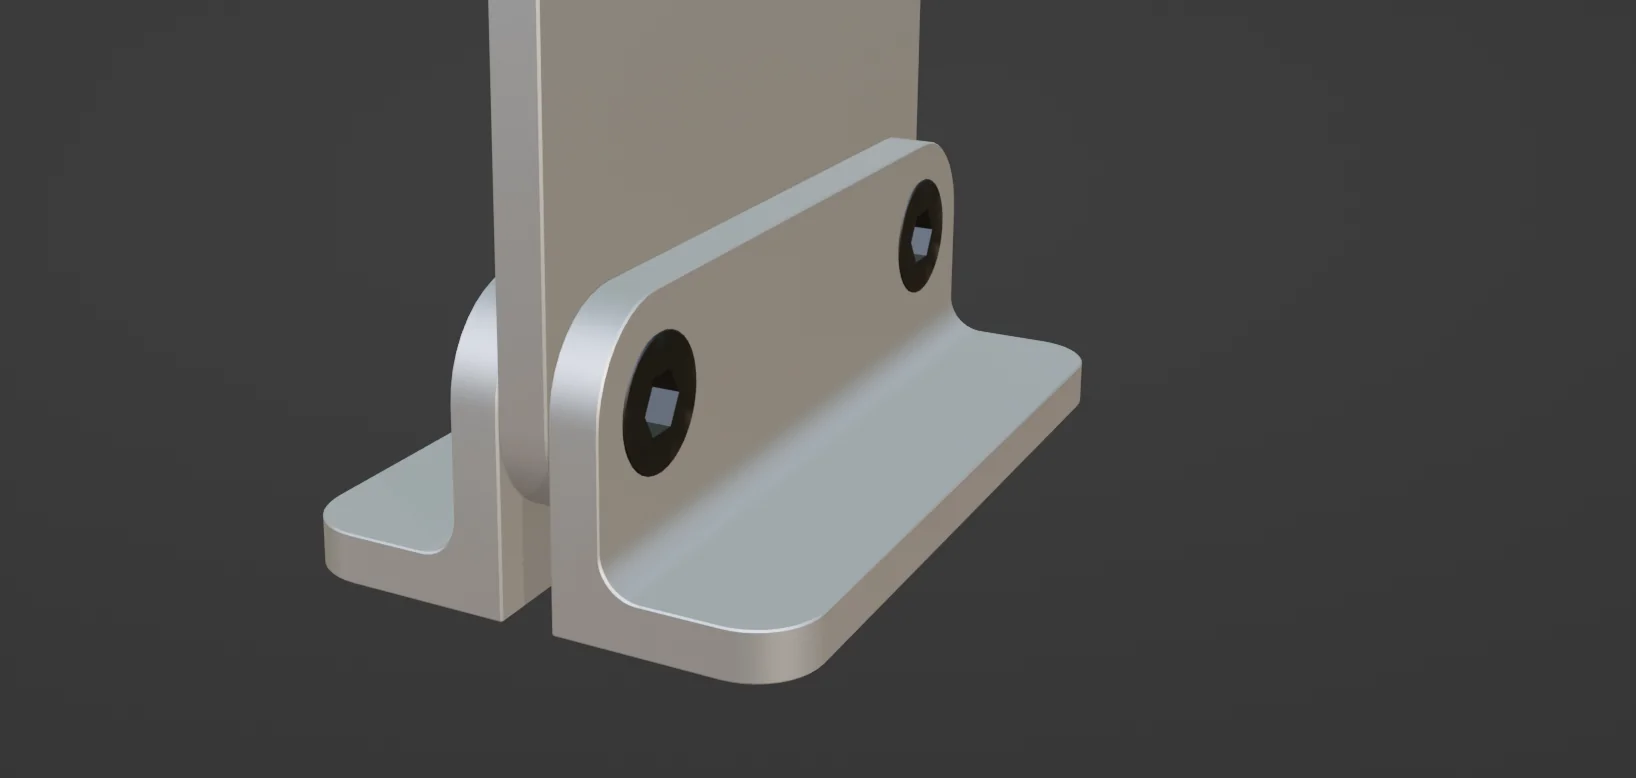
As for the mounts, I don’t expect most installs will require re-drilling, but I’m not calling out compatibility with any specific setups. The mounting brackets themselves are fully my own design.


I’ll also be including a small printed or fiberglass drill template so installs are straightforward if the holes aren’t already there.
Thank you!

Makes perfect sense. Its something you can always do down the road. There are other options for indicators in real life like wool tufts and flow-vis. They each have their pluses and minuses but better than nothing!

As for the gurney, tbh the more I think about it, rhe more it may not even be worth wasting your design time on. Personally I just stuck a gurney on my wing with 3M tape and its been fine for 2 years. I suspect if someone is looking for extea df they would either go to a more motorsports-oriented wing or just stick one on. Good idea though!

As for the drill templates YES YES YES to a physical/non paper guide. I did the same for my fender vents (see Here in the install guide). It makes things foolproof. I think that alone would net you more customers in my experience. Literally anything to make the install as easy as possible pays dividends.
Sponsored


i3igpete

Well-Known Member
Joined
May 16, 2022
Threads
44
Messages
1,257
Reaction score
1,491
Location
Chicago
Car(s)
2023 3.0L 8AT
Thats the tricky thing, can't do a stick-on angle aluminum gurney for a 3d wing. You need to either mold the gurney to the wing shape, or find something sufficiently flexible
 
OP
OP
TheMaker

TheMaker

Well-Known Member
First Name
Cristian
Joined
Jan 30, 2026
Threads
1
Messages
81
Reaction score
64
Location
Toronto ON
Car(s)
Mazda CX-5
Thats the tricky thing, can't do a stick-on angle aluminum gurney for a 3d wing. You need to either mold the gurney to the wing shape, or find something sufficiently flexible
Yeah like I think the most beneficial approach might be to do an integrated gurney but keep it more subtle than something Motorsport-only. Itll still help capture more downforce but wont be a a focal point at 5-6mm tall which is in the realm of 2% chord length (280mm)
 

rwense

Well-Known Member
Silver Sponsor
First Name
Evan
Joined
Dec 10, 2021
Threads
45
Messages
710
Reaction score
1,144
Location
Pittsburgh, PA
Car(s)
21 Nitro Yellow A90 Supra, 10 Honda Fit Sport 5spd
Thats the tricky thing, can't do a stick-on angle aluminum gurney for a 3d wing. You need to either mold the gurney to the wing shape, or find something sufficiently flexible
Ohhhh you're right, I completely forgot this was a 3D wing lmao.
 
OP
OP
TheMaker

TheMaker

Well-Known Member
First Name
Cristian
Joined
Jan 30, 2026
Threads
1
Messages
81
Reaction score
64
Location
Toronto ON
Car(s)
Mazda CX-5
Ohhhh you're right, I completely forgot this was a 3D wing lmao.
I did a gurney version.. cut the chord by 10mm down to 270mm and gurney is 6mm tall and thick. The thickness plays a part in the manufacturing so it’s necessary. We’ll see how the gurney affects the wing

update: 6mm tall gurney didnt add much performance in my personal cfd test, not worth it right now
 
Last edited:
OP
OP
TheMaker

TheMaker

Well-Known Member
First Name
Cristian
Joined
Jan 30, 2026
Threads
1
Messages
81
Reaction score
64
Location
Toronto ON
Car(s)
Mazda CX-5
Quick update after a few more CFD runs:

Tested a revised version of the wing with:


  • chord reduced to 270 mm
  • AoA reduced to 5°
  • slight height increase (~2 mm)

All runs were done at the same speed (144 km/h) using the same setup for comparison.

Observations from the current CFD:


  • The car without the wing shows lift
  • Adding the wing reverses that into downforce
  • The 5° / 270 mm version maintained similar behavior to the previous 6° setup
  • Drag is slightly reduced compared to the 6° version
  • Adding a gurney in this configuration increased drag more than it improved downforce

Takeaway:


At this stage, the CFD suggests the revised setup is a more efficient configuration without needing a gurney.


Still working through model quality and refining the setup, so I’m using this mainly to guide development rather than making any hard performance claims.

All in all, happy with the wing’s design
 
OP
OP
TheMaker

TheMaker

Well-Known Member
First Name
Cristian
Joined
Jan 30, 2026
Threads
1
Messages
81
Reaction score
64
Location
Toronto ON
Car(s)
Mazda CX-5
Using this model to showcase the wing from now on. Its much cleaner than the scan data and its the model Ive been using for the testing.

IMG_1233.webp


IMG_1235.webp


IMG_1234.webp


IMG_1238.webp
 
OP
OP
TheMaker

TheMaker

Well-Known Member
First Name
Cristian
Joined
Jan 30, 2026
Threads
1
Messages
81
Reaction score
64
Location
Toronto ON
Car(s)
Mazda CX-5
Finally got around to scanning the trunk top and bottom.

Got some useful scans/data... ill be making the mounting holes and underside supports soon

Screenshot 2026-04-03 115228.webp


Screenshot 2026-04-03 131653.webp


Screenshot 2026-04-03 131723.webp


Screenshot 2026-04-03 131739.webp
 

Strych9

Well-Known Member
Joined
Jun 3, 2025
Threads
2
Messages
56
Reaction score
69
Location
Ohio
Car(s)
2021 3.0
As for construction, current plan is:

• Wing: 3mm composite shell (carbon + fiberglass), reinforced internally with 5–6 spars for stiffness

• Upper mount: 6mm carbon bracket, bonded + riveted into the wing structure

• Risers: 8mm 6061 aluminum

• Lower mount / trunk mount: CNC 6061 aluminum

• Mounting geometry: middle riser hole is angled ~20° or so i can’t quite remember now, to provide cross stiffness

• Underside support: additional aluminum bracing under the trunk for load distribution

Main focus right now is making sure the load path is solid from wing → risers → mounts → chassis so nothing flexes or fatigues over time.

Still dialing in details, but trying to keep it strong, serviceable, and not overly complicated to manufacture.
A 3mm thick shell is close to what I've seen for limitless budget stuff that has to survive Sebring (Mind the Bumps) at over 200mph. The sun will get to it before anything else at 3mm thick.

8mm thick 6061 would be fine as long as it's 6061-T6. It's probably never going bend much but you do have to worry about wearing the mounting holes into ovals. Just make sure that it's cut on a water jet so that you don't lose the T6 temper. I'm not 100% sure that a laser would be THAT bad but I certainly wouldn't want it rough cut on a plasma cutter before going to the mill/CNC.

As for the mounting holes, I'd order some steel sleeves and press them in. If you're using M8 hardware, I'd grab some 8mm ID sleeves with a wall thickness of around 1.5-2mm. The larger surface area as well as the tight fit will help the aluminum last. If you can't find any, let me know and I can turn some on the lathe and heat treat them. Just please don't ask me to make 100 of them and we'll be good lol.

On top of that, not every single piece has to be super stiff. If the wing bracket and the riser are stiff, the trunk bracket doesn't have much to worry about beyond just holding the load. The same is true if you make the trunk mount and the riser stiff.

Additionally, putting everything you can in double shear will always be an improvement. Not sure what size hardware you're going for, but M6 would be plenty with sleeves and double shear.

I'd also look at something to sit between the mounts and the risers so that any movement due to manufacturing tolerances doesn't chew the aluminum up over time. Maybe a piece of 1mm felt if you're going double shear or 1mm thick silicon if you're going single shear. Sounds weak but at 1mm thick, it'll be so sandwiched tight that it won't make a difference. I wouldn't put it at the top of the list, but it could be a nice little touch.
 

Strych9

Well-Known Member
Joined
Jun 3, 2025
Threads
2
Messages
56
Reaction score
69
Location
Ohio
Car(s)
2021 3.0
OP
OP
TheMaker

TheMaker

Well-Known Member
First Name
Cristian
Joined
Jan 30, 2026
Threads
1
Messages
81
Reaction score
64
Location
Toronto ON
Car(s)
Mazda CX-5
Feet pics anyone?
Trunk mount and hole position made easy with the scan.
Still need to do the under trunk supports

IMG_1272.webp
 
OP
OP
TheMaker

TheMaker

Well-Known Member
First Name
Cristian
Joined
Jan 30, 2026
Threads
1
Messages
81
Reaction score
64
Location
Toronto ON
Car(s)
Mazda CX-5
A 3mm thick shell is close to what I've seen for limitless budget stuff that has to survive Sebring (Mind the Bumps) at over 200mph. The sun will get to it before anything else at 3mm thick.

8mm thick 6061 would be fine as long as it's 6061-T6. It's probably never going bend much but you do have to worry about wearing the mounting holes into ovals. Just make sure that it's cut on a water jet so that you don't lose the T6 temper. I'm not 100% sure that a laser would be THAT bad but I certainly wouldn't want it rough cut on a plasma cutter before going to the mill/CNC.

As for the mounting holes, I'd order some steel sleeves and press them in. If you're using M8 hardware, I'd grab some 8mm ID sleeves with a wall thickness of around 1.5-2mm. The larger surface area as well as the tight fit will help the aluminum last. If you can't find any, let me know and I can turn some on the lathe and heat treat them. Just please don't ask me to make 100 of them and we'll be good lol.

On top of that, not every single piece has to be super stiff. If the wing bracket and the riser are stiff, the trunk bracket doesn't have much to worry about beyond just holding the load. The same is true if you make the trunk mount and the riser stiff.

Additionally, putting everything you can in double shear will always be an improvement. Not sure what size hardware you're going for, but M6 would be plenty with sleeves and double shear.

I'd also look at something to sit between the mounts and the risers so that any movement due to manufacturing tolerances doesn't chew the aluminum up over time. Maybe a piece of 1mm felt if you're going double shear or 1mm thick silicon if you're going single shear. Sounds weak but at 1mm thick, it'll be so sandwiched tight that it won't make a difference. I wouldn't put it at the top of the list, but it could be a nice little touch.

I guess i went a little overboard with the 3mm thick shell lol ... ill have to get more expert opinions on the composite side of things.

Did you mean like a flange nut when referring to sleeves? Photo for reference. I use those in prototyping but I can transfer it over to production (if and when). I like the look too.. same hardware appearance on both sides looks professional. I decided to go with M6 hardware all round but M8 would considered for the riser-to- trunk mount threads

I had considered a gasket in between the components as well but i never see other manufacturers use them so i thought i was just been over cautious... good to know my thinking was correct

Screenshot 2026-04-04 123142.webp
 
Last edited:

Strych9

Well-Known Member
Joined
Jun 3, 2025
Threads
2
Messages
56
Reaction score
69
Location
Ohio
Car(s)
2021 3.0
3mm isn't a bad choice. I'd call it good tbh. It'll last.

As for the sleeves and barrels, I'd look at using both. The countersunk bolt will hold it's piece in place but the slack between the bolt and the bolt hole on the other parts isn't a matter of whether it will or won't wear, but rather how much and how quickly.

I drafted this up just to show you what I mean. Instead of threaded barrels, I drew it up using broached inserts but either is viable for the opposite side. Yours looks better but the key to either is a very tight fit. You can absolutely make it work but every thousandth of slack contributes more to a problem. A broach fit is king when it comes to staying in place (when used correctly). I'm not sure where to get them but I've seen them come in a bag from a hardware supplier.

BlownUp.webp

Fit.webp

AssembledSideB.webp

AssembledSideA.webp


Of course if you're going single shear, a barrel nut on one side and a countersunk bolt on the other will absolutely work, you'll just have to make sure that your barrel depth and part thickness match either in the design phase or hand fitting phase.
 
OP
OP
TheMaker

TheMaker

Well-Known Member
First Name
Cristian
Joined
Jan 30, 2026
Threads
1
Messages
81
Reaction score
64
Location
Toronto ON
Car(s)
Mazda CX-5
3mm isn't a bad choice. I'd call it good tbh. It'll last.

As for the sleeves and barrels, I'd look at using both. The countersunk bolt will hold it's piece in place but the slack between the bolt and the bolt hole on the other parts isn't a matter of whether it will or won't wear, but rather how much and how quickly.

I drafted this up just to show you what I mean. Instead of threaded barrels, I drew it up using broached inserts but either is viable for the opposite side. Yours looks better but the key to either is a very tight fit. You can absolutely make it work but every thousandth of slack contributes more to a problem. A broach fit is king when it comes to staying in place (when used correctly). I'm not sure where to get them but I've seen them come in a bag from a hardware supplier.

BlownUp.webp

Fit.webp

AssembledSideB.webp

AssembledSideA.webp


Of course if you're going single shear, a barrel nut on one side and a countersunk bolt on the other will absolutely work, you'll just have to make sure that your barrel depth and part thickness match either in the design phase or hand fitting phase.
Nice example thank you


I was going single shear ...trunk mounts-to-riser, 3 bolt with the middle being at an angle. and single shear up top .

The riser being 8mm and the top bracket being 6mm thick is 14mm total... then add 2x2mm washers and a spring washer on the riser side you're at 18mm before the spring washer..20 ish mm with the spring washer.. so an 18mm barrel nut like a showed you should be long enough with just a little extra, the flange bolt (matching style) would be about 20mm.

The spring washer could be thicker to offset the setup so the flange bolt doesn't bottom out completely and leaves 1-2mm of thread. Thread locker too... or could just use nylocks and through-flanged or button head bolts. It looks a lot more aftermarket but nylocks are better
Sponsored


Top