IND | 3D Design A90 Supra Carbon Paddle Set DIY

iND-Distribution

Well-Known Member
Gold Sponsor
First Name
iND
Joined
Dec 10, 2019
Threads
42
Messages
146
Reaction score
203
Location
Chicago
Car(s)
A90 Supra
49228501008_d8a5830929_b.jpg


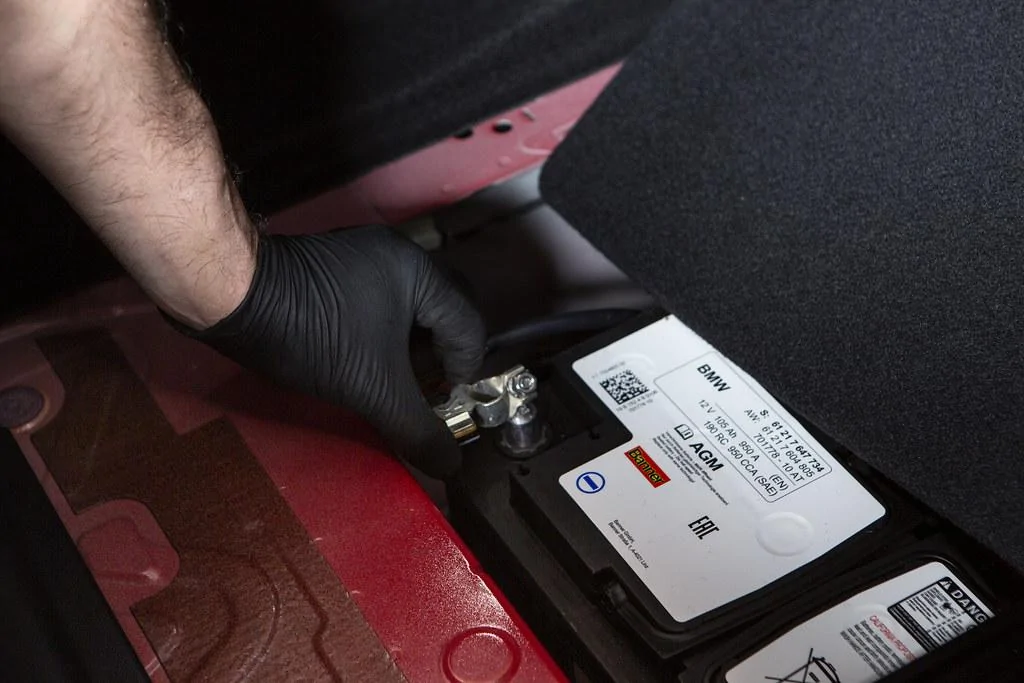
1.Disconnect the negative battery terminal and wait 10-15 minutes before proceeding. If you feel you’ll need more room to work, move the driver’s seat back before disconnecting the battery.

49215124961_aeca76c869_b.jpg


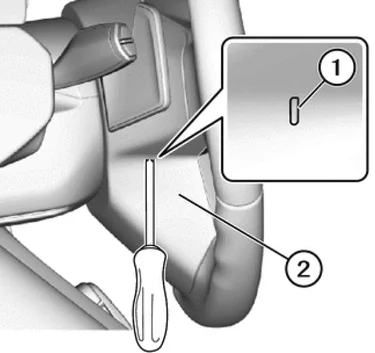
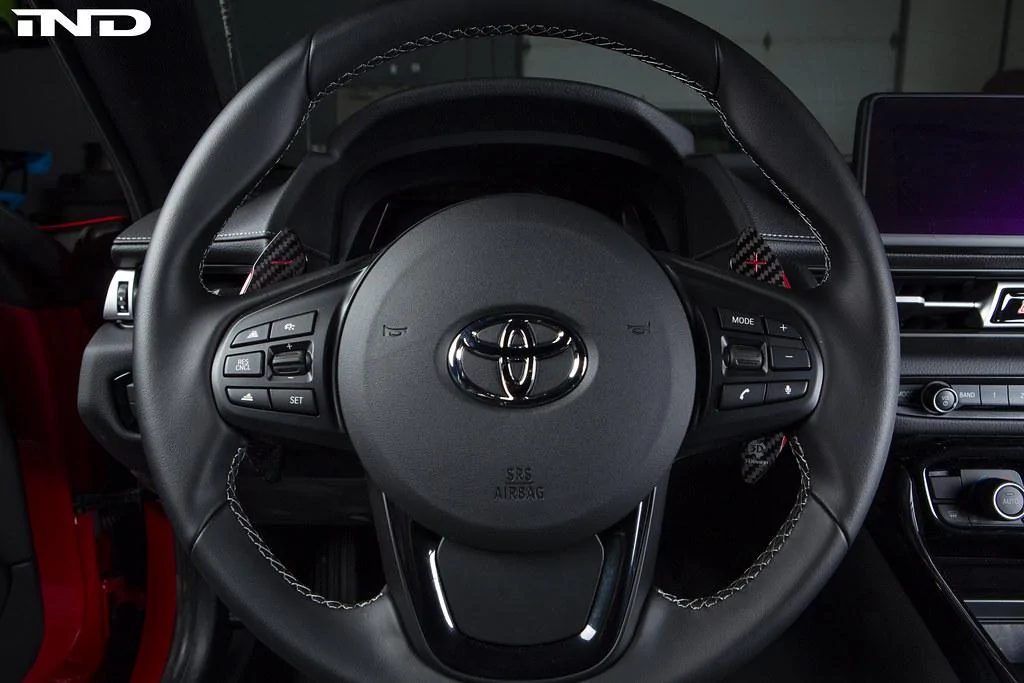
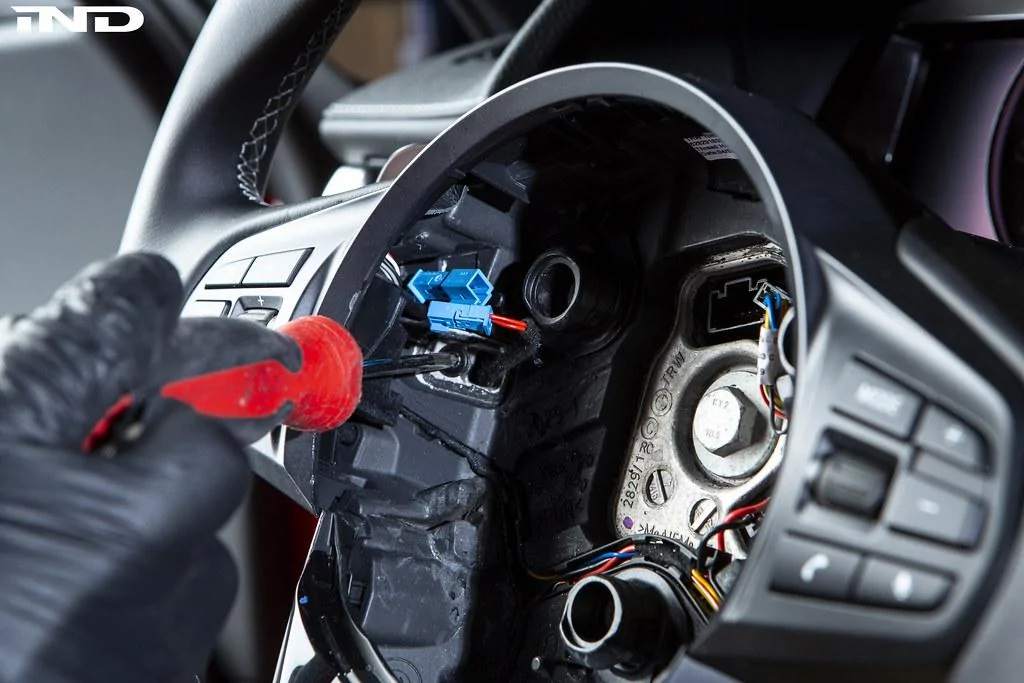
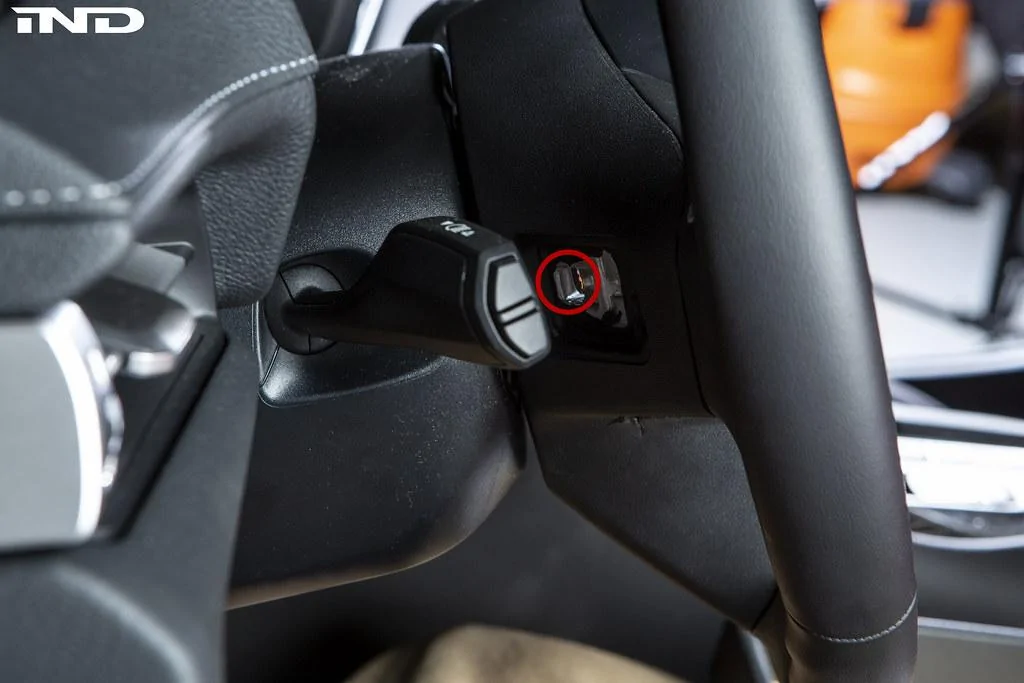
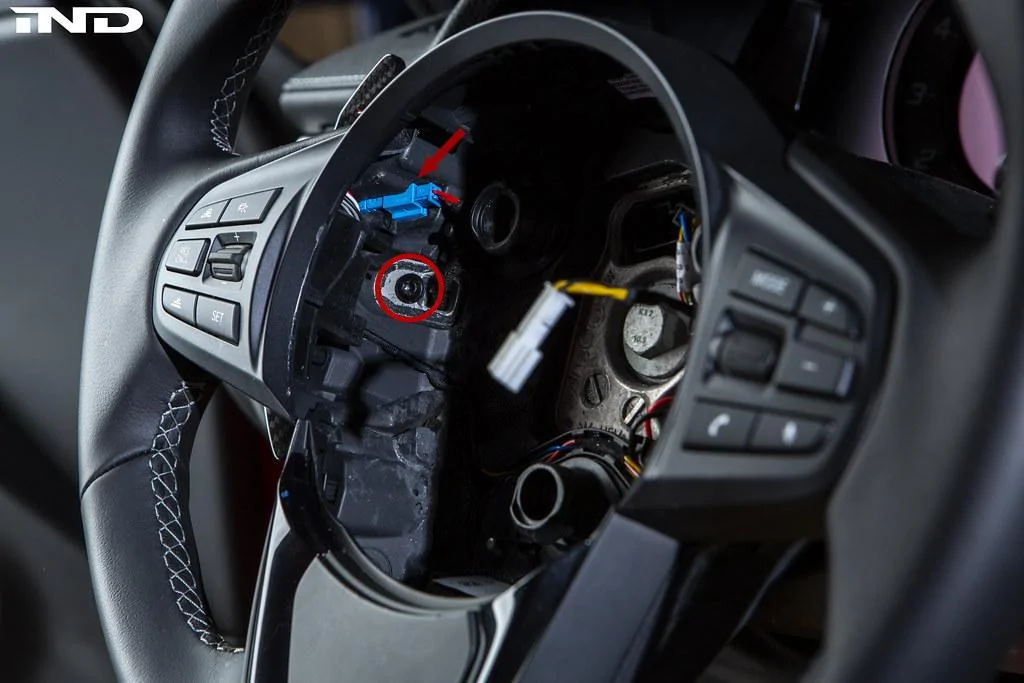
2. Locate the small slit on the right side of the OEM steering wheel. Insert a small flathead screwdriver and press the airbag retaining spring inwards to release the airbag from the wheel. Repeat this on the other side. Please see our reference photos to show how the spring mechanism controls the airbag release.

49215123516_b8dcba5bc8_b.jpg

49215354272_d69e0ebd99_b.jpg

49215125796_93fd4d72e9_b.jpg


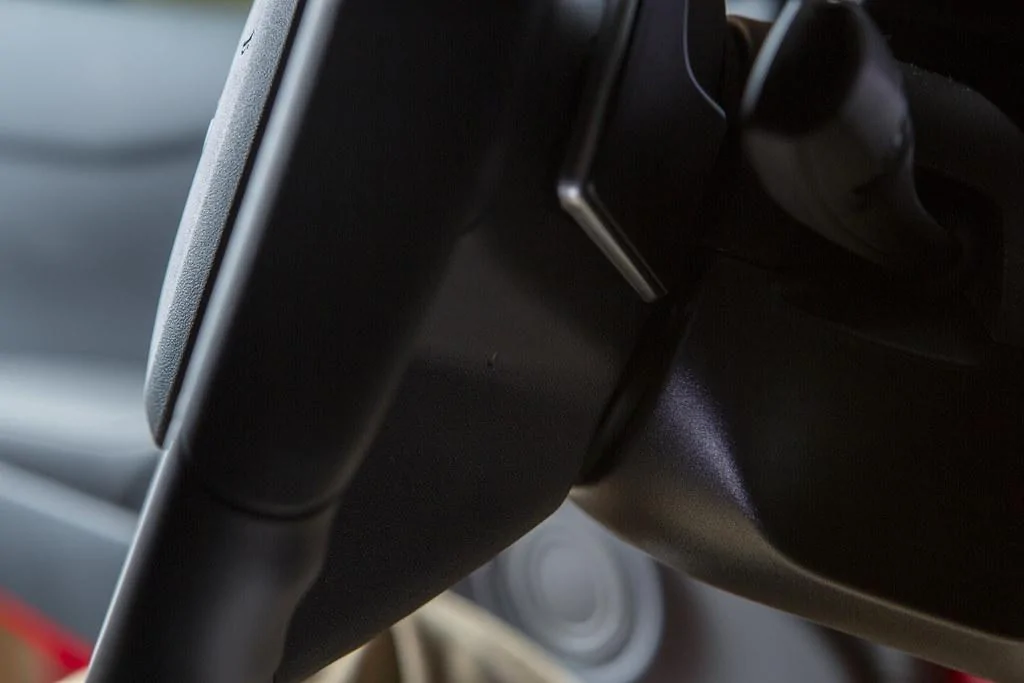
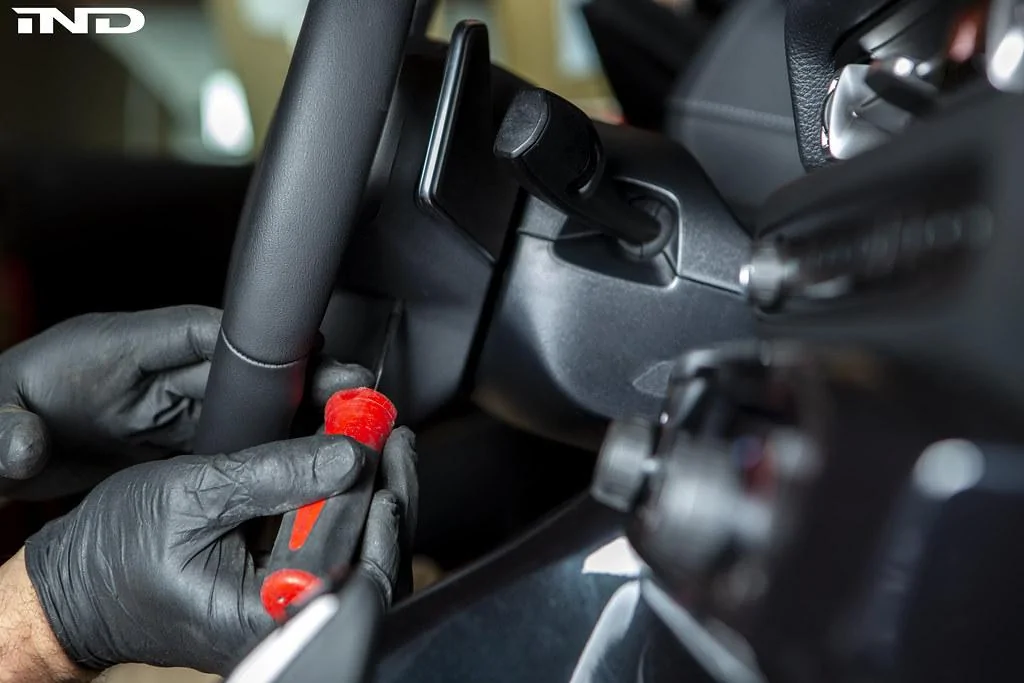
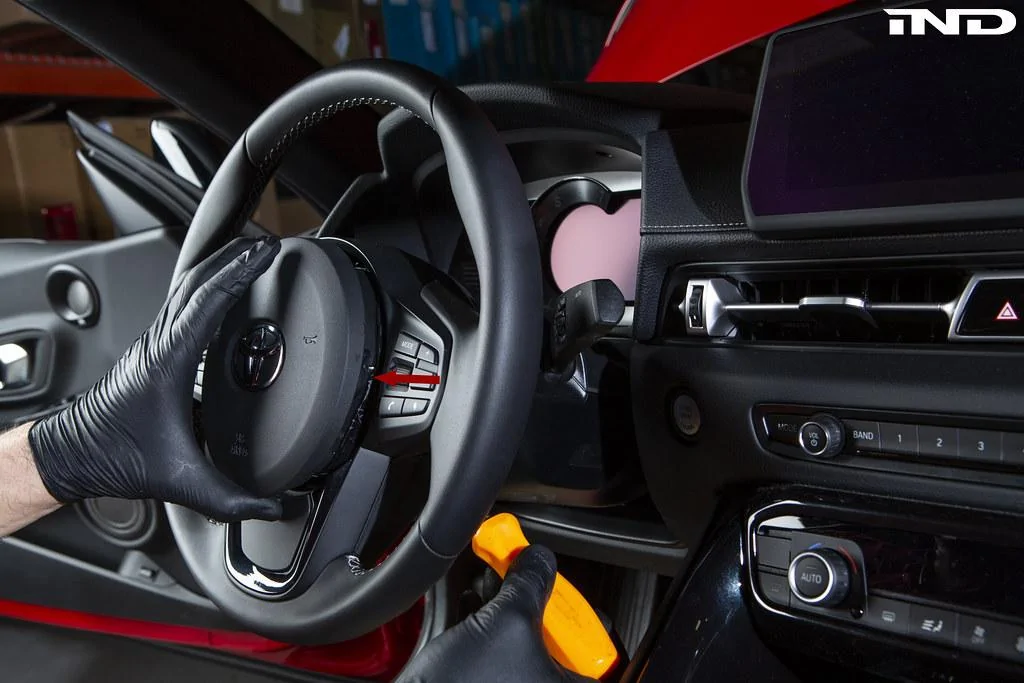
Airbag Spring Release


49215128406_d7748b6f59_b.jpg

49214646958_2eafe106da_b.jpg


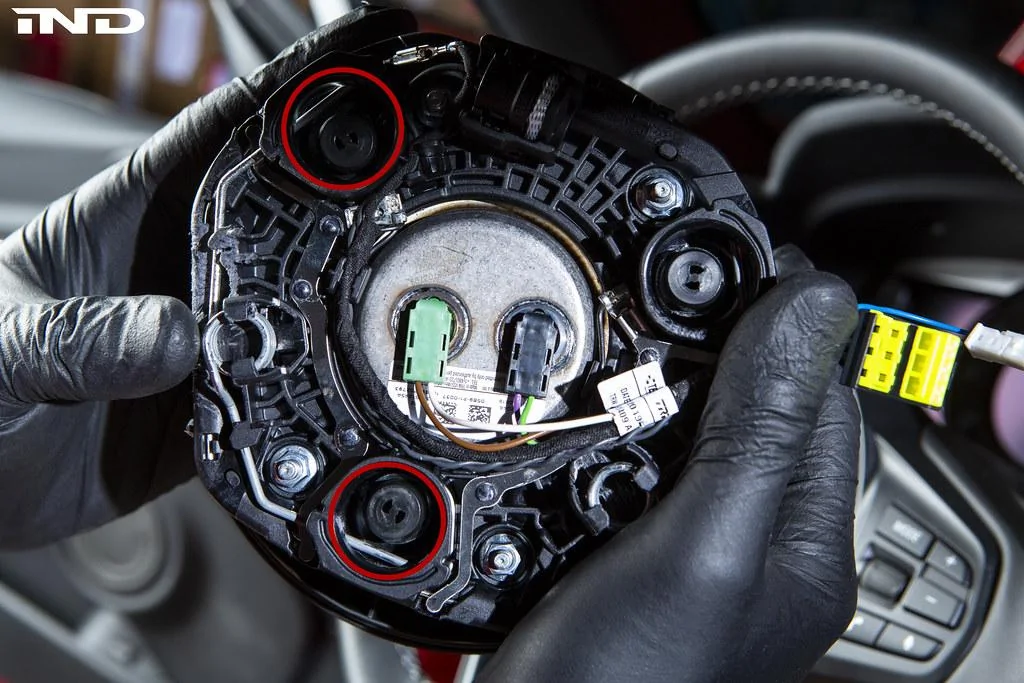
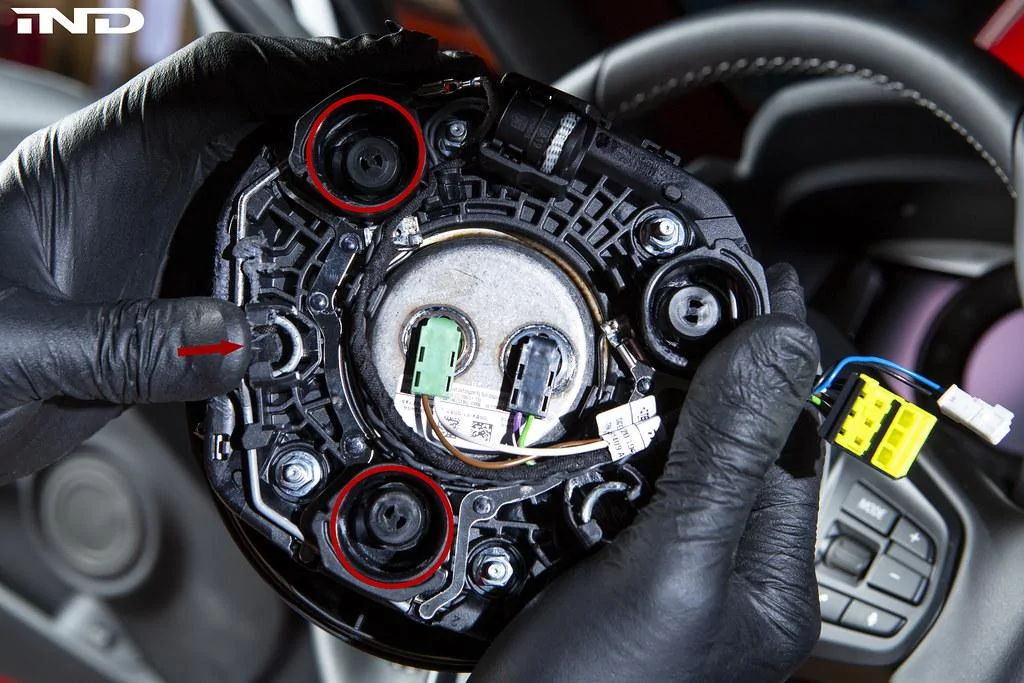
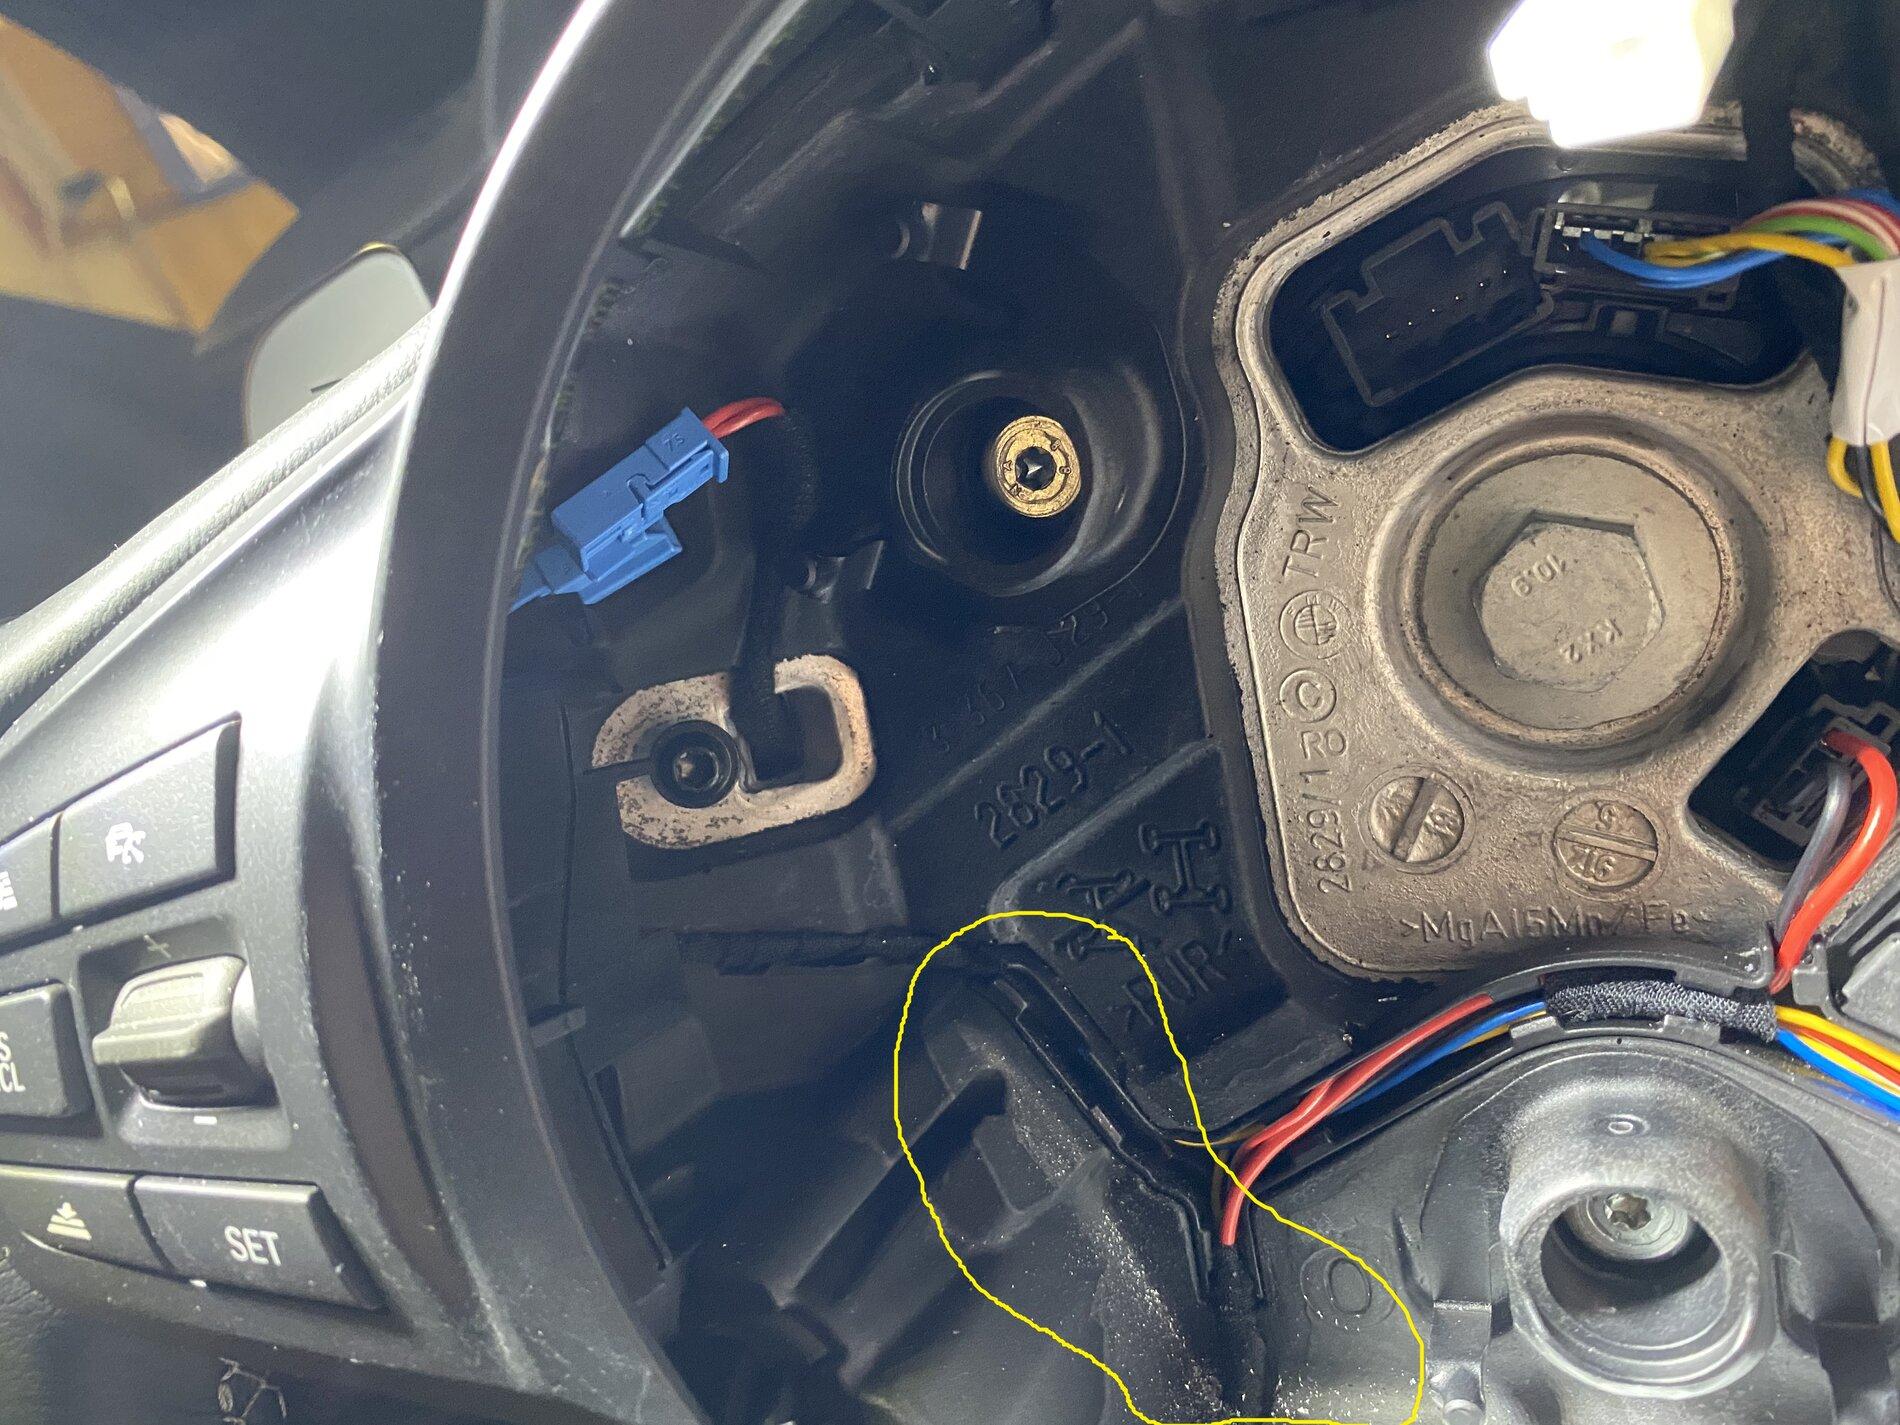
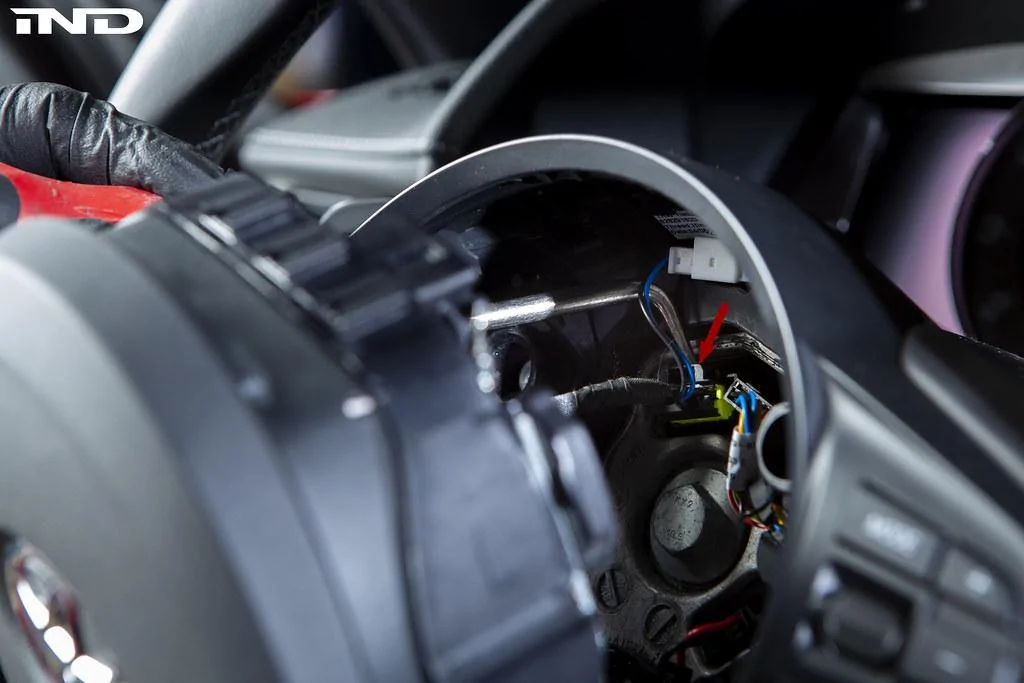
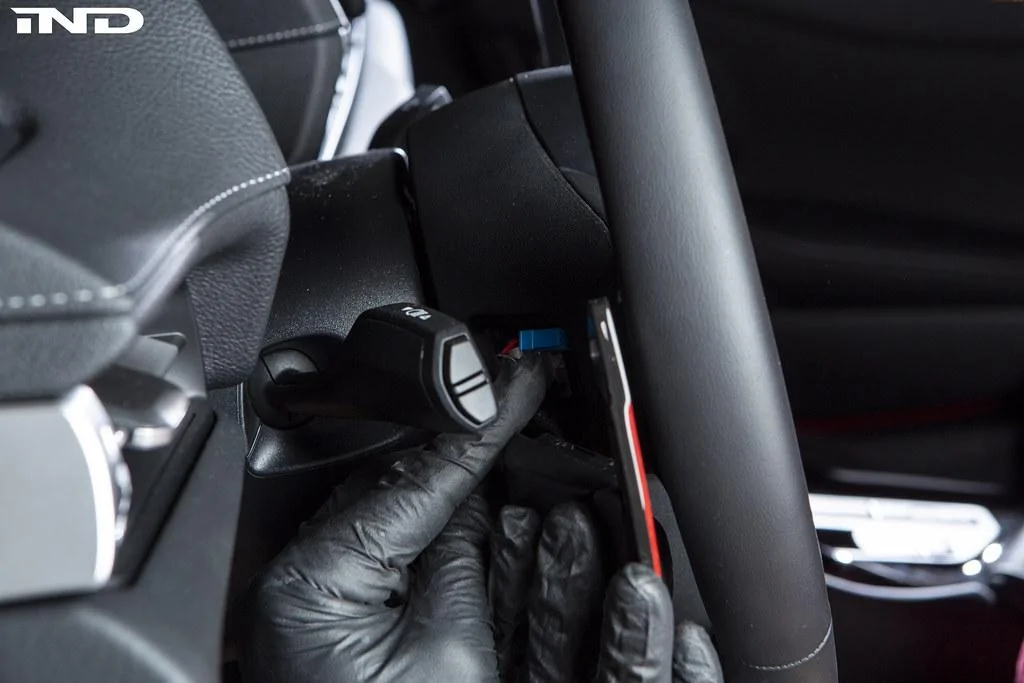
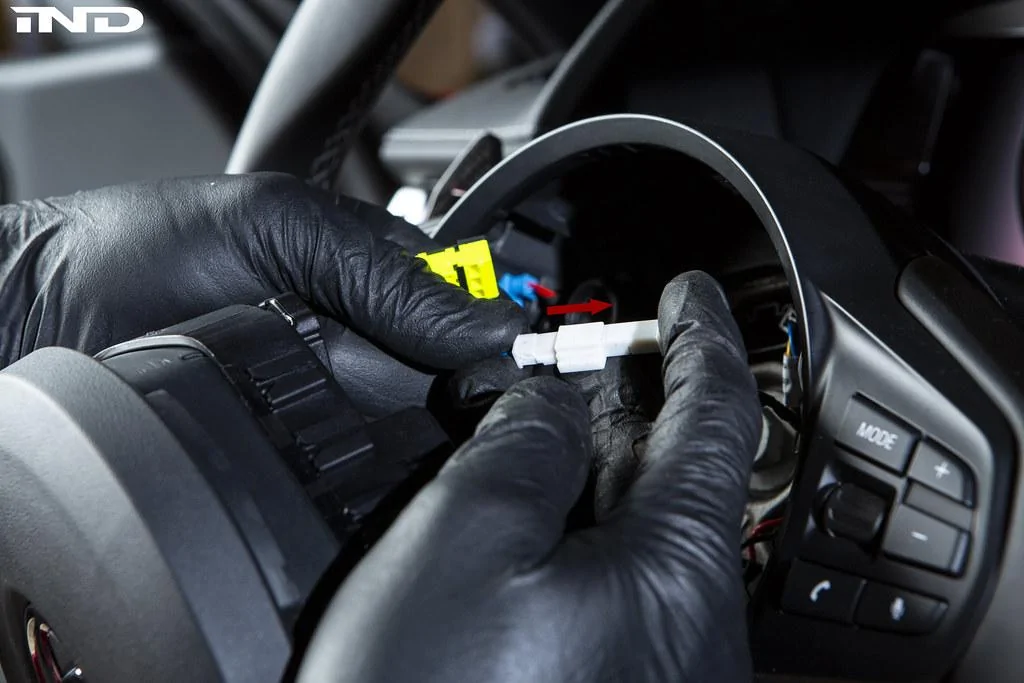
3. Before pulling the airbag away from the wheel completely, unclip the lime green / white airbag connectors that sits right above the 16mm steering wheel bolt. The airbag should now be completely free.

49215126631_05376aab27_b.jpg


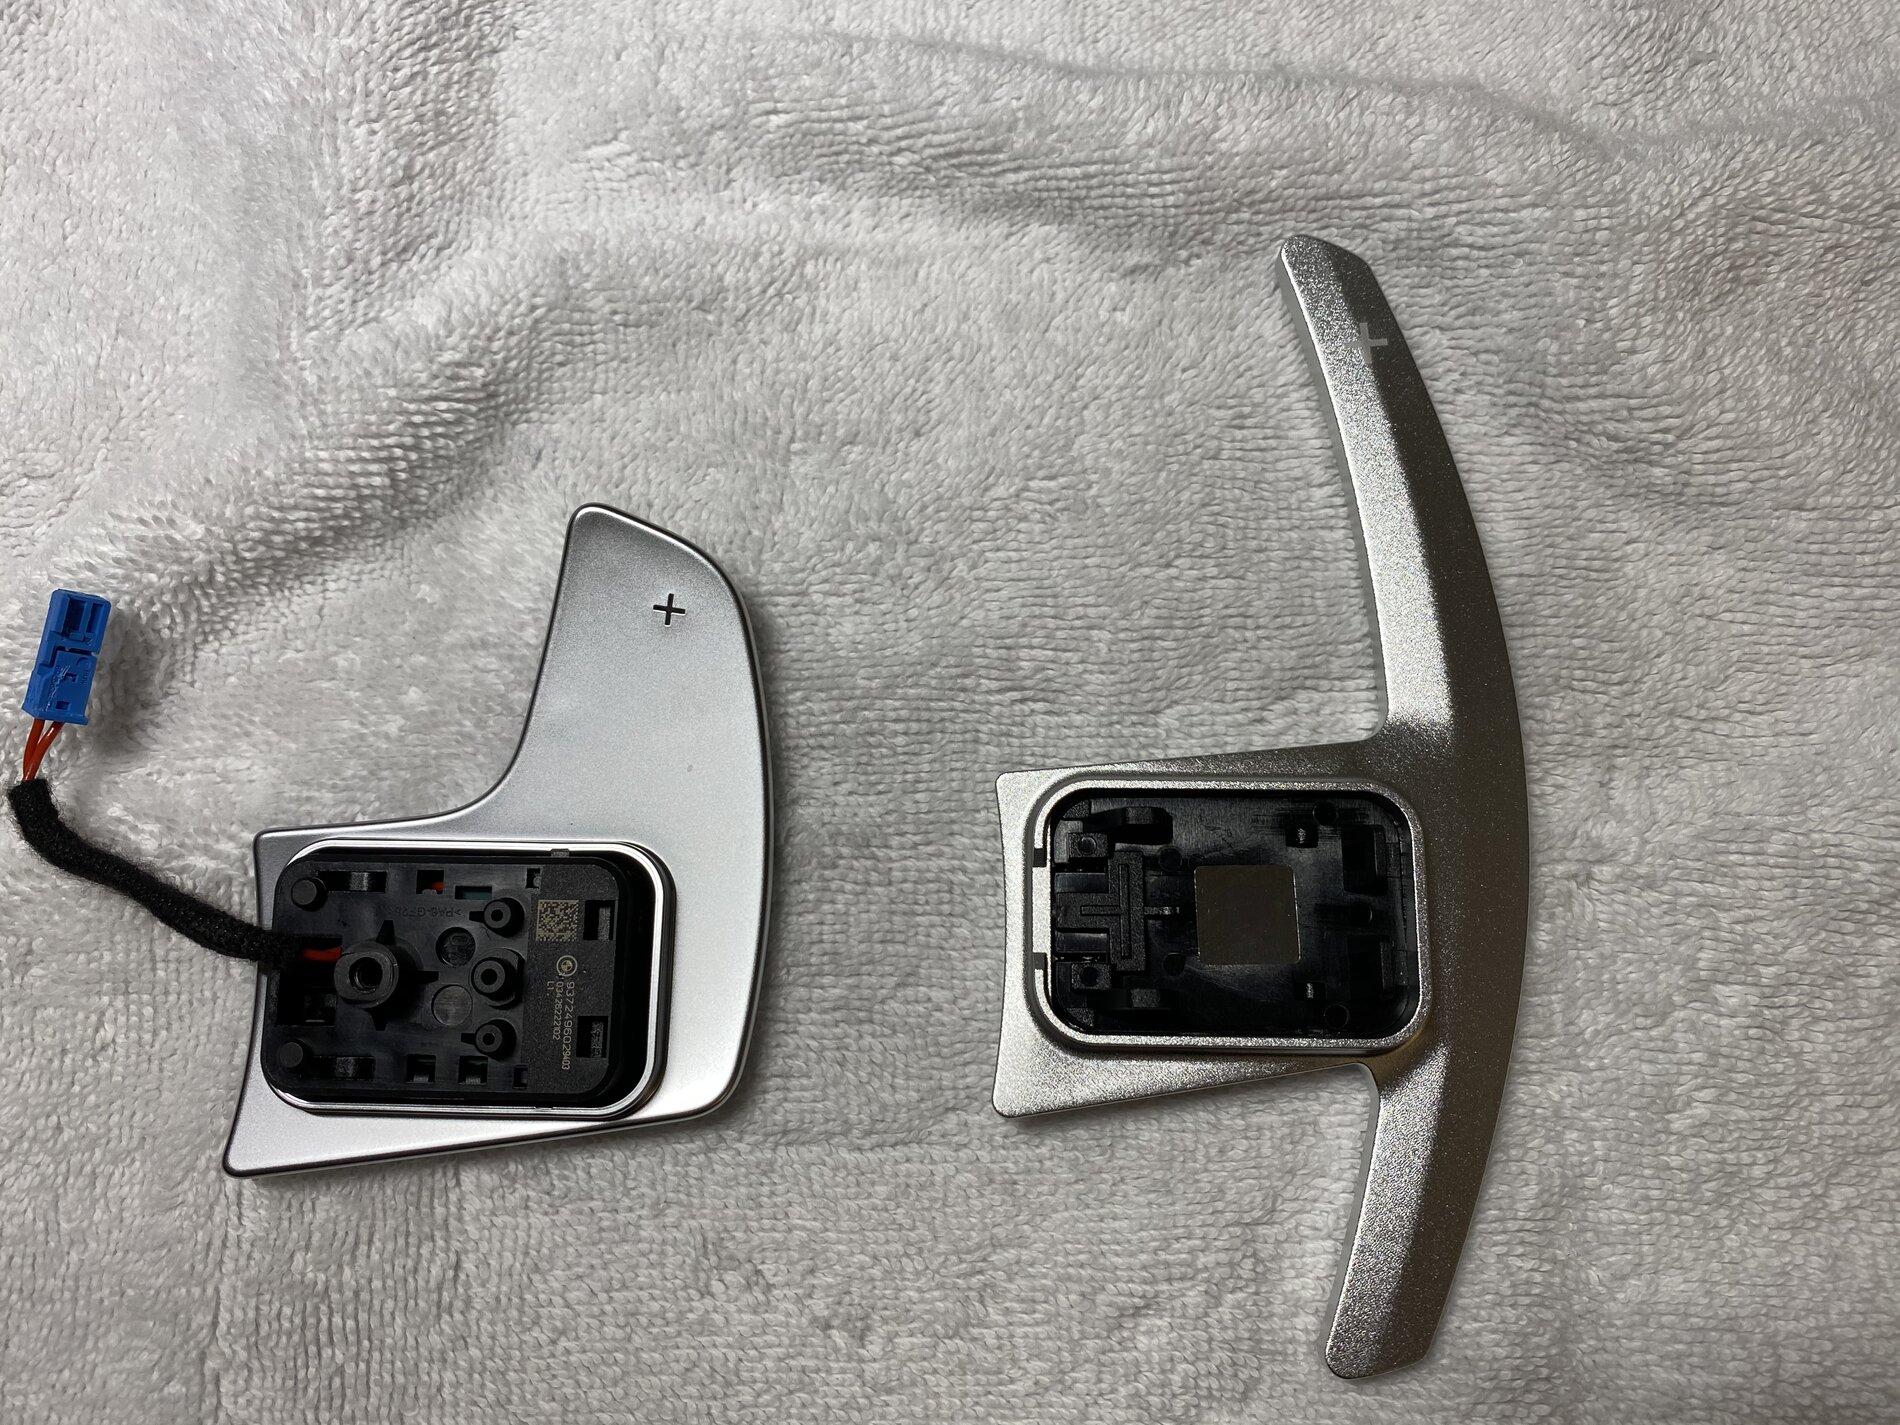
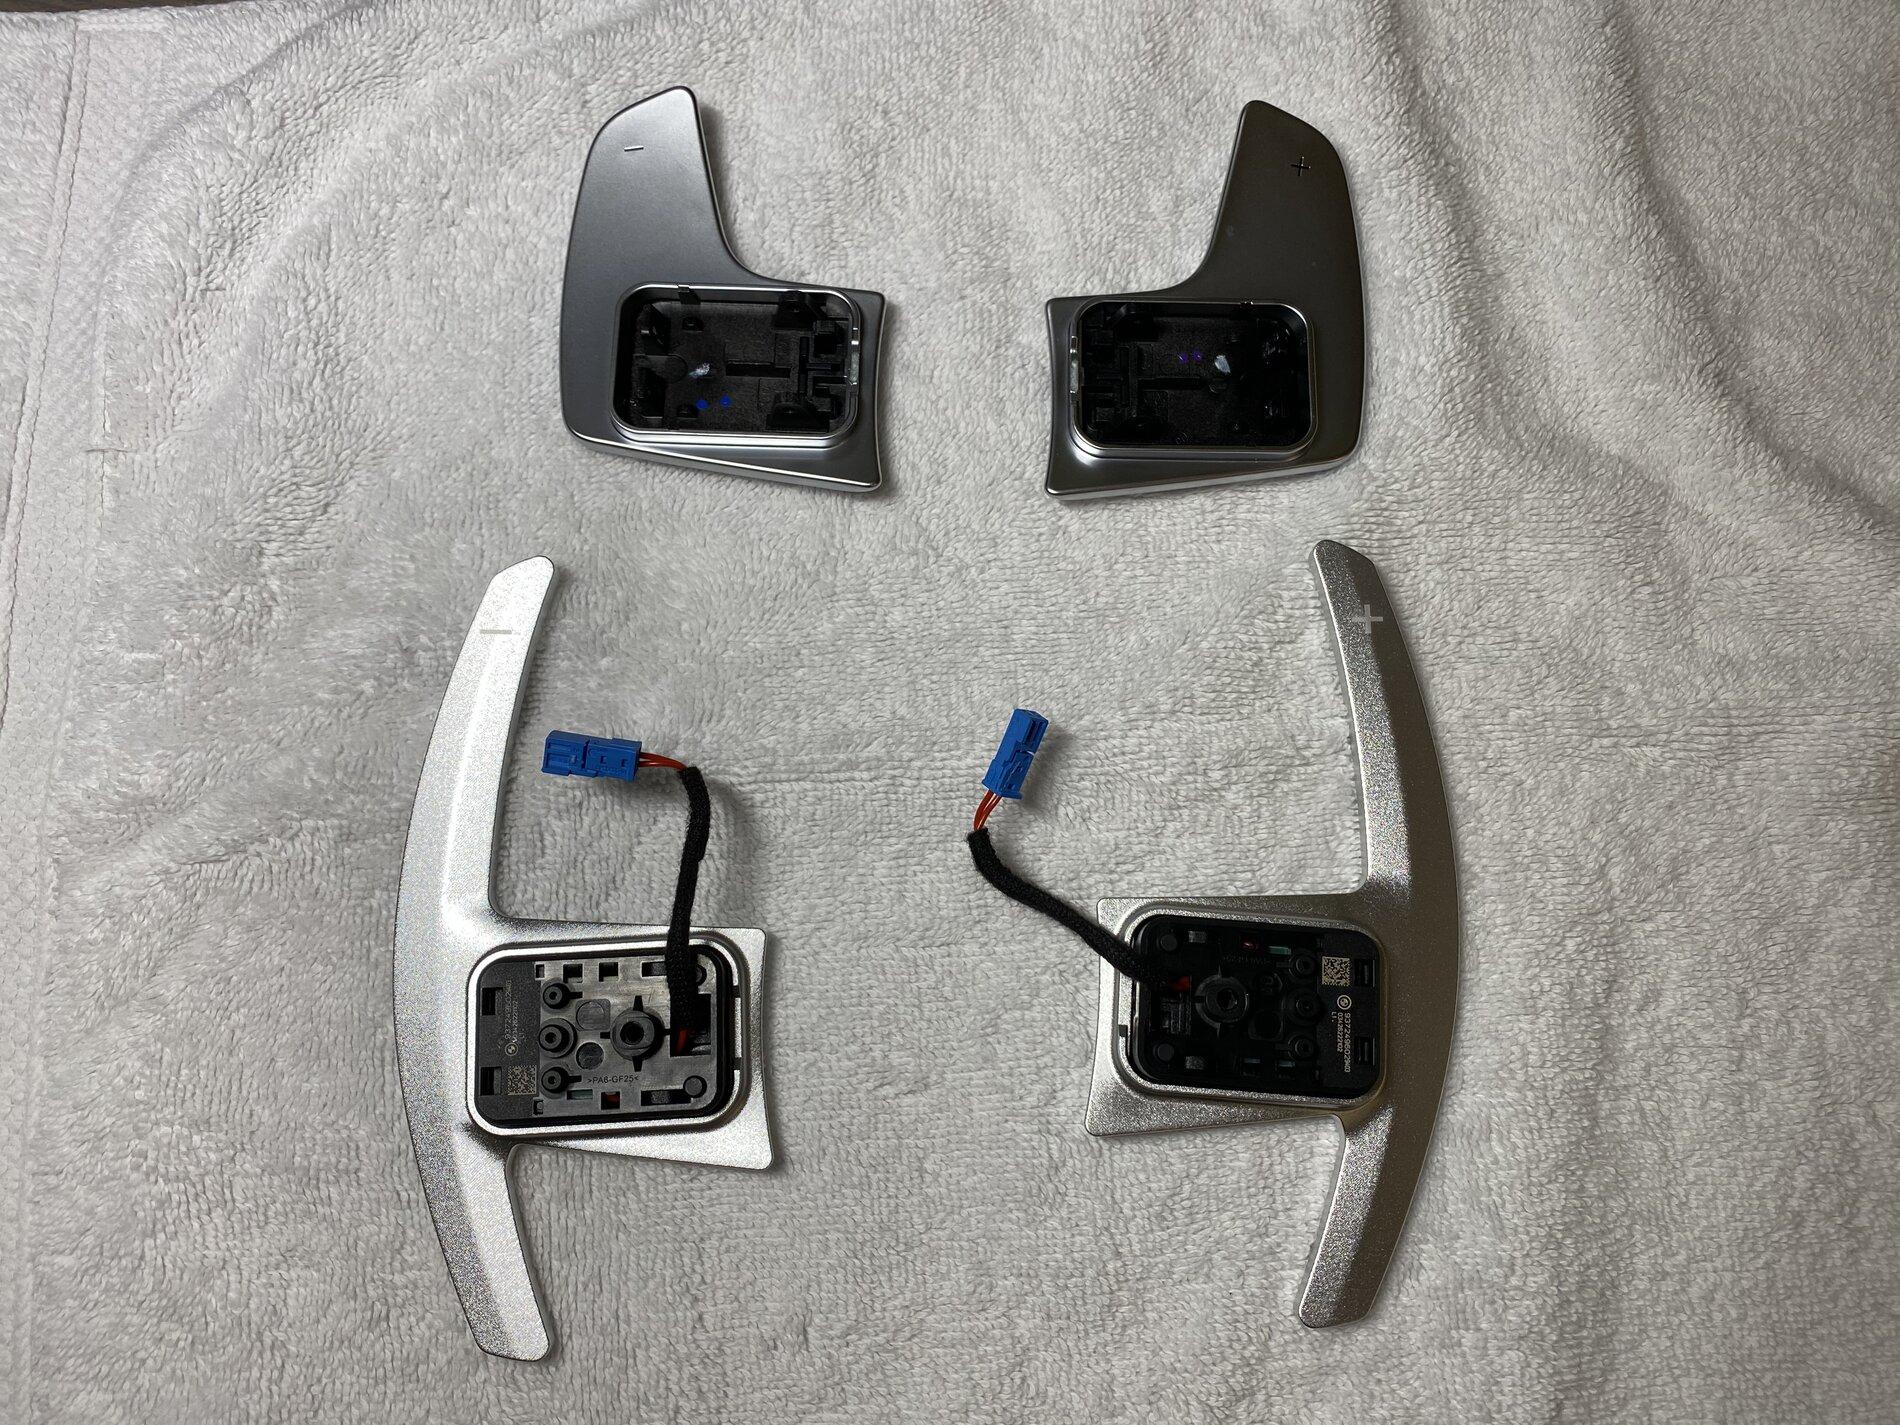
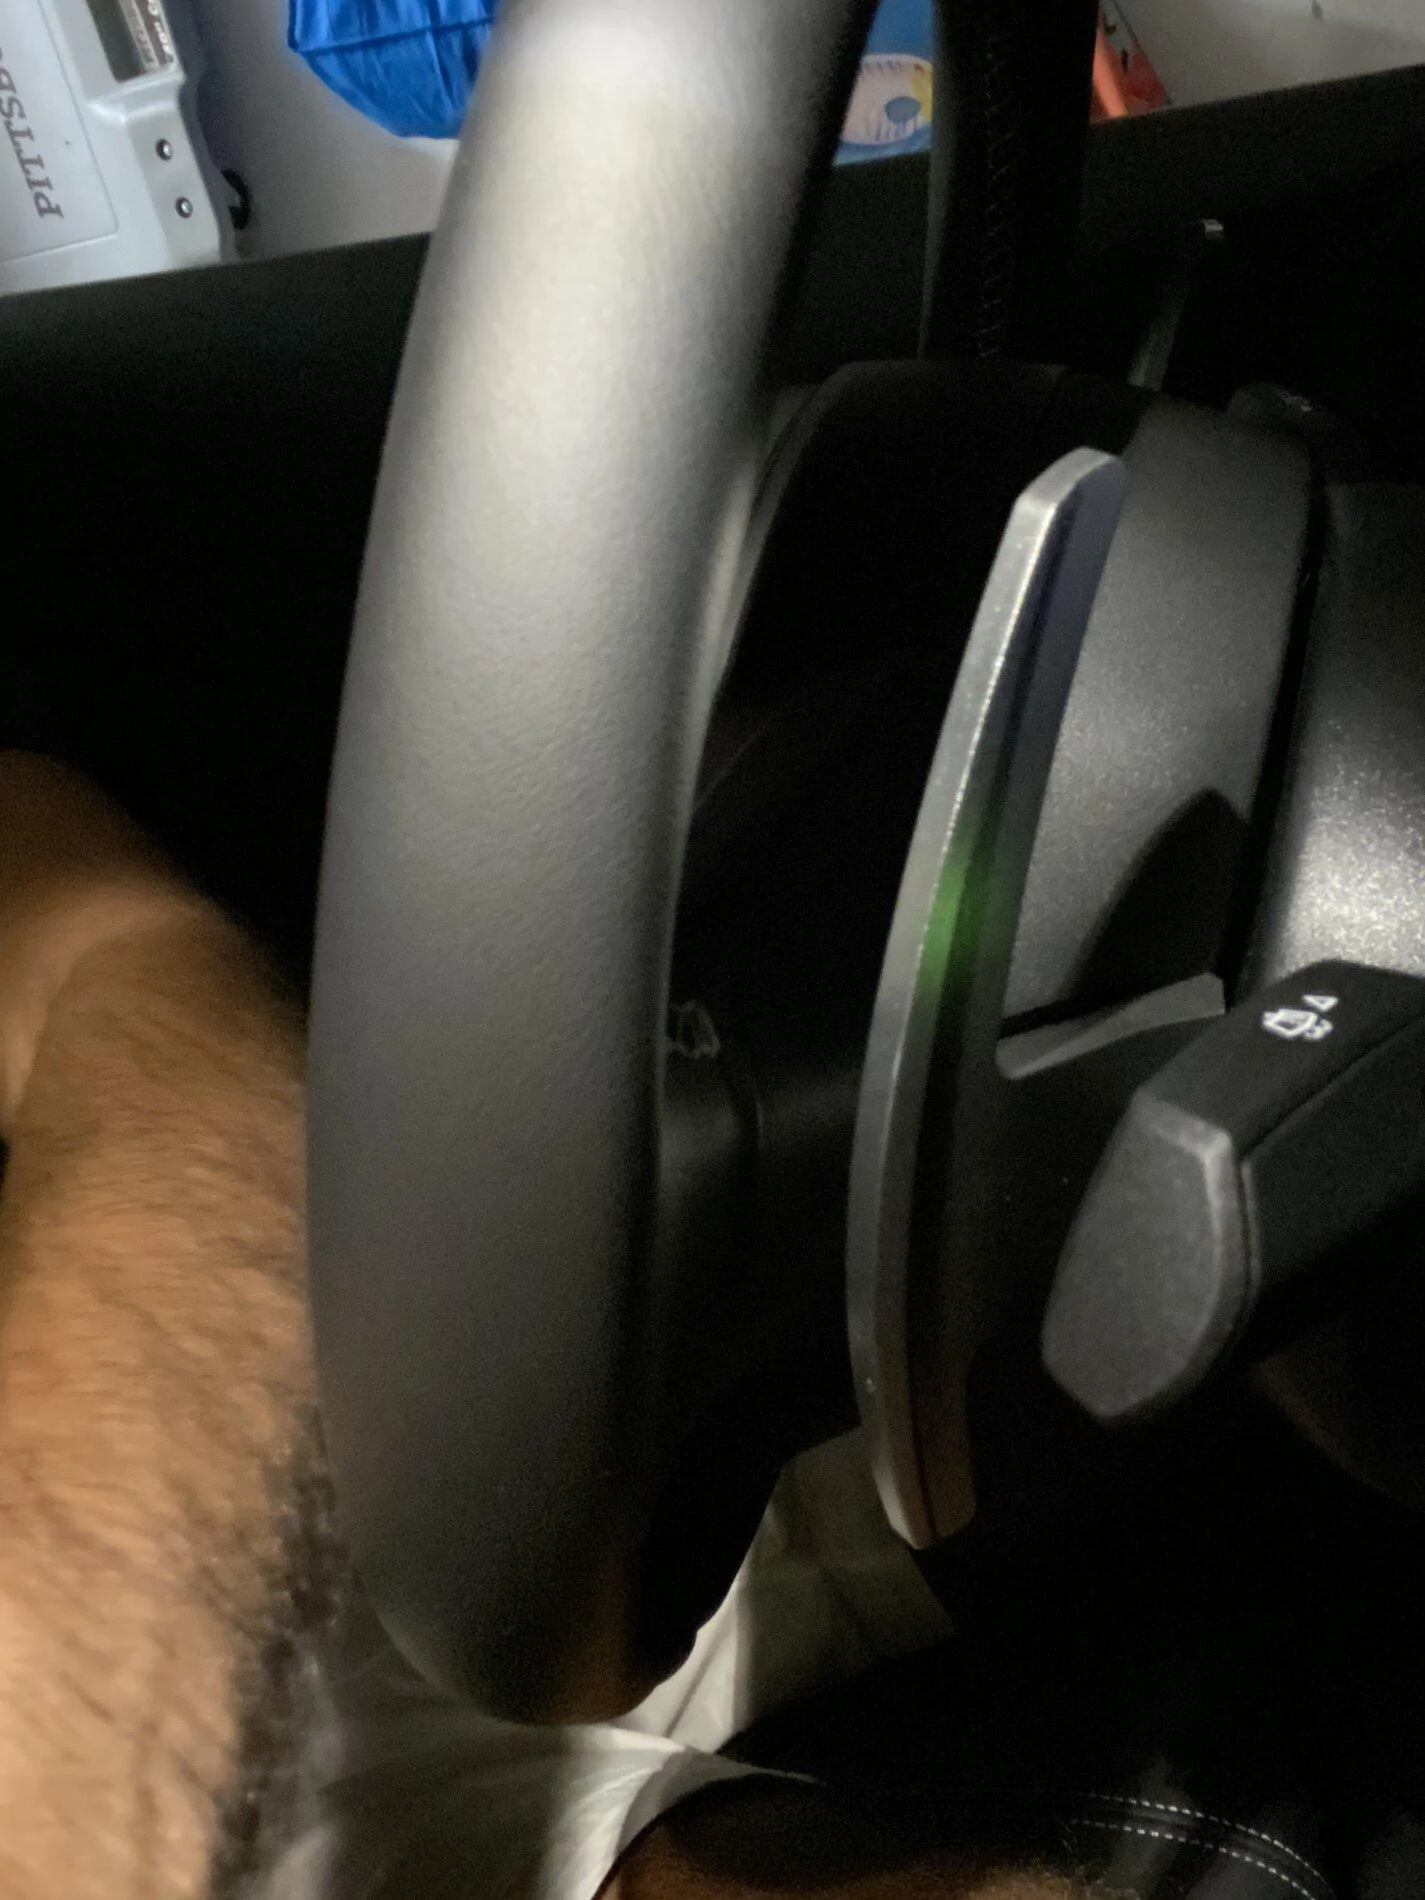
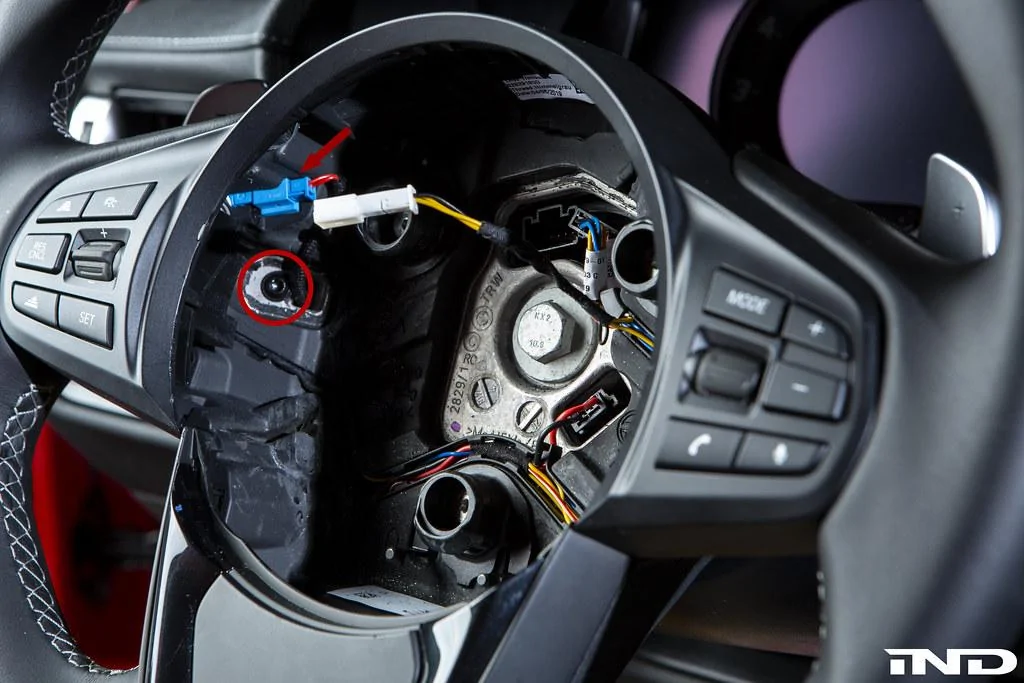
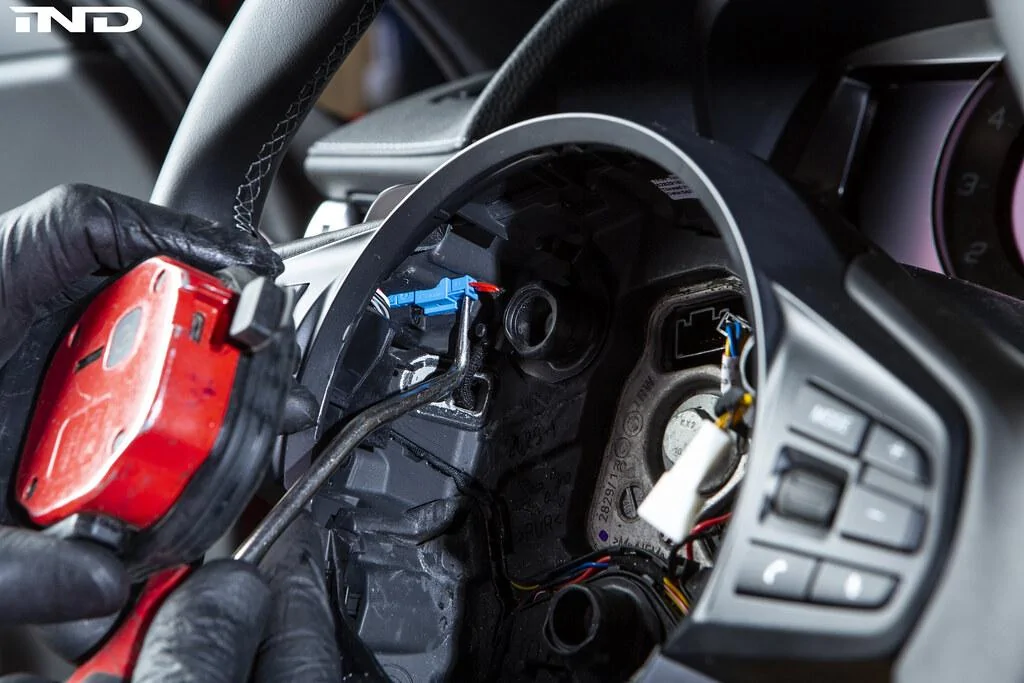
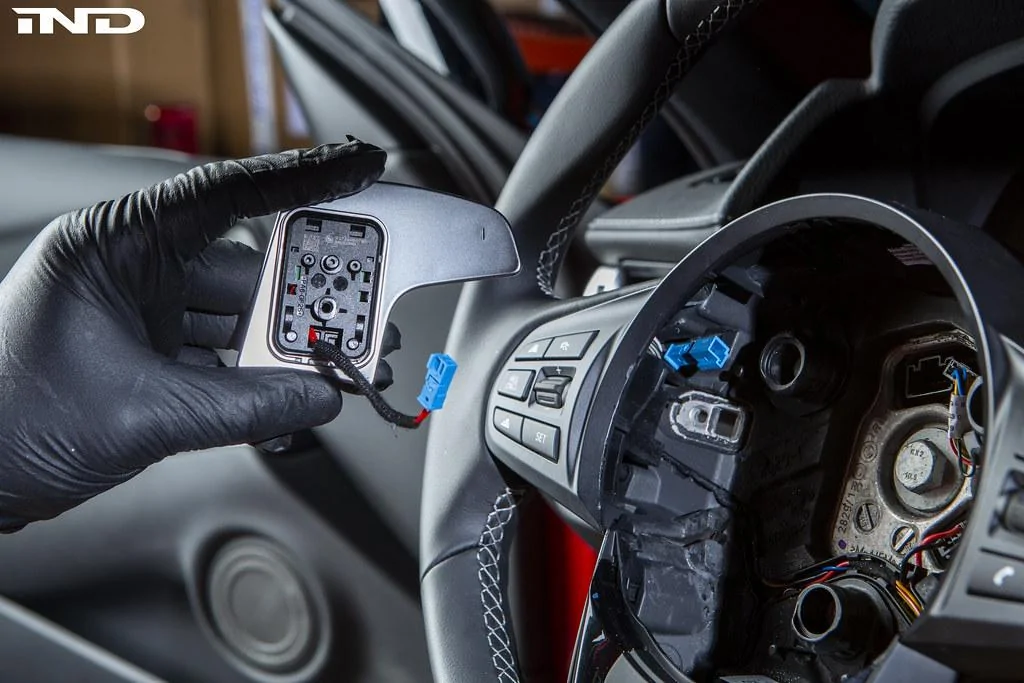
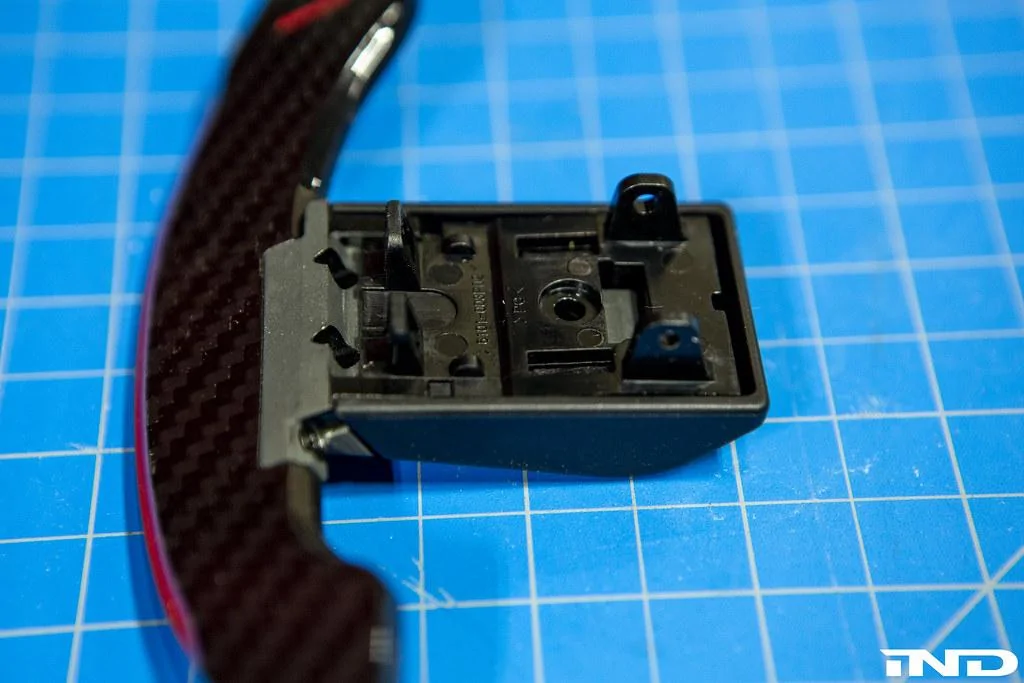
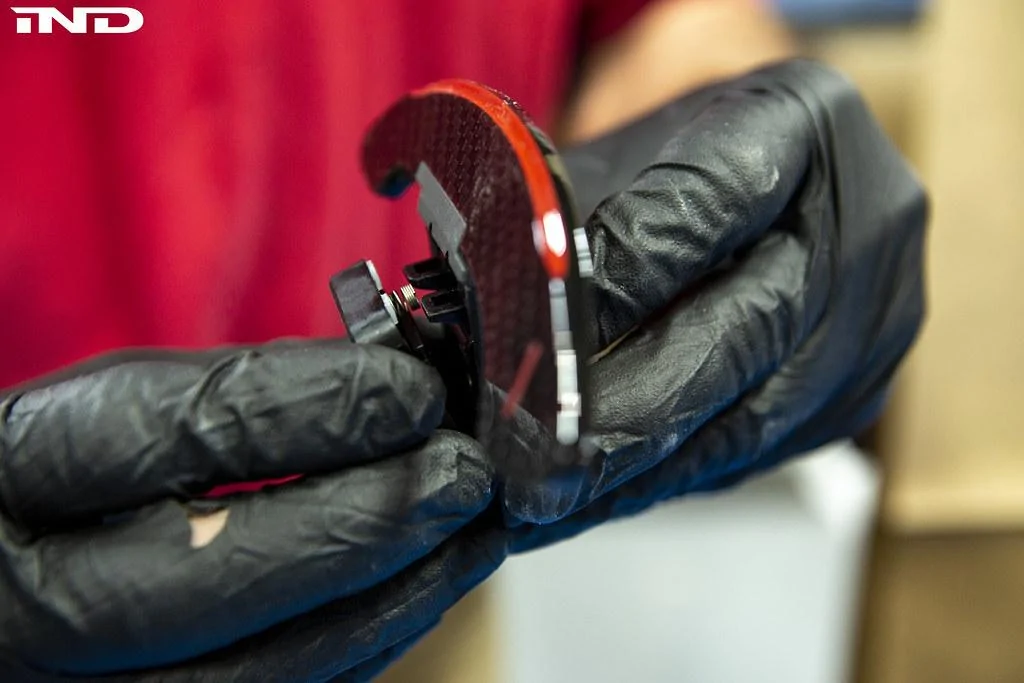
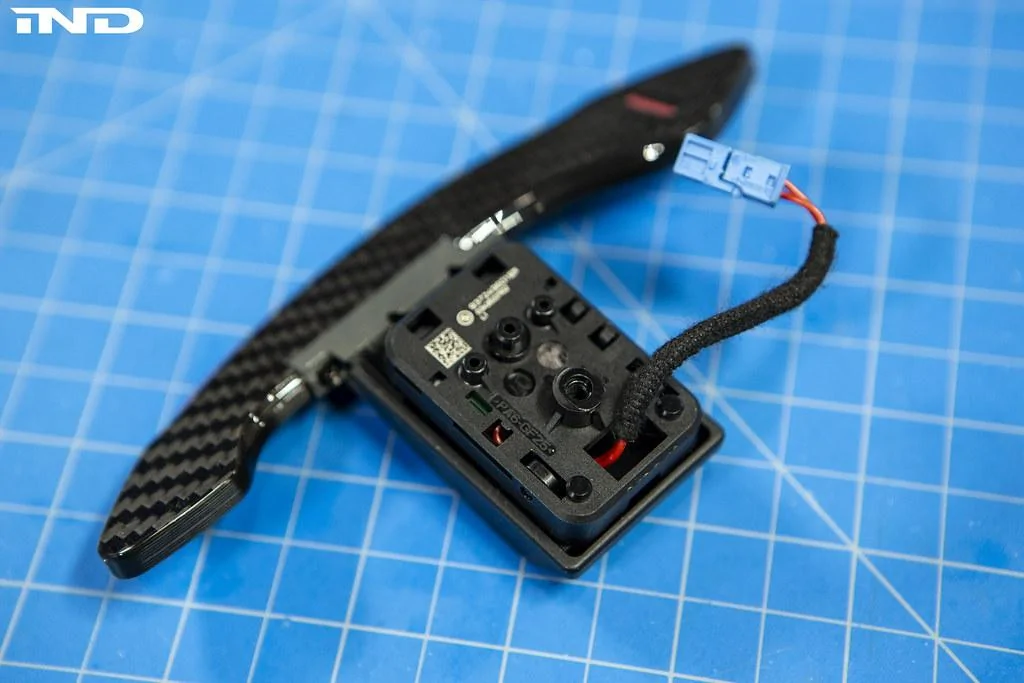
4. With the airbag set aside, you now have adequate access to remove the OE paddles. Unplug the blue paddle connector, unscrew the T20 Torx, and remove the paddle from the back of the steering wheel. Repeat on the other side

49214645388_454273df54_b.jpg

49215360447_e115116d75_b.jpg

49215129416_396148031c_b.jpg

49214642368_a3837e810b_b.jpg


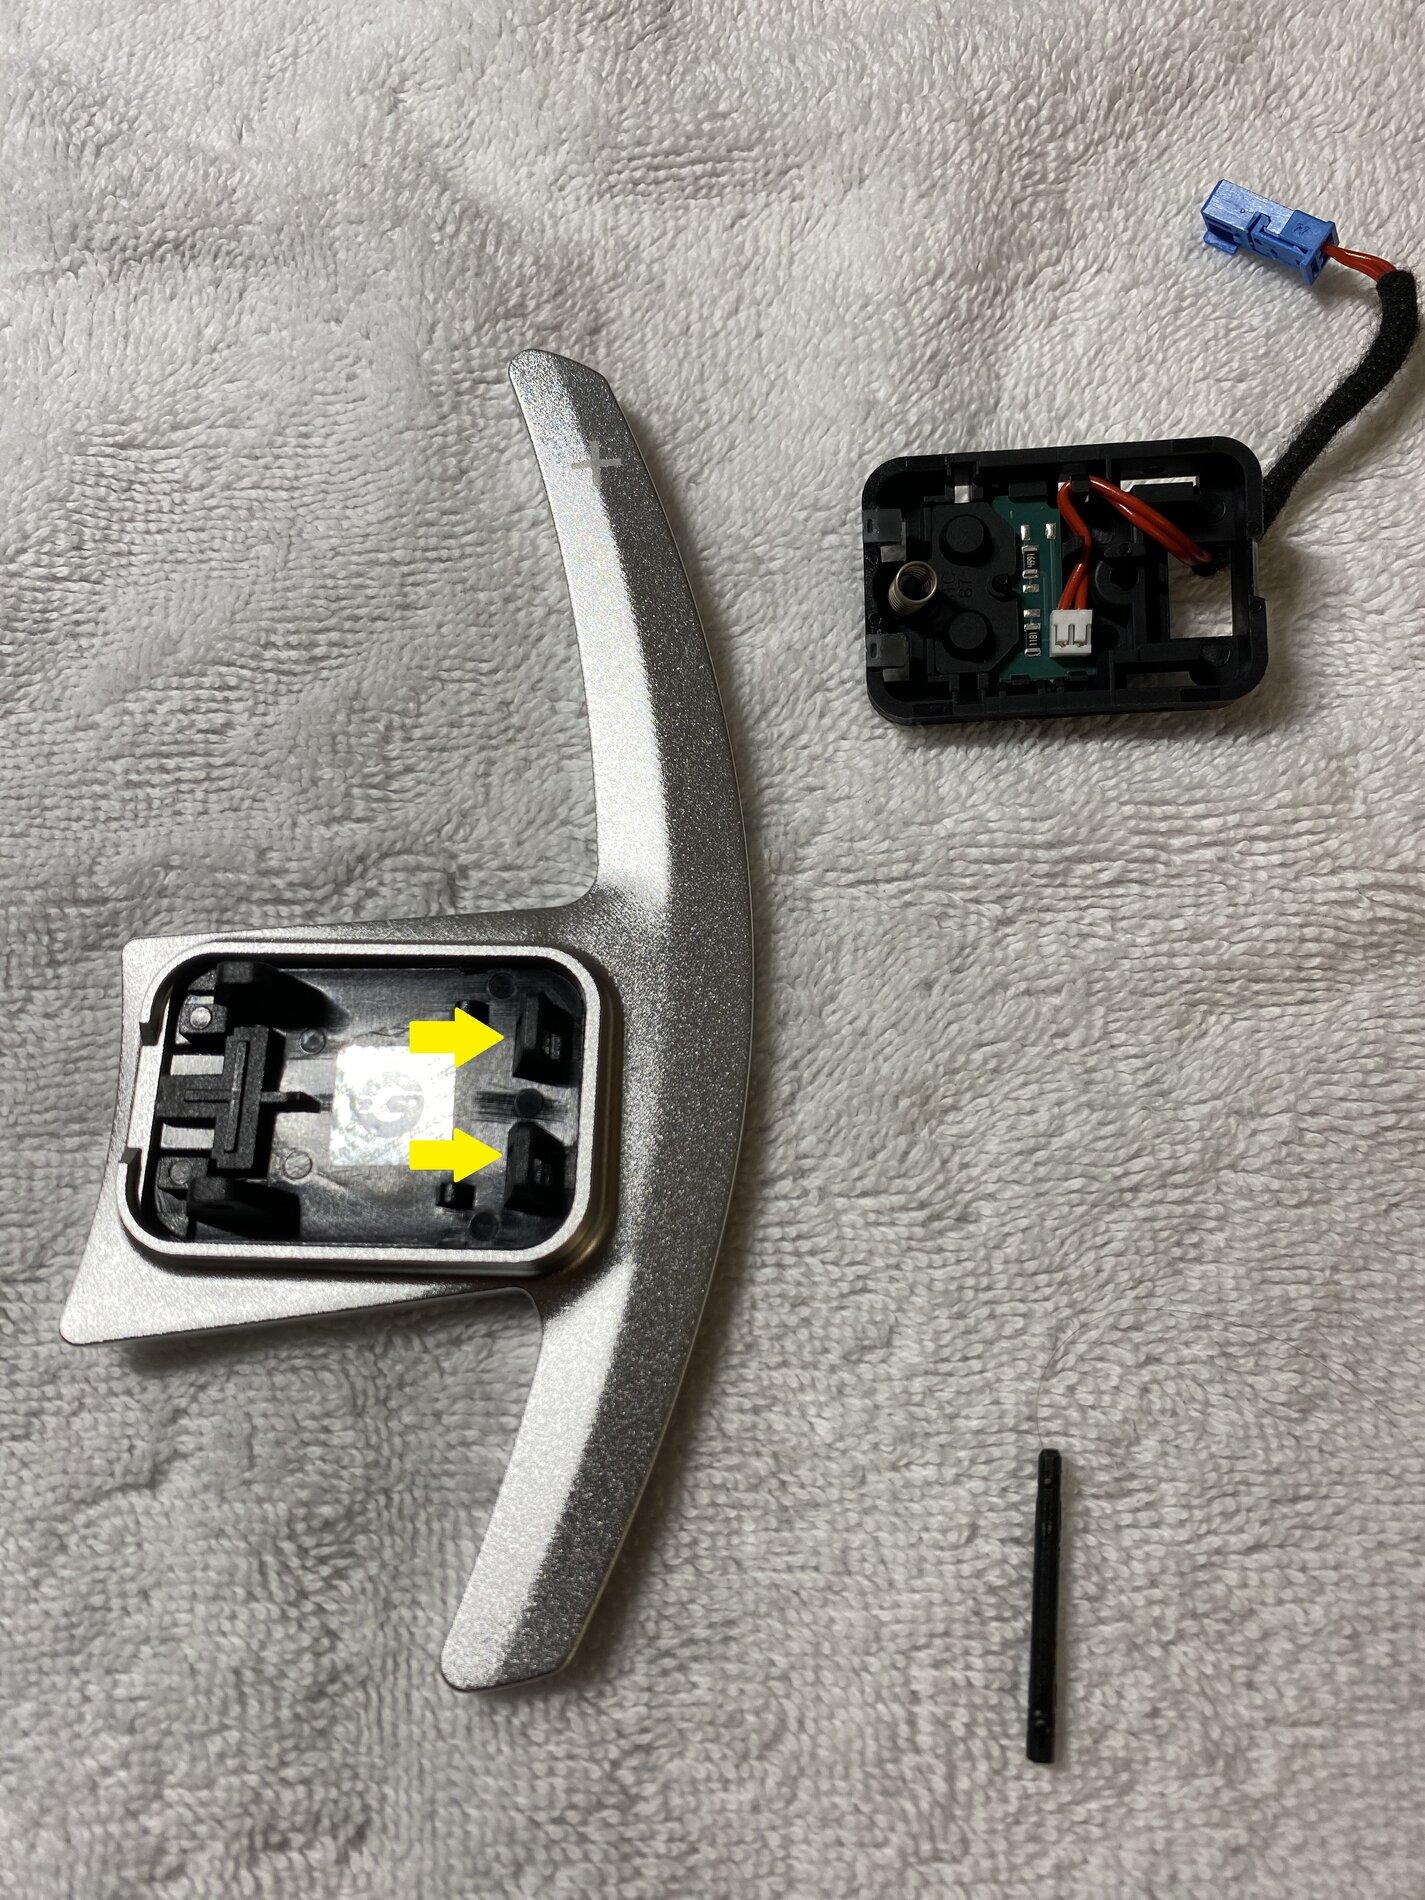
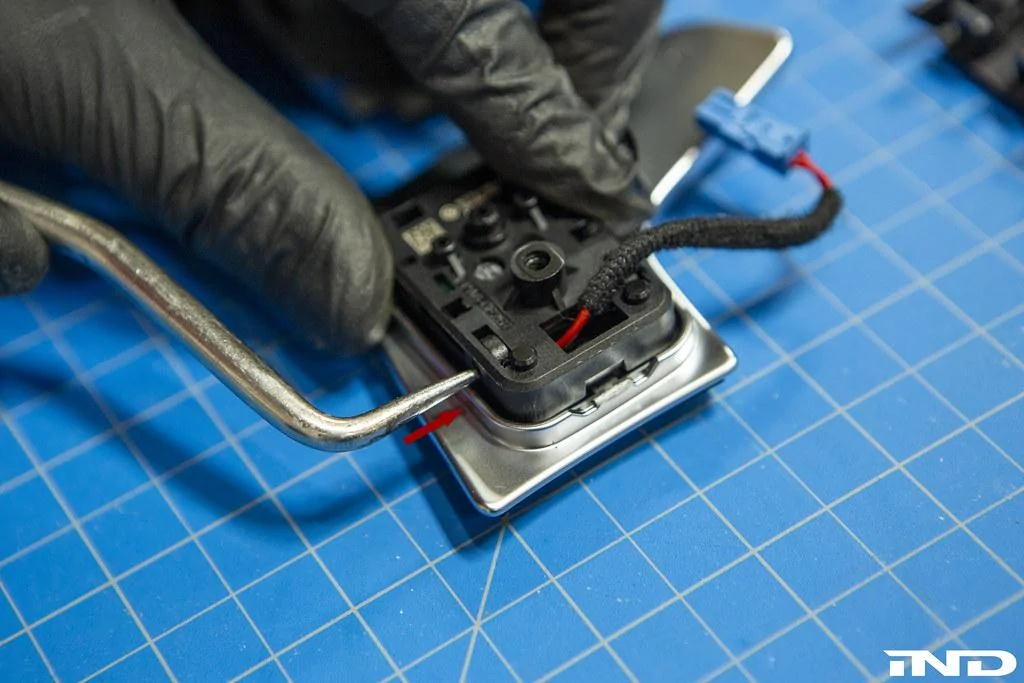
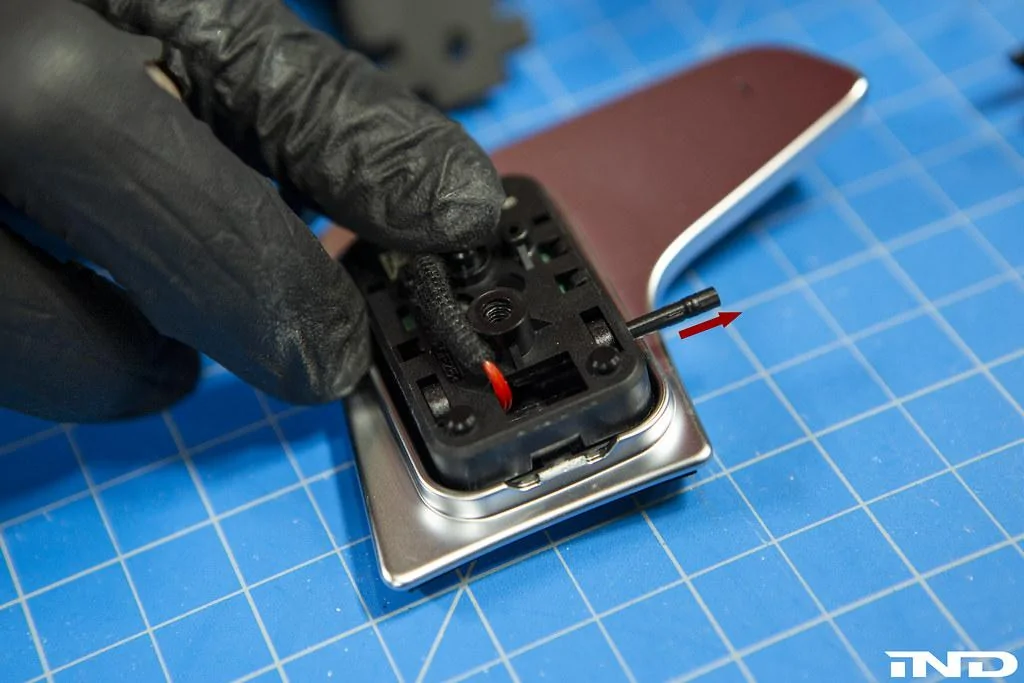
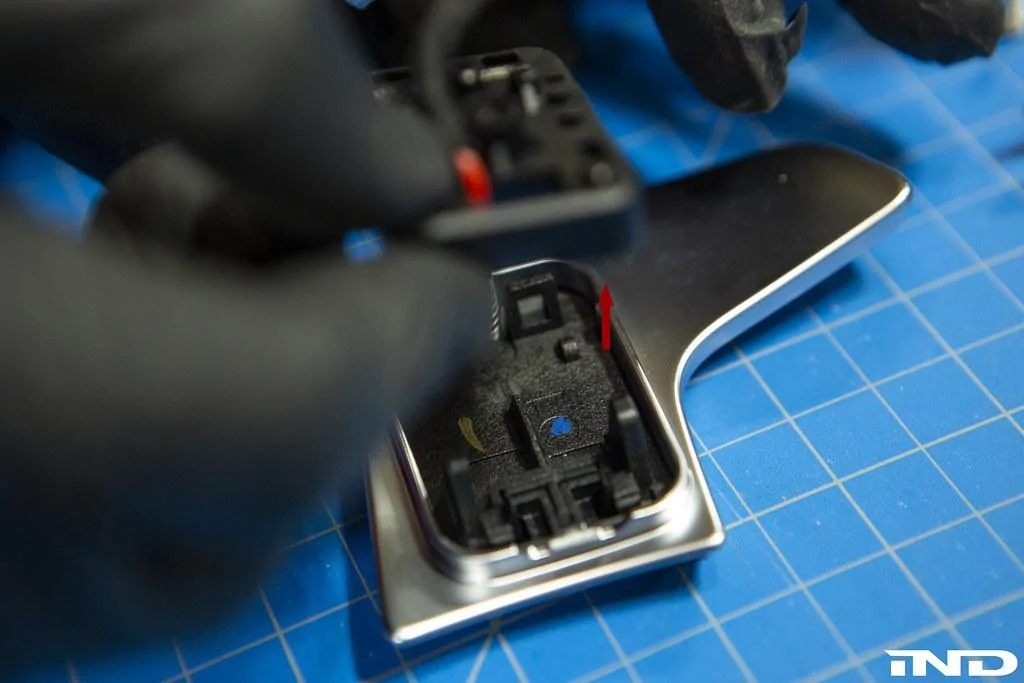
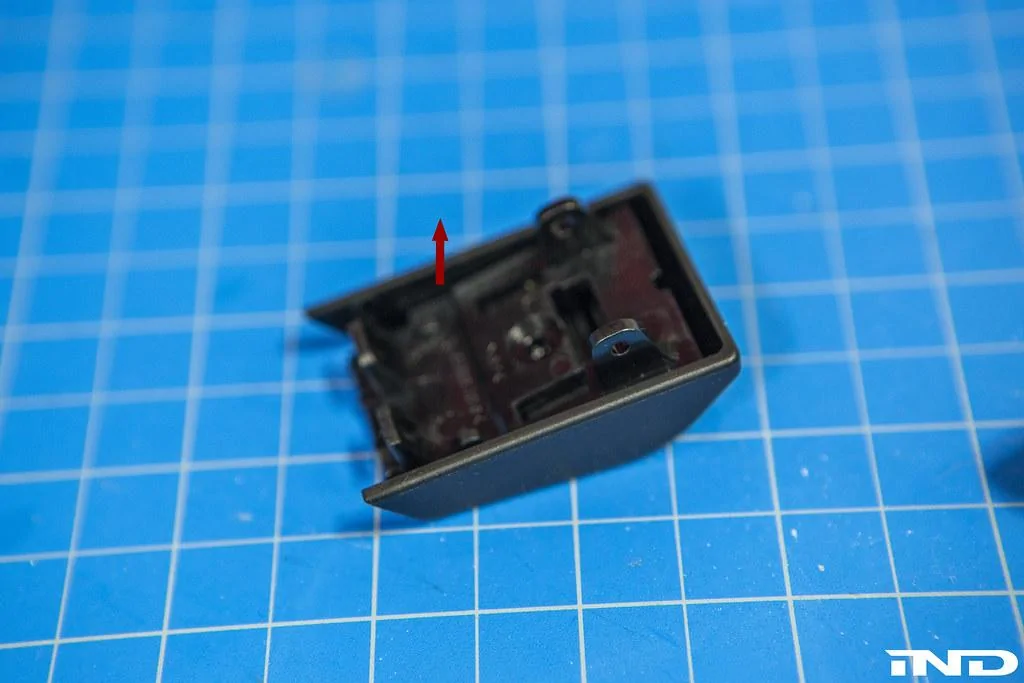
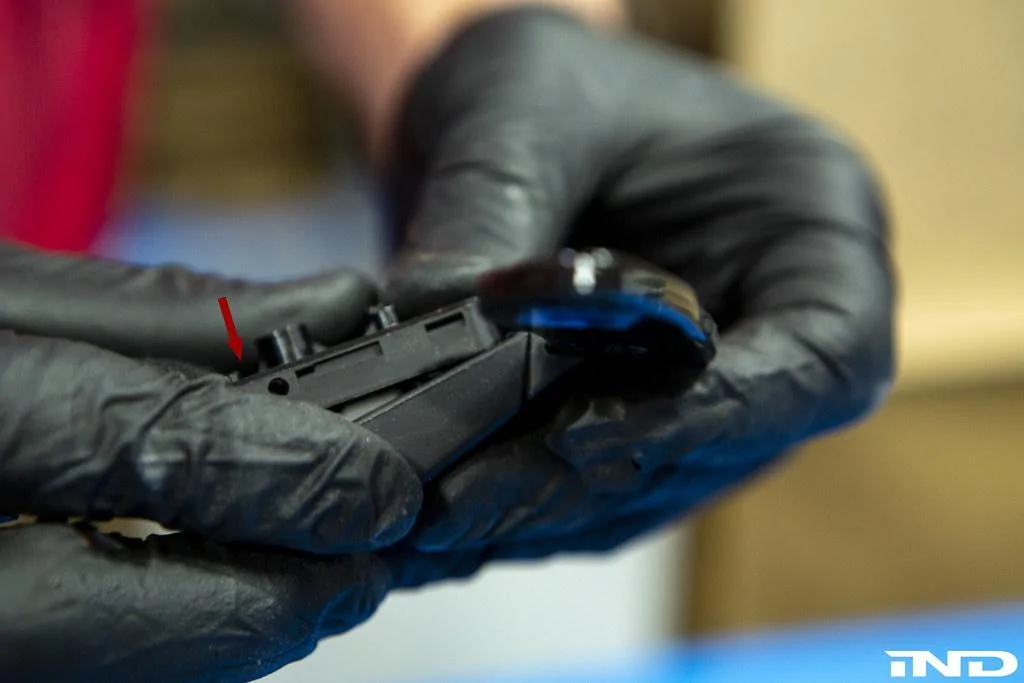
5. With a pick tool, push the retaining pin out from the OE paddle to release the articulating cover / connector. Remove it and set it aside—this will attach to the 3D paddle.

49215130676_f722bca90c_b.jpg

49214649703_4e7d379294_b.jpg

49215364137_7f67bd2ecf_b.jpg


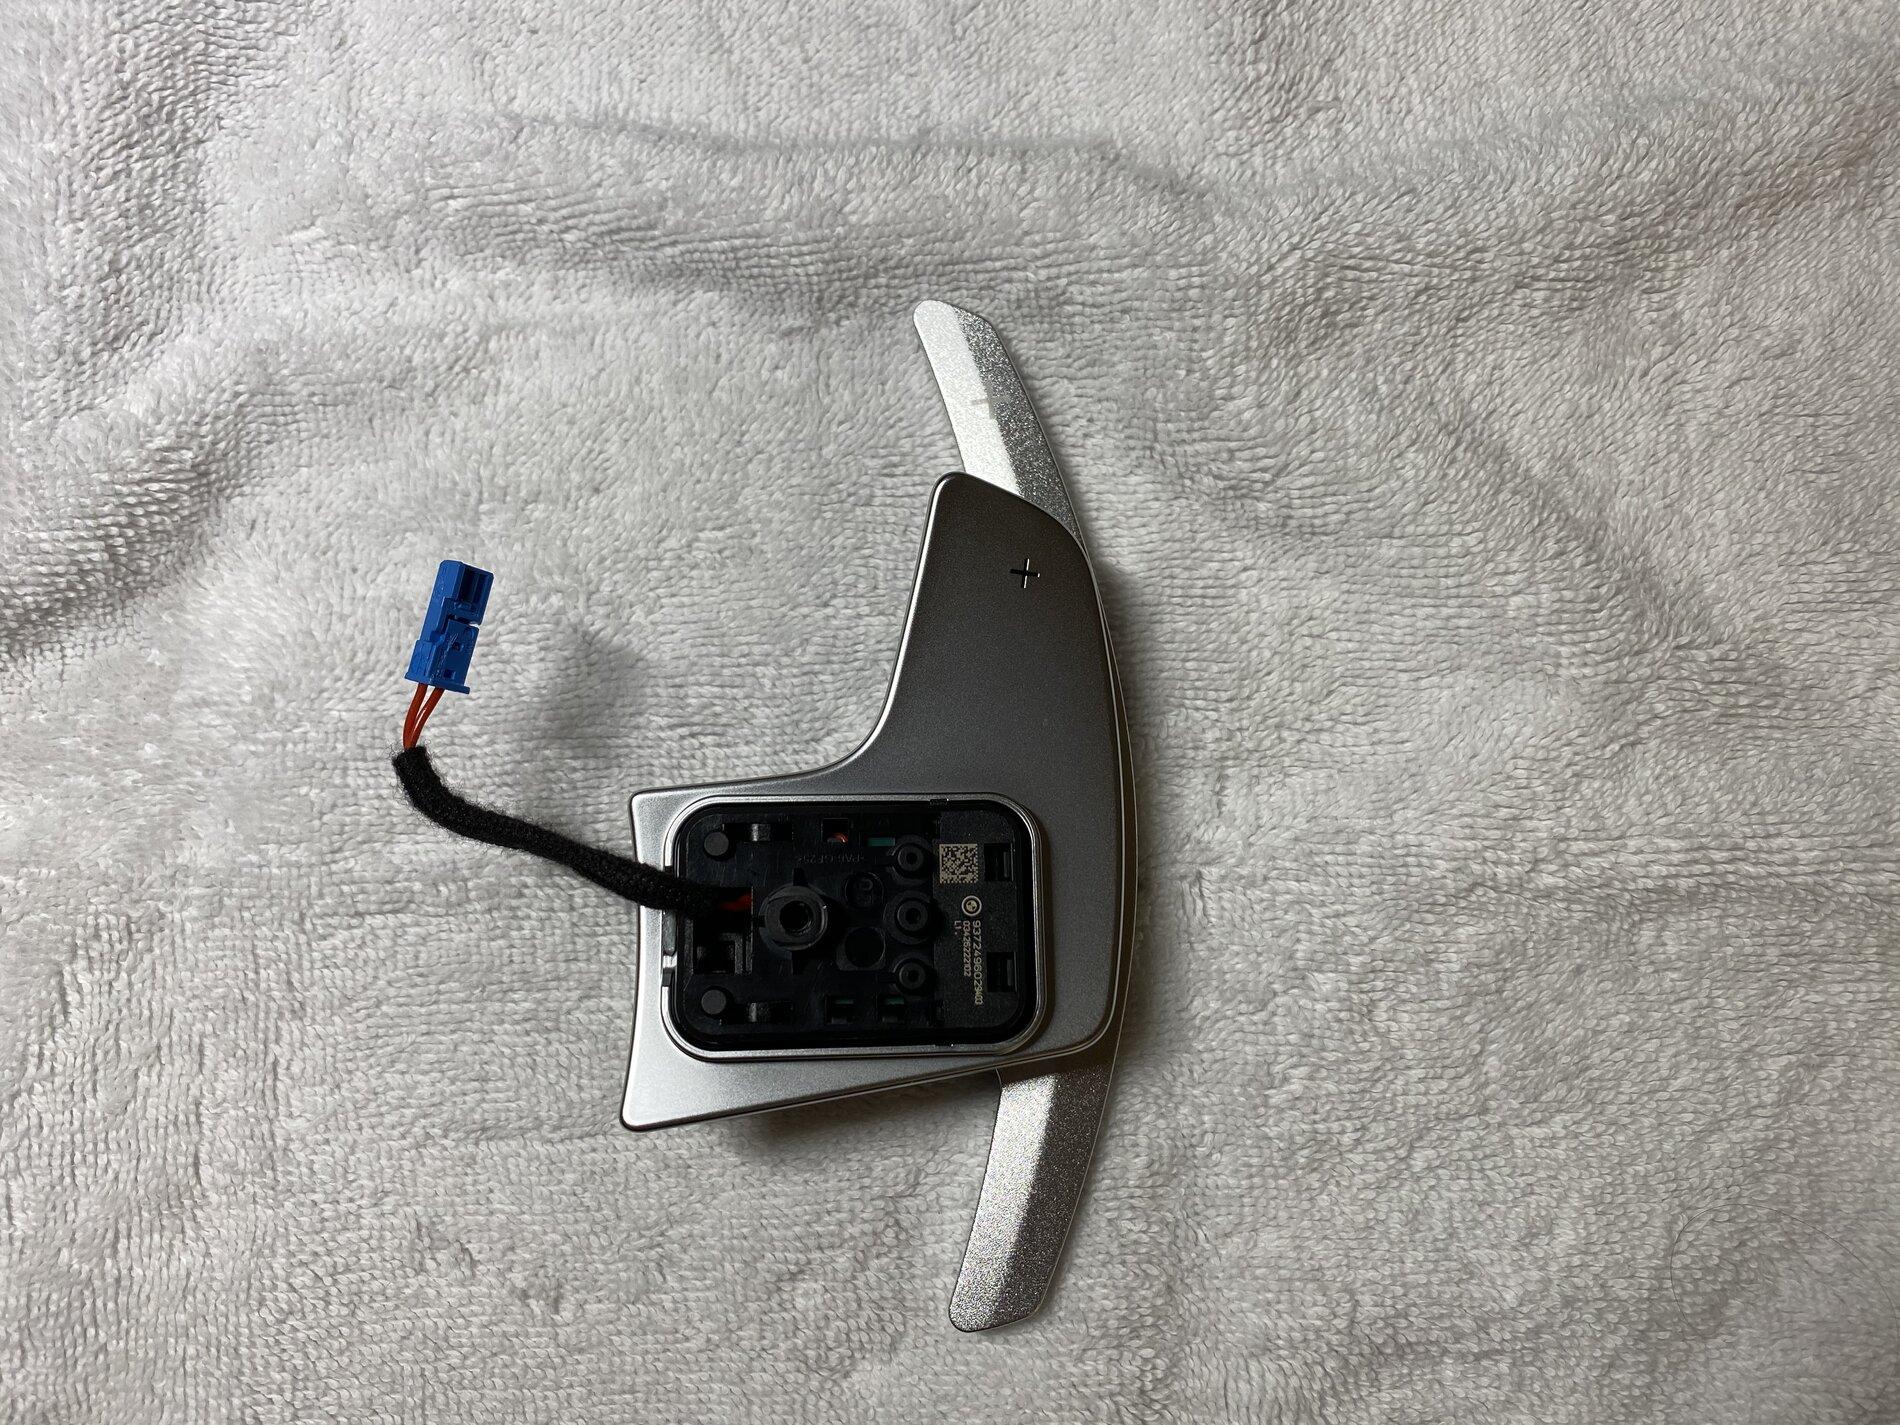
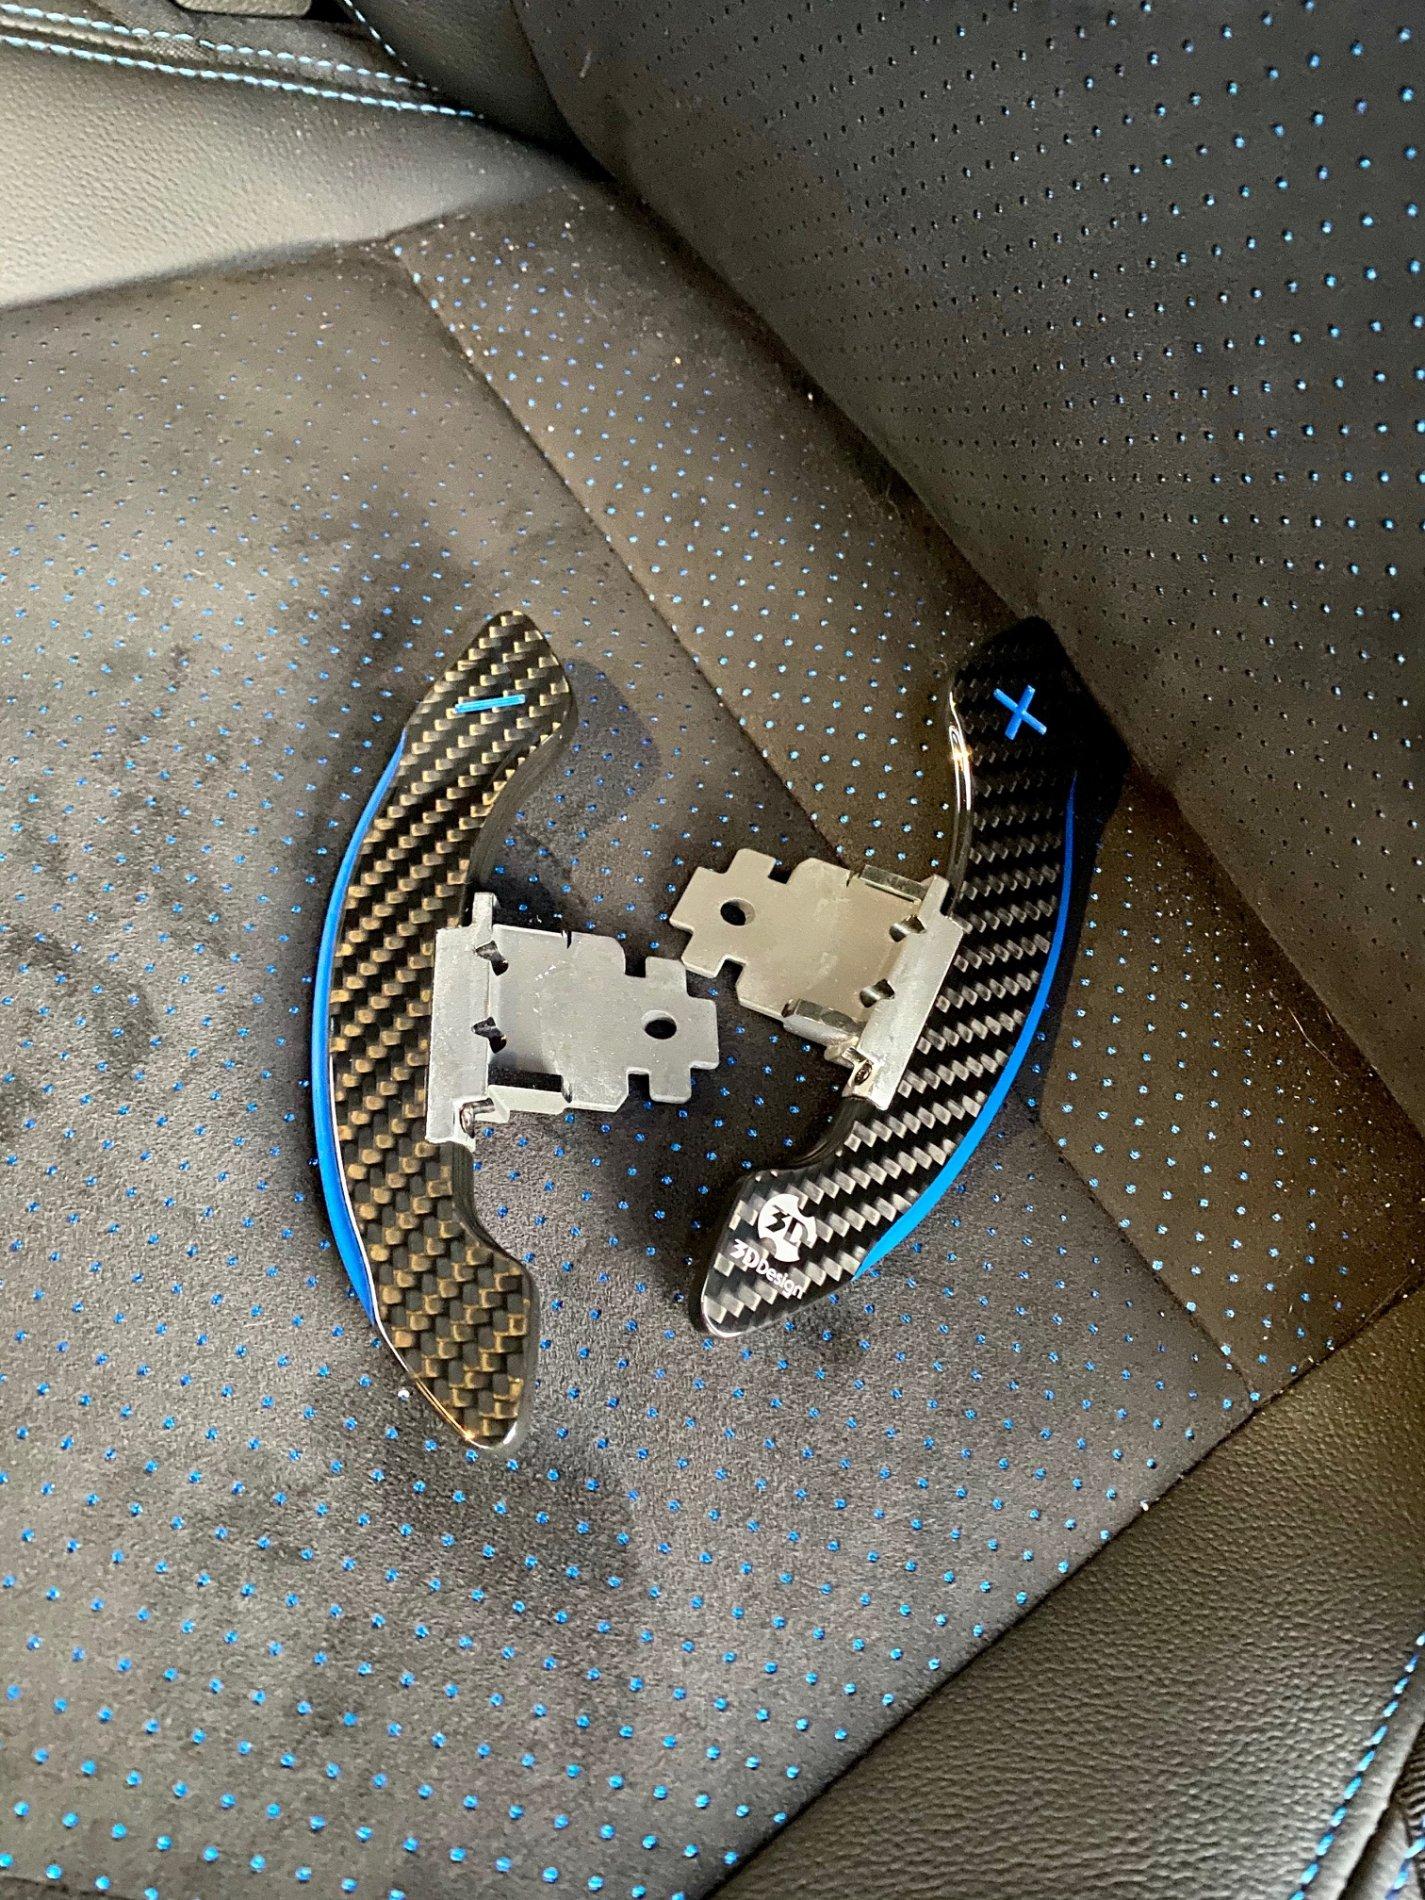
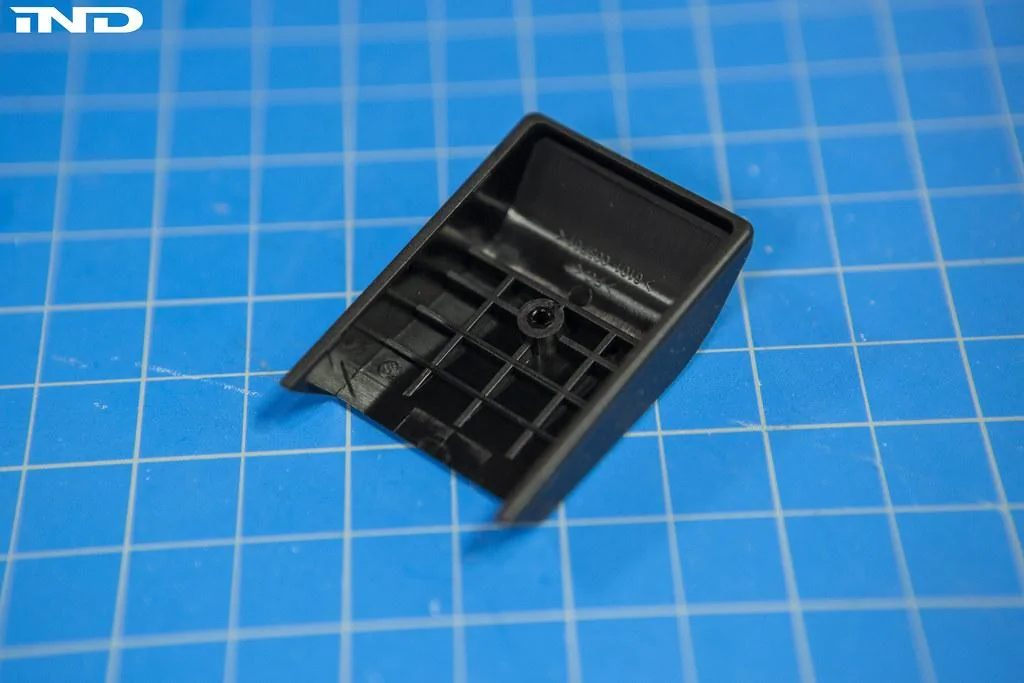
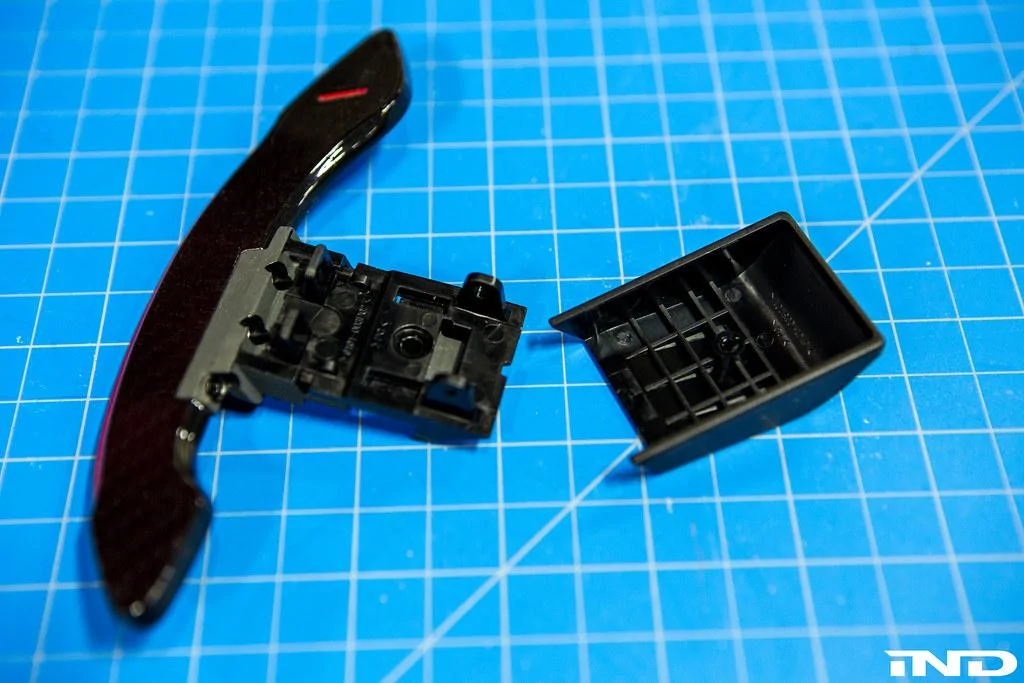
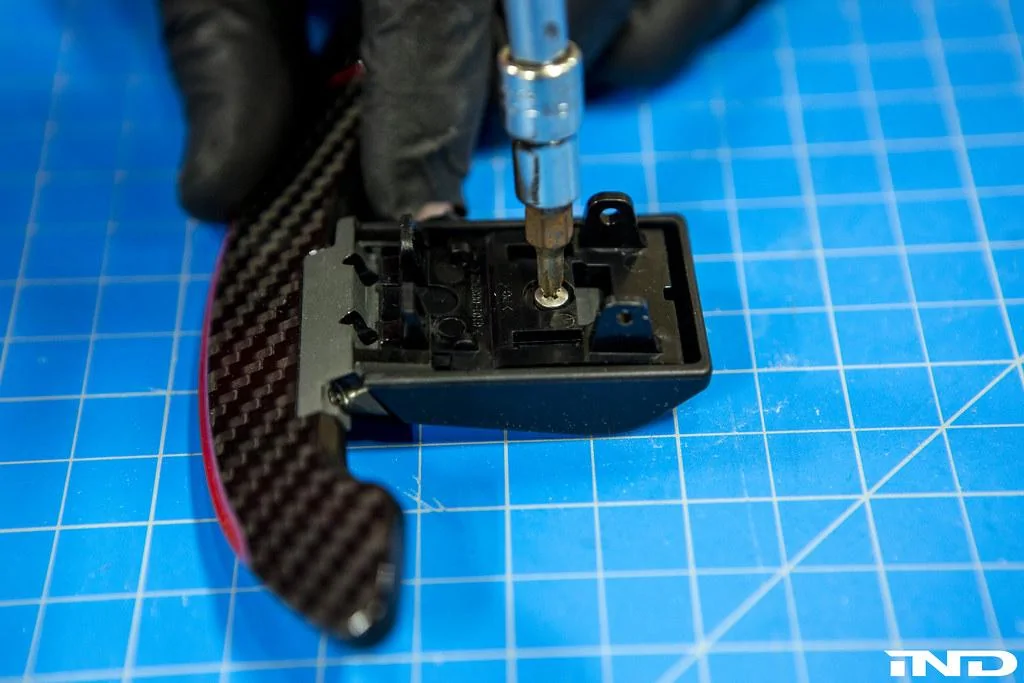
6. Attach the plastic 3D housings to the housings to the 3D paddle. The housings should “sandwich” the 3D paddle’s arm extension where the trapezoid-shaped piece rests on the back. The screw recess and retaining rod provision should be facing “up” and inboard relative to the carbon section (see photos).

49214652048_81a9bc7deb_b.jpg

49215366262_da15ffd56d_b.jpg

49215135181_bbf91584b8_b.jpg

49215136101_843c72a2a3_b.jpg


7. Once in place, affix the Phillips screw onto the 3D paddle.

49215368492_d0bf780155_b.jpg


8. Carefully transfer the spring from the OE paddle onto the articulating cover.

49215369052_38d0cb12dd_b.jpg

49214655863_5473aeb074_b.jpg


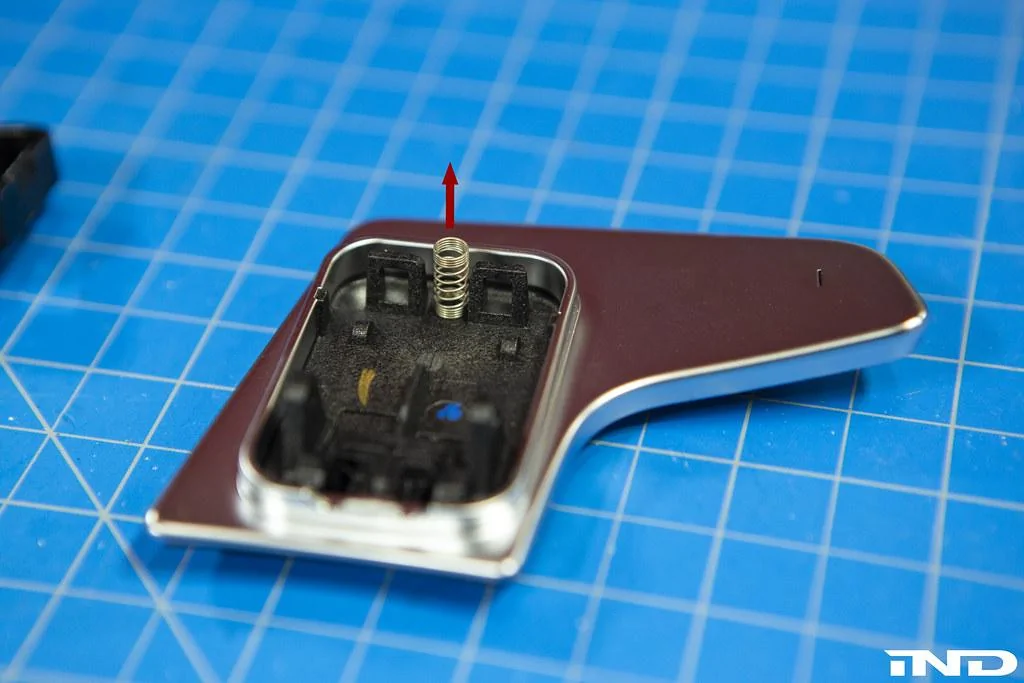
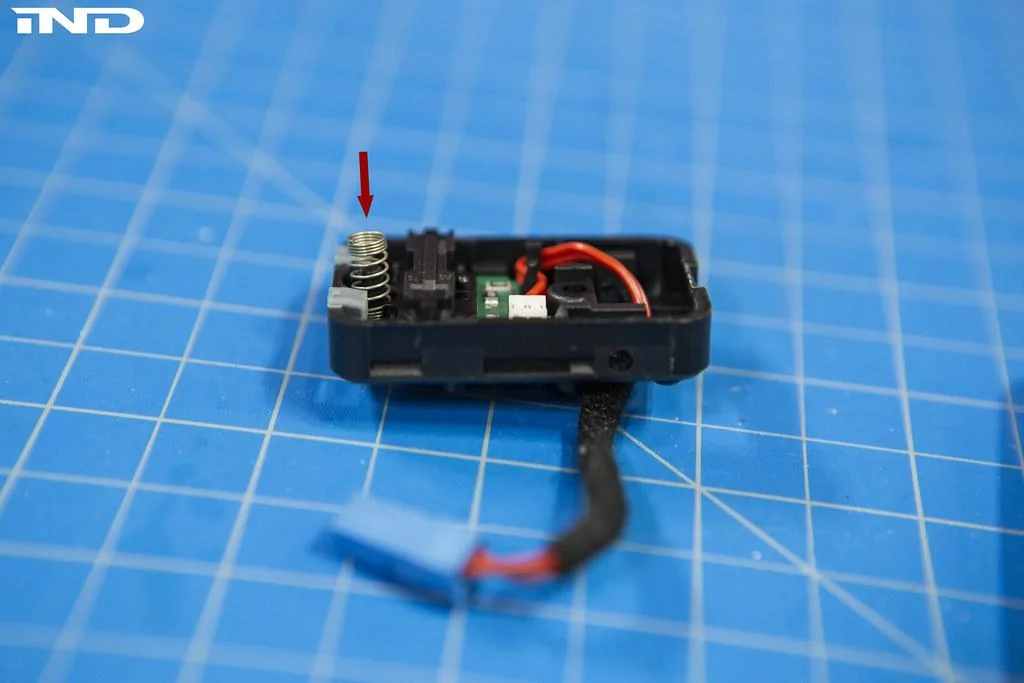
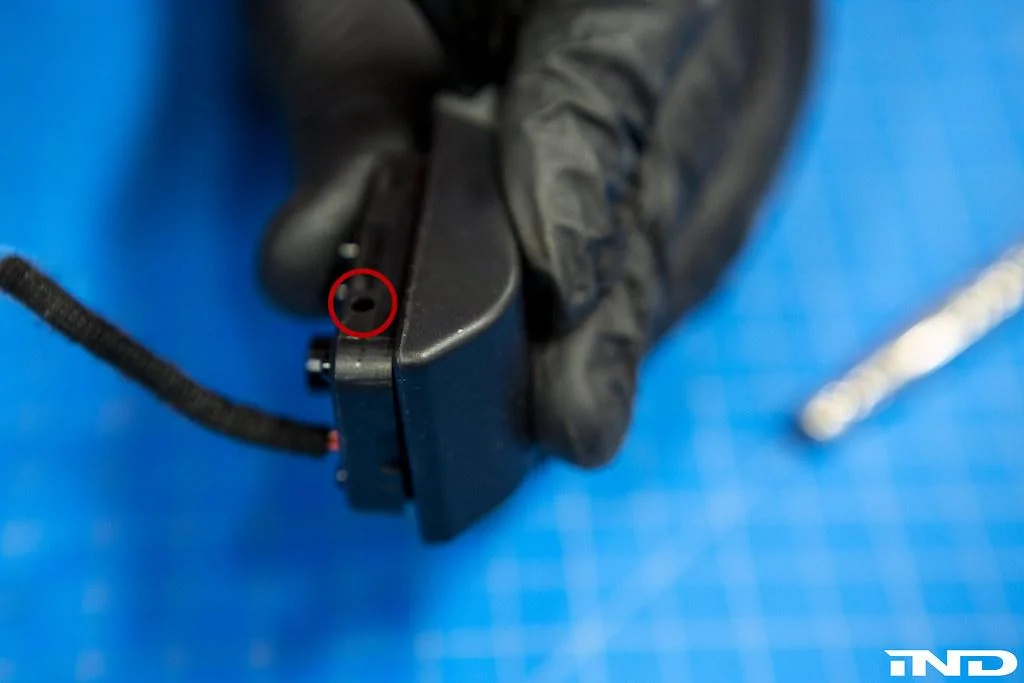
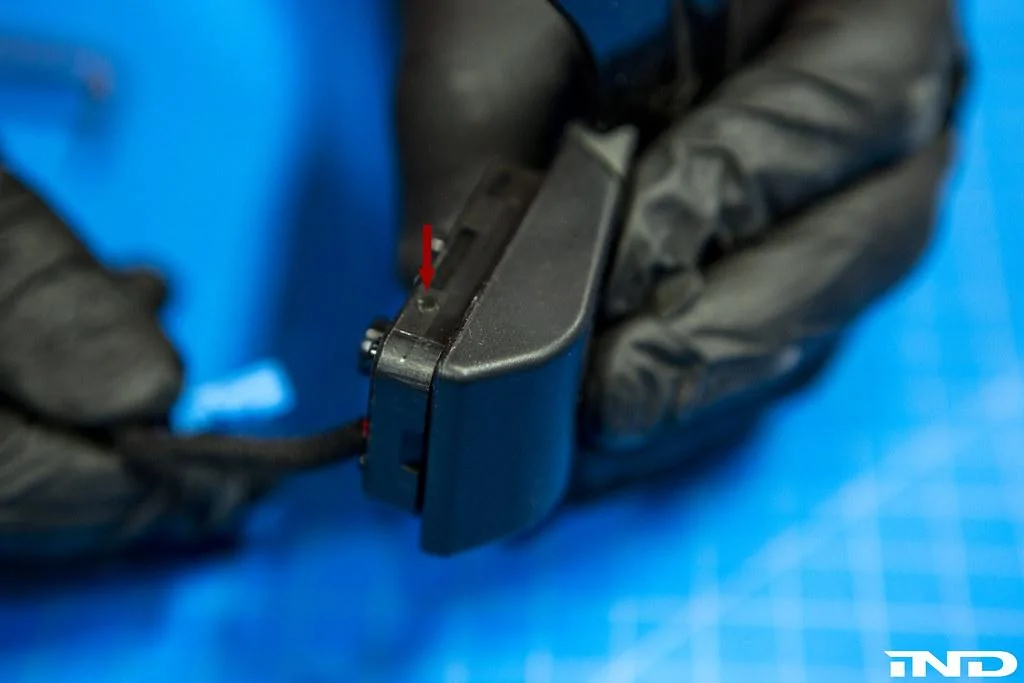
9. Connect the articulating cover to the 3D paddle assembly. Once in position, insert the retaining pin until it is completely flush within the articulating cover. Repeat steps 5-9 for the other paddle.

49215369892_6943ba3d57_b.jpg

49215370352_b7481d0d01_b.jpg

49215371127_9250624032_b.jpg

49215371612_9ec064c018_b.jpg

49215140121_5d91a5ce09_b.jpg

49214659023_6d4d317fa8_b.jpg

49215373467_ae8e148f81_b.jpg


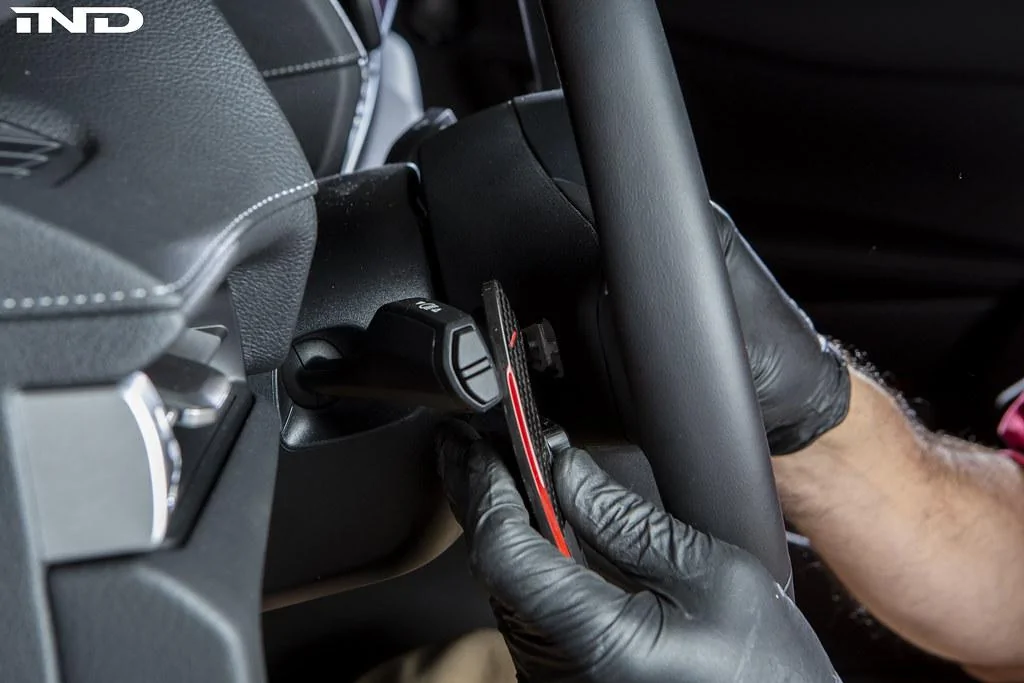
10. Route the paddle connector through the steering wheel recess and plug it in. Once the 3D paddle is adequately positioned, affix it with the T20 Torx you removed in Step 4. Repeat on the other side.

49215361332_c69233f9f8_b.jpg

49215373847_b2c5919195_b.jpg

49214660388_c2f0fdcfdc_b.jpg

49214661763_33bf781b2b_b.jpg


11. Reconnect the white / lime green connectors for the airbag. Ensure all wires are back in their OEM orientation / position before pressing the airbag into place.

49214661968_a1278d4fb2_b.jpg

49215143996_b0e6cbe818_b.jpg


12. Complete the installation by reconnecting the negative battery terminal.

49228501008_d8a5830929_b.jpg
Sponsored


30MilesOffshore

Well-Known Member
Joined
Jan 27, 2020
Threads
27
Messages
379
Reaction score
316
Location
Charlotte, NC
Car(s)
2020 Supra
Leave some links so people can check out the products on your website. Wouldn't hurt to add your website address to your bio info. Cheers!
 

antonio88x

Well-Known Member
First Name
Antonio
Joined
Sep 4, 2019
Threads
3
Messages
249
Reaction score
247
Location
Jupiter, FL
Car(s)
2020 Supra 3.0 Premium (mine), 2018 CX-5 GT (wife's)
For the life of me I can’t get the airbag off. I’m using as much force as I can. Idk if I’m contacting the springs correctly. Are there any extra tips for getting it off?
 

antonio88x

Well-Known Member
First Name
Antonio
Joined
Sep 4, 2019
Threads
3
Messages
249
Reaction score
247
Location
Jupiter, FL
Car(s)
2020 Supra 3.0 Premium (mine), 2018 CX-5 GT (wife's)
I can get the right side off. But can’t get the left side off.
 

KBG

Well-Known Member
First Name
Bryan
Joined
Jun 30, 2020
Threads
9
Messages
152
Reaction score
111
Location
A galaxy..far far away
Car(s)
2021 Supra
I recall reading/hearing that you might need to push on the horn/airbag as you are applying pressure to release the retention spring.
 

30MilesOffshore

Well-Known Member
Joined
Jan 27, 2020
Threads
27
Messages
379
Reaction score
316
Location
Charlotte, NC
Car(s)
2020 Supra
Tips:

1. You have to push down and hold down the entire horn assembly. Not just one side of the horn your trying to unclip.

2. Use something that has a flat edge to push the clip with. Don't use a regular screwdriver. It's recommended to use either T25 screwdriver or a long allen wrench. The flat edge creates pressure on the entire clip to release it. The screwdriver only tries to wedge itself in between the springs.

3. When inserting the T25 screwdriver/allen wrench make sure you are not at any angles. It must be placed straight in and not leaning in any directions. Make sure its not leaning up/down/forward/back. It must be exactly at a right angle to hit the clips.


--------------------------
It took me about an hour to get mine off. Since you are able to get the right off, I would leave that one clipped in and work on the left side first. Once you get the left side off then the right will pop right out easily. I had the opposite issue, I could get the left off super easy but couldn't get the right off for nothing. Then I pushed the left side back in and focused on the right. Once it popped, I was then able to pop the left easily.
 

Attachments

antonio88x

Well-Known Member
First Name
Antonio
Joined
Sep 4, 2019
Threads
3
Messages
249
Reaction score
247
Location
Jupiter, FL
Car(s)
2020 Supra 3.0 Premium (mine), 2018 CX-5 GT (wife's)
Tips:

1. You have to push down and hold down the entire horn assembly. Not just one side of the horn your trying to unclip.

2. Use something that has a flat edge to push the clip with. Don't use a regular screwdriver. It's recommended to use either T25 screwdriver or a long allen wrench. The flat edge creates pressure on the entire clip to release it. The screwdriver only tries to wedge itself in between the springs.

3. When inserting the T25 screwdriver/allen wrench make sure you are not at any angles. It must be placed straight in and not leaning in any directions. Make sure its not leaning up/down/forward/back. It must be exactly at a right angle to hit the clips.


--------------------------
It took me about an hour to get mine off. Since you are able to get the right off, I would leave that one clipped in and work on the left side first. Once you get the left side off then the right will pop right out easily. I had the opposite issue, I could get the left off super easy but couldn't get the right off for nothing. Then I pushed the left side back in and focused on the right. Once it popped, I was then able to pop the left easily.
This is great. I was actually able to get it off, but I had to switch tools. I was using a flat head screw driver, but apparently it was going between the spring coils. I had a lot of spring metal shavings coming out during my initial struggles. I later switched to a T15 torx driver and that was able to push the springs no problem. The rest was easy from there.

I was actually installing the Golden Wrench aluminum paddles. I decided to add a little molykote grease to the "hooks" inside the switch assembly. I noticed the original ones had some gease and he new ones were dry. Everything went back together super easy.

On my BRZ the airbag is held on with 3 screws and comes off super easy. This spring clip mechanism just seems a little unnecessary. But got them on and I love them! The OEM paddles are too small in my opinion. I'd go to grab the next gear and I would have to fish around looking for it. I needed paddles that would extend down further. There's no slop or flexing in them, super rigid. Very happy with the result.

All my metal spring shavings:
IMG_3052.jpg


OEM comparison:
IMG_3055.jpg
IMG_3056.jpg


IMG_3058.jpg


Where I added a little molykote grease to have it match the OEM configuration:
IMG_3057.jpg


These damn springs...
IMG_3059.jpg
IMG_3060.jpg


But very happy with the final product!!
IMG_3061.jpg
IMG_3062.jpg
IMG_3063.jpg
 
OP
OP
iND-Distribution

iND-Distribution

Well-Known Member
Gold Sponsor
First Name
iND
Joined
Dec 10, 2019
Threads
42
Messages
146
Reaction score
203
Location
Chicago
Car(s)
A90 Supra
Sorry for the delayed reply; we had to close last week Tuesday afternoon through the end of the week.

Thank you for everyone that provided assistance and install tips.

To be honest, once you get used to the springs, popping off the airbag should only take 30 seconds I promise, but we have a bit of an unfair advantage. Coming from BMWs, we've been dealing with those clips for well over the last 10 years.

When using a flathead screwdriver, the tip is that you need to hold it so the head is 90 degrees (perpendicular) to the spring coils. When you do this, it won't go between the coils and easily activates the spring clips.

That said, thanks for the Torx bit recommendation, should make it easier for a lot of people. We neglected to be more clear with the spring release instruction.

Thanks Antonio for the install pics. The paddles look great and are definitely a huge improvement over stock.
 
OP
OP
iND-Distribution

iND-Distribution

Well-Known Member
Gold Sponsor
First Name
iND
Joined
Dec 10, 2019
Threads
42
Messages
146
Reaction score
203
Location
Chicago
Car(s)
A90 Supra
Great write up. Looking forward to getting these installed along with the new steering wheel.
Looking forward to seeing them installed. I love the theme you have going. Those paddles were gorgeous with the blue accents.
 

puzzled

Well-Known Member
First Name
Calvin
Joined
Jun 4, 2020
Threads
0
Messages
1,788
Reaction score
2,287
Location
USA
Car(s)
2020 Supra Premium; VA STI; MK7 GOLF-R; etc..
I think most people (including me) get confused on which tool to use and the orientation because of the de-bossed slot on the side of the steering wheel where you tear through the skin to access the springs.

As IND mentioned, if one turns the regular head screw driver perpendicular to that slot after penetrating the skin, then pressing the spring is not so difficult. I too ended up using a torx driver per service manual however.
 

antonio88x

Well-Known Member
First Name
Antonio
Joined
Sep 4, 2019
Threads
3
Messages
249
Reaction score
247
Location
Jupiter, FL
Car(s)
2020 Supra 3.0 Premium (mine), 2018 CX-5 GT (wife's)
My main issue is disconnecting those blue connectors for the paddles and the white connector of the airbag. Is there an approach to this?
I used some pick tools to push on the connectors like IND showed in their photos. If you're using a screwdriver, it might be harder since the connectors are so small.
Sponsored


Top