richy200
Member
- First Name
- richard
- Joined
- Apr 13, 2025
- Threads
- 1
- Messages
- 6
- Reaction score
- 7
- Location
- united kingdom
- Car(s)
- a90 supra
Yea that’s a shame
Sponsored
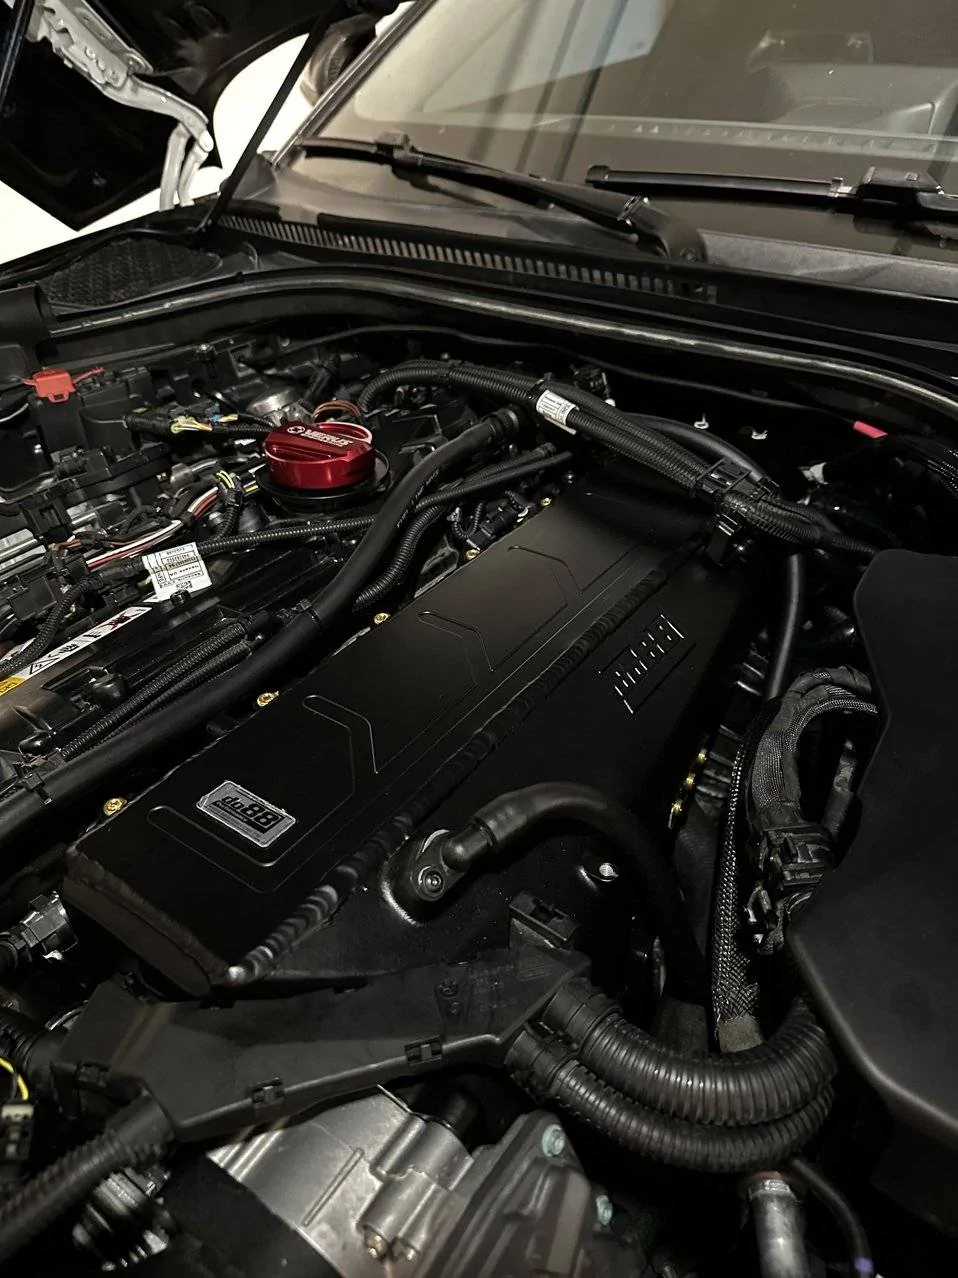
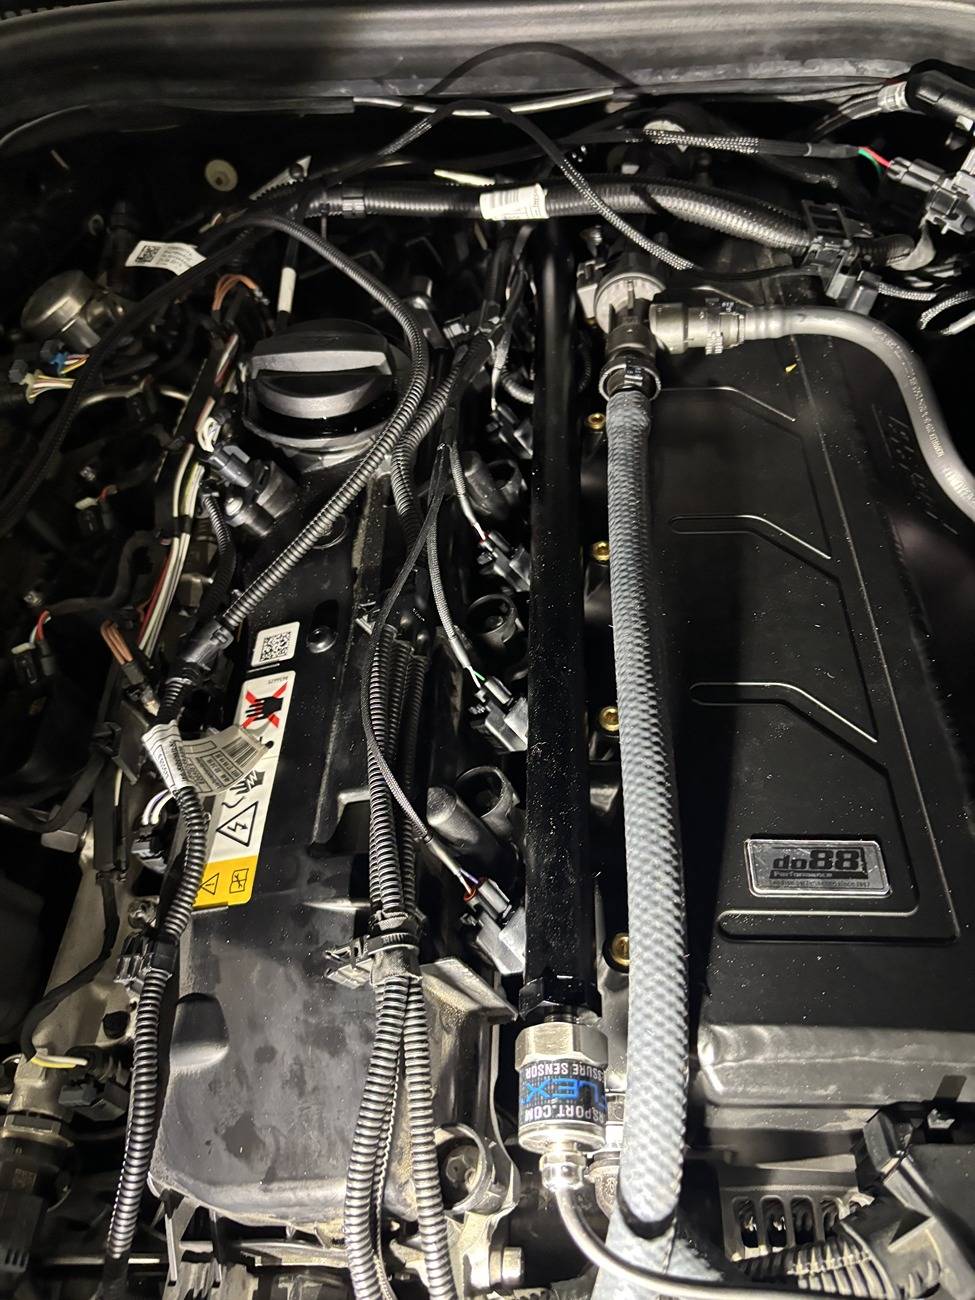
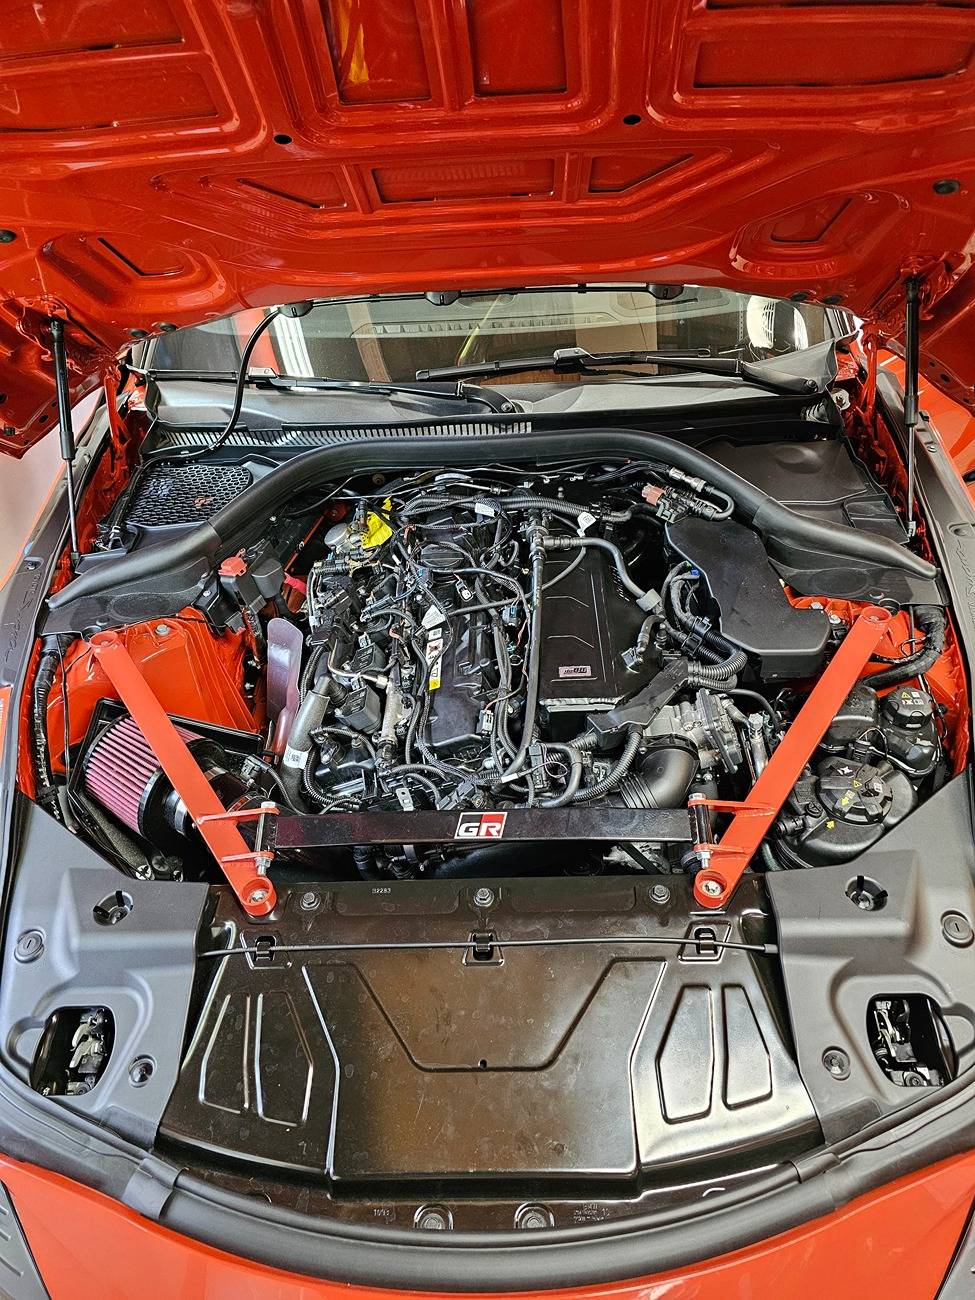
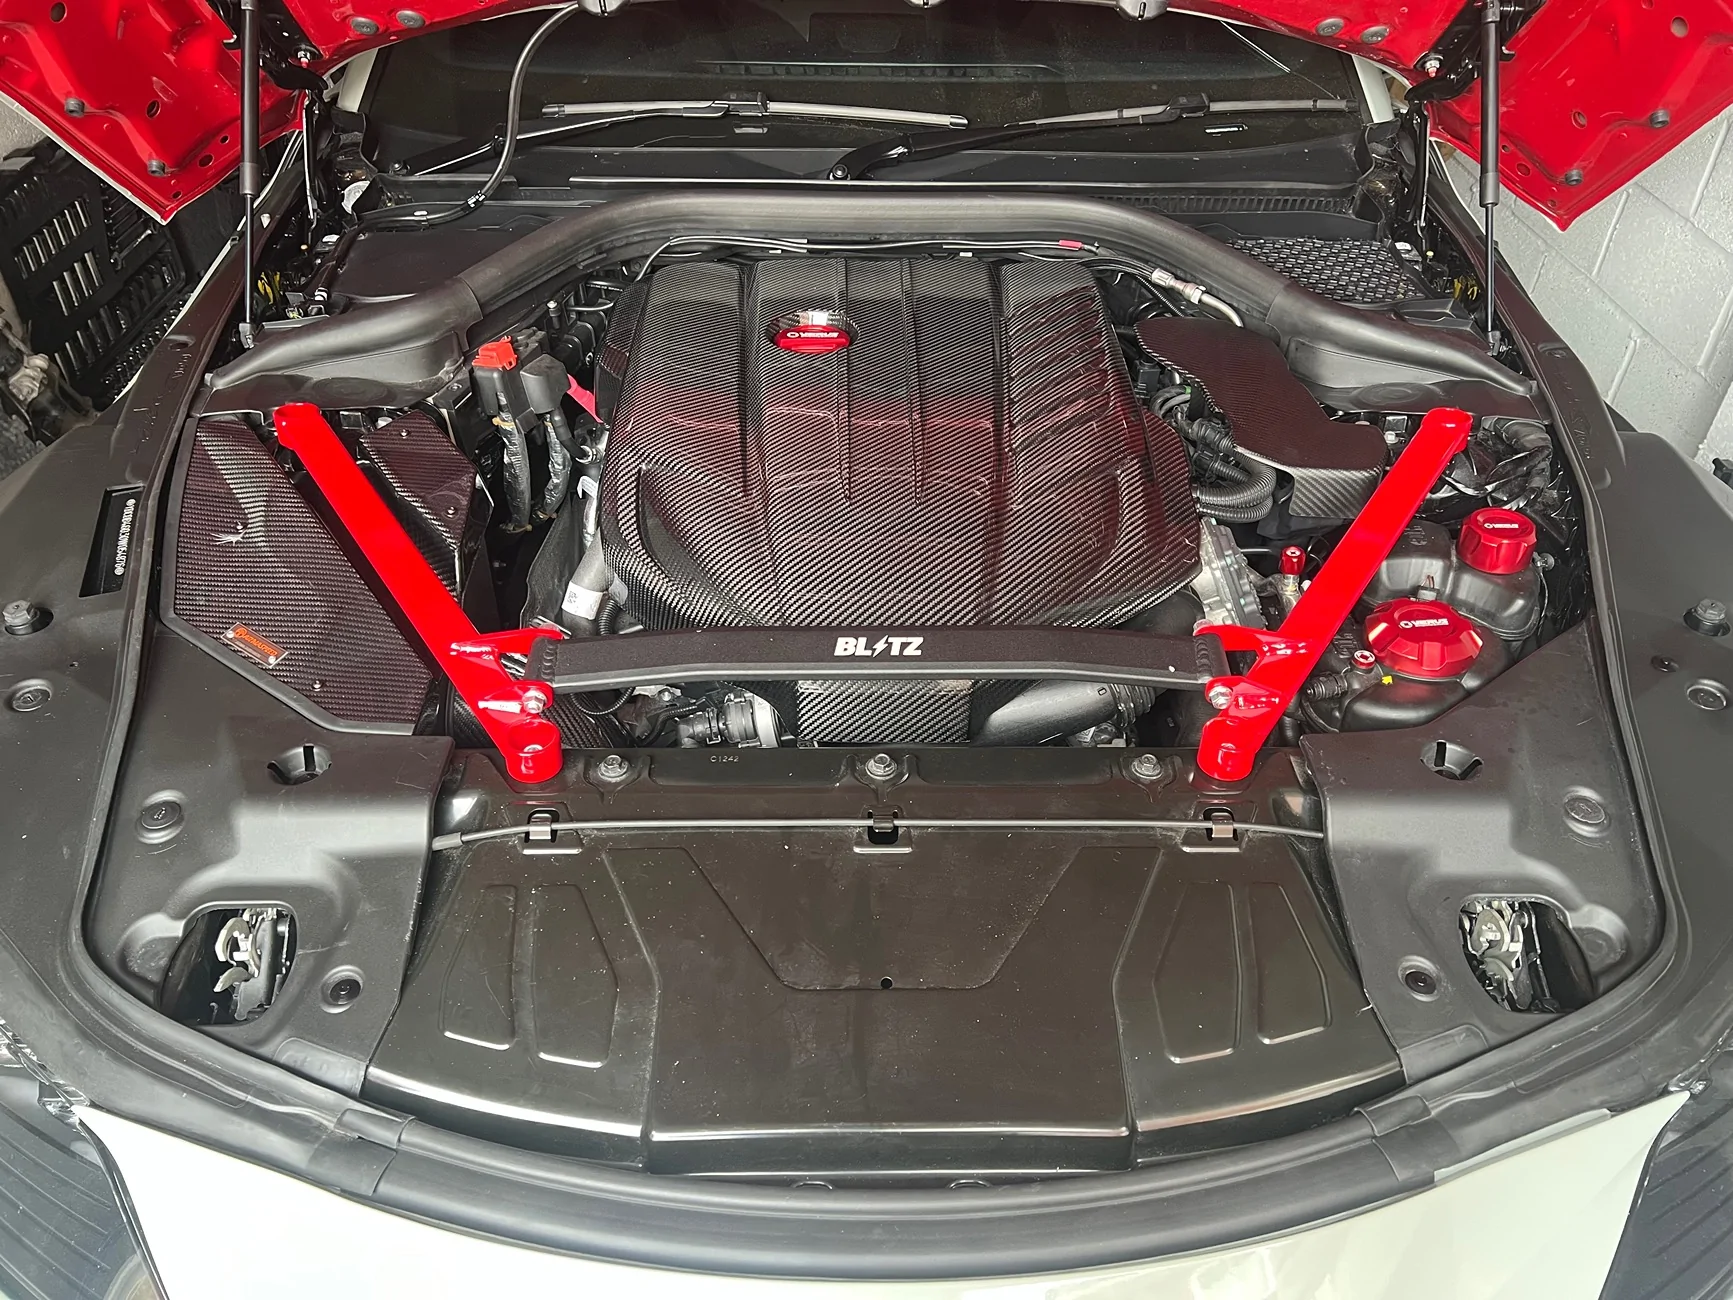
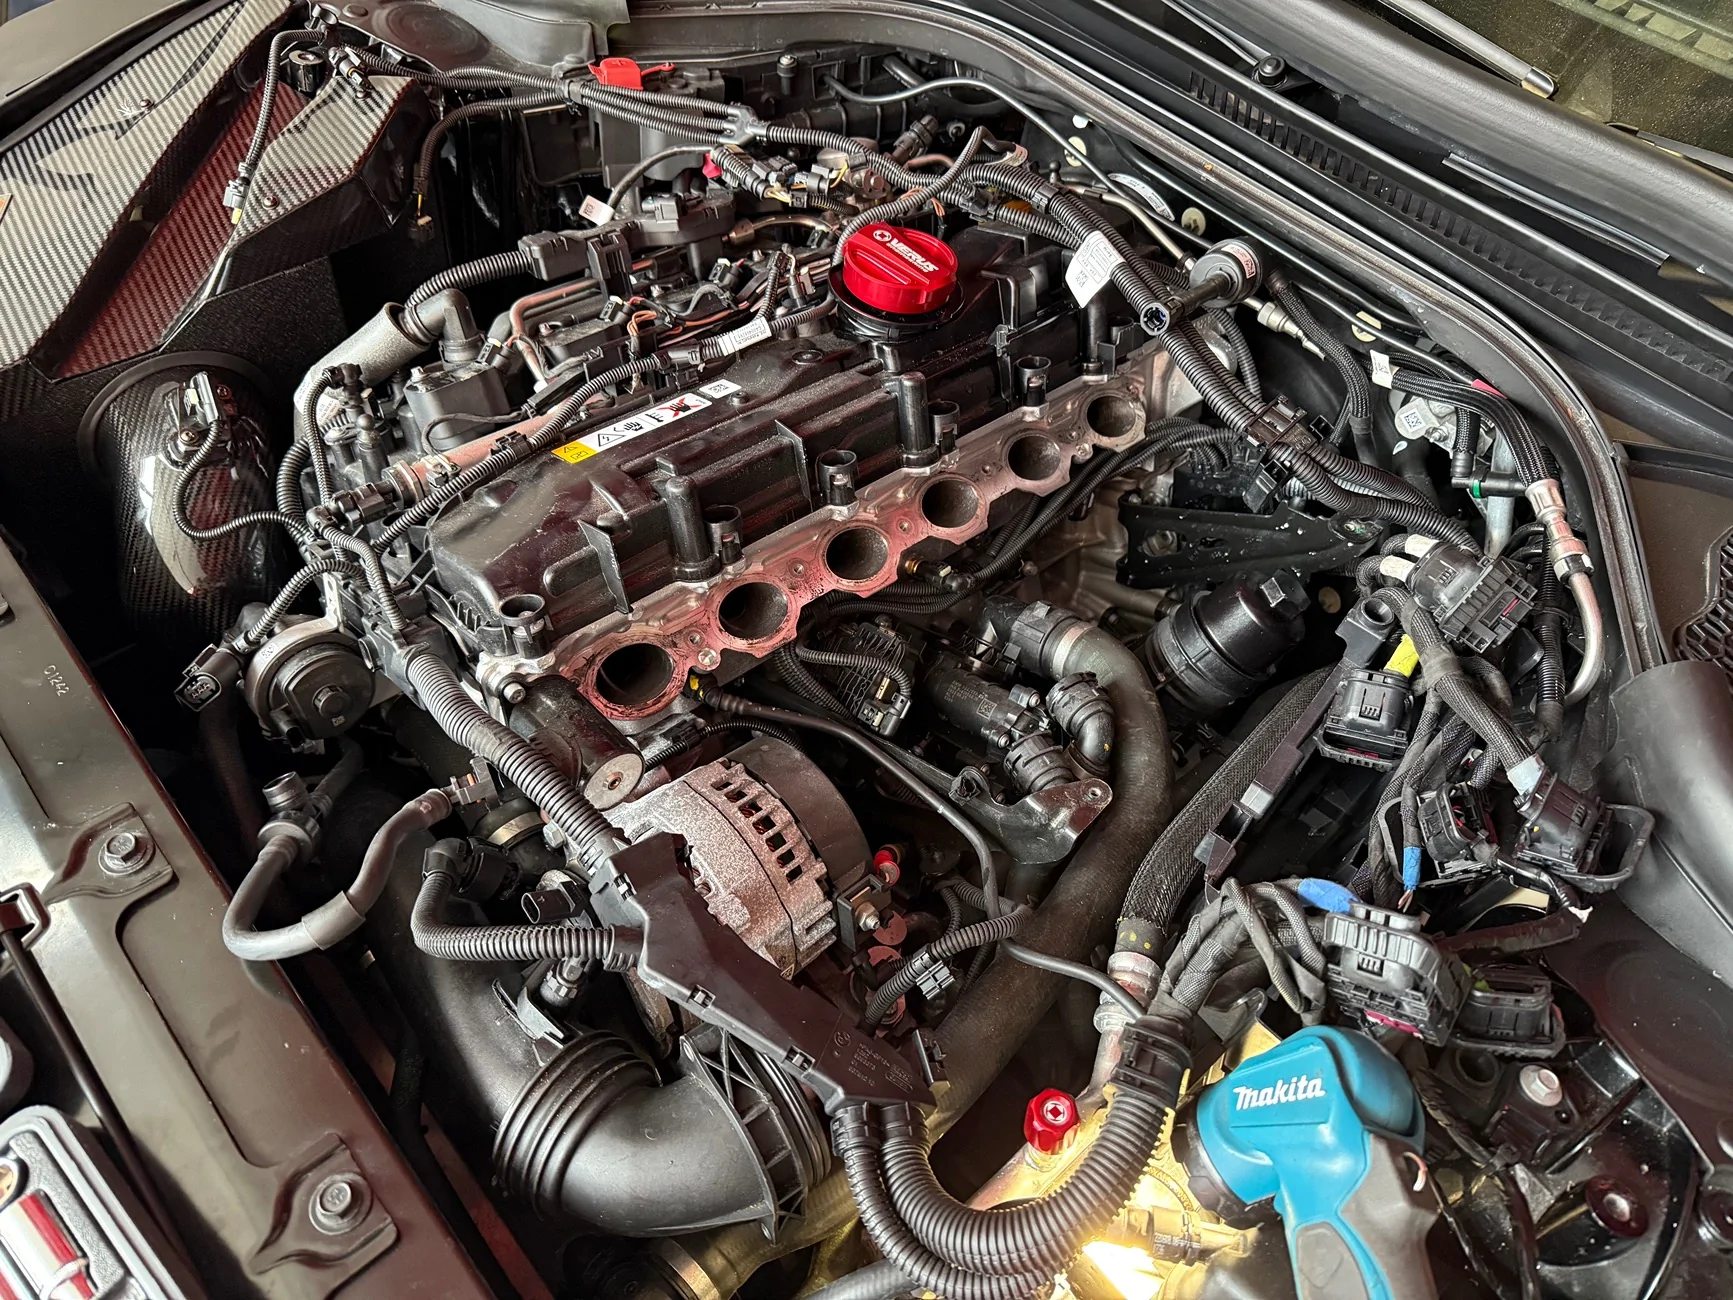
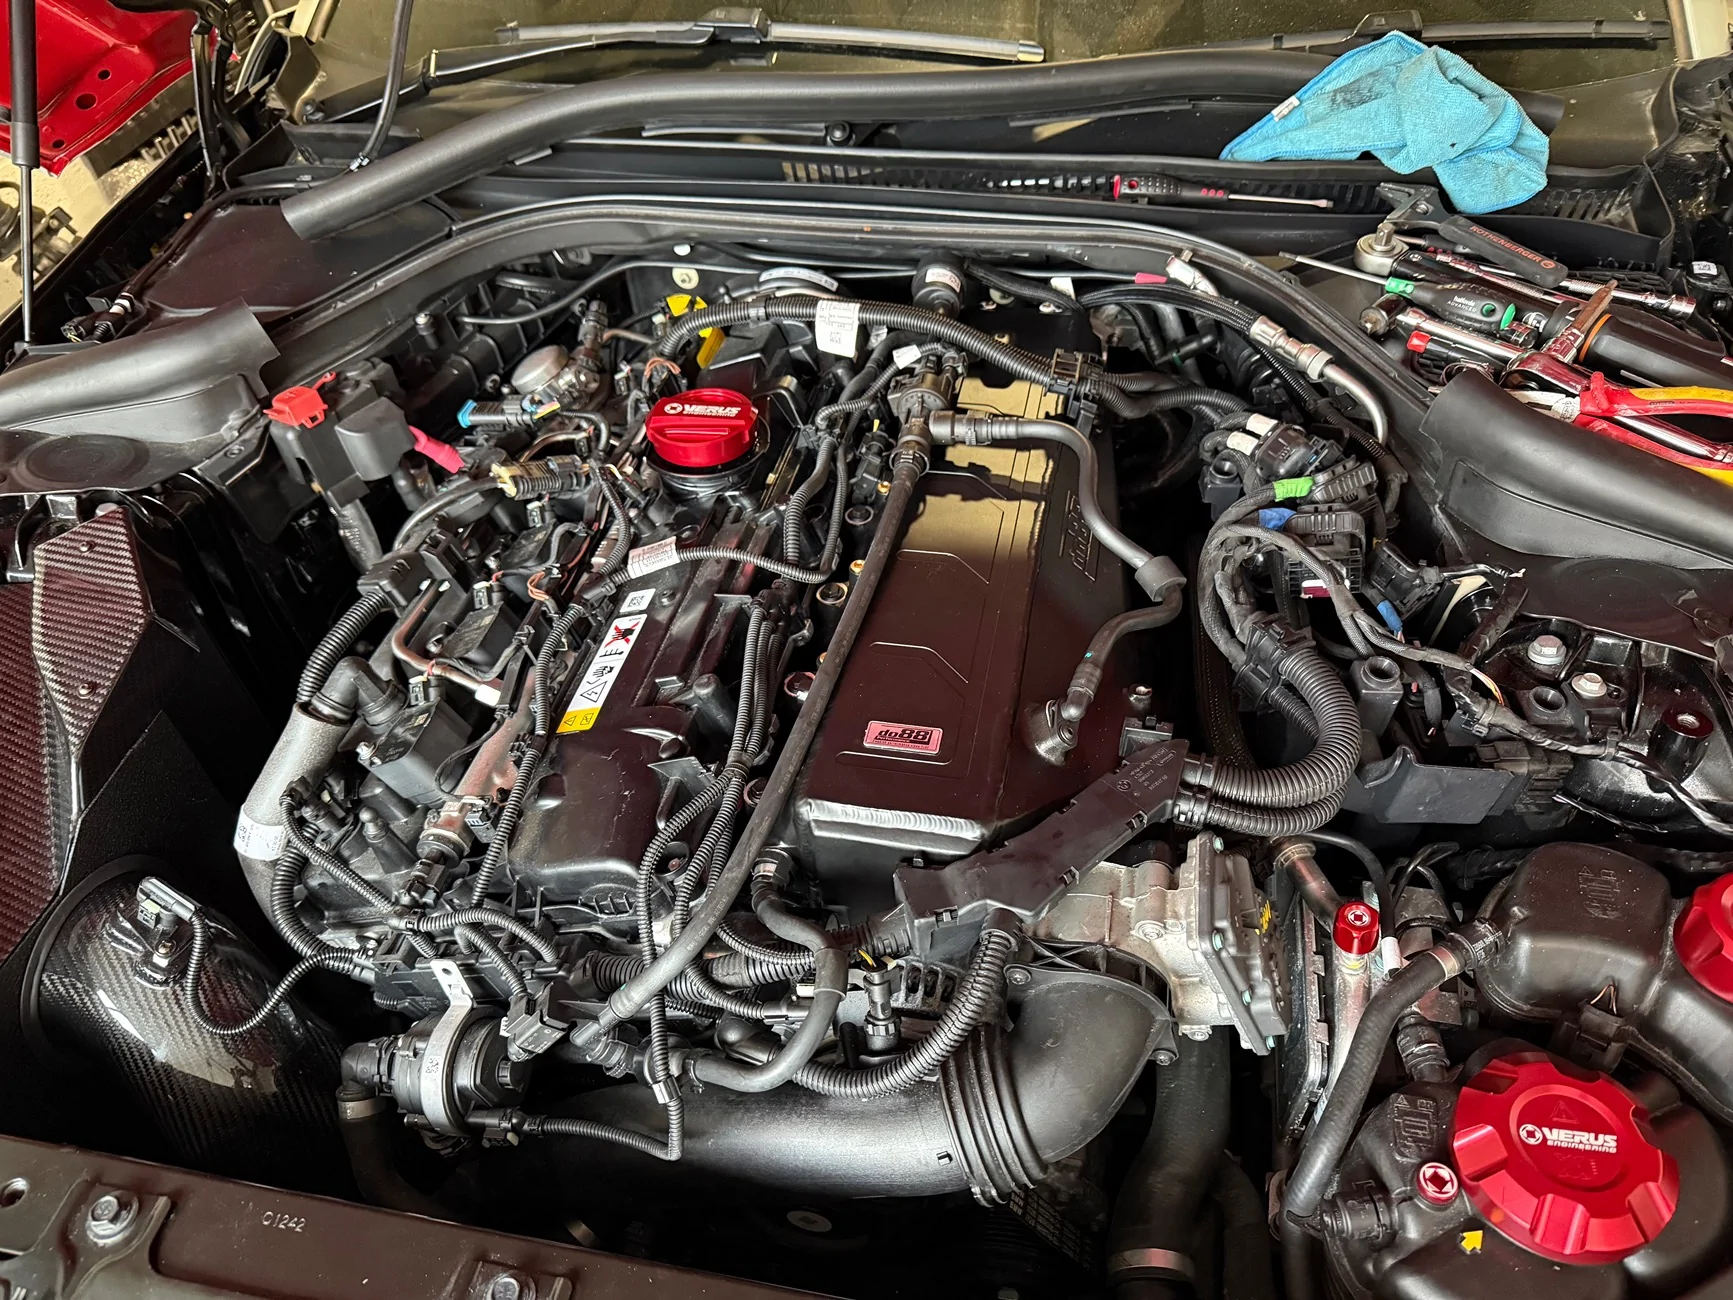
How bad was the install? How many hours?Finally installed after so long sitting in box.
Still testing and comparing the data.
Currently impressed ?
(Not concrete comparable data)
(Discovered the cooling loop was not fully bled)
5sec pull
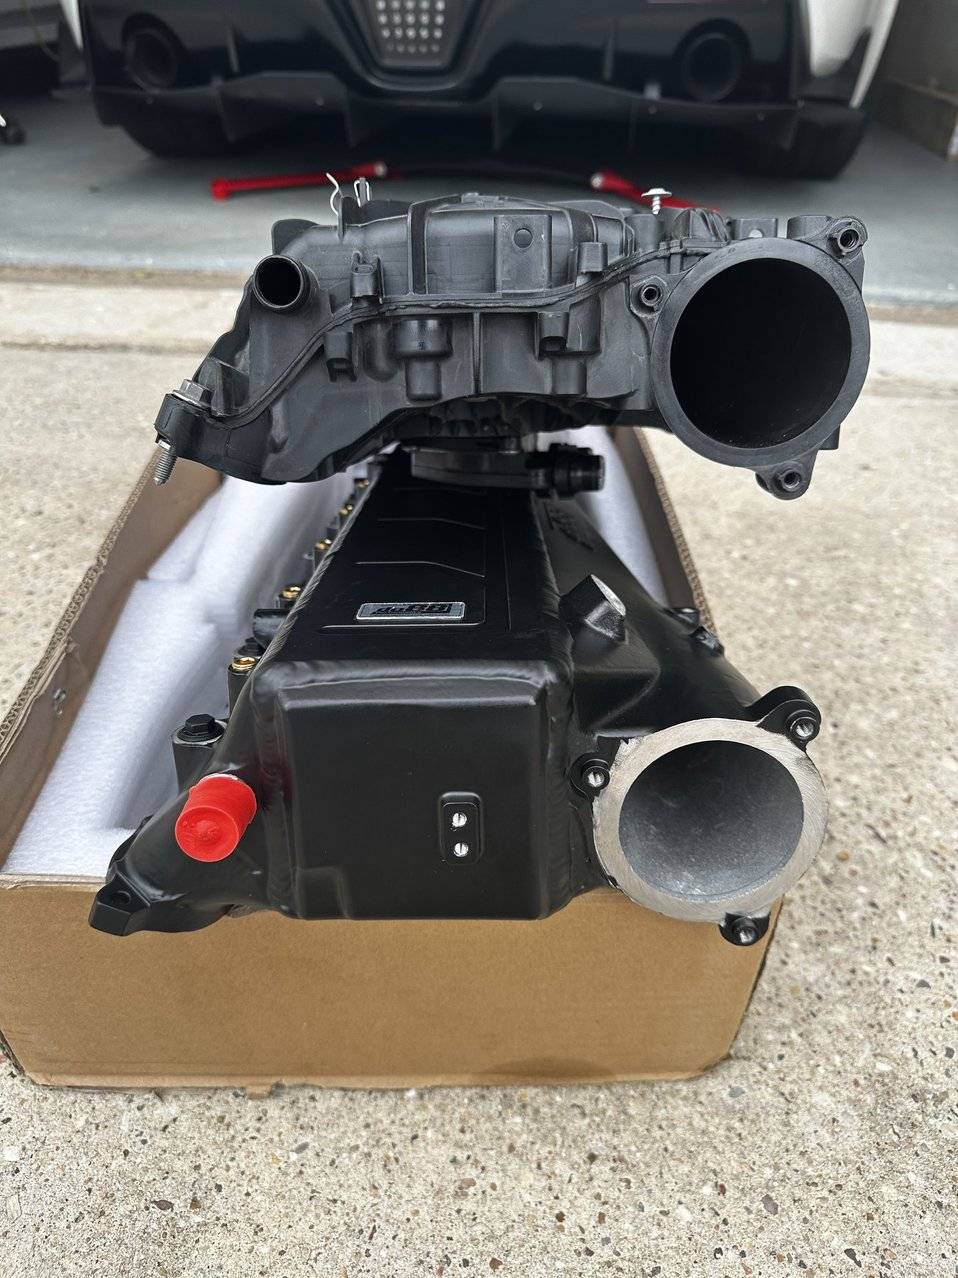
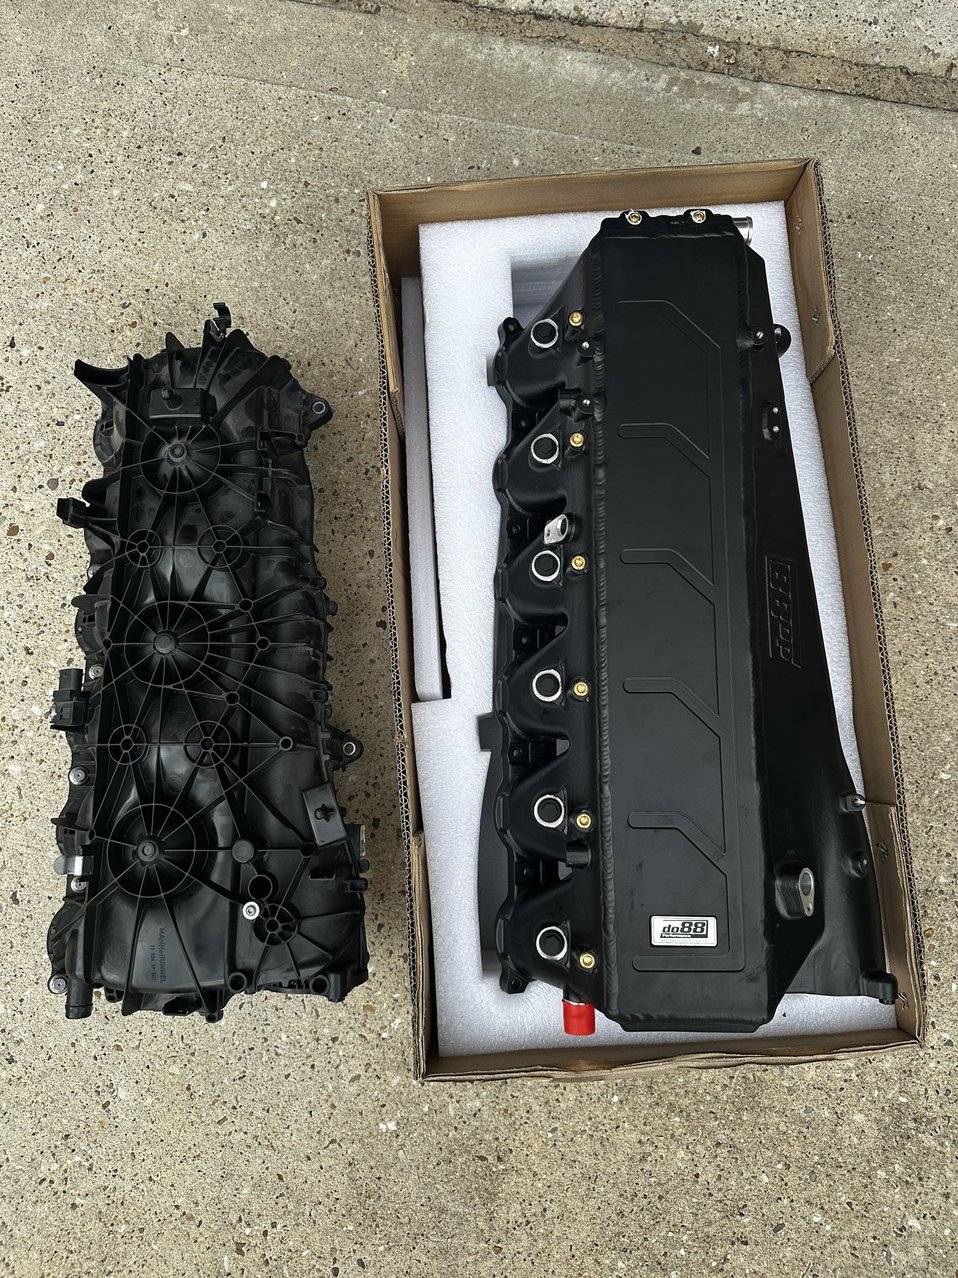
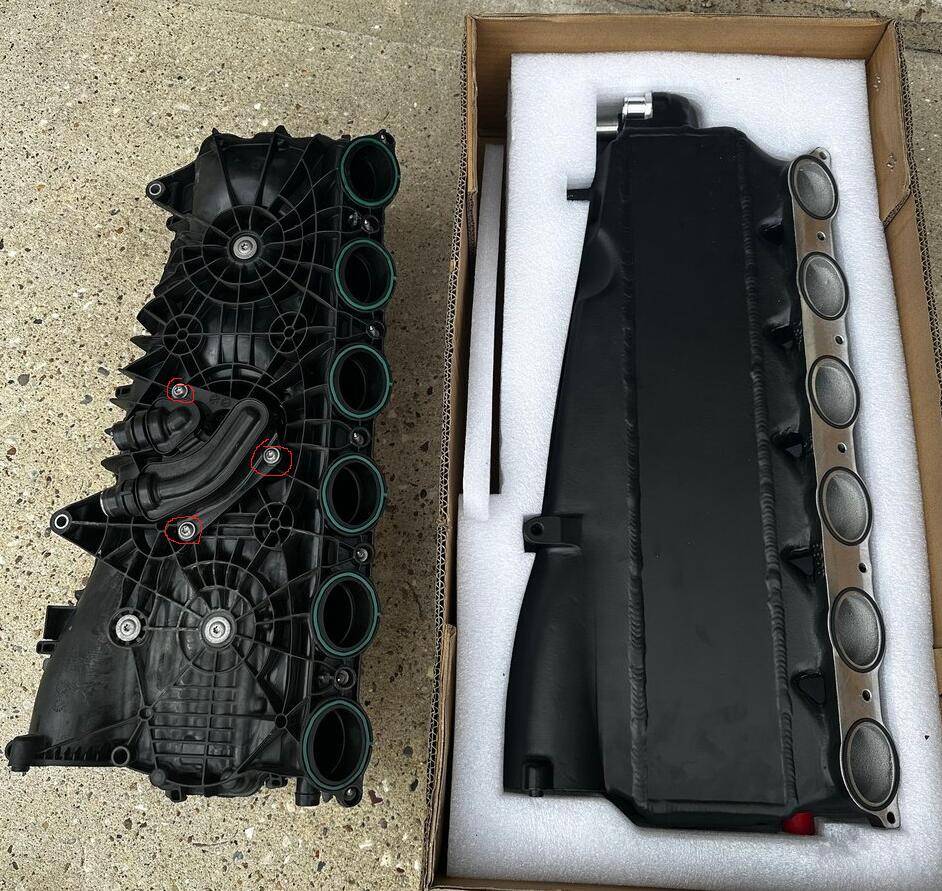
do88 (cheap) manifold:
Ambient: 84F
IAT: 96F -> 100F (4F delta)
IAT throttlebody: 134F -> ~280-290F (able to shed 190F of heat, maybe more on a longer run)
Stock manifold:
Ambient: 84F
IAT: 102F - 111F (9F delta)
Was not logging the IAT throttlebody.

do88 install instructionsHow bad was the install? How many hours?
do88 install instructions
It's alright, there's a couple of sections one can skip to make it easier.
Took maybe ~6hrs, I leisurely worked on it solo (3) 2hr sessions.
I mostly followed the Kies Motorsports vid (dont have to drain all the coolant).
I bought the extra fuel rail and evap delete caps, decided to keep the evap system for now.
(Separate for cheap version, included in MERA version)
The install guide does skip over some disassembly and reassembly.
I skipped the bracket spacer that is behind engine, legit hard and cannot see the bolts.
The manifold mounted fine without it.
I did relocate the evap canister and redid the lines, for a cleaner look.
I have a quickjack, so it was easy for me to get underneath for that section.
($20 fuel line & zip ties)
When removing the stock manifold, my coolant lines were stuck on solid.
It was easier to unbolt the bottom of the manifold (3bolts & separate), then disconnect the lines.
It took 3-4 bleeding procedures, I didnt prefill the lines/manifold per instructions.
Was cleaner to just fill and bleed at the reservoir.
Mainly to keep the lines clean to test for leaks.
Mount the TMAP sensor on the manifold before installing onto the engine.
The bolt cannot be reached once installed, the instructions skips over this I believe.
(Few members noted this)
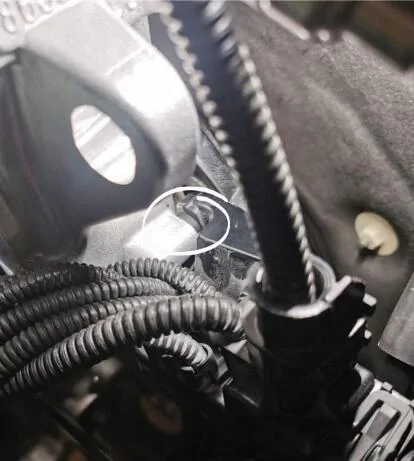
The manifold-to-engine bolt (pictured) near it is also super hard to install.
It is very easy to lose the washers included, be careful there.
The headless screws used to position the phenolic spacer, were a pain to remove, use a magnet.
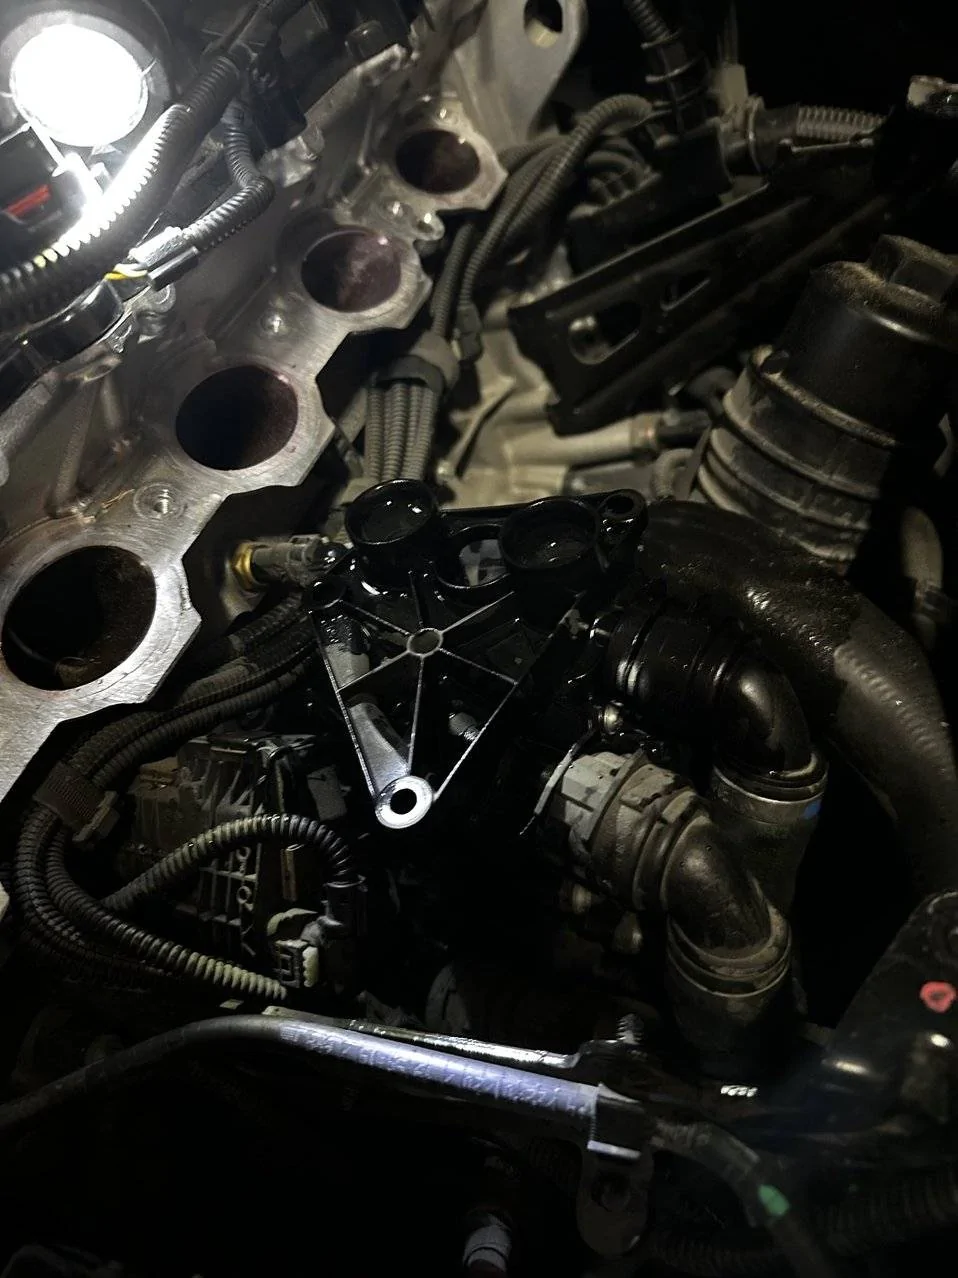
Bracket spacer:

Bottom stock manifold part:
Unbolt these bolts if you cannot unhook the coolant lines:

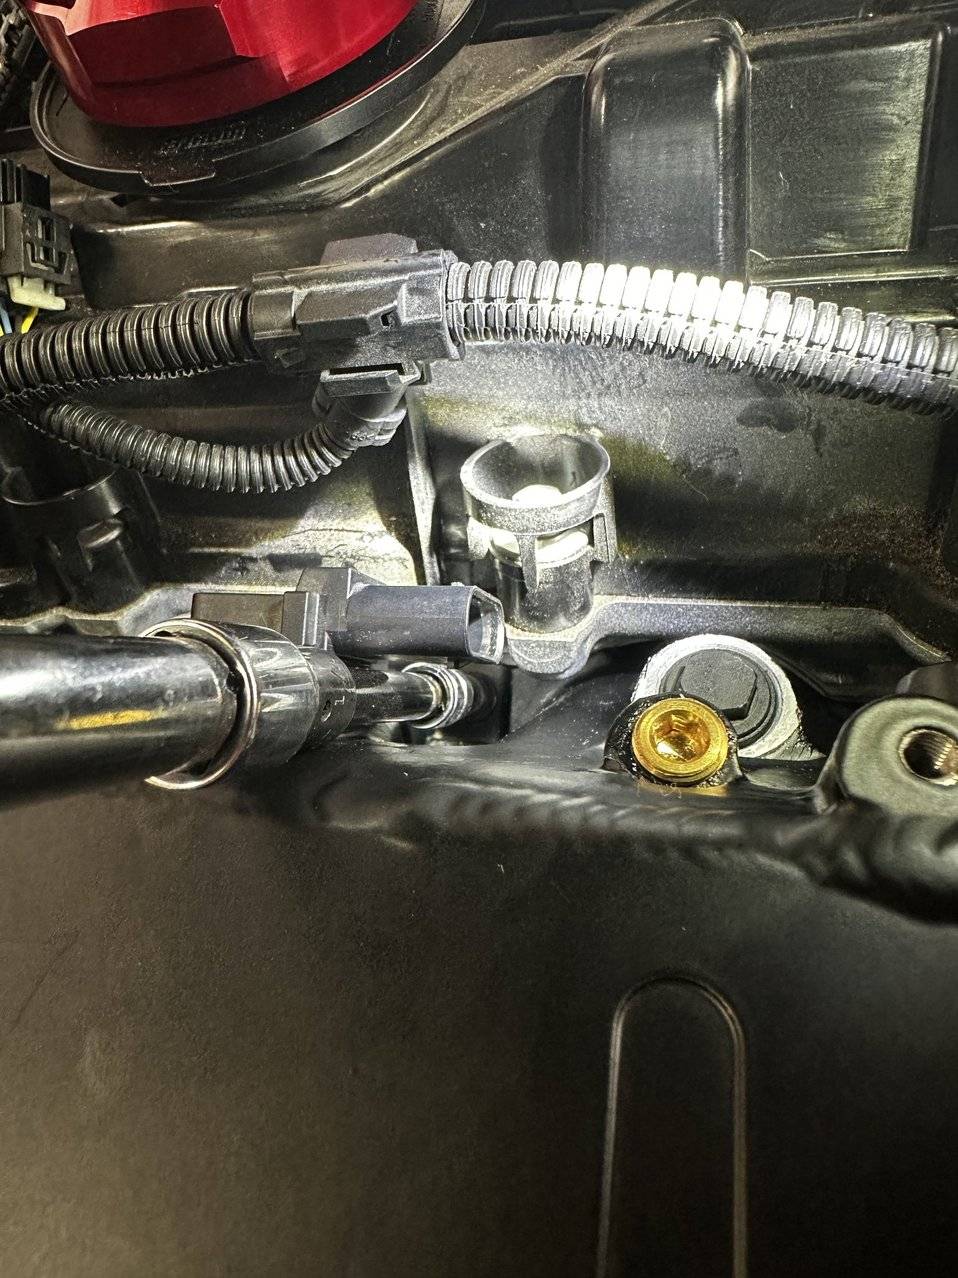
TMAP sensor:
that bracket spacer was a pain from what i remember. same here with the bleeding procedure. i had to do it 3-4 times too. how did you relocate the evap canister? seemed like too much work for me to do so my mani looks messy.do88 install instructions
It's alright, there's a couple of sections one can skip to make it easier.
Took maybe ~6hrs, I leisurely worked on it solo (3) 2hr sessions.
I mostly followed the Kies Motorsports vid (dont have to drain all the coolant).
I bought the extra fuel rail and evap delete caps, decided to keep the evap system for now.
(Separate for cheap version, included in MERA version)
The install guide does skip over some disassembly and reassembly.
I skipped the bracket spacer that is behind engine, legit hard and cannot see the bolts.
The manifold mounted fine without it.
I did relocate the evap canister and redid the lines, for a cleaner look.
I have a quickjack, so it was easy for me to get underneath for that section.
($20 fuel line & zip ties)
When removing the stock manifold, my coolant lines were stuck on solid.
It was easier to unbolt the bottom of the manifold (3bolts & separate), then disconnect the lines.
It took 3-4 bleeding procedures, I didnt prefill the lines/manifold per instructions.
Was cleaner to just fill and bleed at the reservoir.
Mainly to keep the lines clean to test for leaks.
Mount the TMAP sensor on the manifold before installing onto the engine.
The bolt cannot be reached once installed, the instructions skips over this I believe.
(Few members noted this)
The manifold-to-engine bolt (pictured) near it is also super hard to install.
It is very easy to lose the washers included, be careful there.
The headless screws used to position the phenolic spacer, were a pain to remove, use a magnet.
Bracket spacer:
Bottom stock manifold part:
Unbolt these bolts if you cannot unhook the coolant lines:
TMAP sensor:

This manifold does not require a retune, correct?do88 install instructions
It's alright, there's a couple of sections one can skip to make it easier.
Took maybe ~6hrs, I leisurely worked on it solo (3) 2hr sessions.
I mostly followed the Kies Motorsports vid (dont have to drain all the coolant).
I bought the extra fuel rail and evap delete caps, decided to keep the evap system for now.
(Separate for cheap version, included in MERA version)
The install guide does skip over some disassembly and reassembly.
I skipped the bracket spacer that is behind engine, legit hard and cannot see the bolts.
The manifold mounted fine without it.
I did relocate the evap canister and redid the lines, for a cleaner look.
I have a quickjack, so it was easy for me to get underneath for that section.
($20 fuel line & zip ties)
When removing the stock manifold, my coolant lines were stuck on solid.
It was easier to unbolt the bottom of the manifold (3bolts & separate), then disconnect the lines.
It took 3-4 bleeding procedures, I didnt prefill the lines/manifold per instructions.
Was cleaner to just fill and bleed at the reservoir.
Mainly to keep the lines clean to test for leaks.
Mount the TMAP sensor on the manifold before installing onto the engine.
The bolt cannot be reached once installed, the instructions skips over this I believe.
(Few members noted this)
The manifold-to-engine bolt (pictured) near it is also super hard to install.
It is very easy to lose the washers included, be careful there.
The headless screws used to position the phenolic spacer, were a pain to remove, use a magnet.
Bracket spacer:
Bottom stock manifold part:
Unbolt these bolts if you cannot unhook the coolant lines:
TMAP sensor:
No - it just keeps your intake air temperatures lower/stable so that your car does not heat soak and pull power.This manifold does not require a retune, correct?
Thanks. Read in another thread that the manifold caused enough change in airflow that wot was no longer smooth and required a retune to adjust.No - it just keeps your intake air temperatures lower/stable so that your car does not heat soak and pull power.
Great insights, thank you. Don't drain all coolant and skip the spacer on the back/blind side of cylinder head. Stock chargepipe was difficult to connect to tb and took some forceful prying. I also prefilled the new lines and intake mani before connecting both lines. One service bleed seemed to do the trick. Not too bad of an install at all. Took me about 5hrs.do88 install instructions
It's alright, there's a couple of sections one can skip to make it easier.
Took maybe ~6hrs, I leisurely worked on it solo (3) 2hr sessions.
I mostly followed the Kies Motorsports vid (dont have to drain all the coolant).
I bought the extra fuel rail and evap delete caps, decided to keep the evap system for now.
(Separate for cheap version, included in MERA version)
The install guide does skip over some disassembly and reassembly.
I skipped the bracket spacer that is behind engine, legit hard and cannot see the bolts.
The manifold mounted fine without it.
I did relocate the evap canister and redid the lines, for a cleaner look.
I have a quickjack, so it was easy for me to get underneath for that section.
($20 fuel line & zip ties)
When removing the stock manifold, my coolant lines were stuck on solid.
It was easier to unbolt the bottom of the manifold (3bolts & separate), then disconnect the lines.
It took 3-4 bleeding procedures, I didnt prefill the lines/manifold per instructions.
Was cleaner to just fill and bleed at the reservoir.
Mainly to keep the lines clean to test for leaks.
Mount the TMAP sensor on the manifold before installing onto the engine.
The bolt cannot be reached once installed, the instructions skips over this I believe.
(Few members noted this)
The manifold-to-engine bolt (pictured) near it is also super hard to install.
It is very easy to lose the washers included, be careful there.
The headless screws used to position the phenolic spacer, were a pain to remove, use a magnet.
Bracket spacer:
Bottom stock manifold part:
Unbolt these bolts if you cannot unhook the coolant lines:
TMAP sensor:
Yes, I noticed on my car esp with 3" charge pipe.Thanks. Read in another thread that the manifold caused enough change in airflow that wot was no longer smooth and required a retune to adjust.
Standard version or MERA?I just got mine installed over the weekend. I'm seeing around 15F above the ambient temp when it was 61F. Today after sitting in the garage for a few hours after an hour of spirited driving, I saw up to 30F above the ambient.
The power gained is noticeable.
StandardStandard version or MERA?

What was ambient for those track laps?I also installed the standard version. It took about 3 hours to install, pre-filled the coolant lines before connecting them.
I abused the car on track for a full day (approx 80 - 100 laps) and didn’t see temperatures higher than 40degrees C (104 F). I had no noticeable heat soak or loss of power. I’m also running mishimotto aux coolers and bmw ht-12 (green coolant)
I skipped a few steps also, I didn’t move the evap or do the lines as engine cover fits on fine