- First Name
- Evan
- Joined
- Dec 10, 2021
- Threads
- 45
- Messages
- 709
- Reaction score
- 1,142
- Location
- Pittsburgh, PA
- Car(s)
- 21 Nitro Yellow A90 Supra, 10 Honda Fit Sport 5spd
- Thread starter
- #1
Hi everyone! A little while back I discovered Speed Engineering's A90 brake duct kit and thought it was a compelling offering to the Verus brake duct kit at a much lower cost. I figured I would give it a shot as they seemed to be a fairly reputable company and I know one of their employees is a regular on the forums. Now that I've had the time to install it and get a bit of track/street driving I think I can confidently make a review on it.
As a bit of background I am currently running HKS HAS set to the HKS factory height along with 18x10.7 titan 7 TD6e wrapped in Nankang CRS 275/40/18 tires. I'm sitting at about -2.25-2.5° camber as well. I reached out to see if this setup would be compatible and they told me their development car is running a set A052s in 265 and due to that tire running wide there is a chance mine would fit. (Not sure of the diameter but I'd imagine 19").
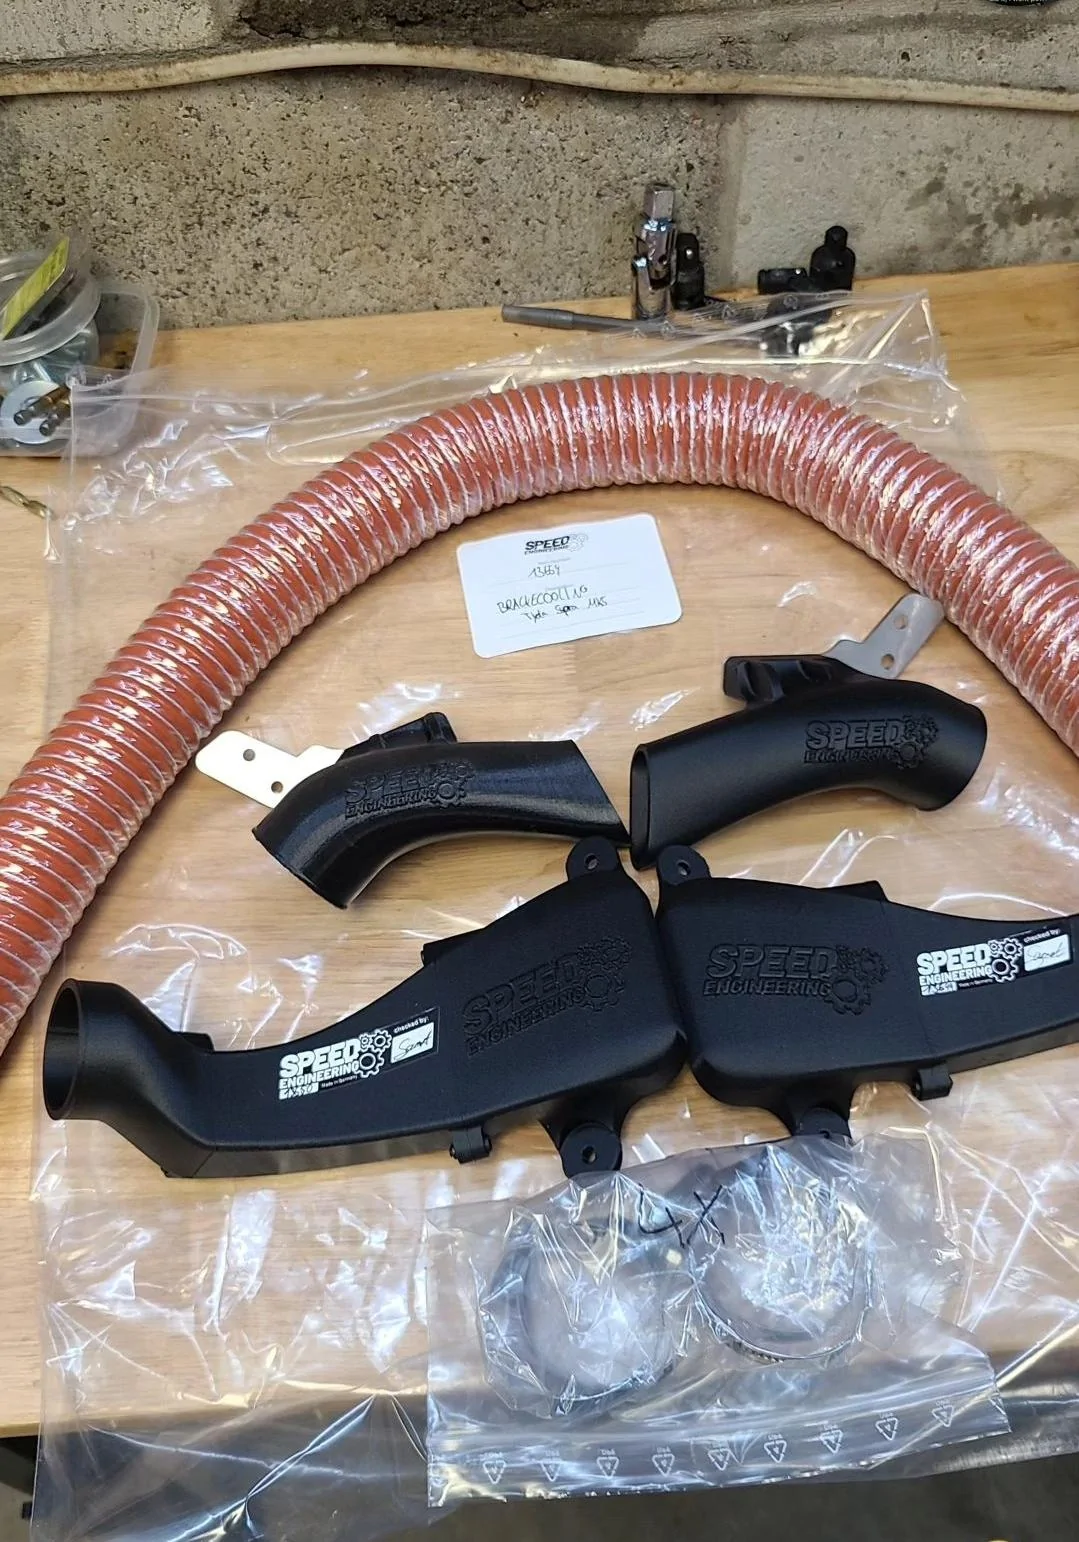
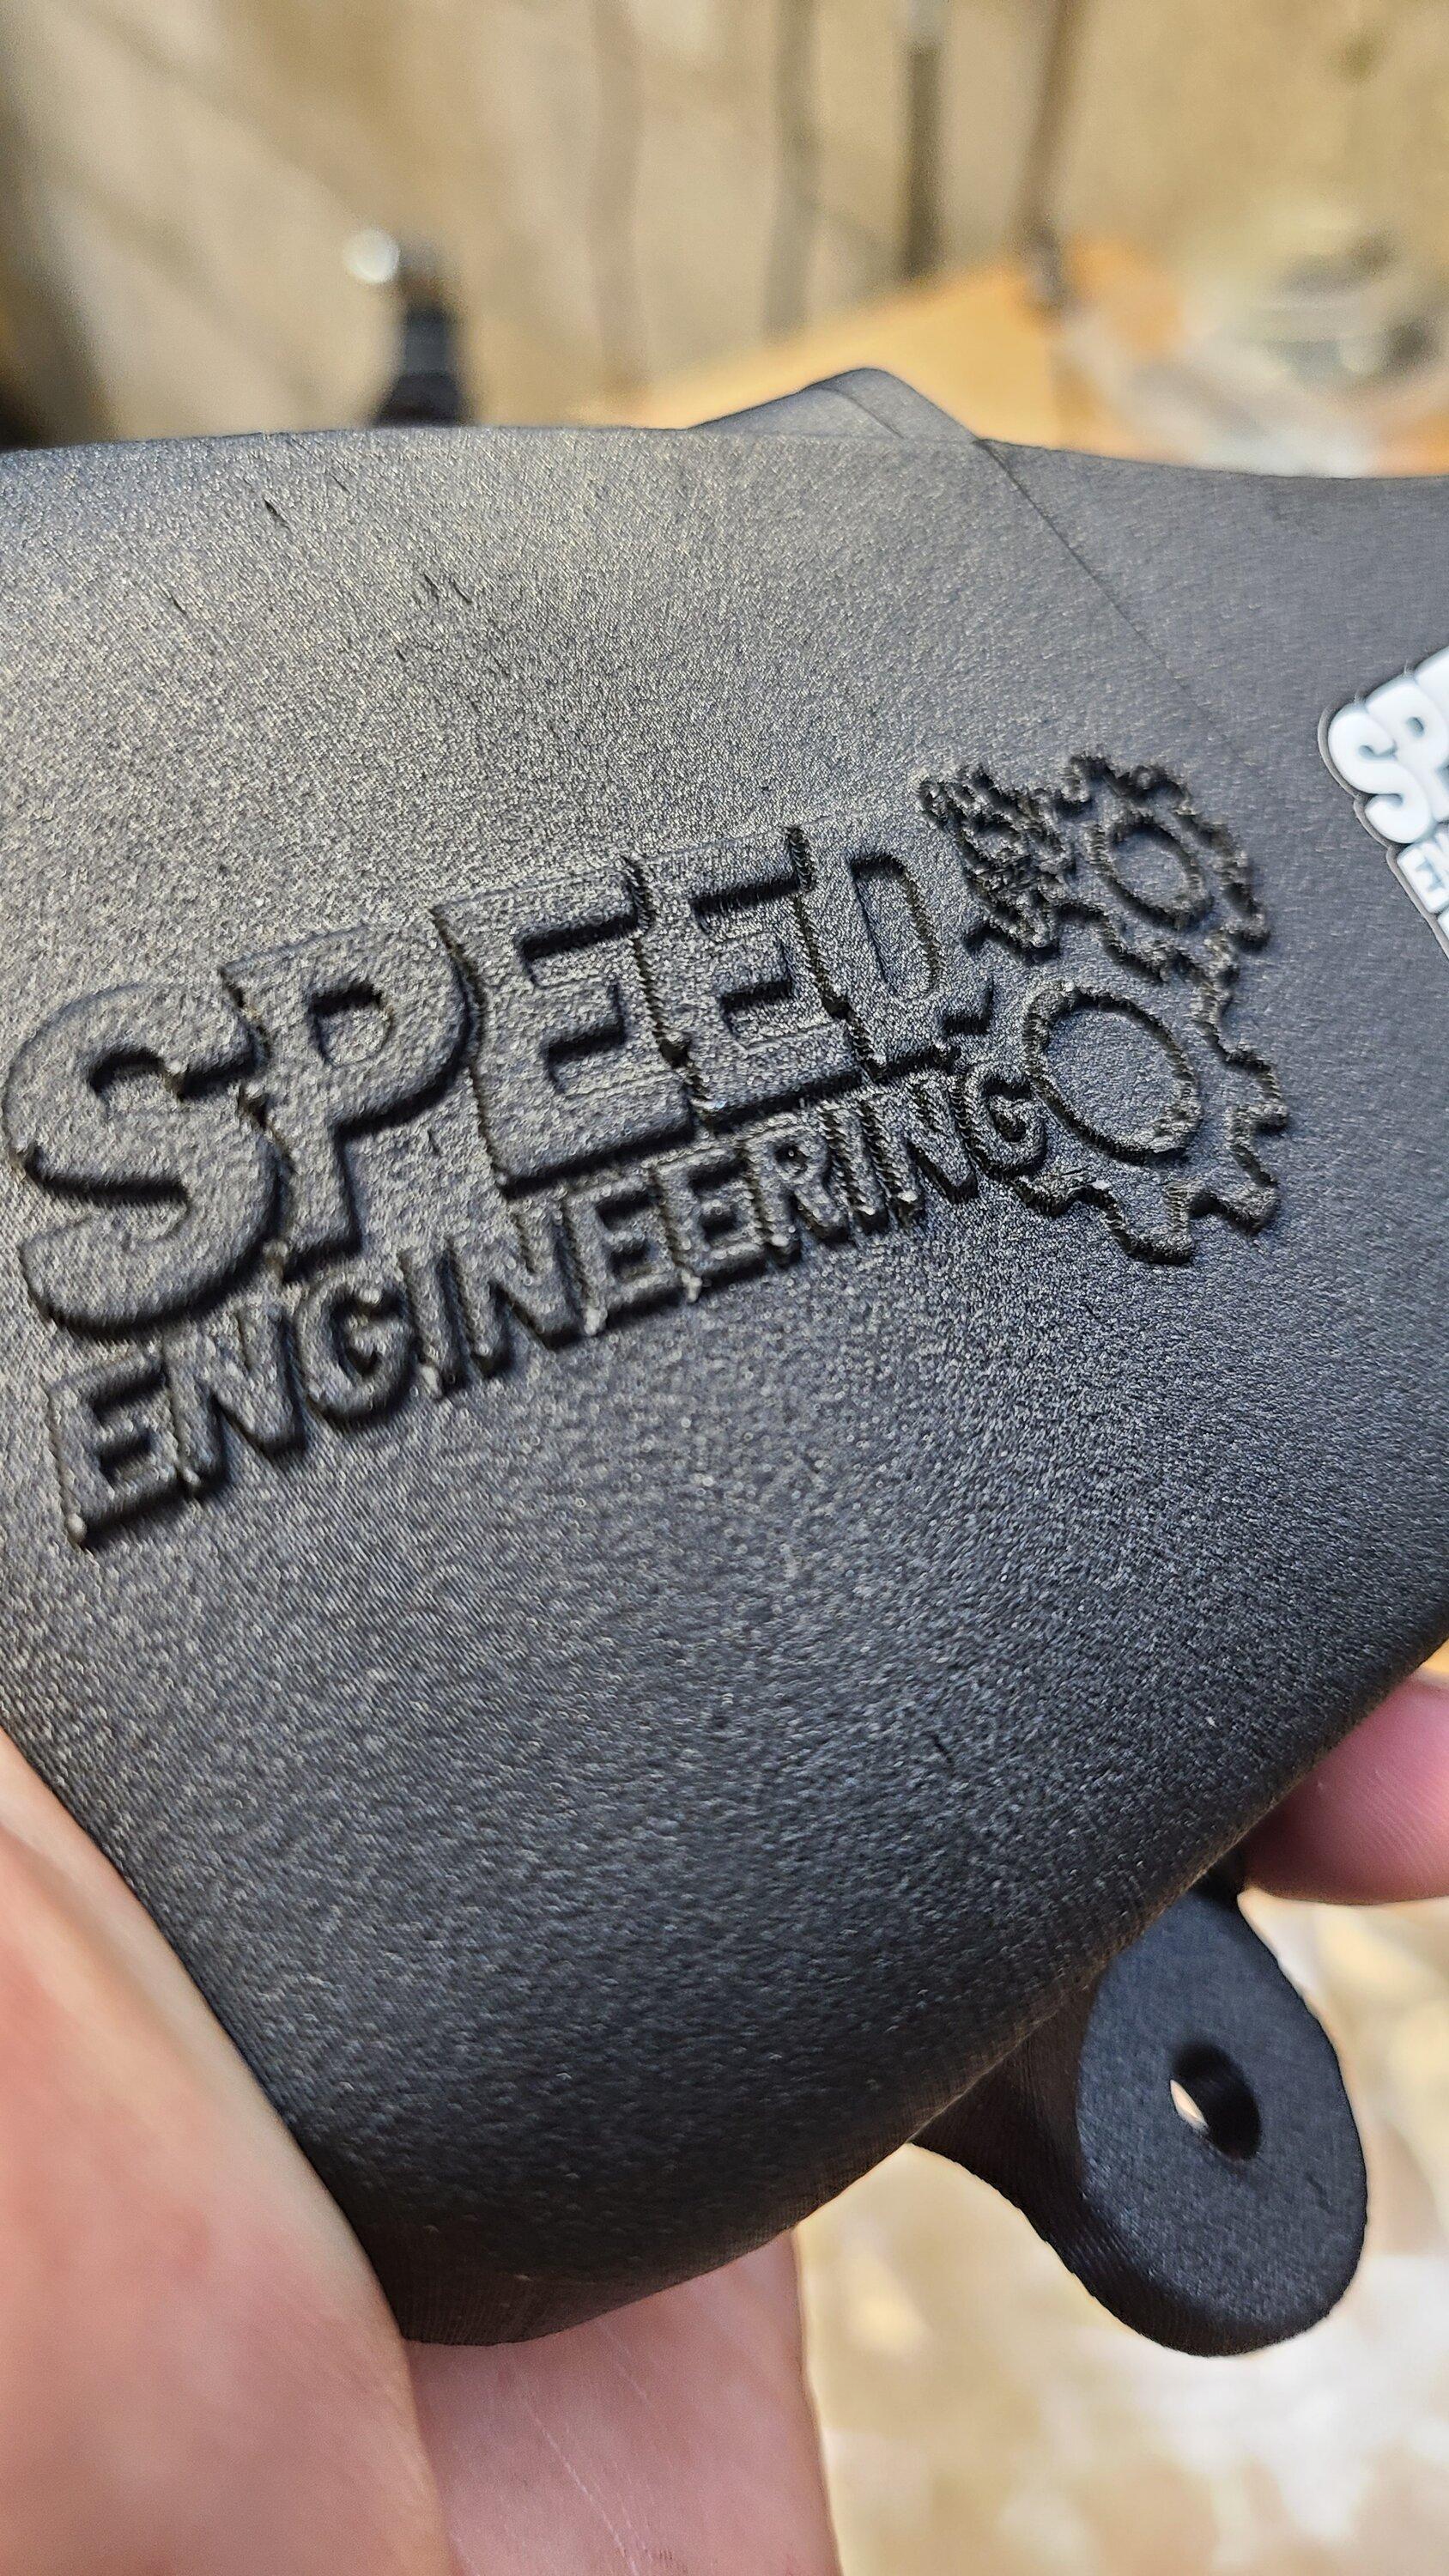
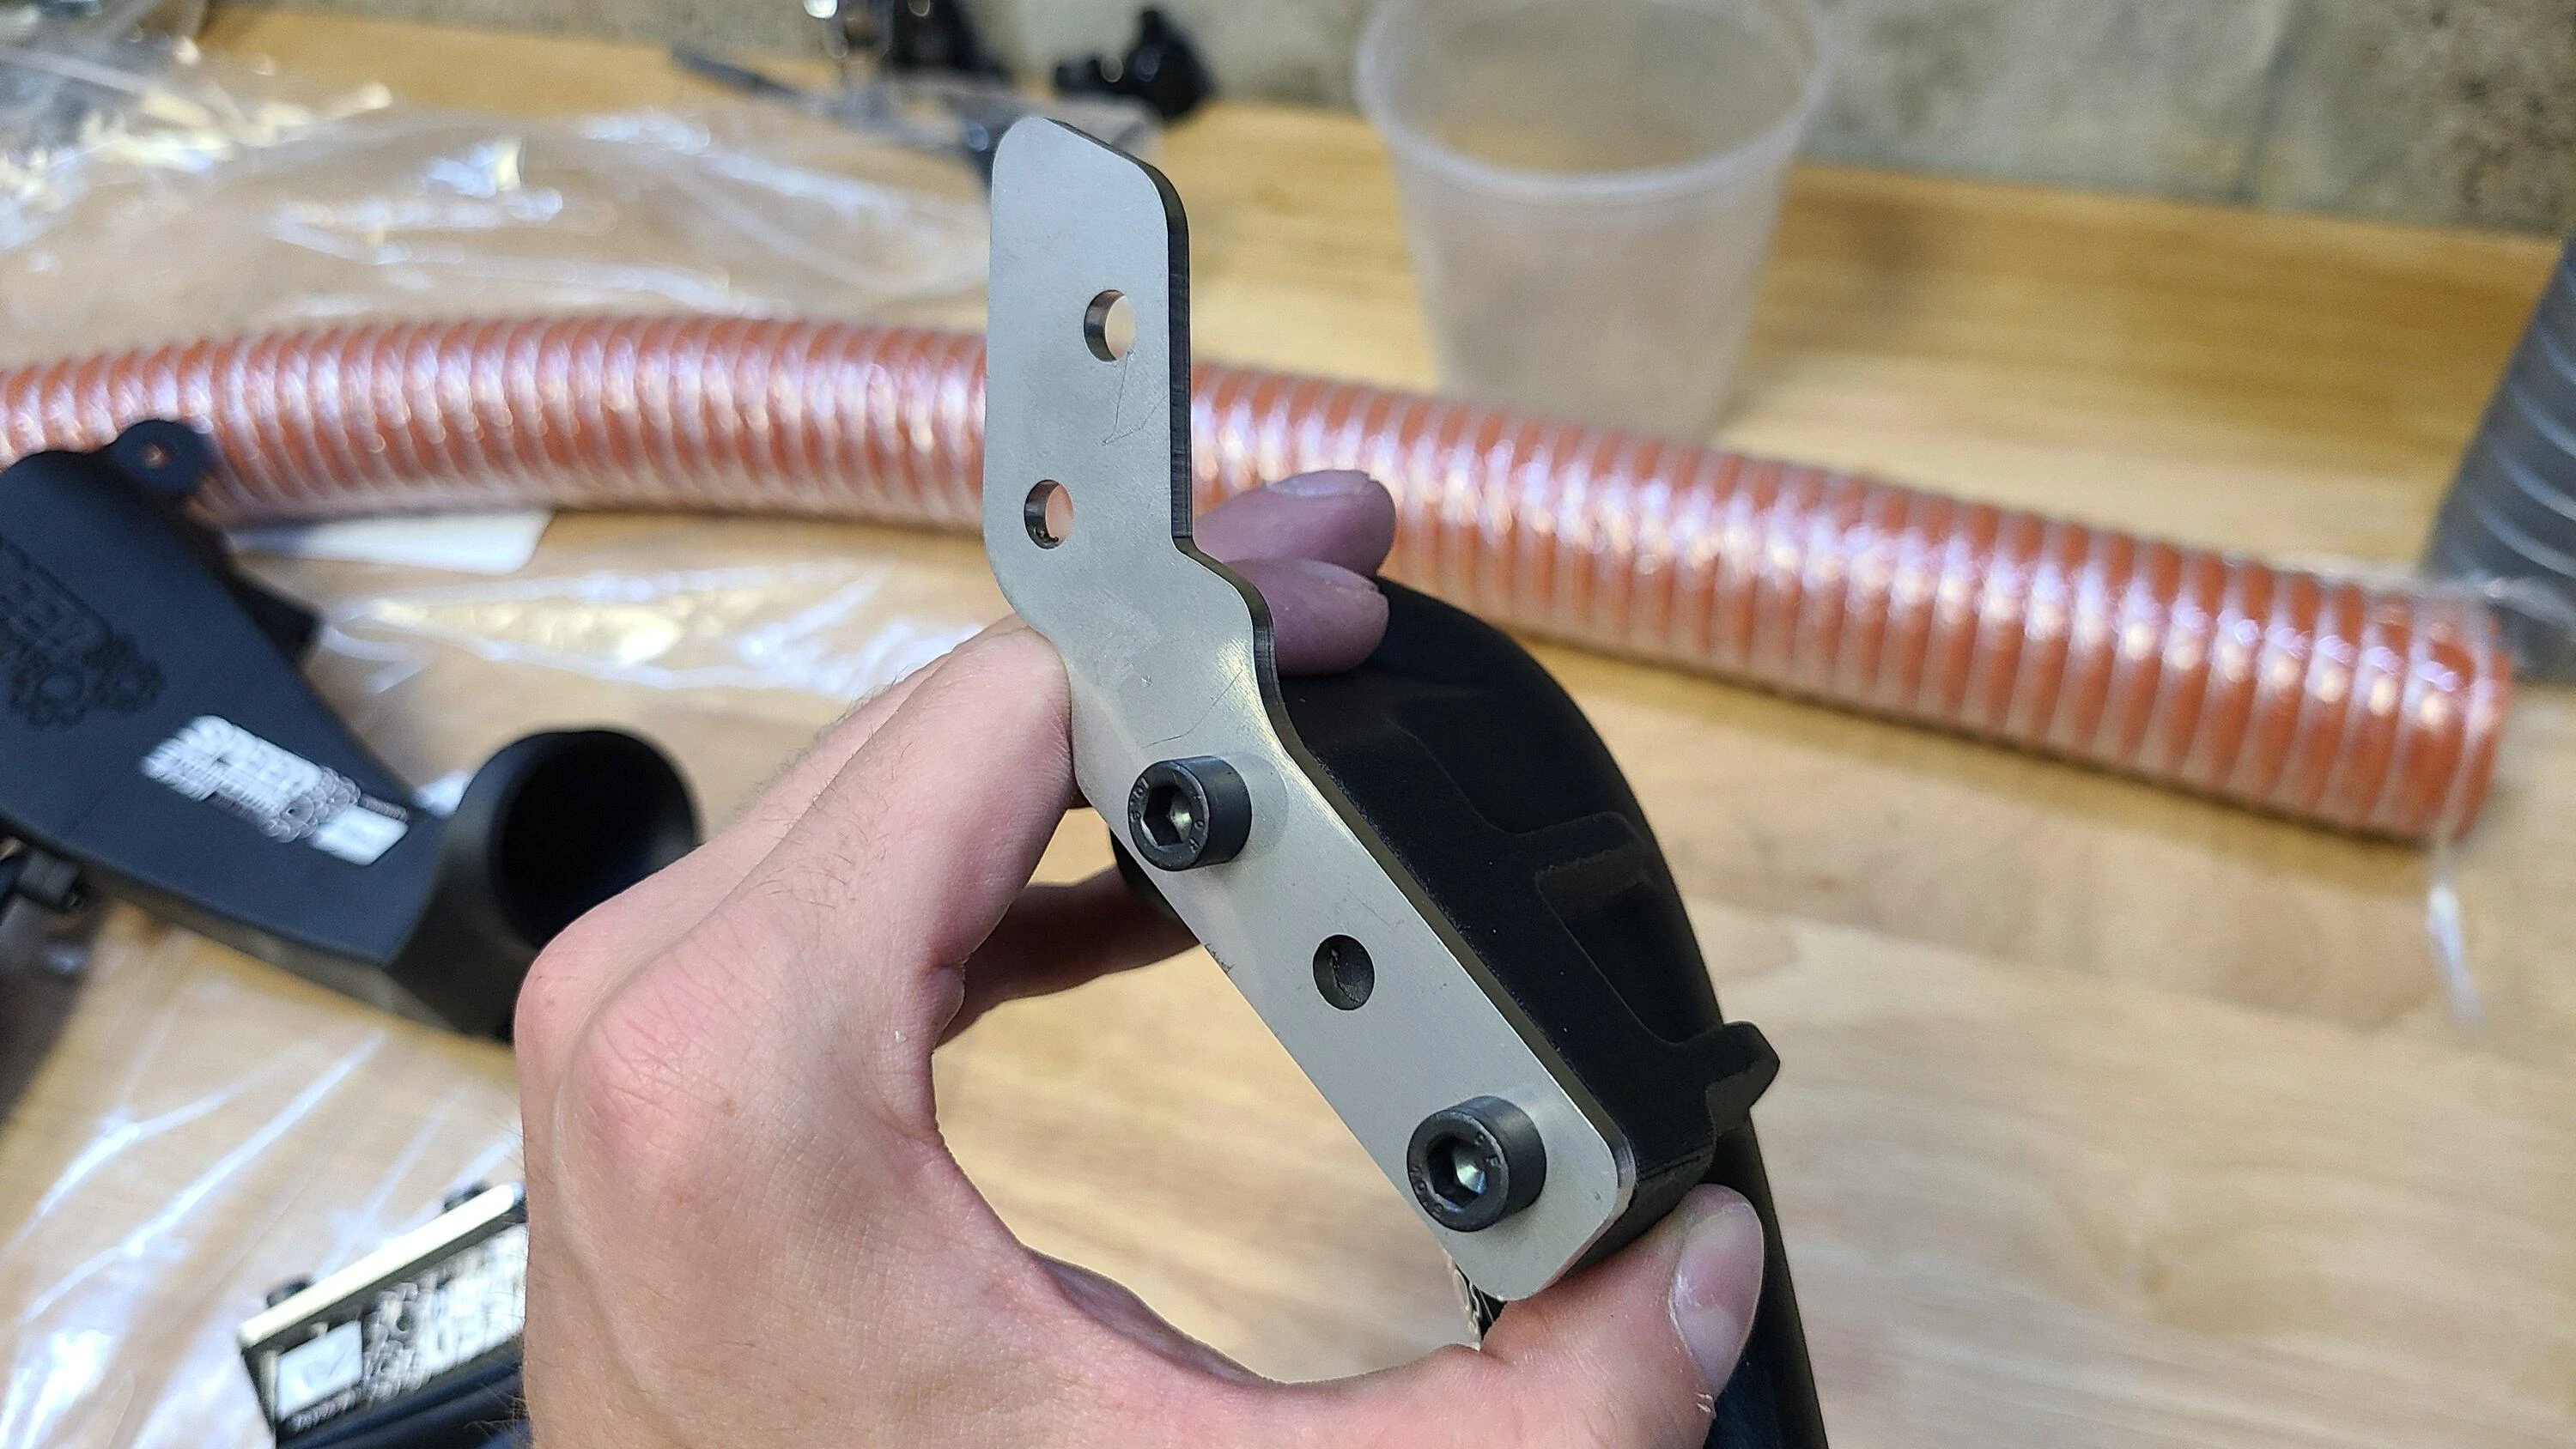
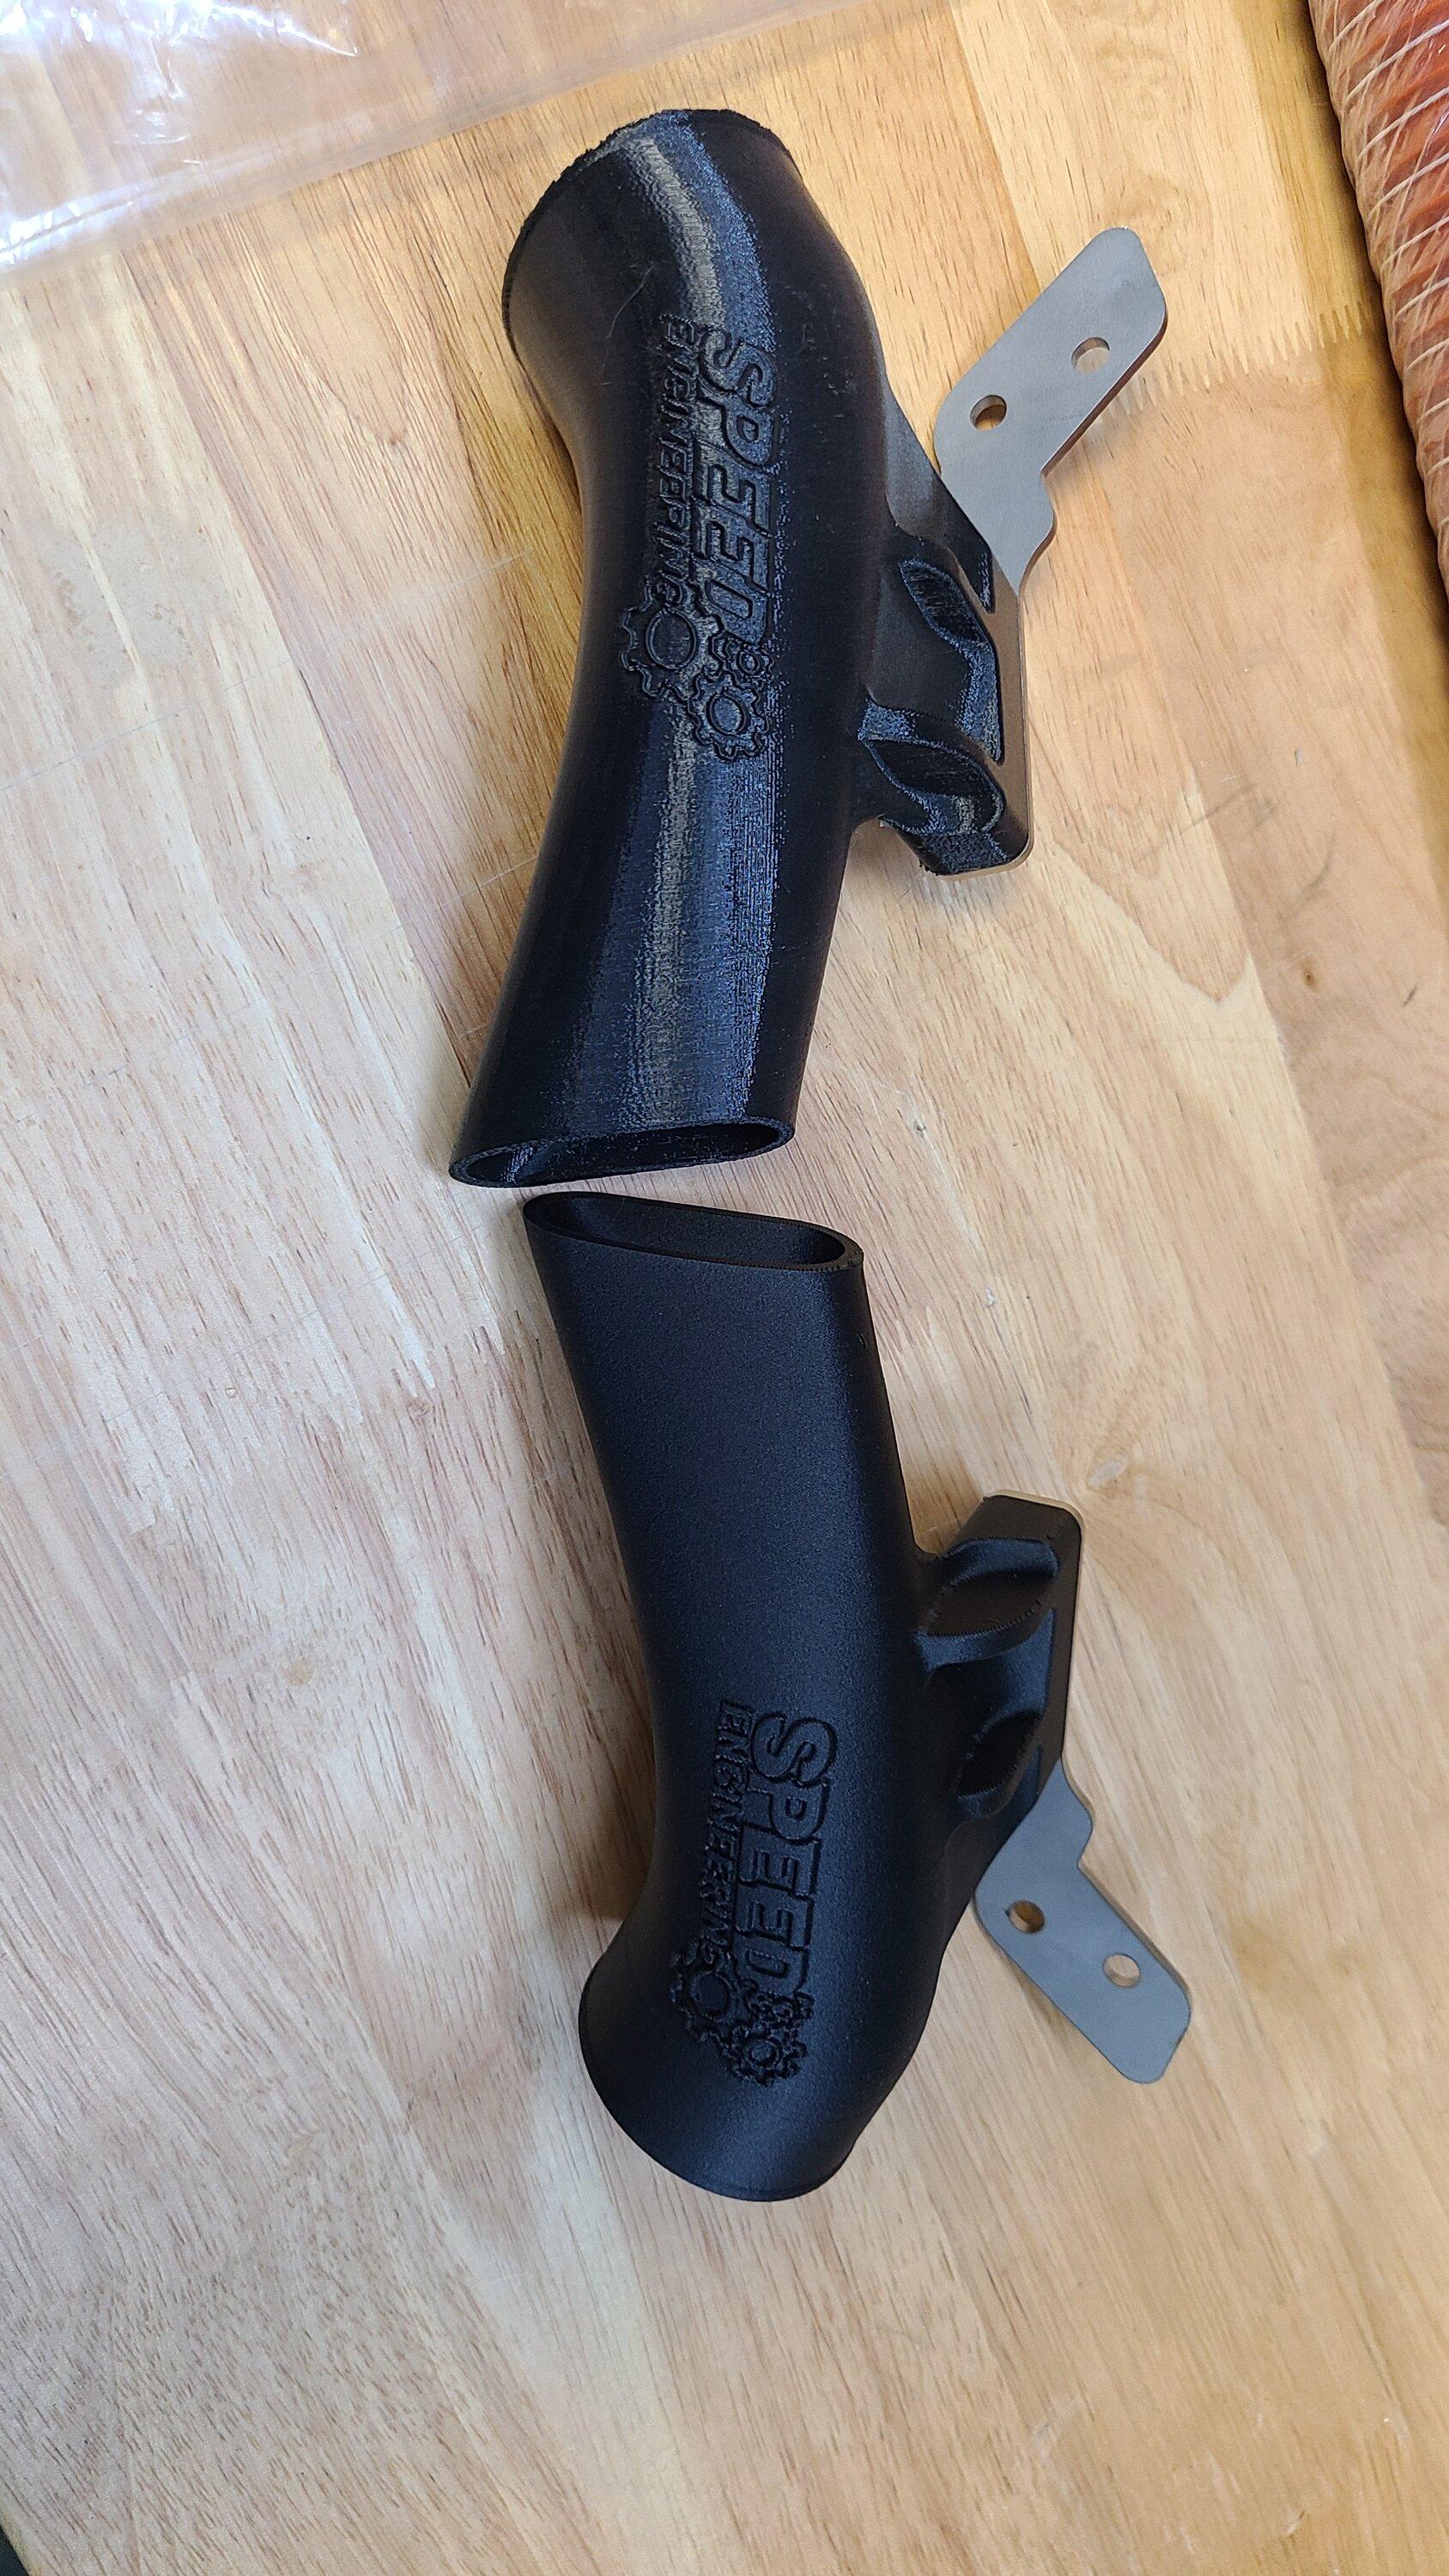
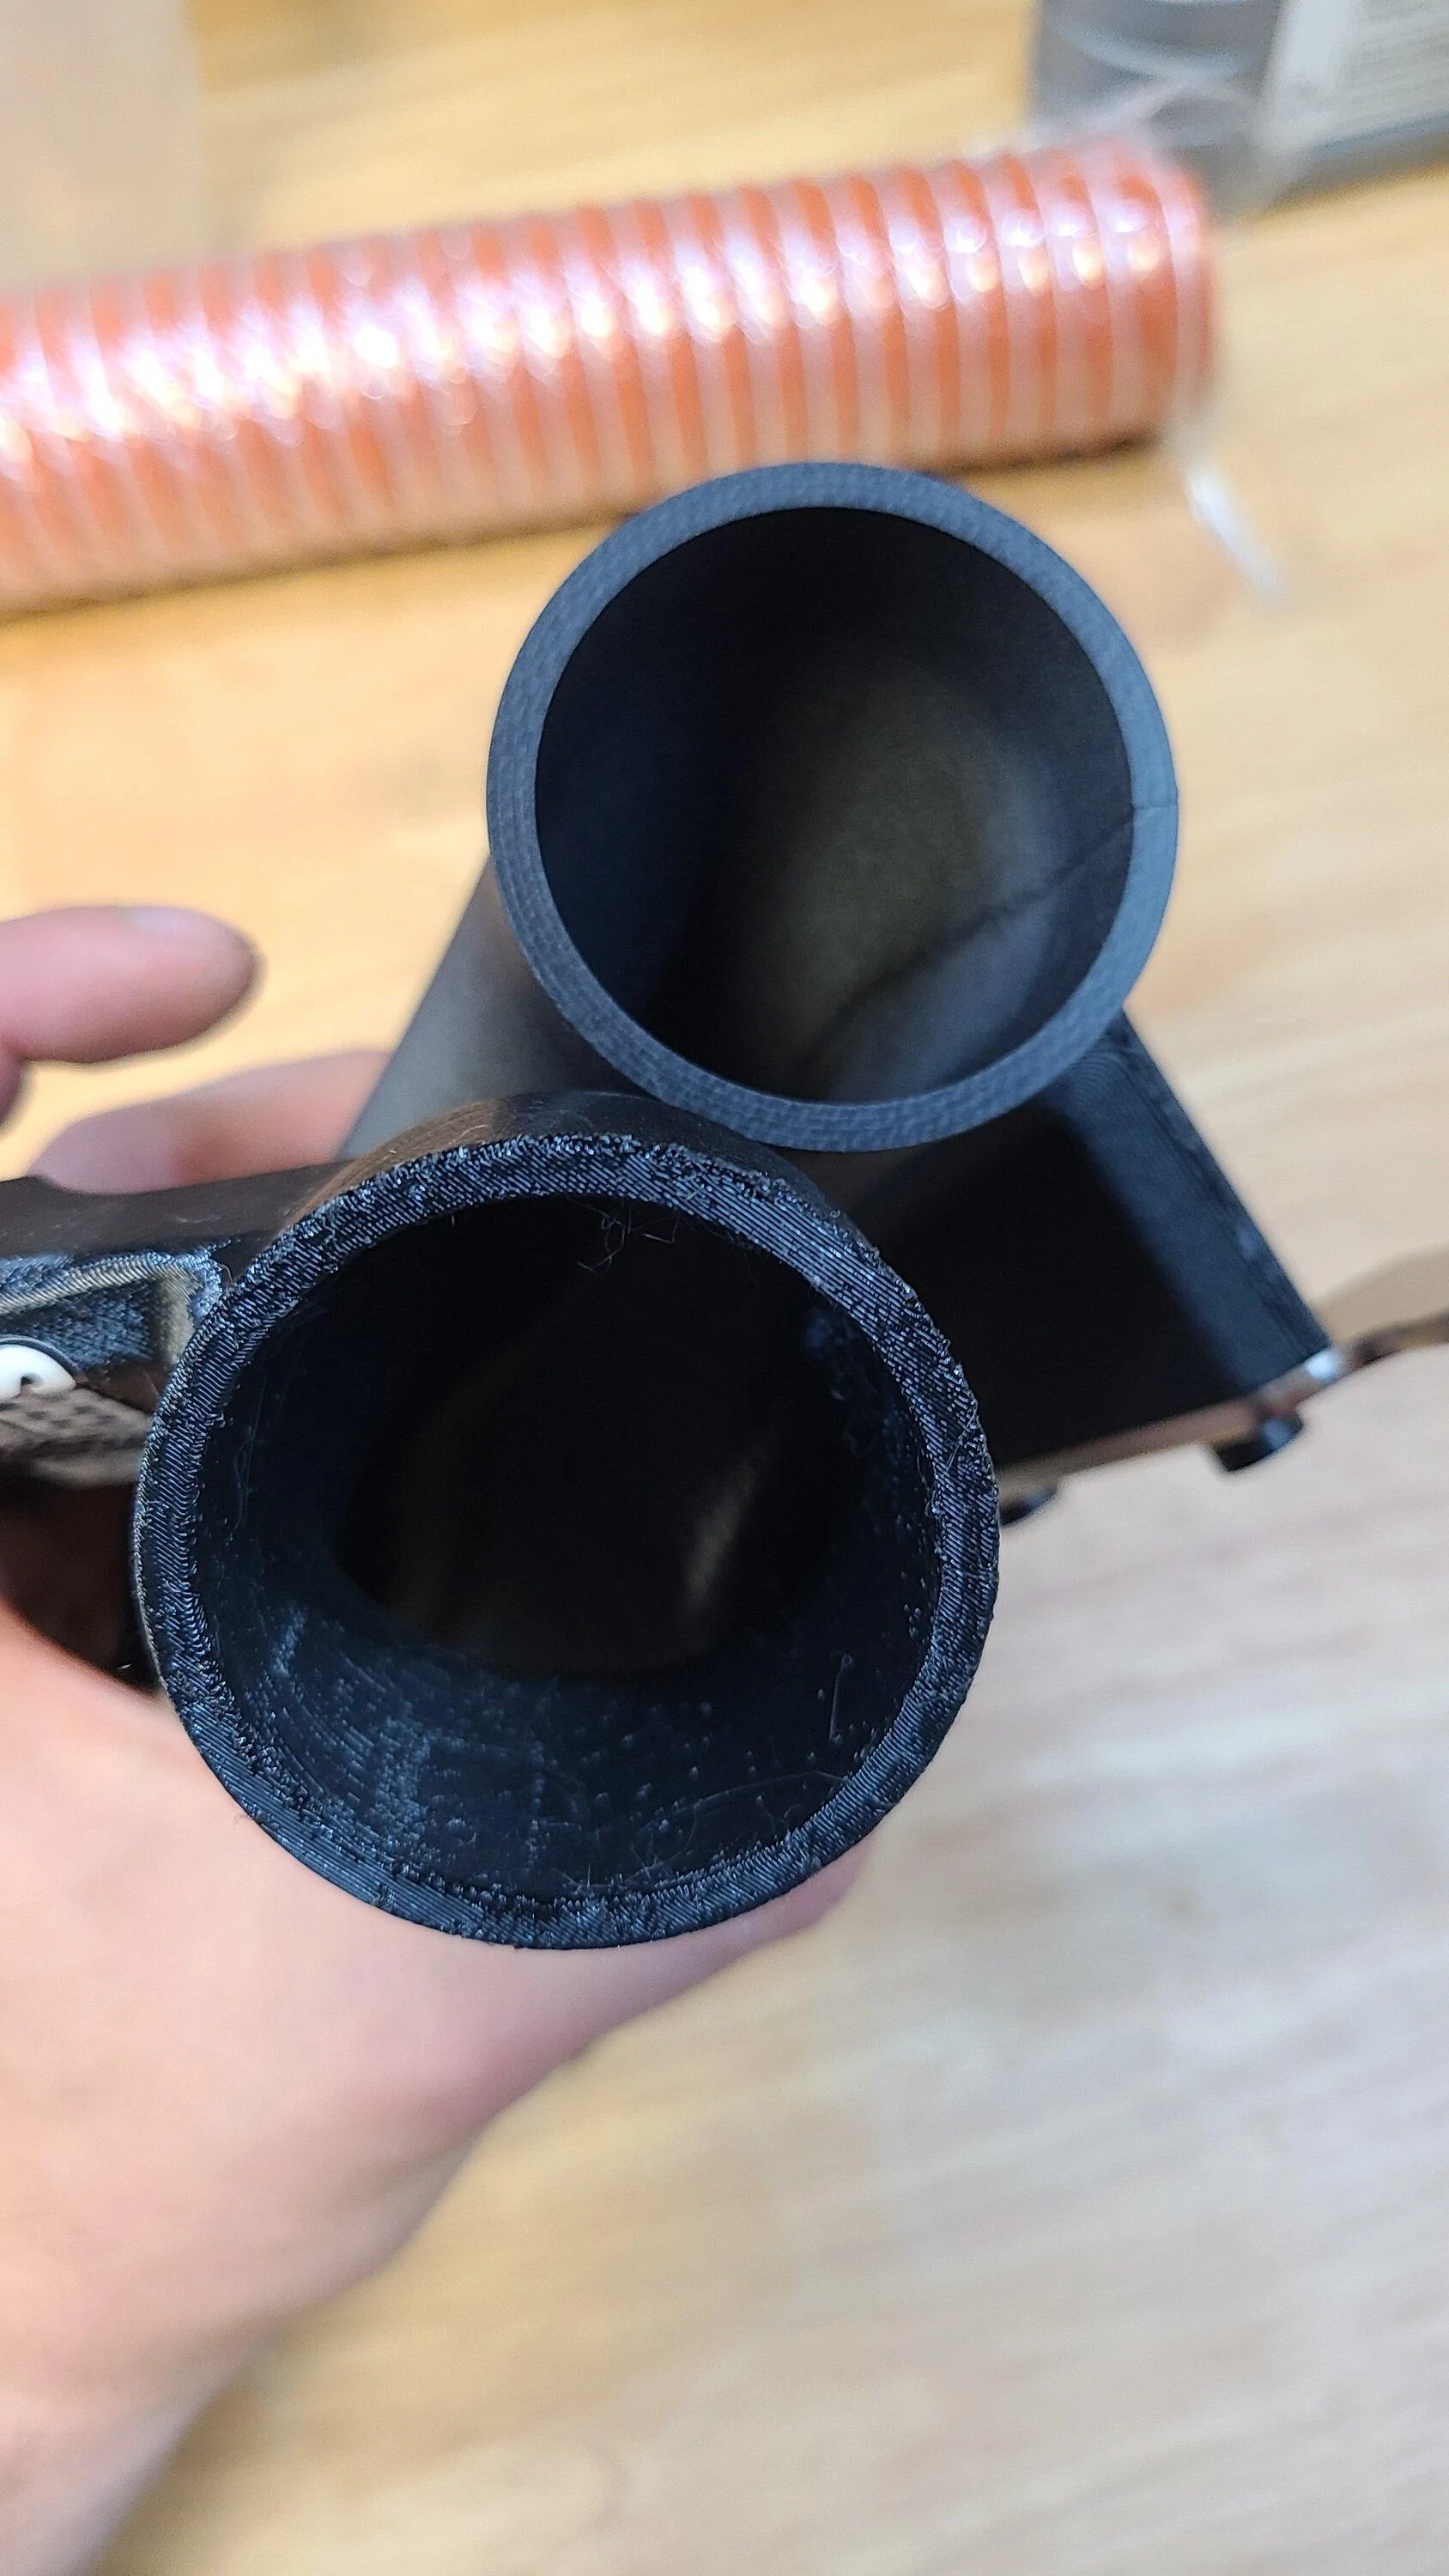
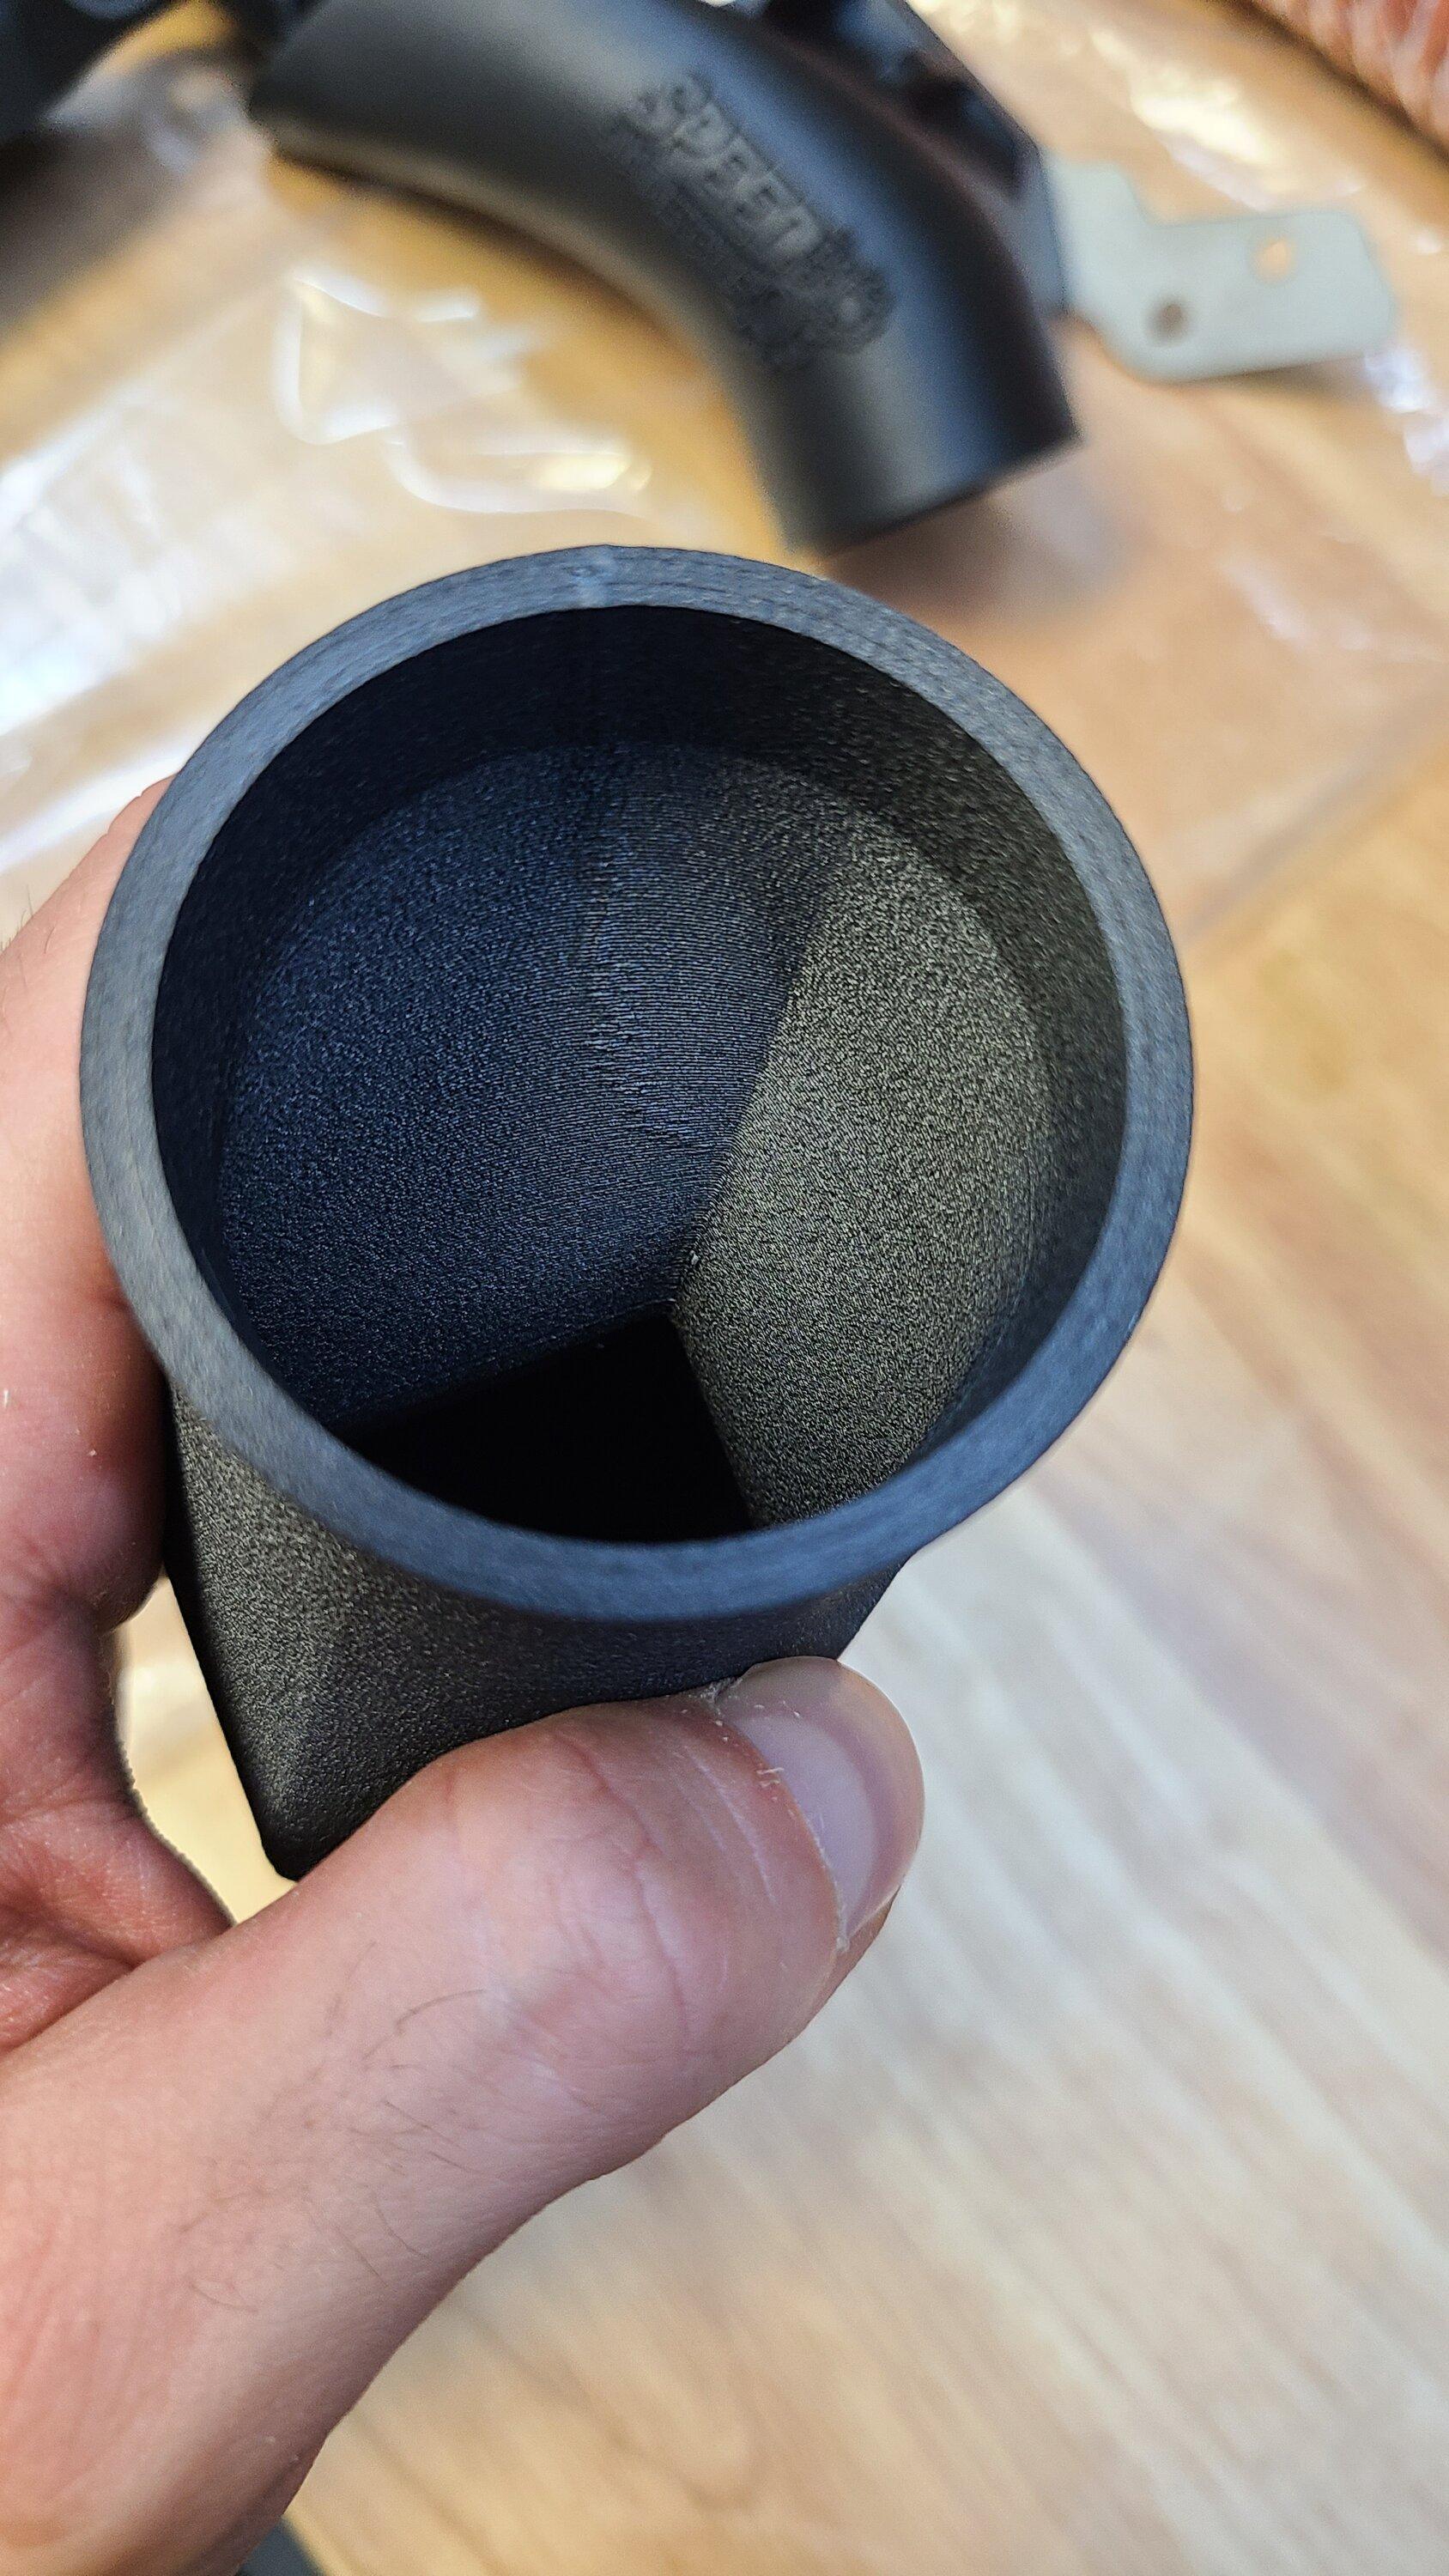
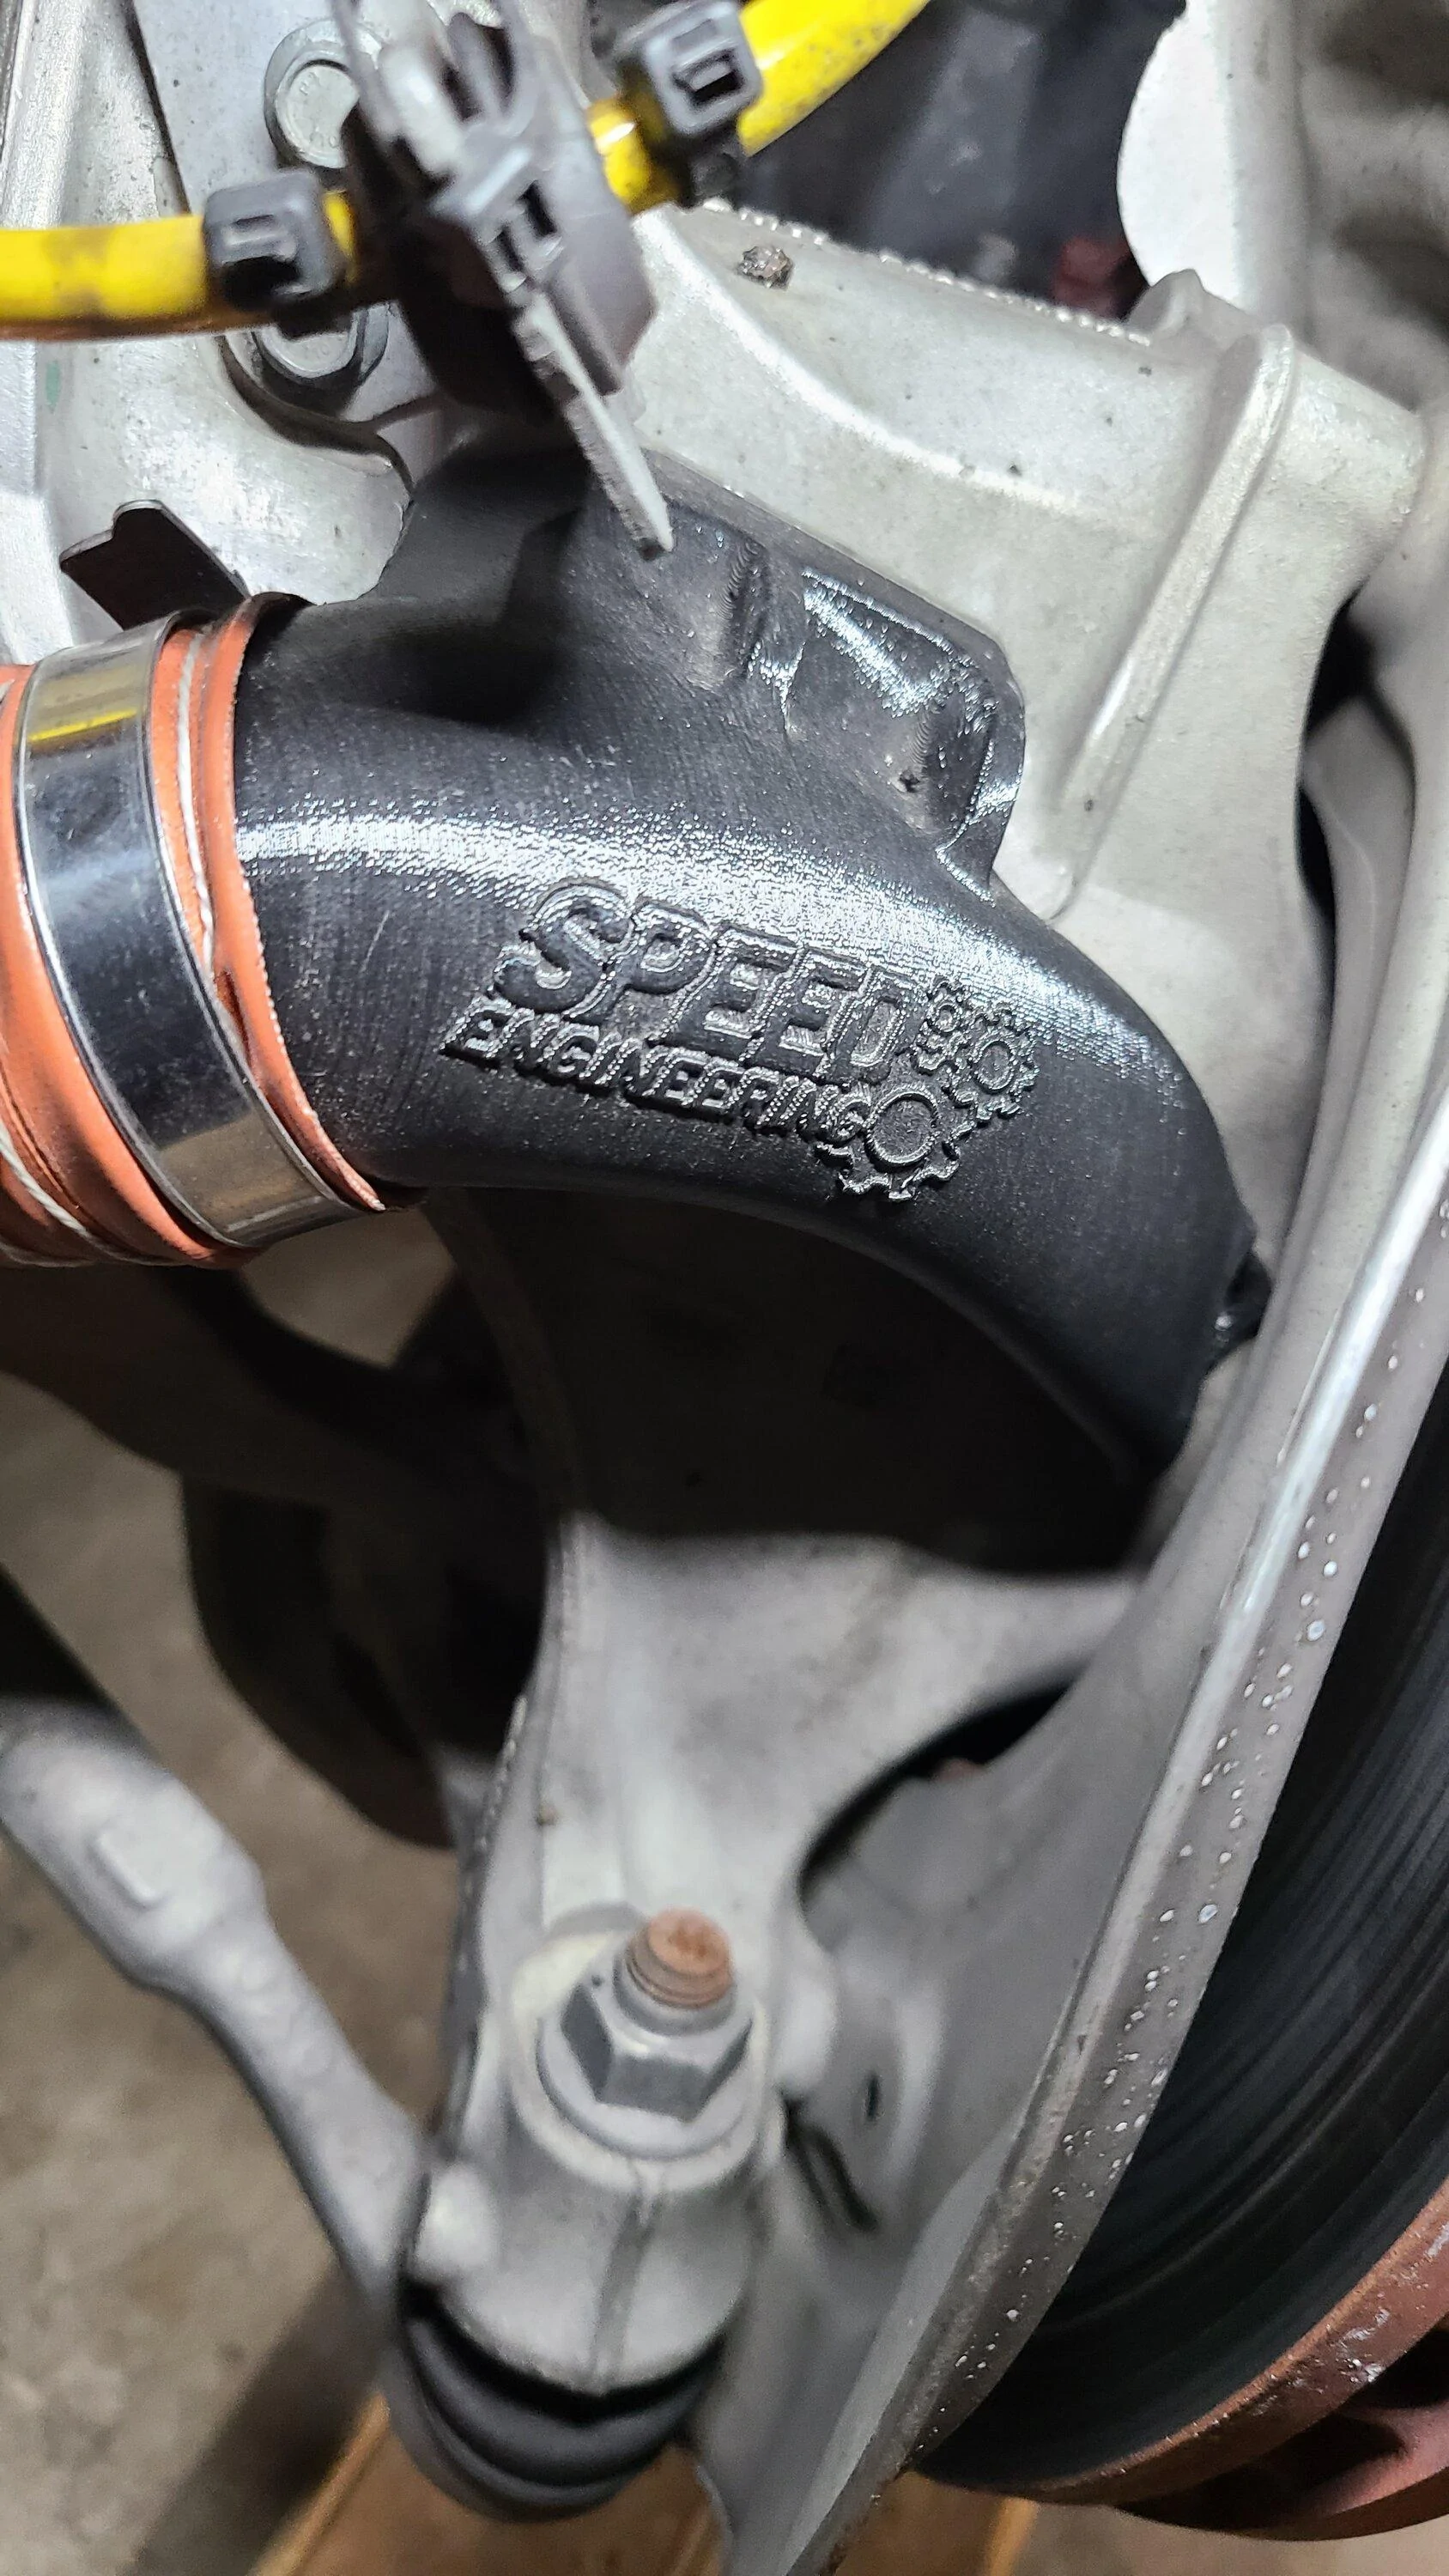
With that said, I ordered the kit! Upon receiving the box was fairly decent condition and the parts were packaged well. You can see that the ducts themselves are printed out of a carbon/nylon filament and generally have great print quality. However I was a bit confused as one nozzle looked a fair bit different from the other nozzle and the rest of the 3d printed parts. As someone who prints things regularly I noticed the glossy nozzle was printed in a completely different orientation from the other and either was printed in a different material/brand of material, or had a significant change in settings which owes to the glossy-ness. Regardless it still seemed fine.


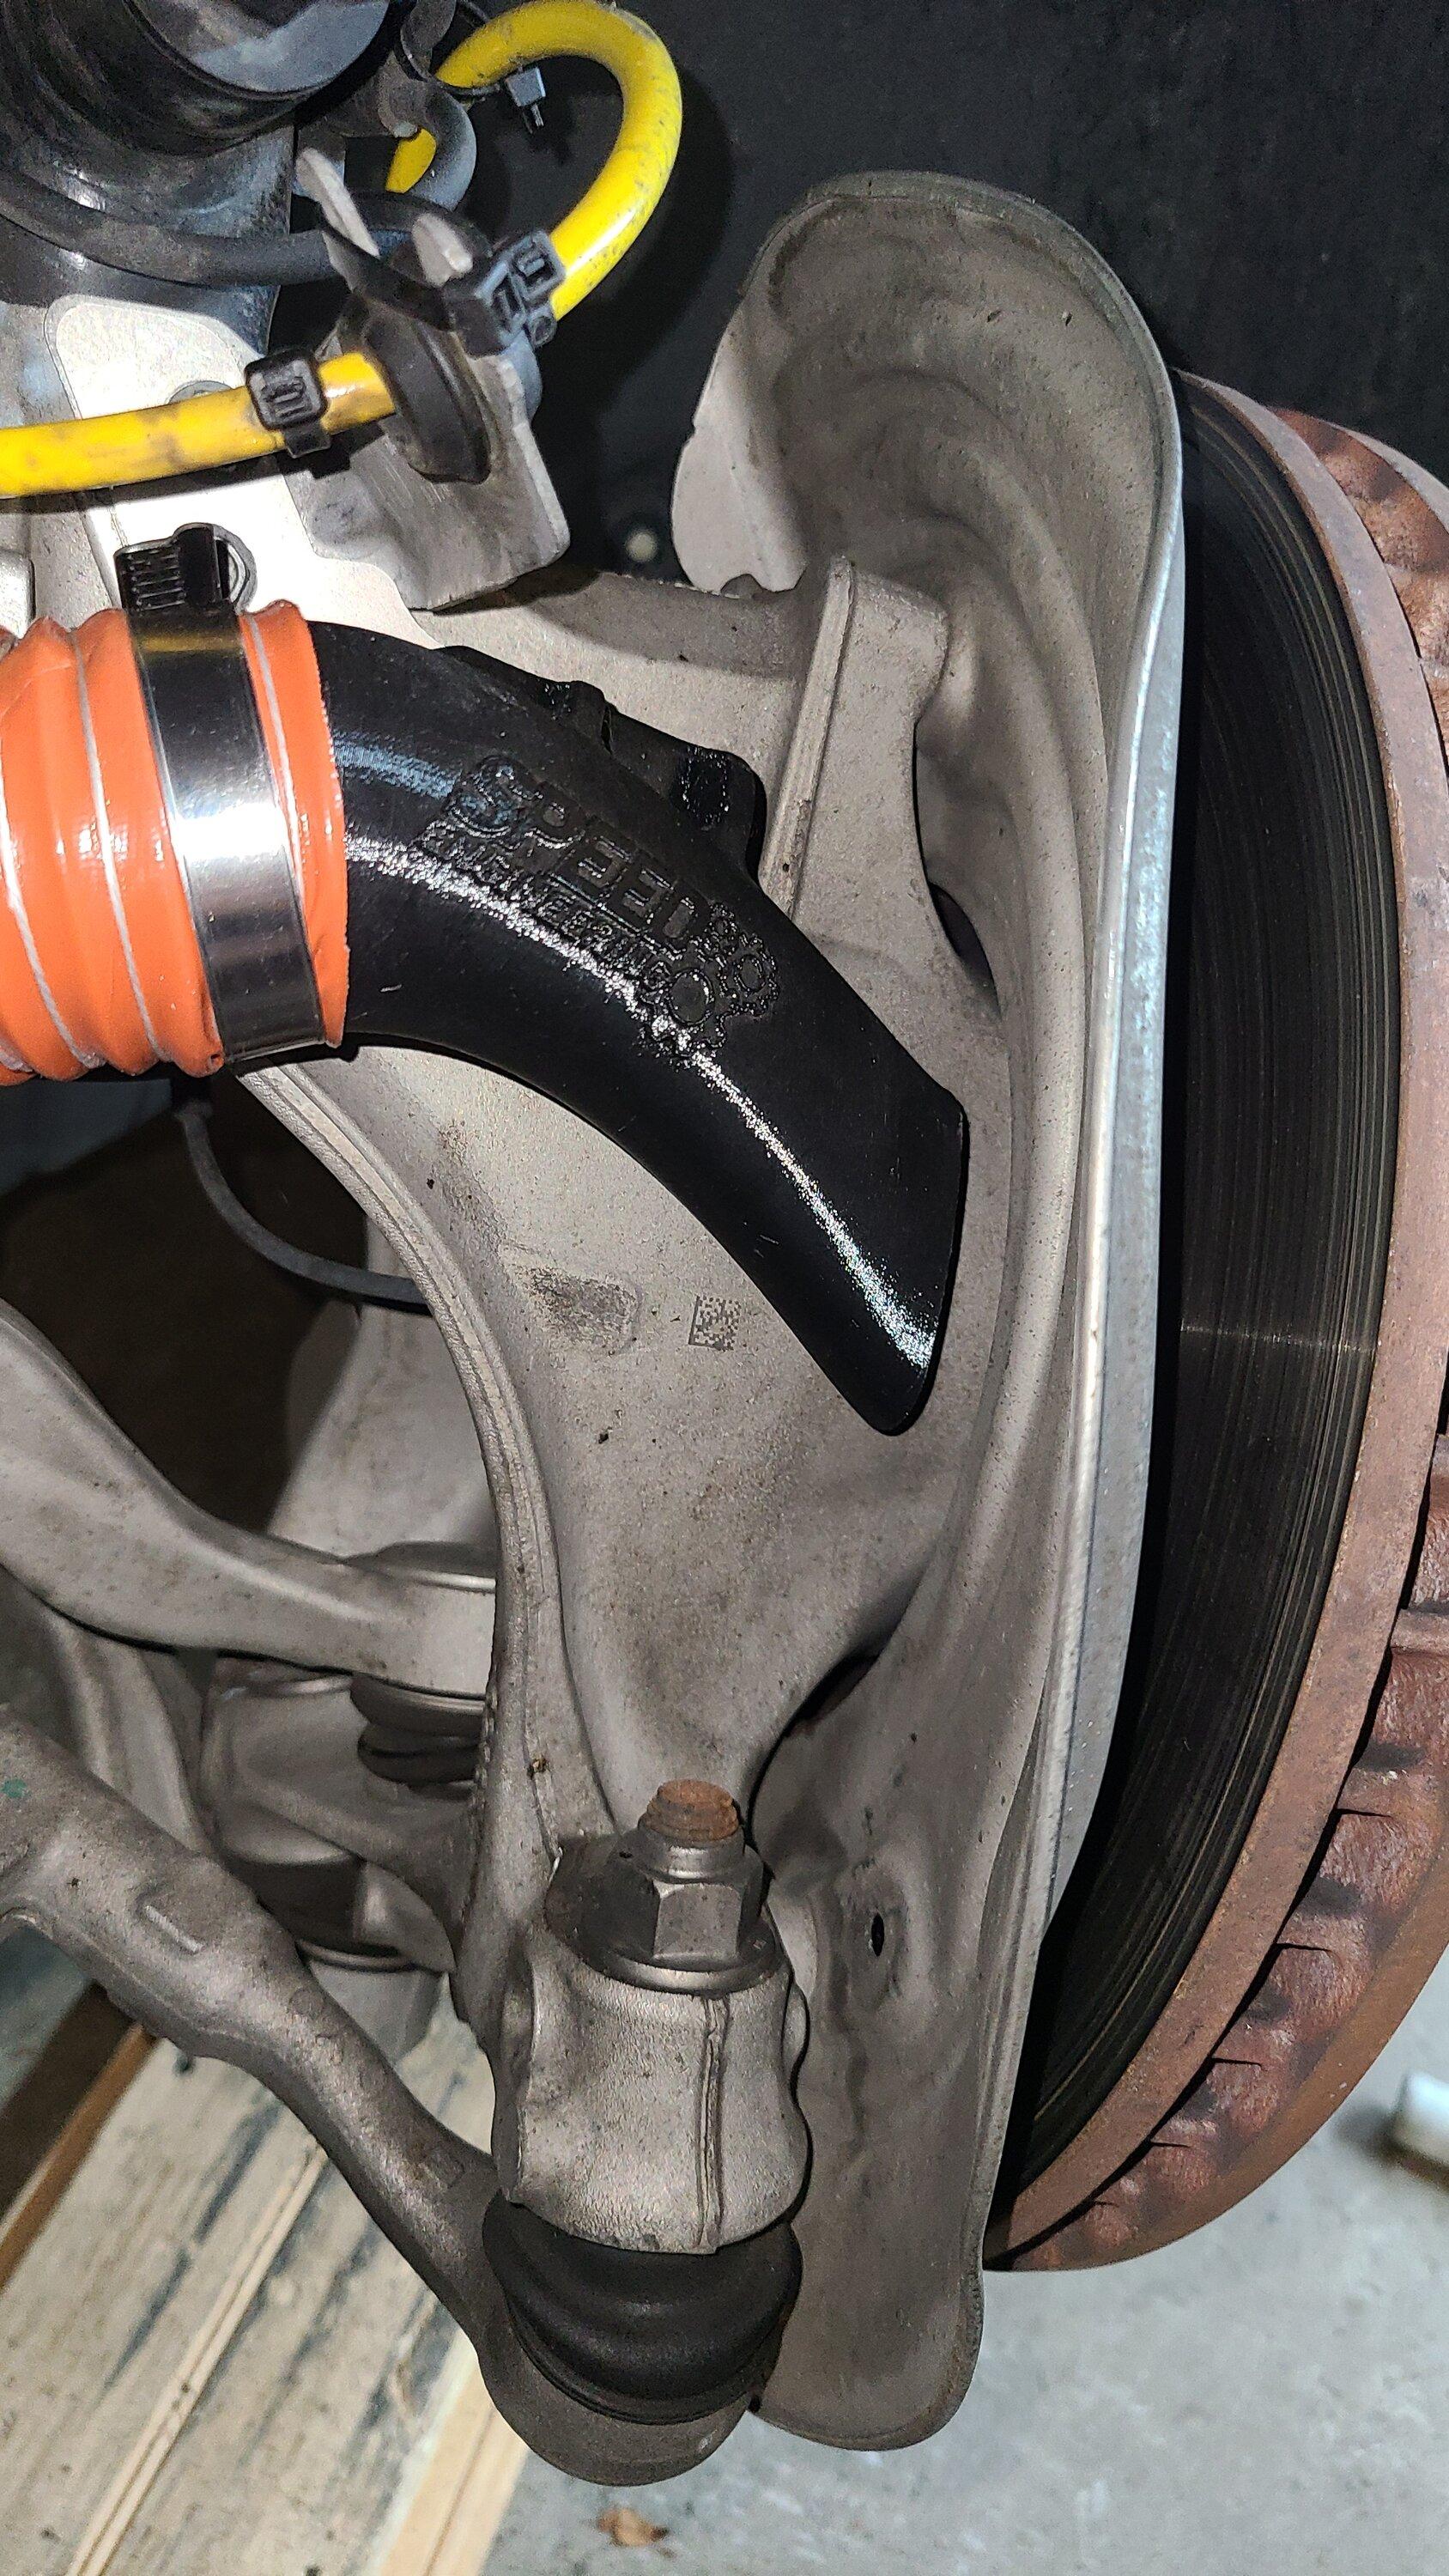
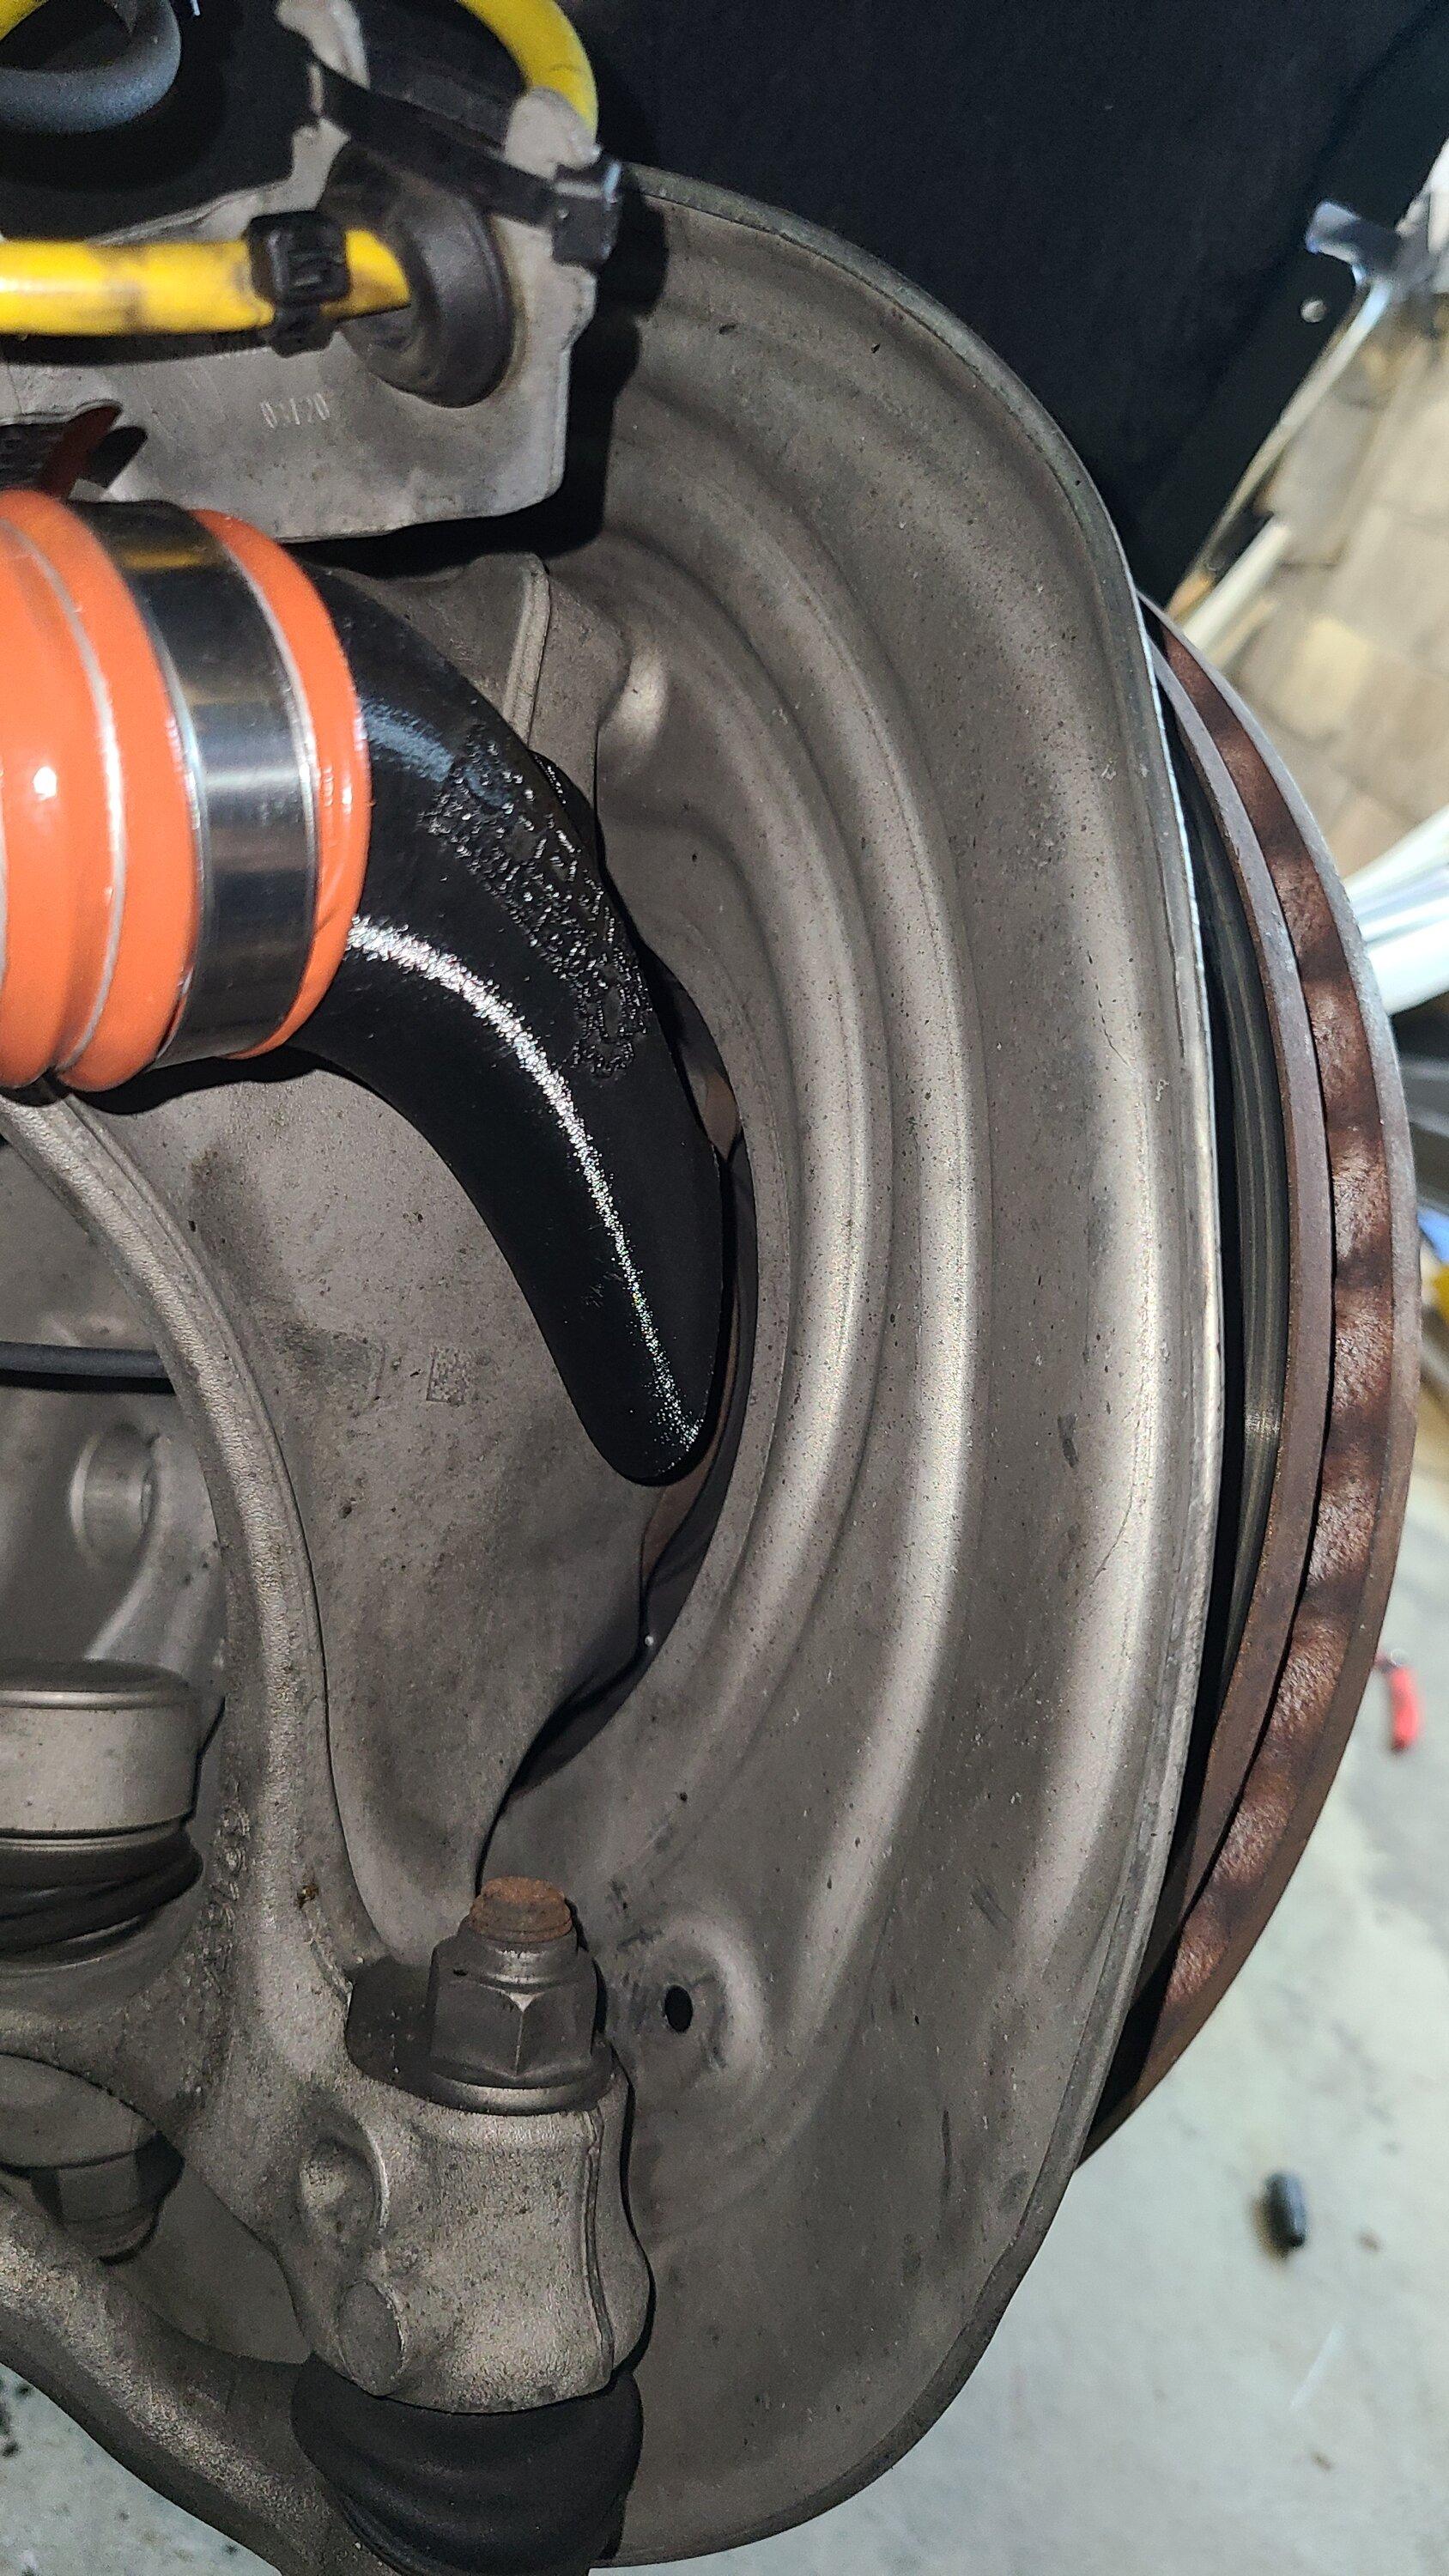
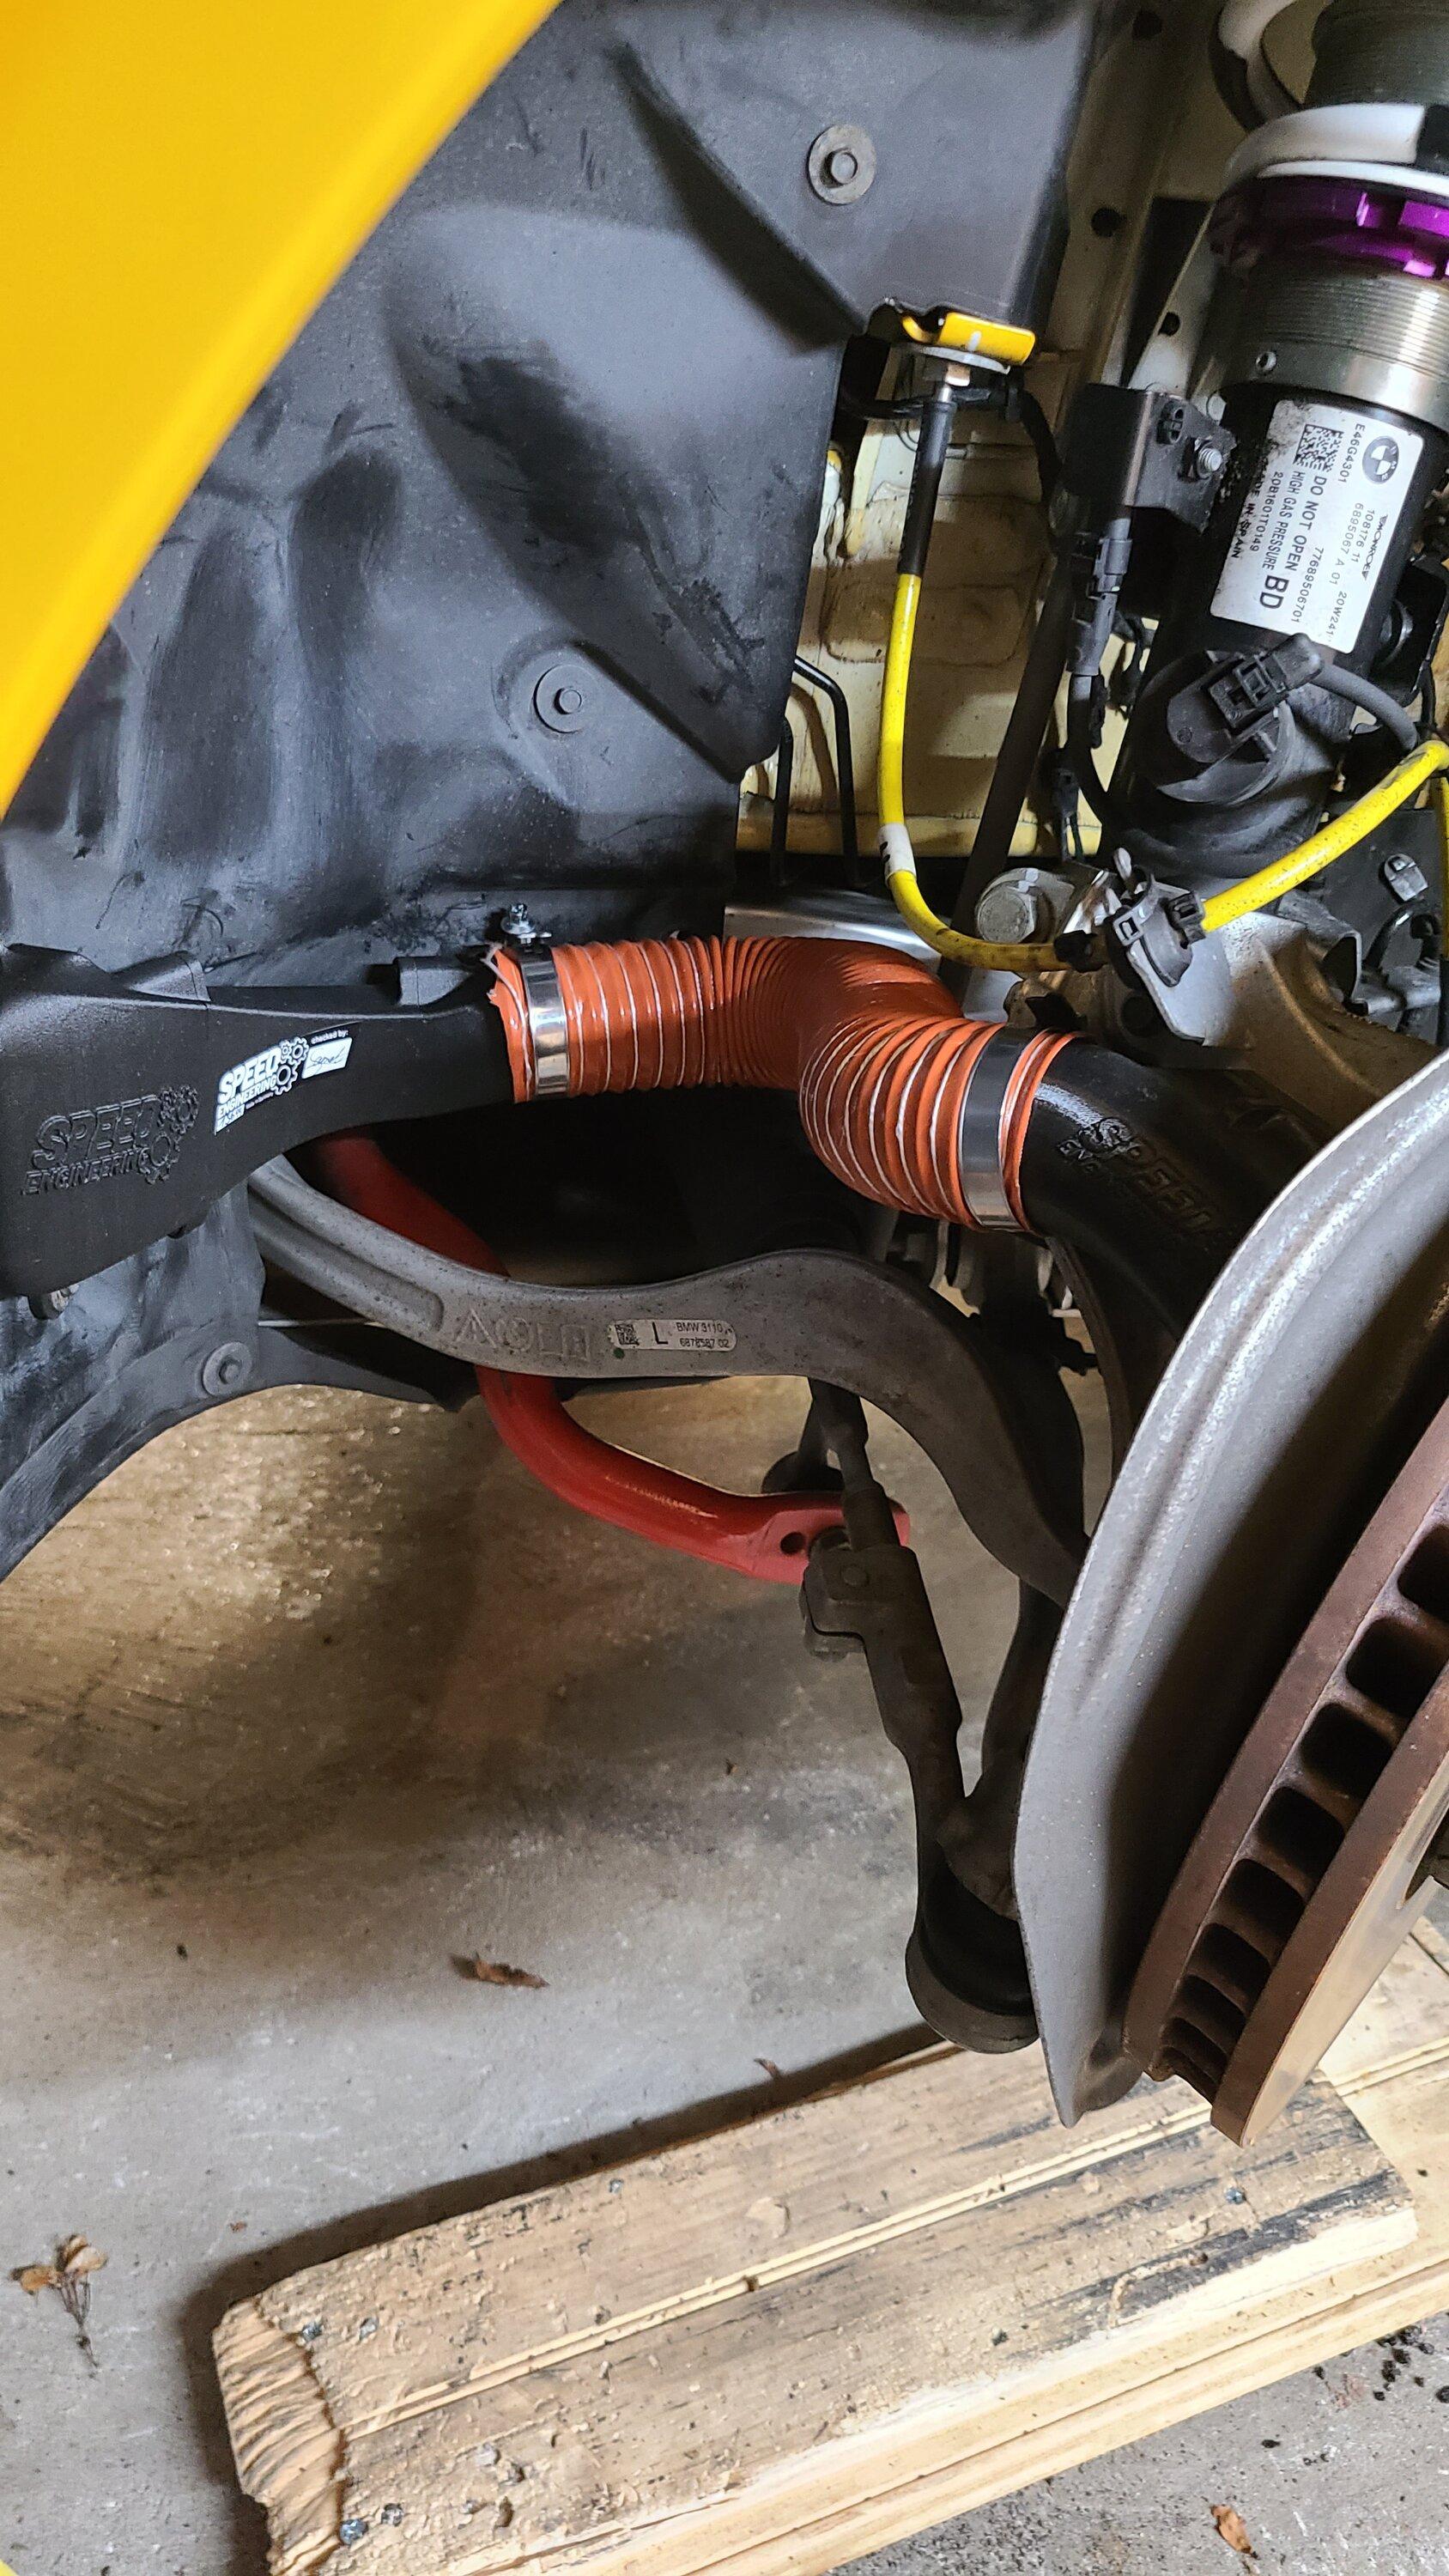
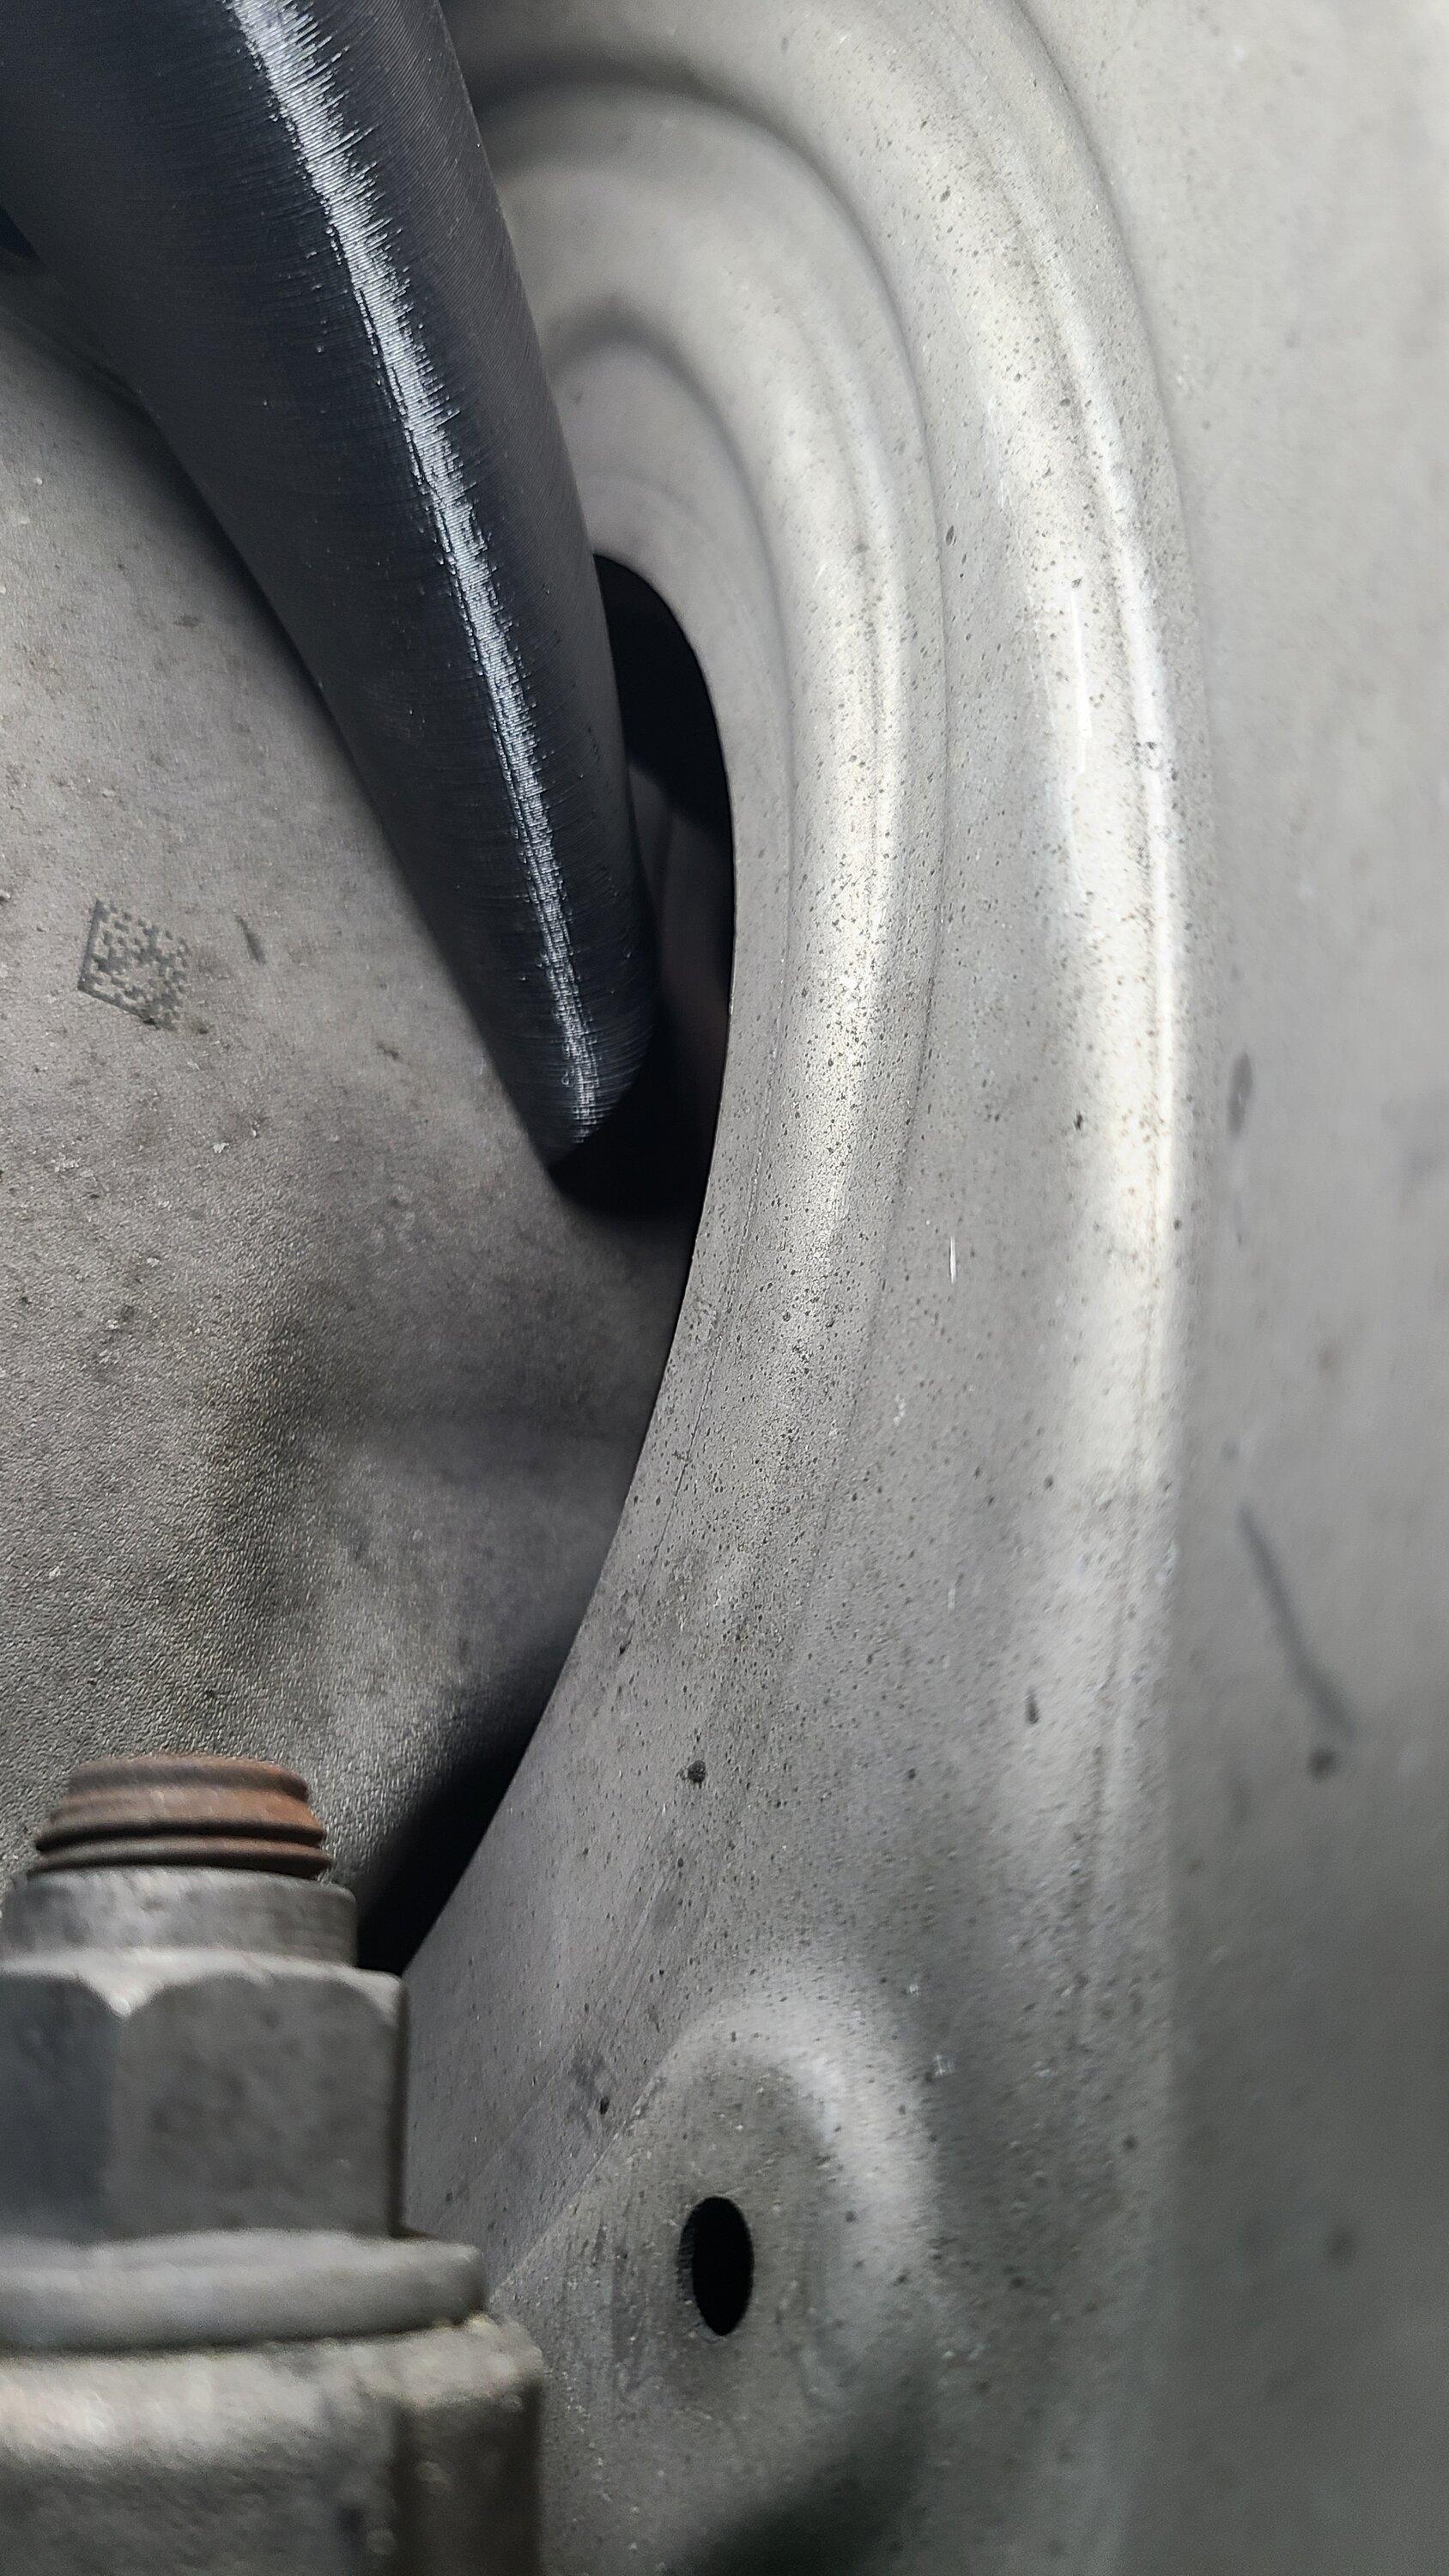
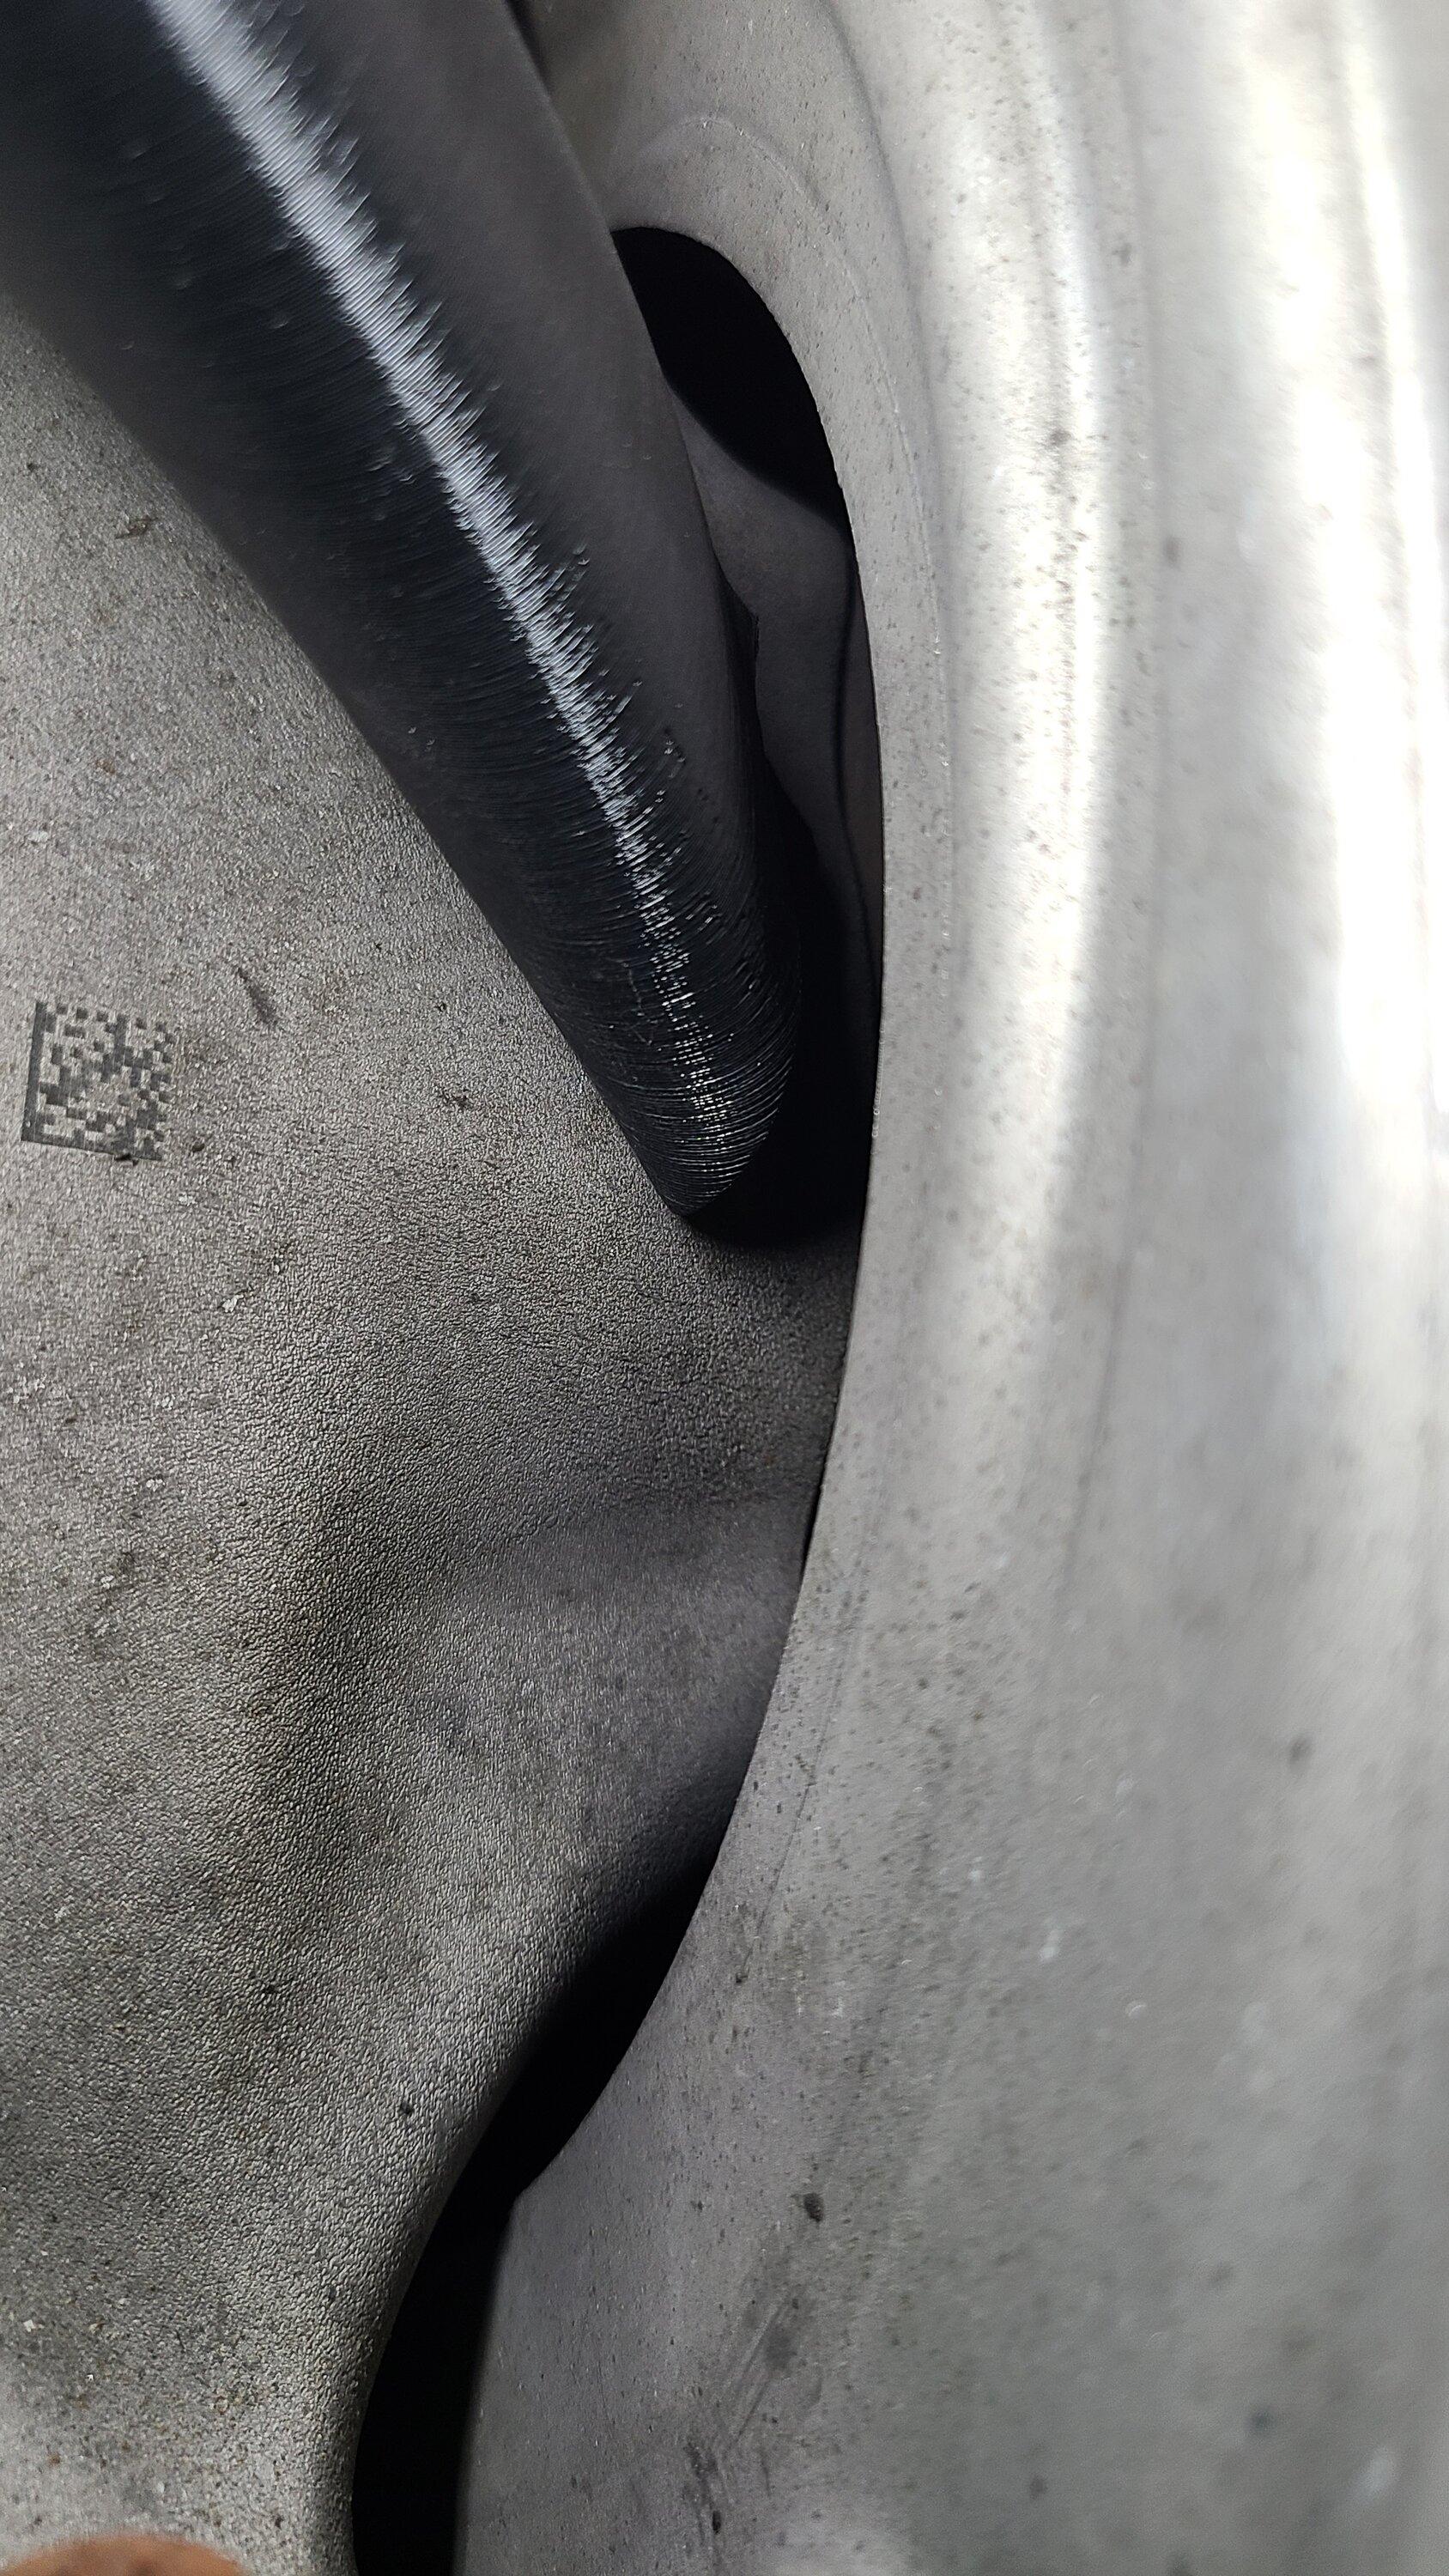
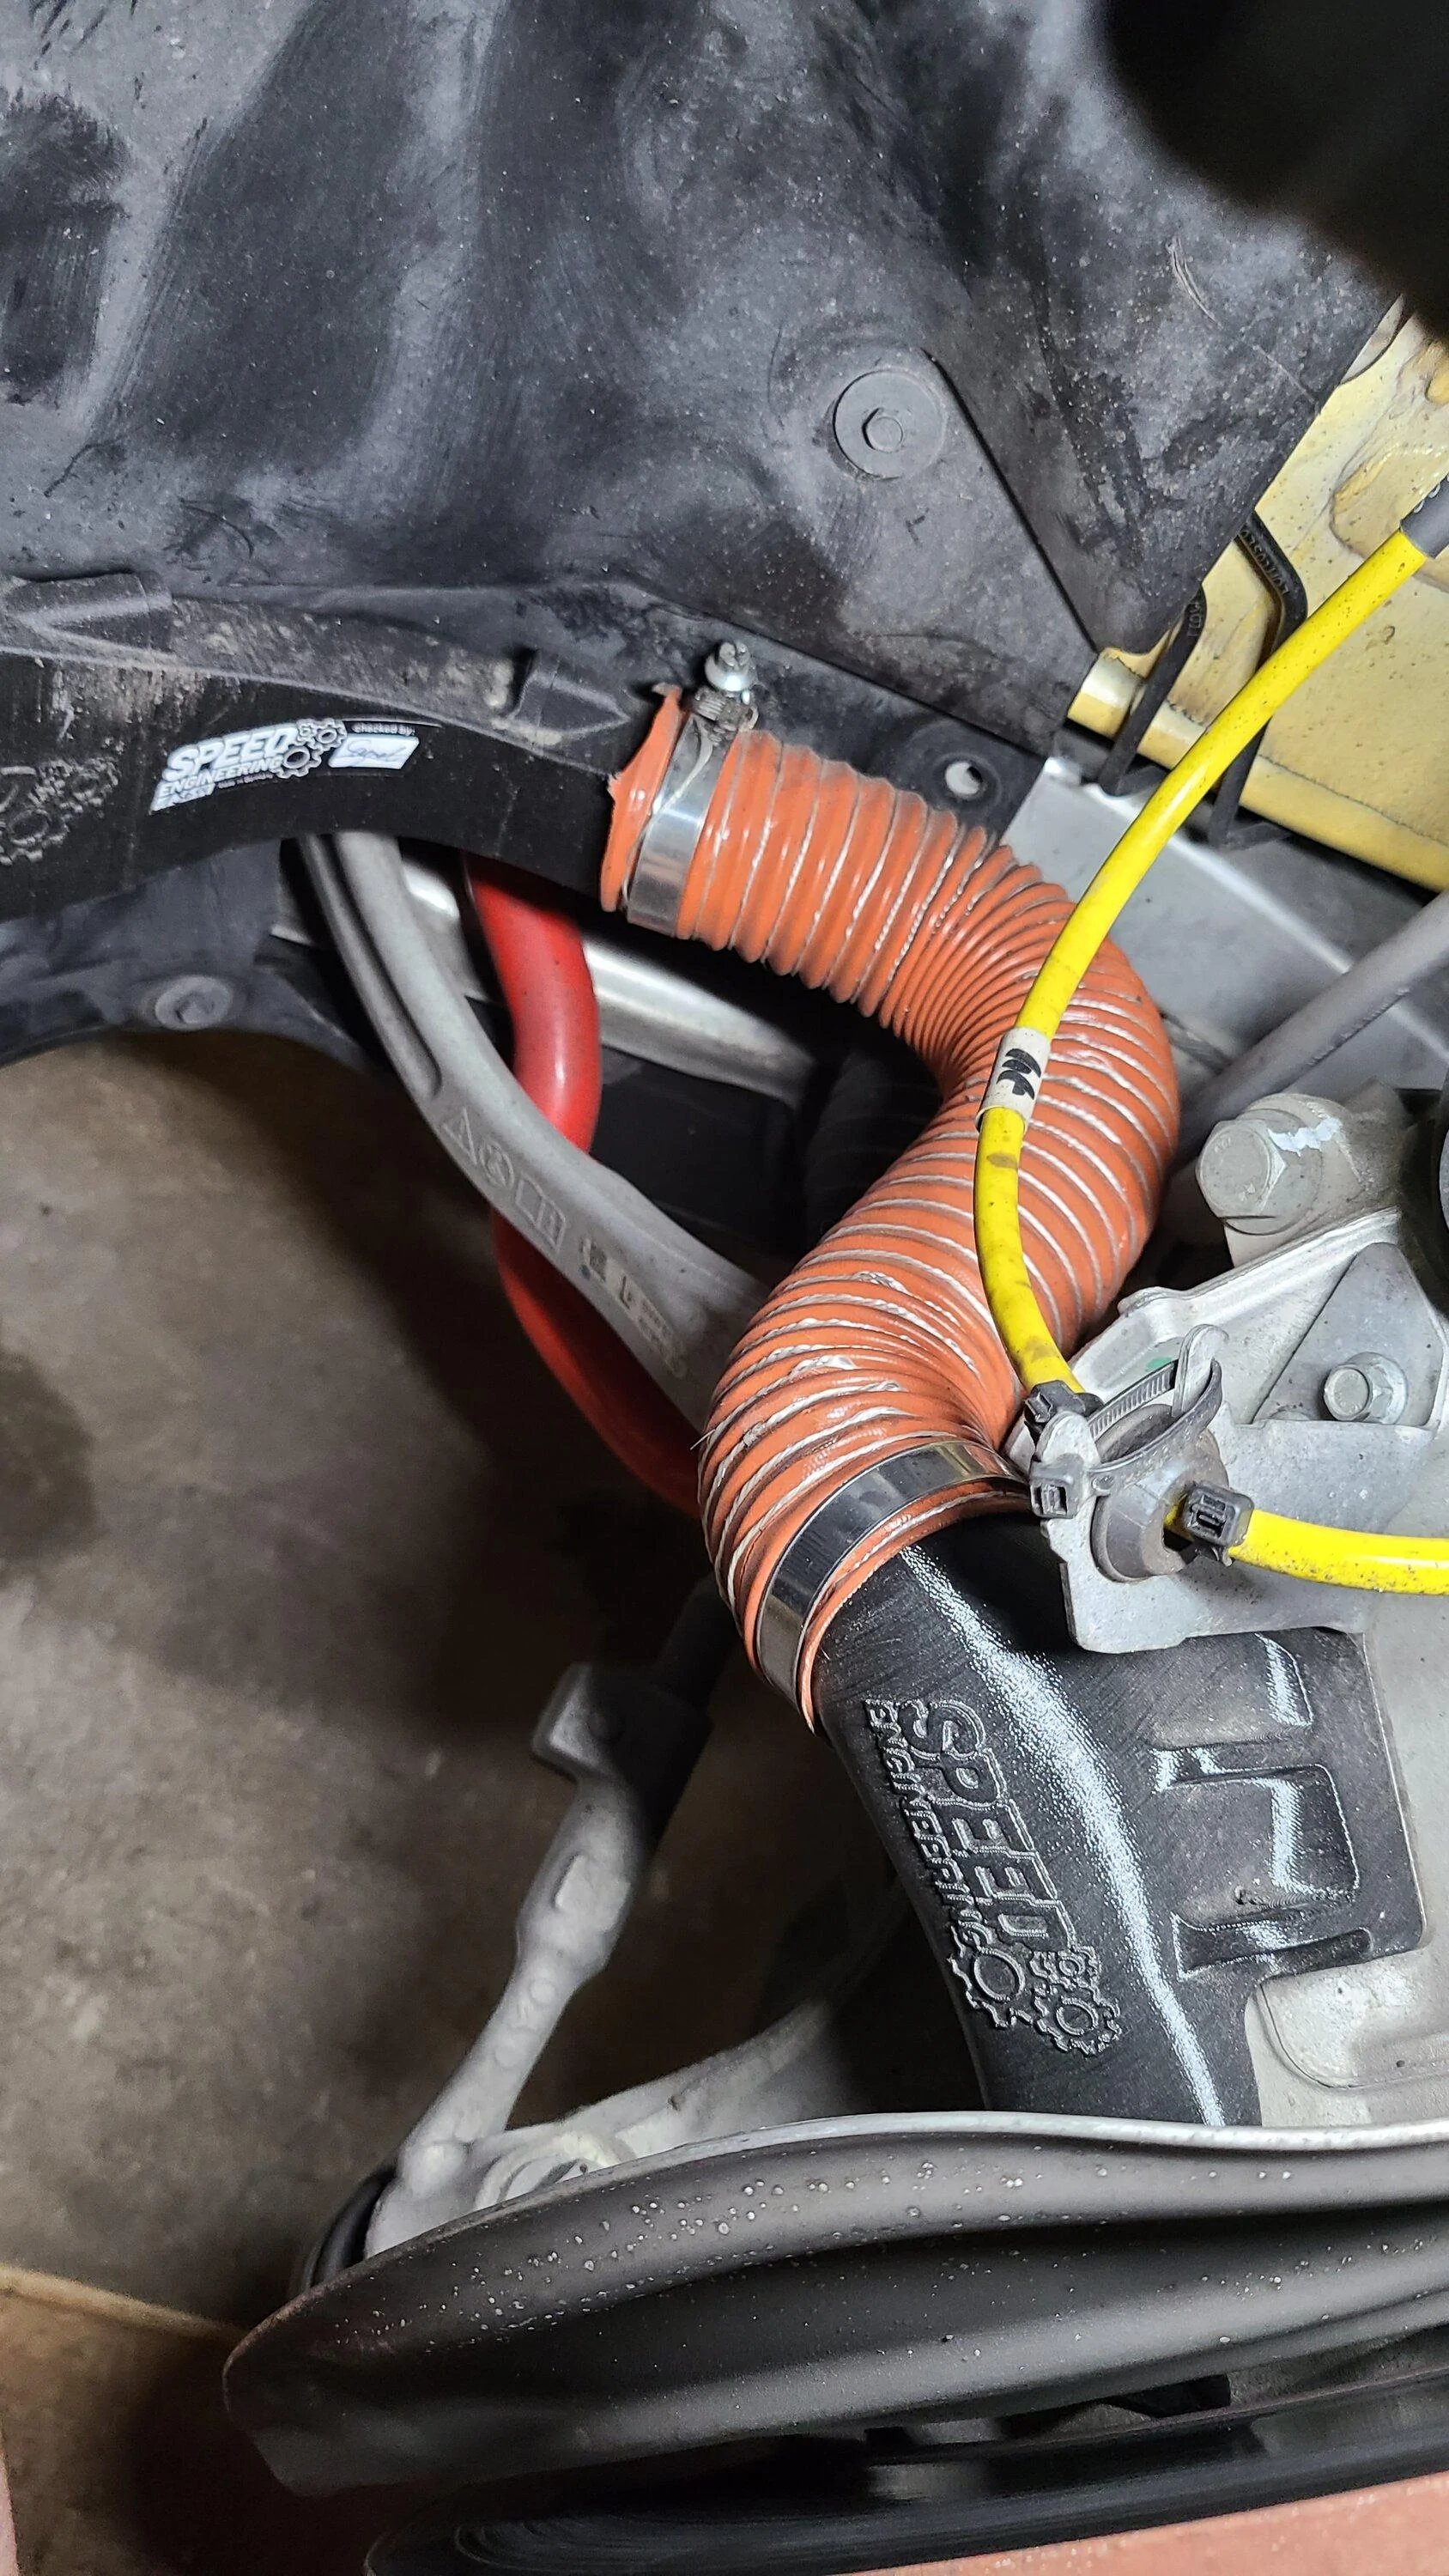
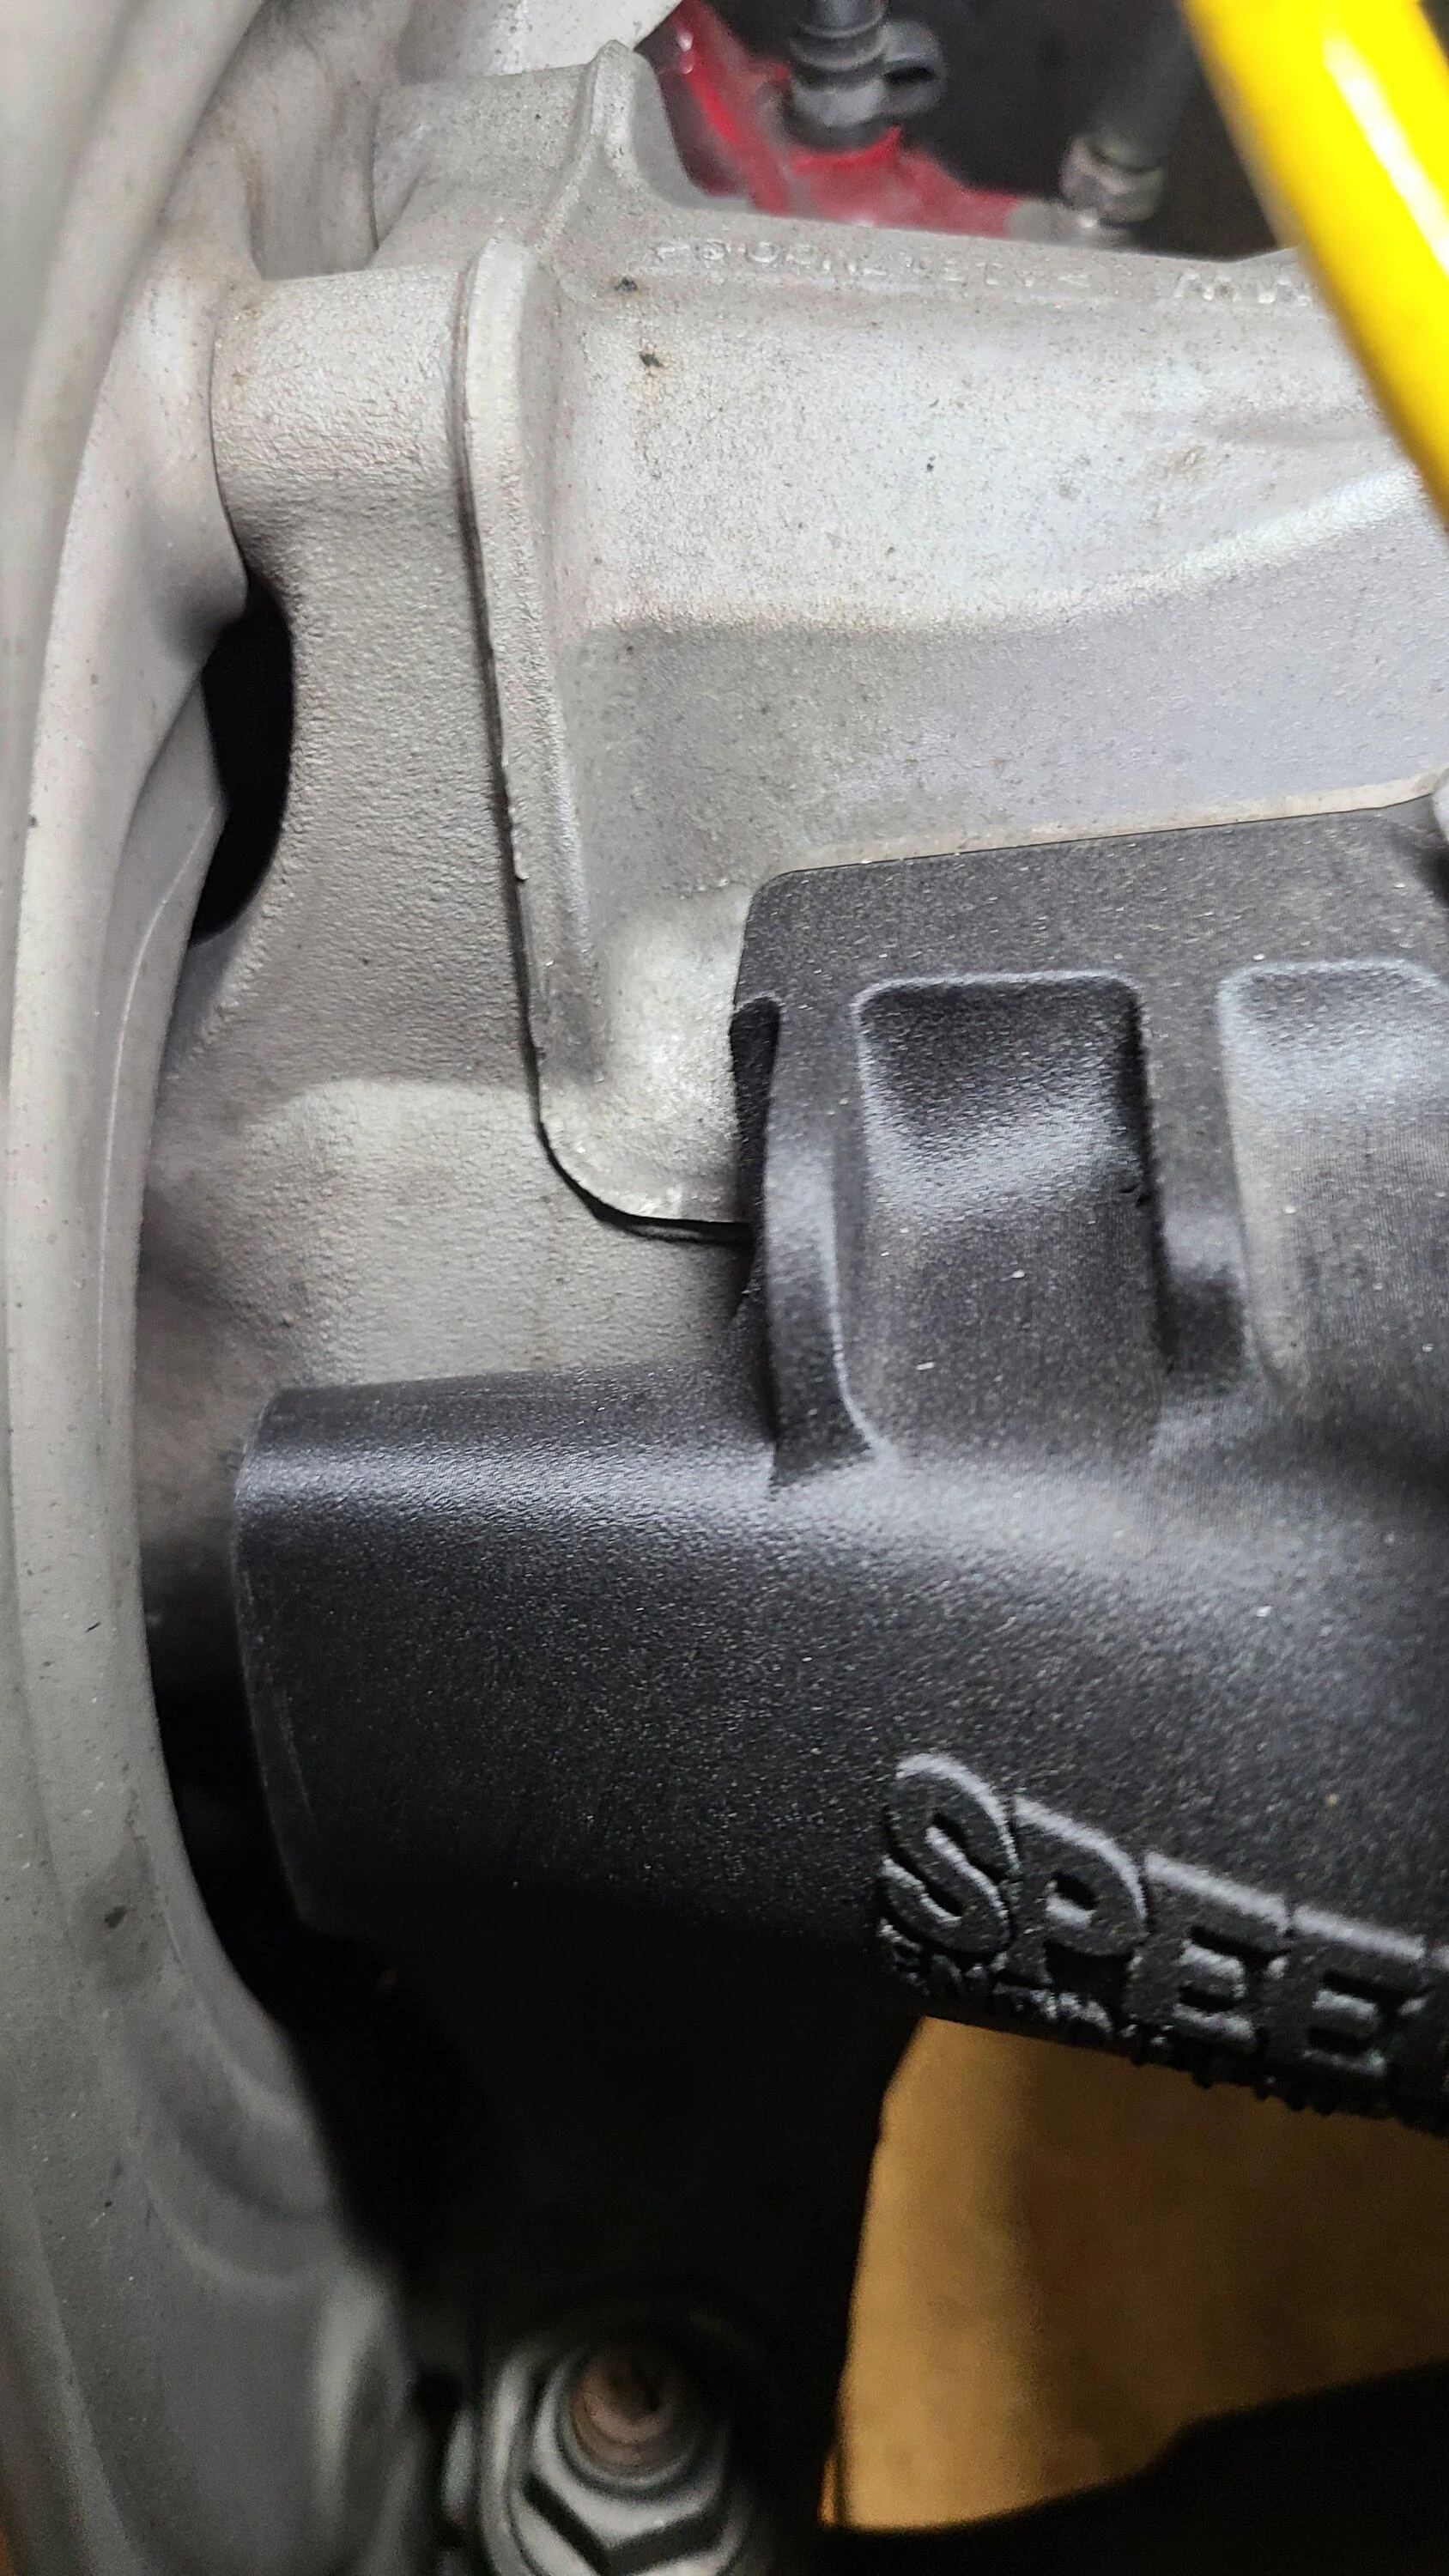
Once I got the chance I began the install on the driver's side without a problem. Before moving to the other side I tried moving the wheel to full lock and jacking the wheel up and down through the stroke of the suspension. You can see that it is VERY close:

However there wasn't any contact!
I was a bit concerned with the tire picking up pebbles and essentially sand blasting the duct but figured I would just have to wait and see how it fares.
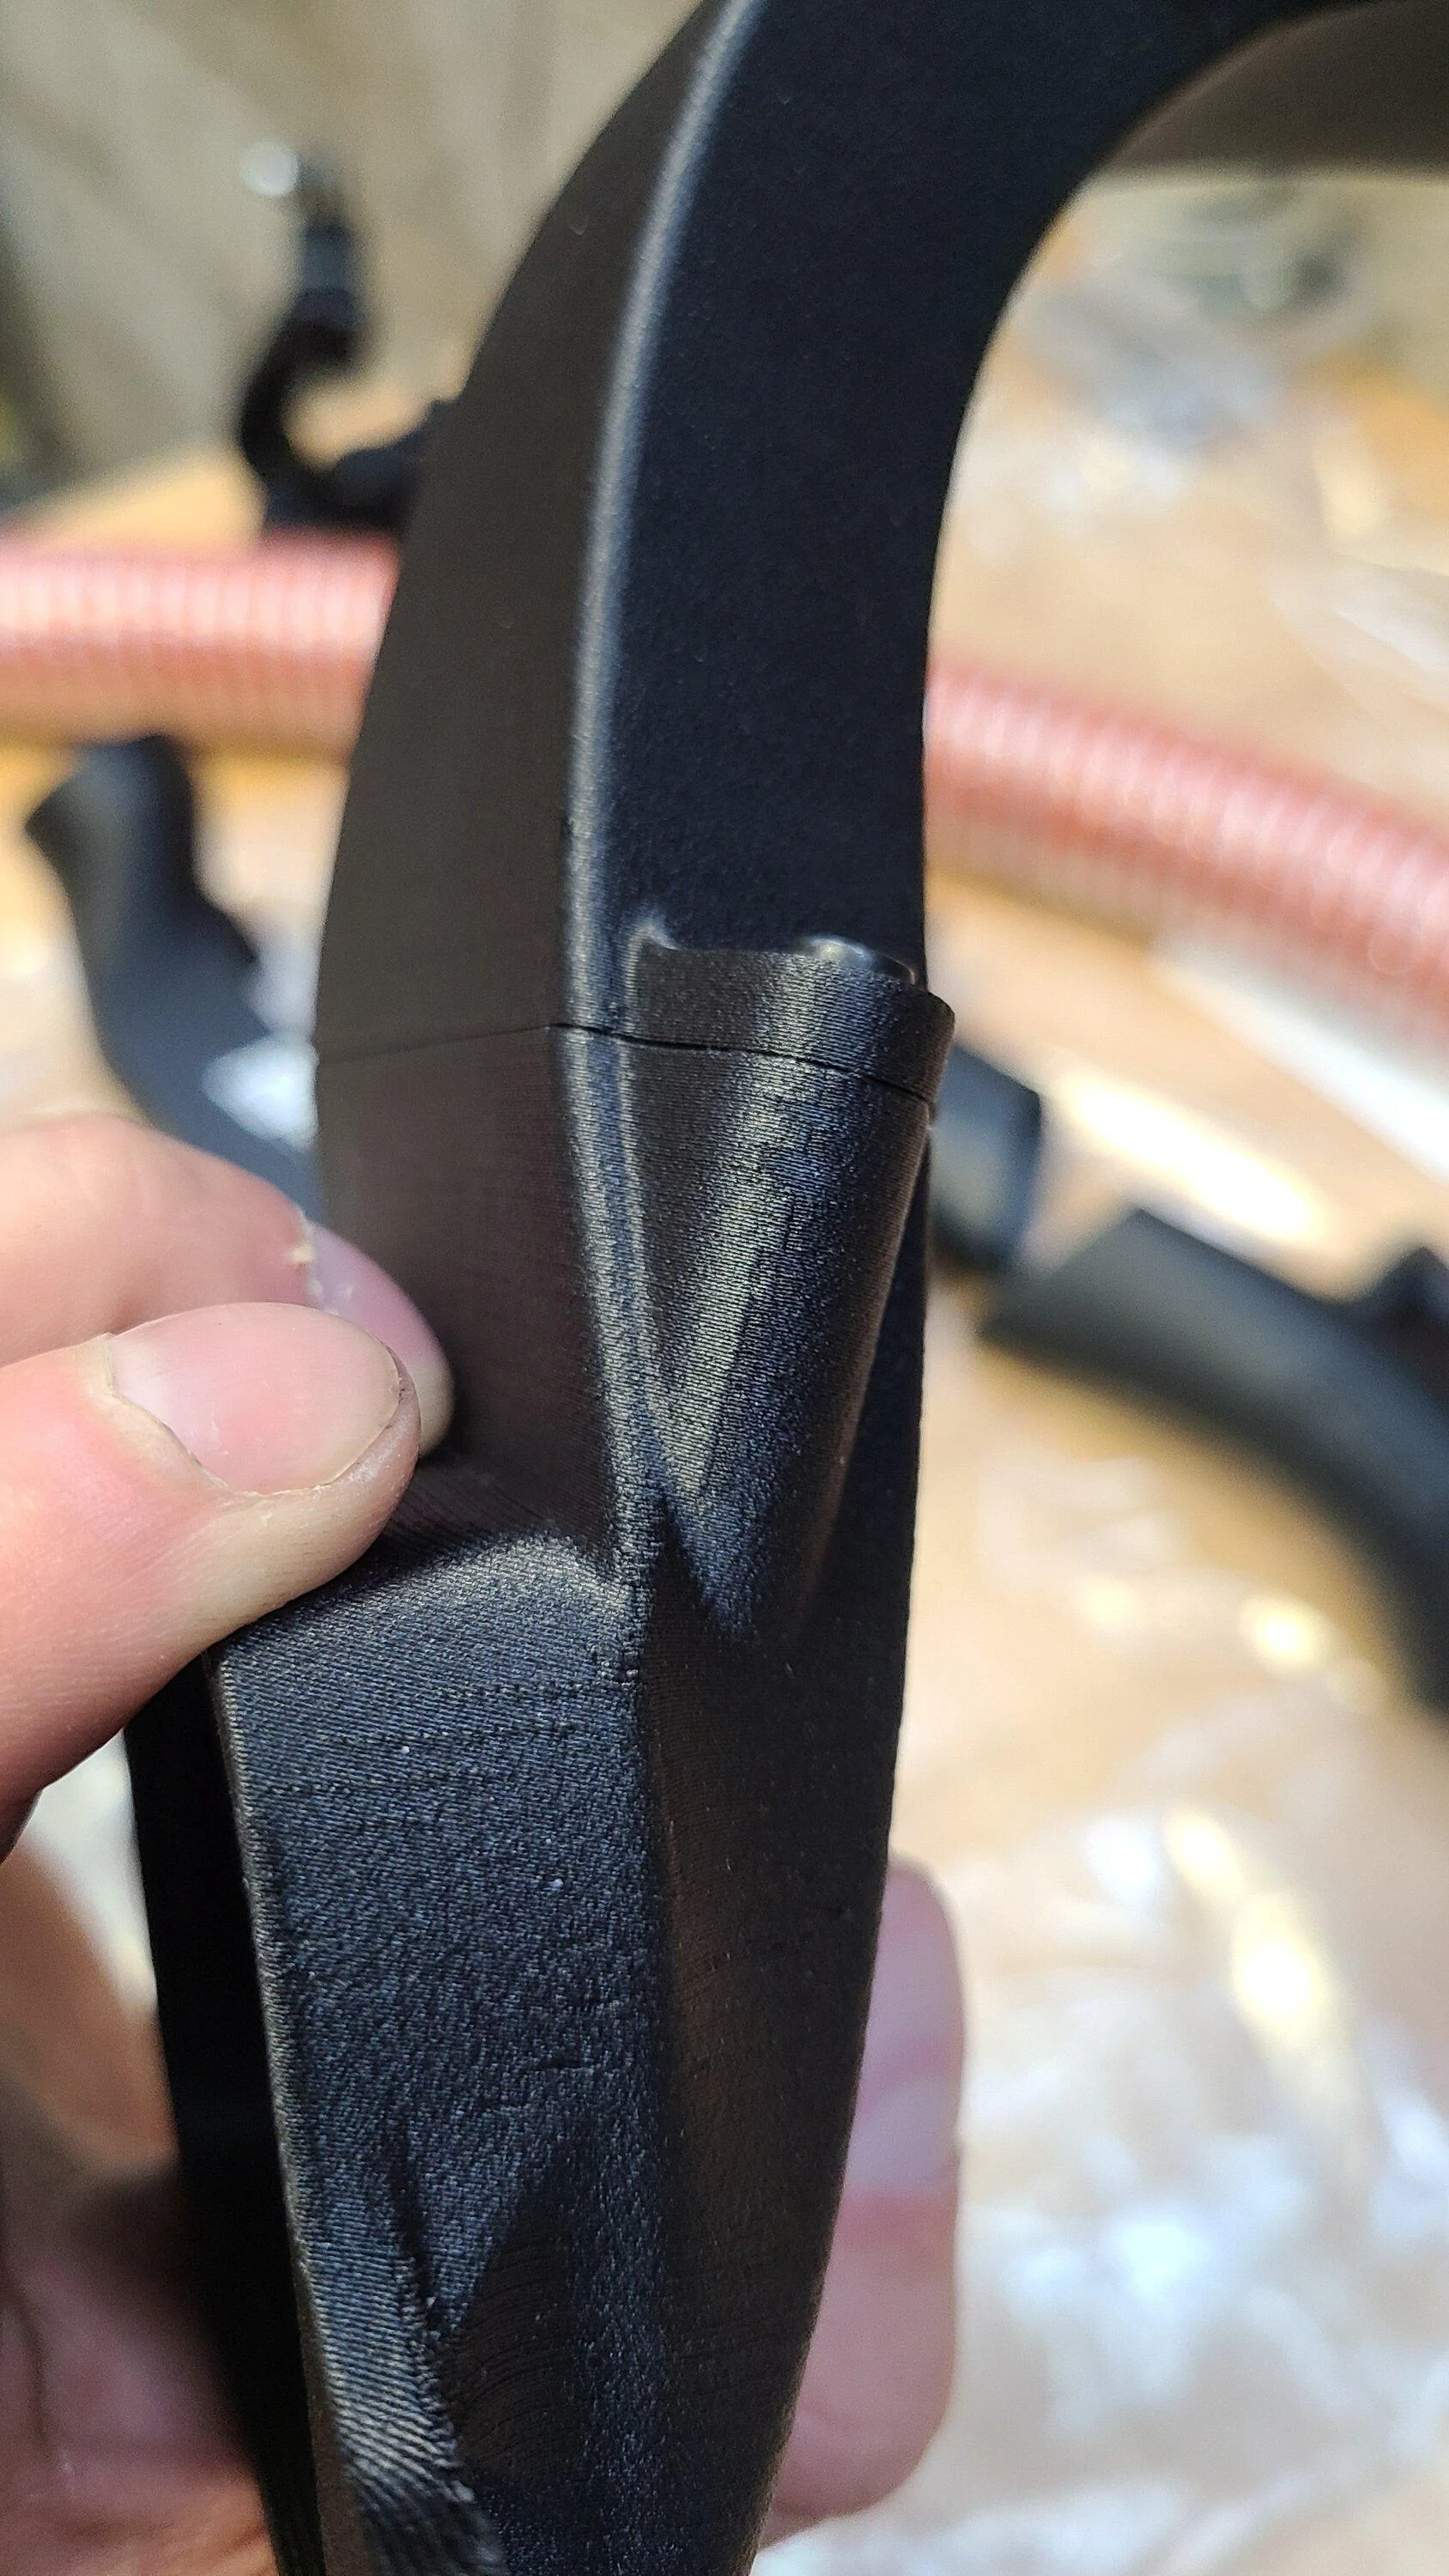
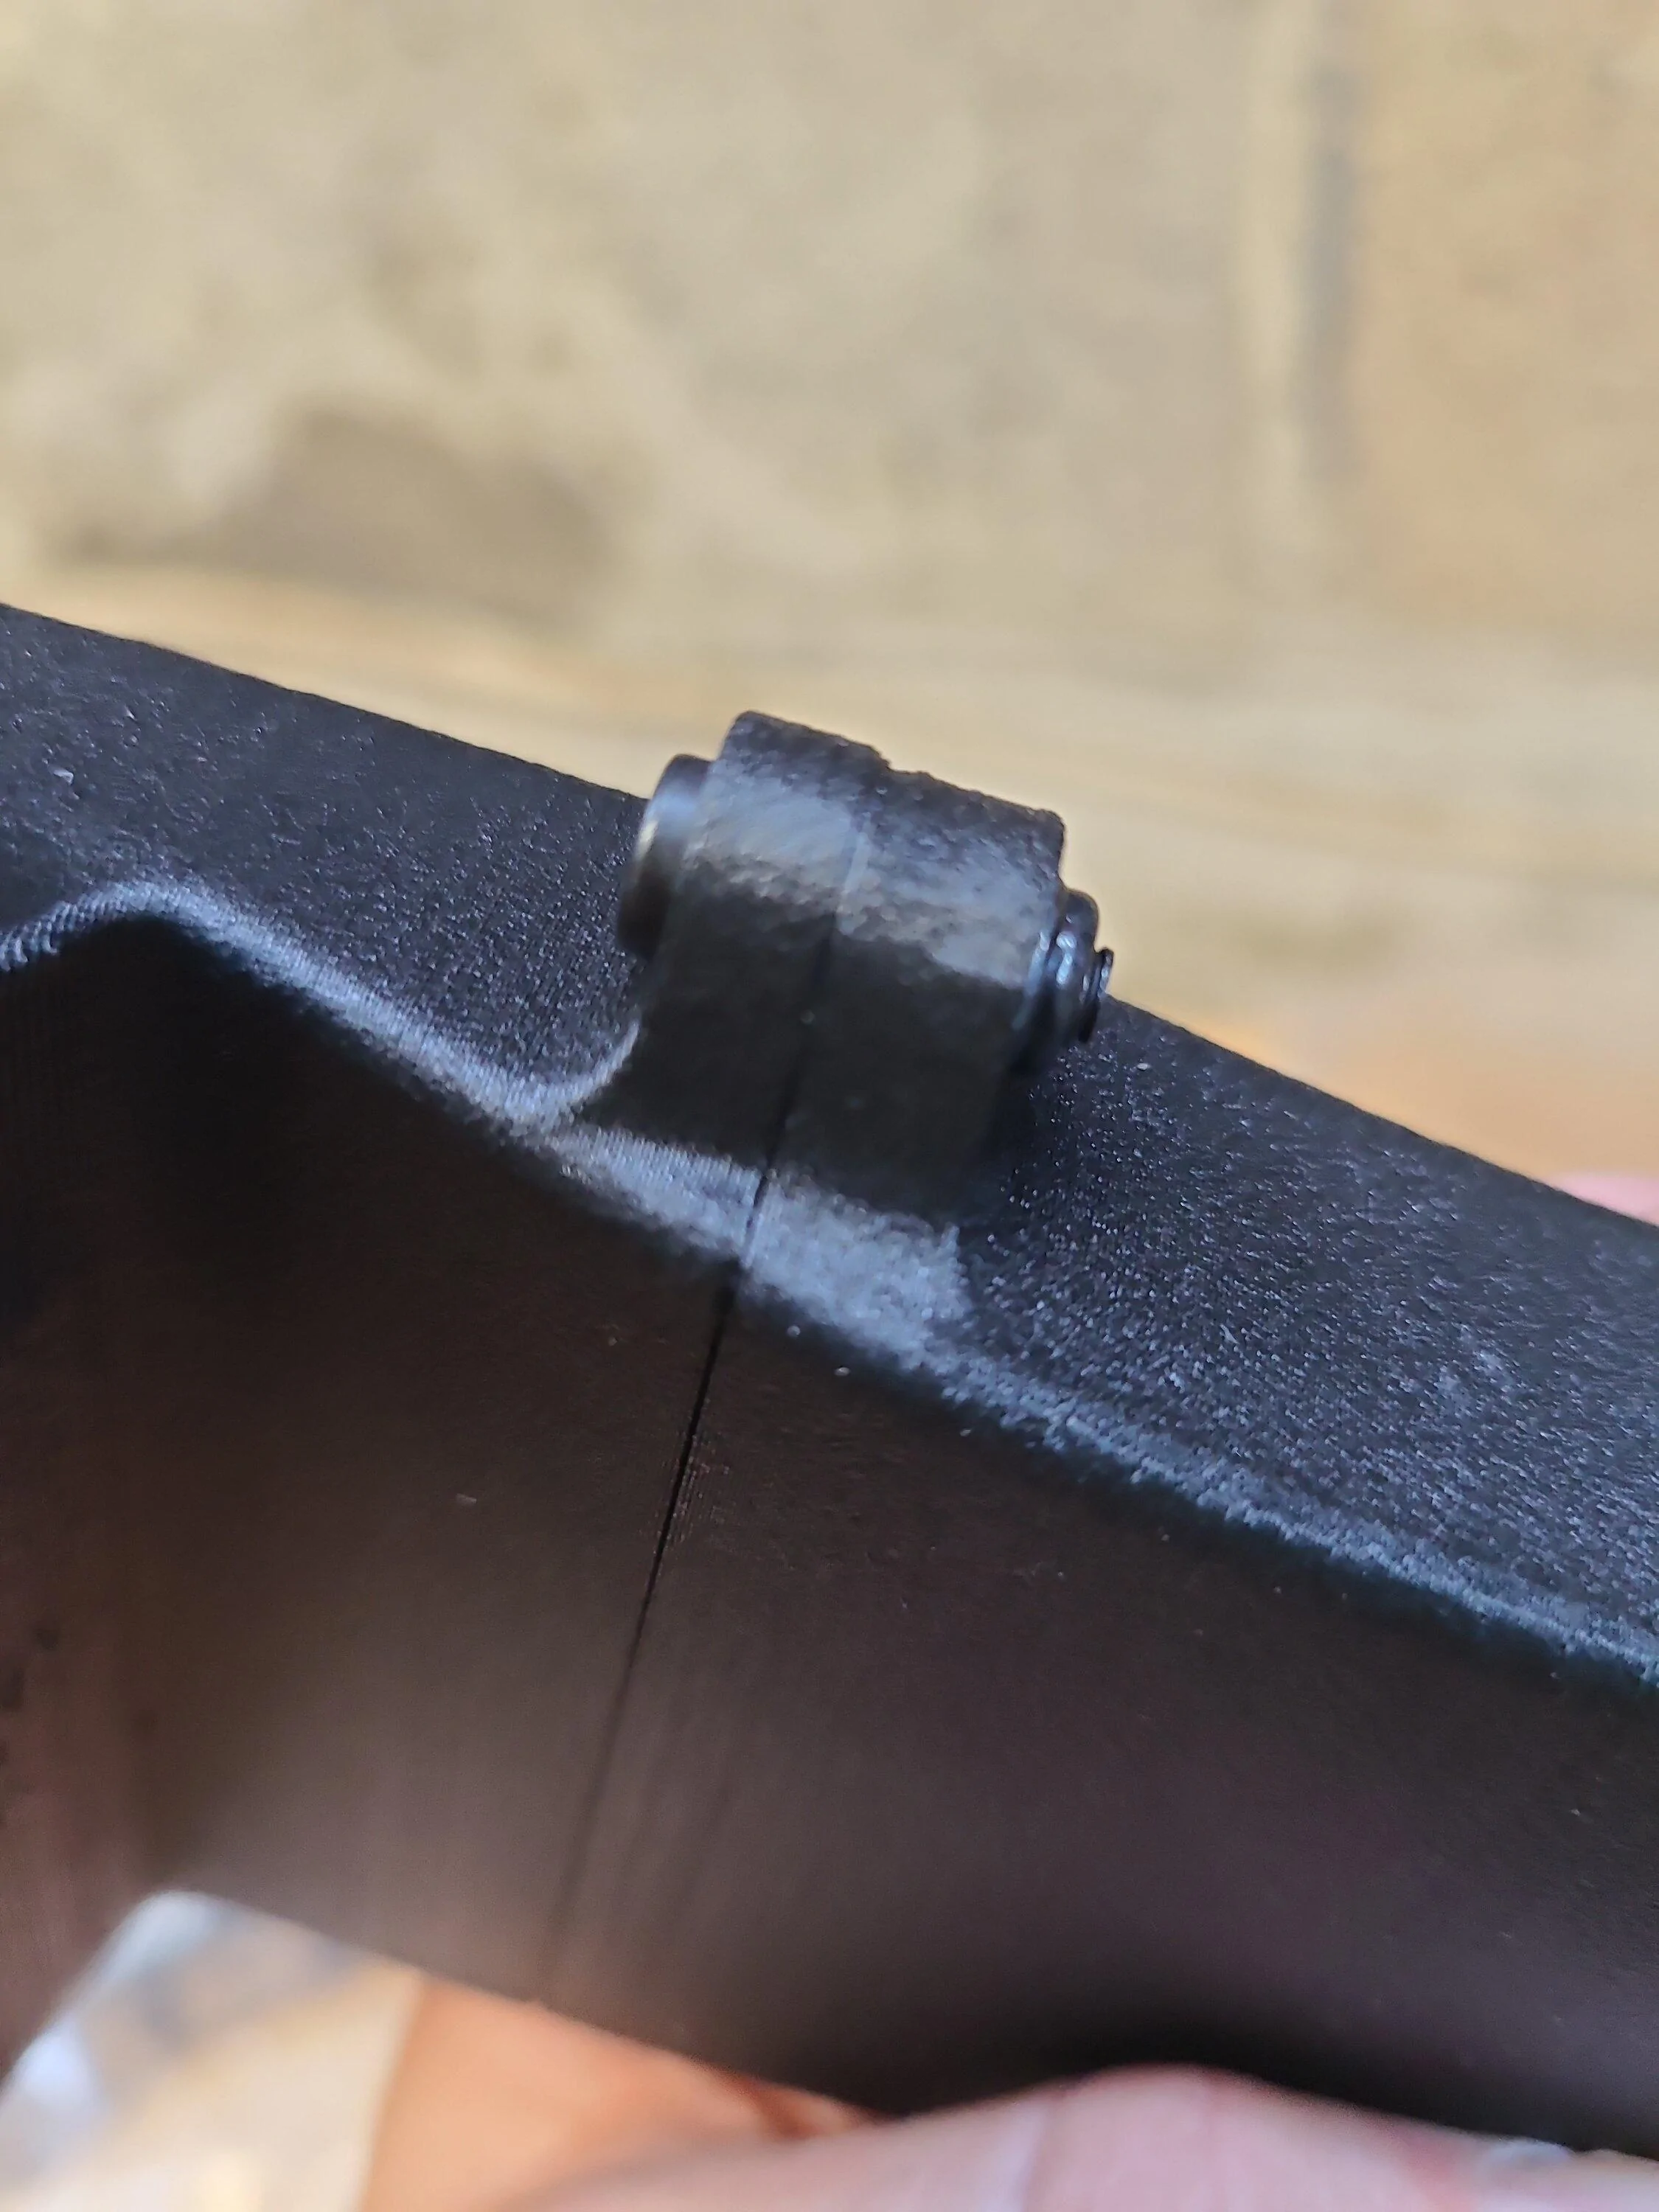
Anyway, I moved on to the passenger side.....and that's where I had my first issue. In the passenger side wheel well. There is a bulge in the fender liner that covers a bundle of wires. I'm not exactly sure what these wires go to but needless to say it made the installation impossible. I decided to try and install the duct and see if I could cinch it down to see if that would press the bulge in enough. Well, being 3d printed and applying a decent amount of stress, I managed to crack the duct along a few layer lines ? .
.
I ran to advanced auto and grabbed some plastic weld to fix the duct and reinforce the mounting ears which seemed to work out just fine. You can see the color of the epoxy in some of the pictures. At this point I reached out to Speed Engineering and asked if maybe there was a difference in the US cars vs the EU cars. They told me the cars are the same and that the bulge needs to be cut and wires need to be relocated and will be specified in their instructions.....which were still in progress. I'll admit I was a little peeved since it would have been nice to know they were working on install instructions but then again, this is modifying so no hard feelings.
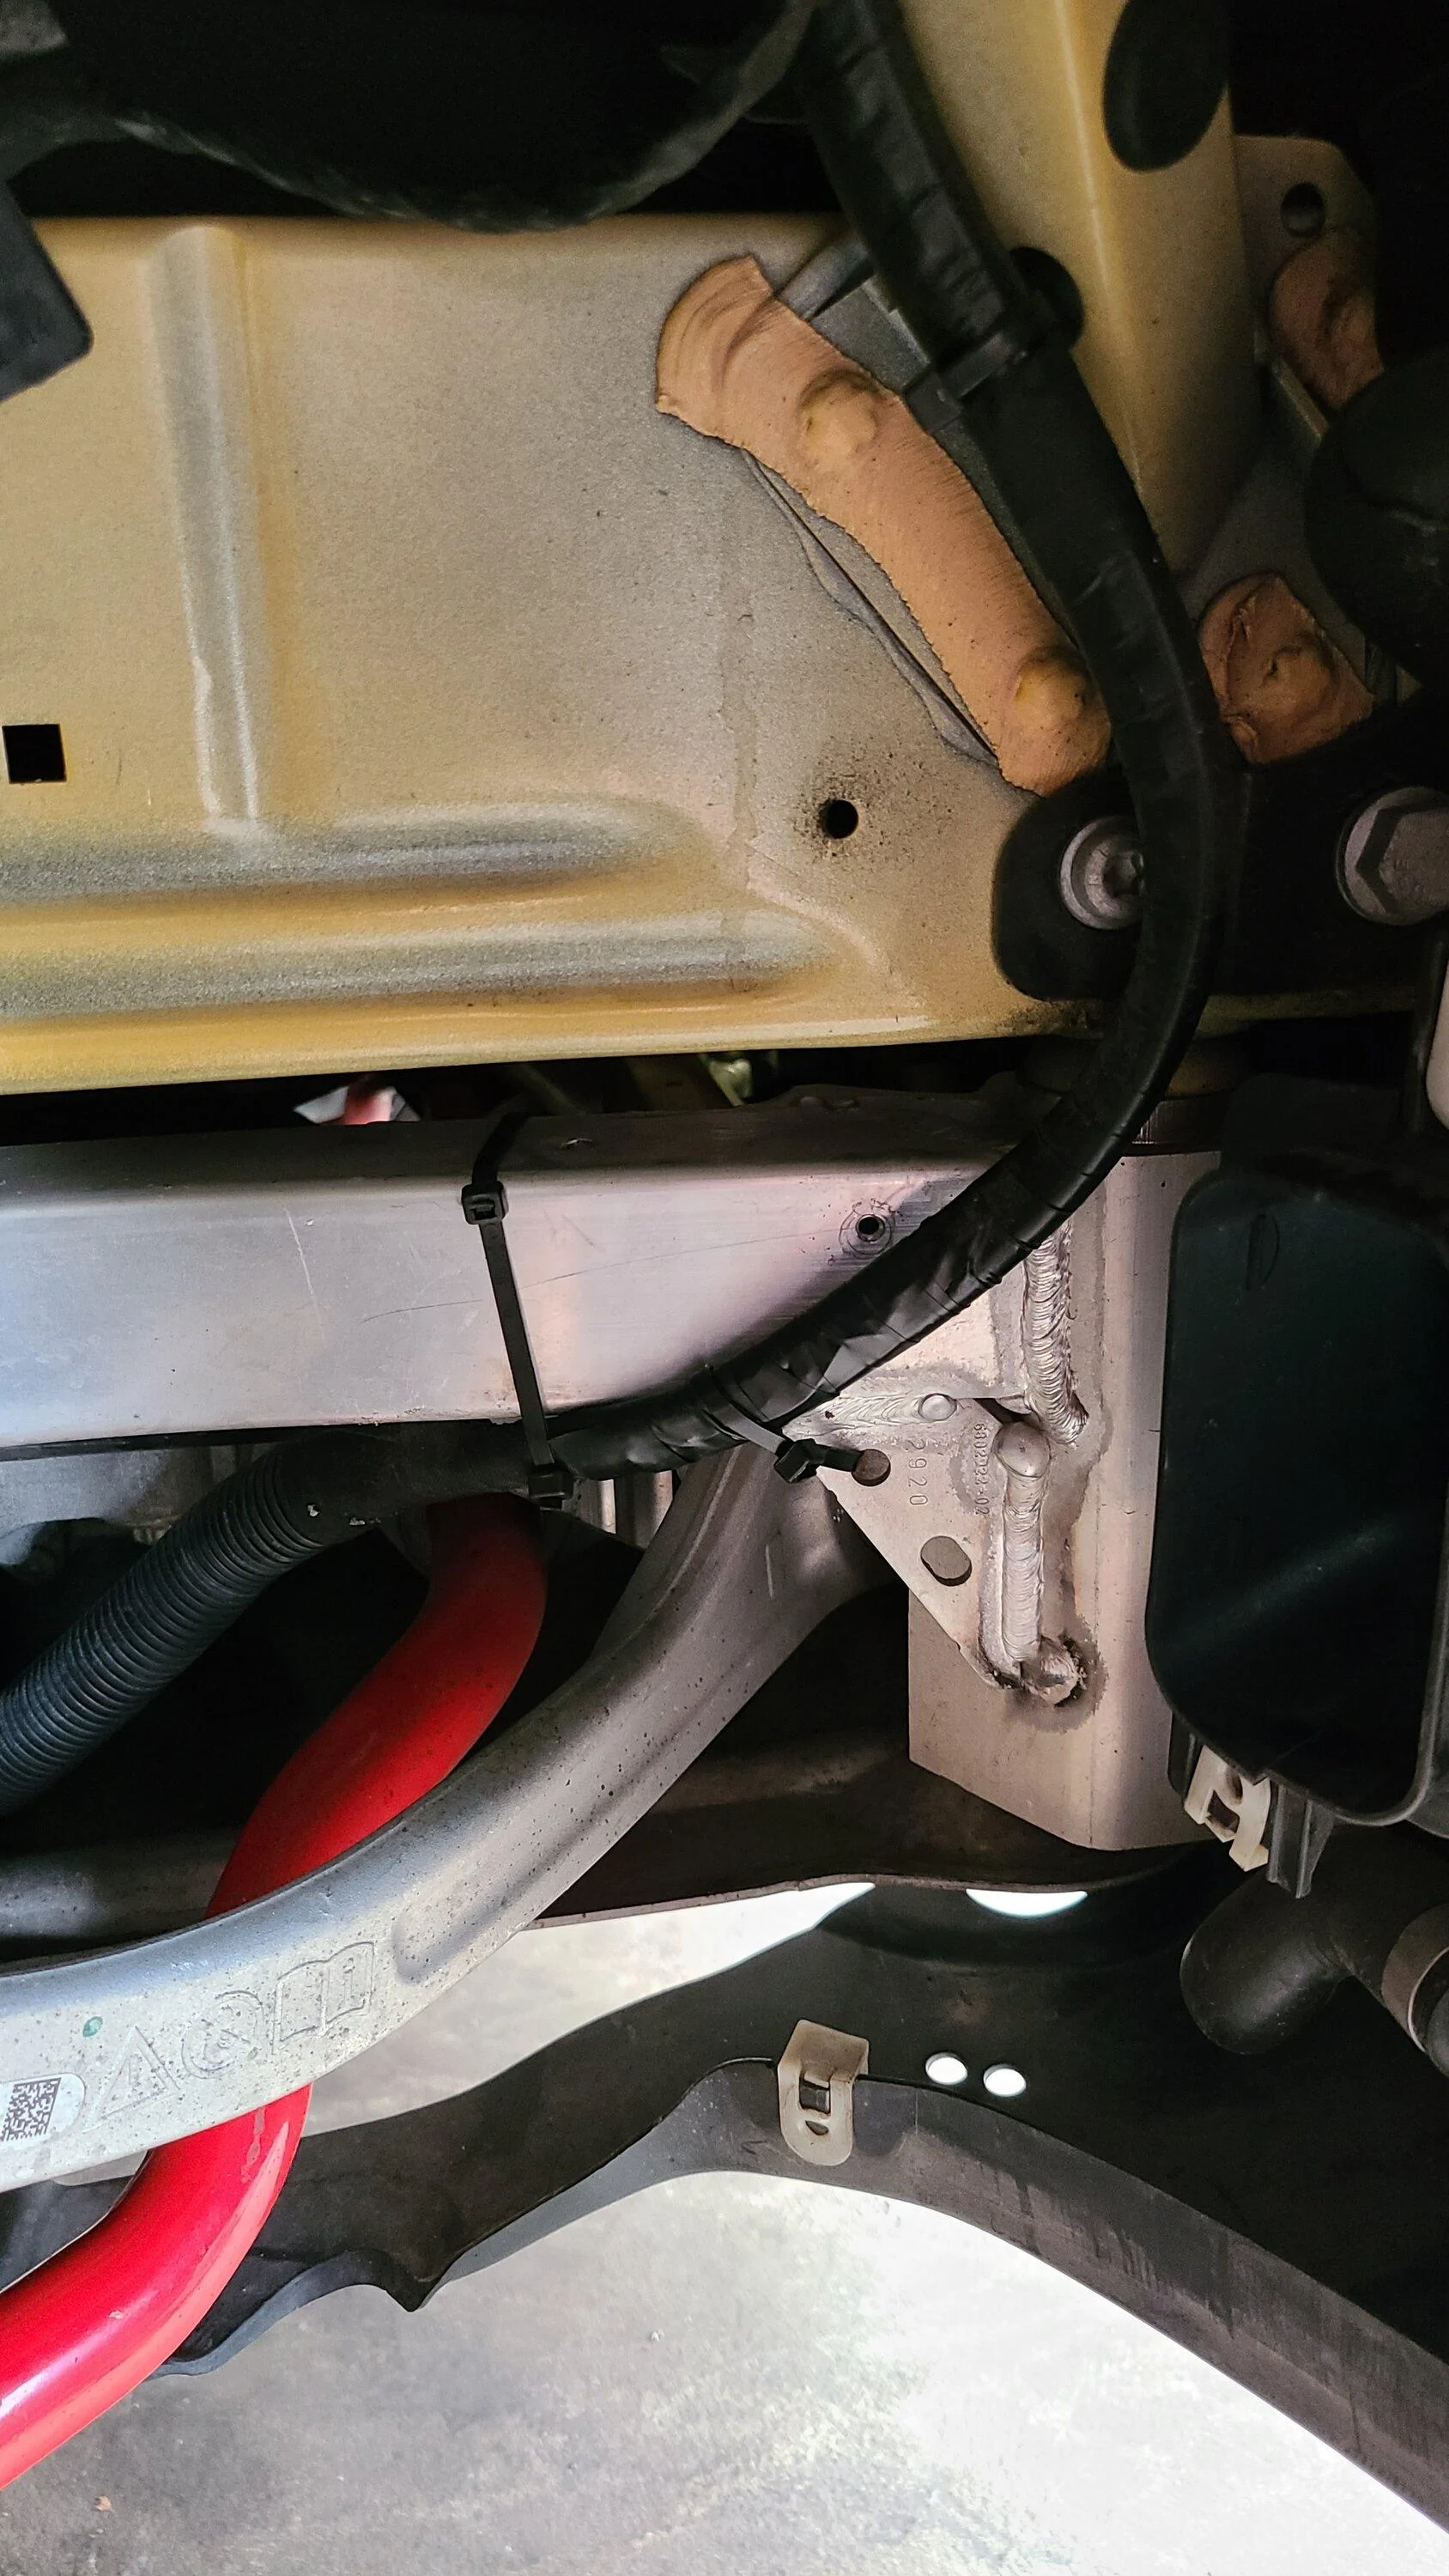
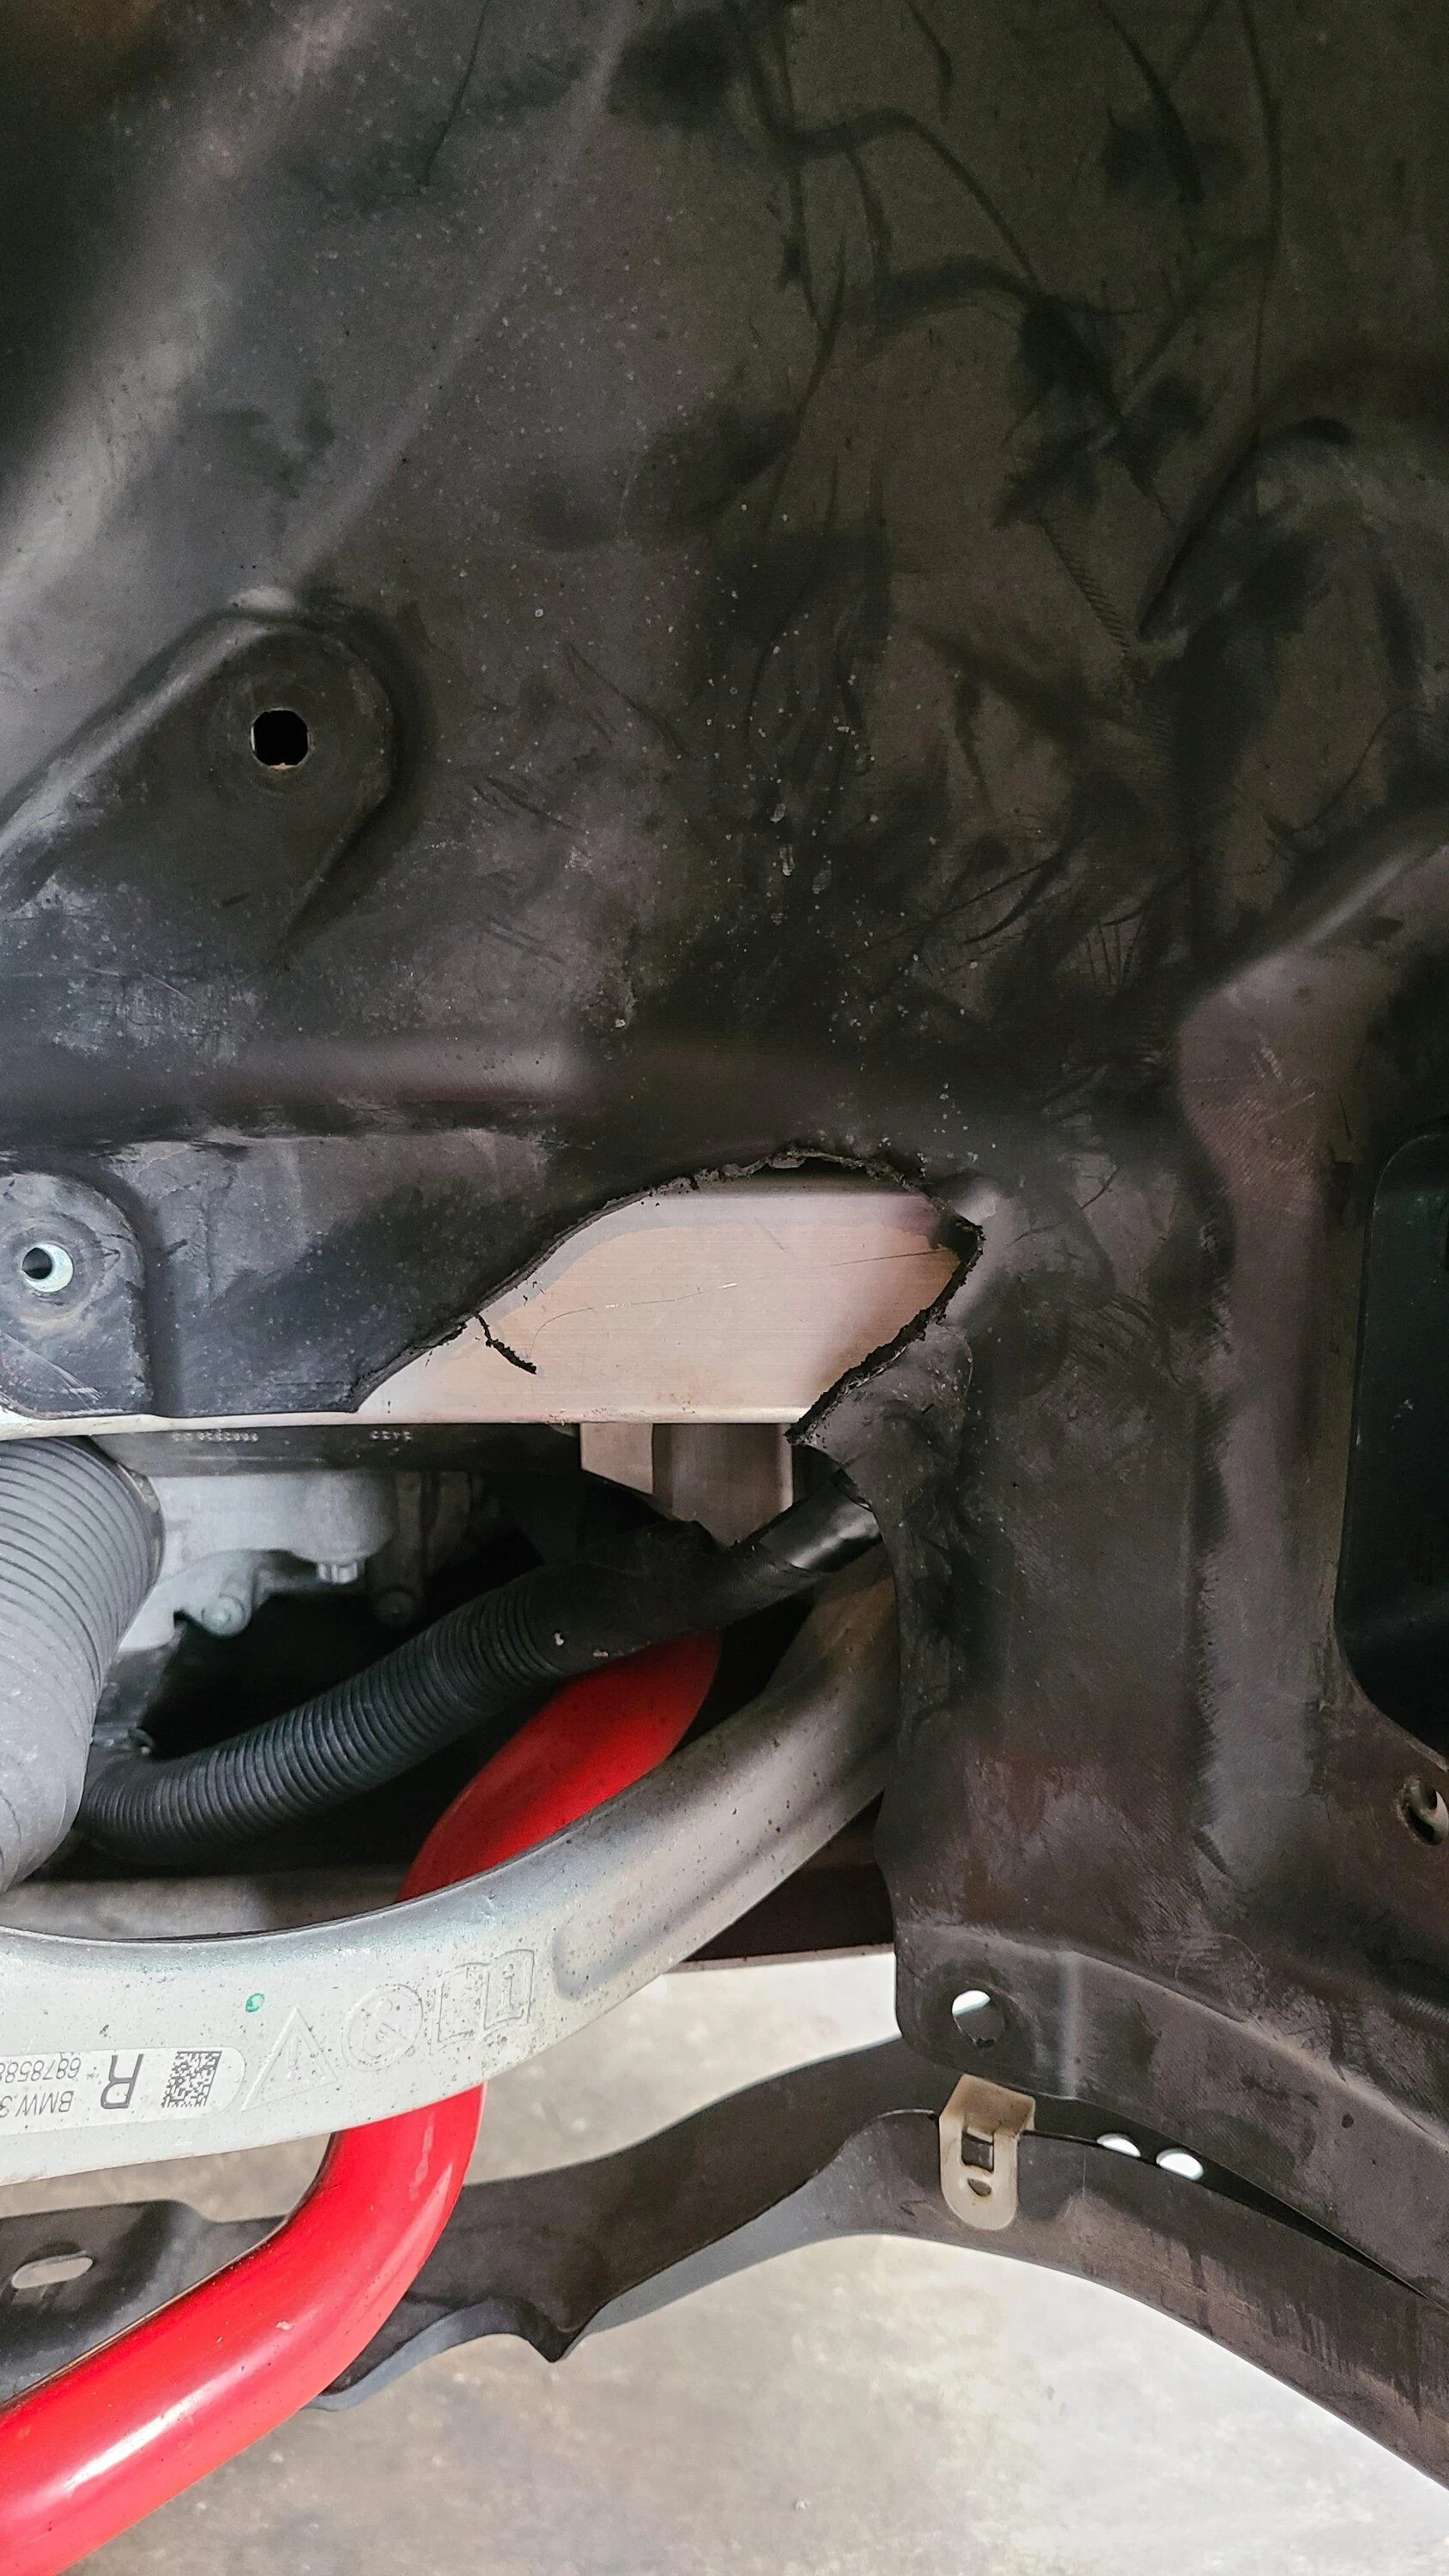
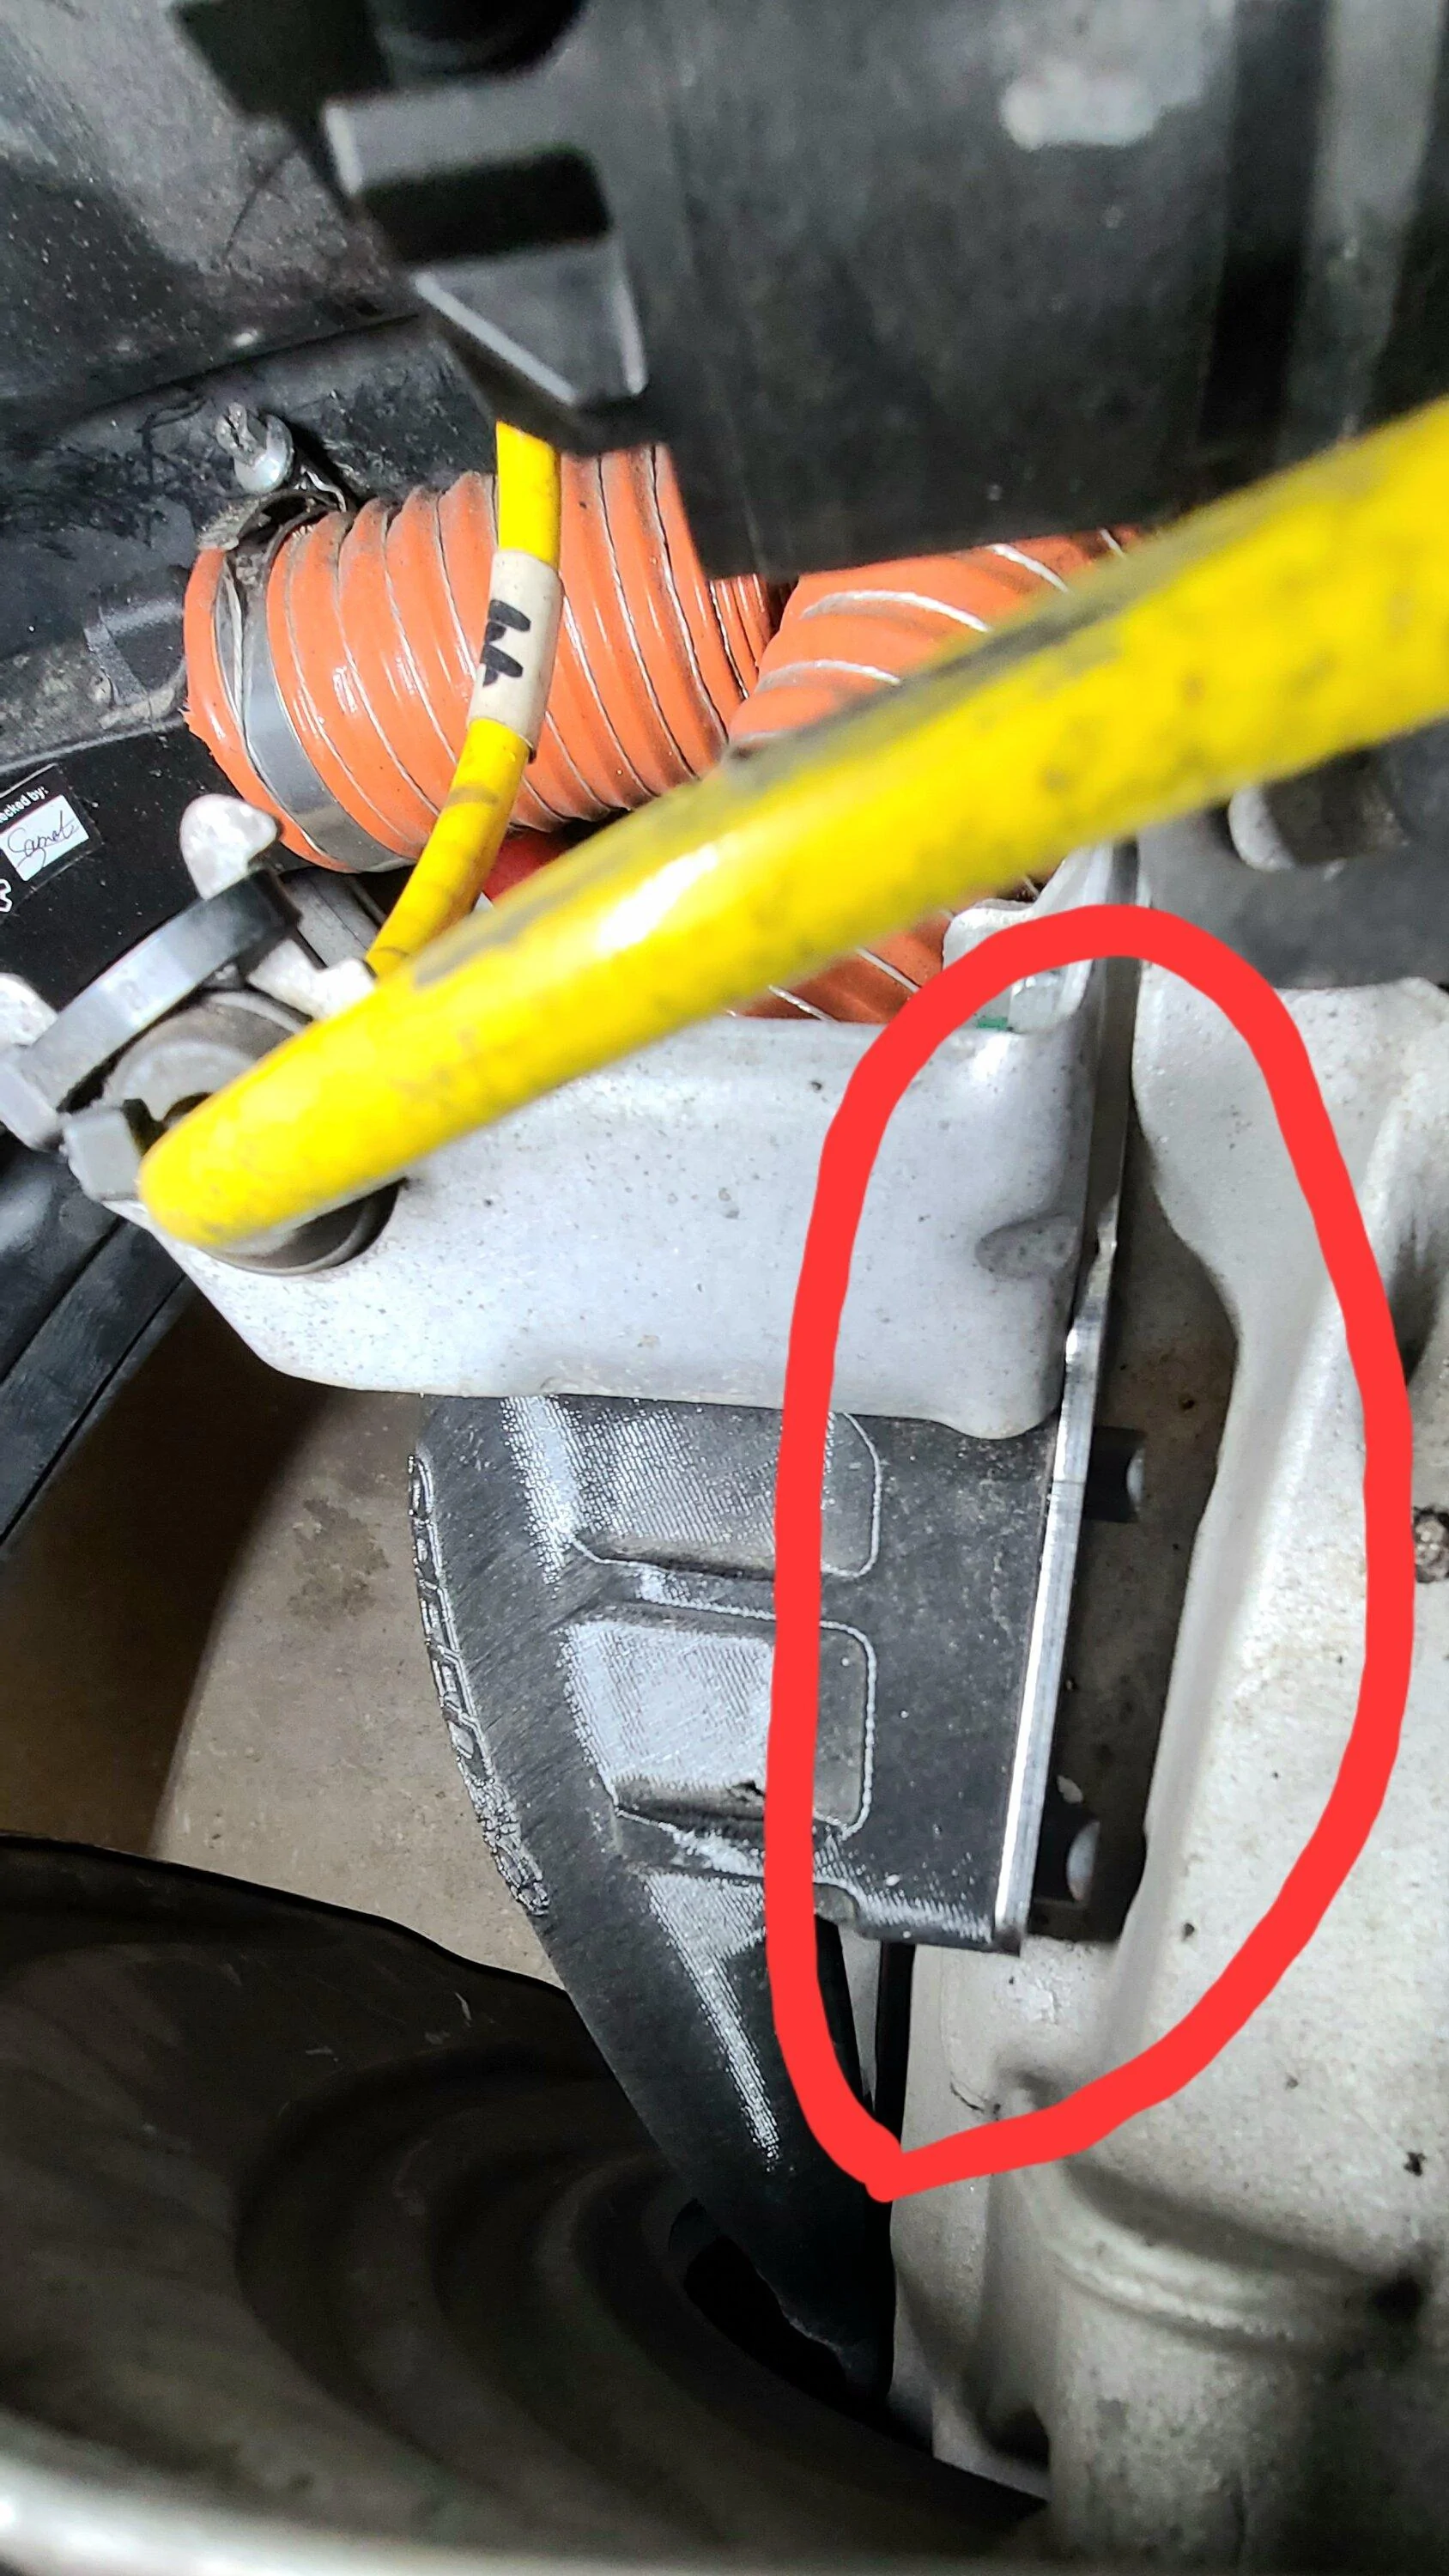
Anyway, I went back and looked at the wires, determined where I could move them (more toward the front of the car) using zip ties and removed the plastic elbow that held them prior. At that point, with a quick trim using my dremel, I cut out the bulge and was on the home stretch! You can see the area I cut out as well as the wires being tucked below:
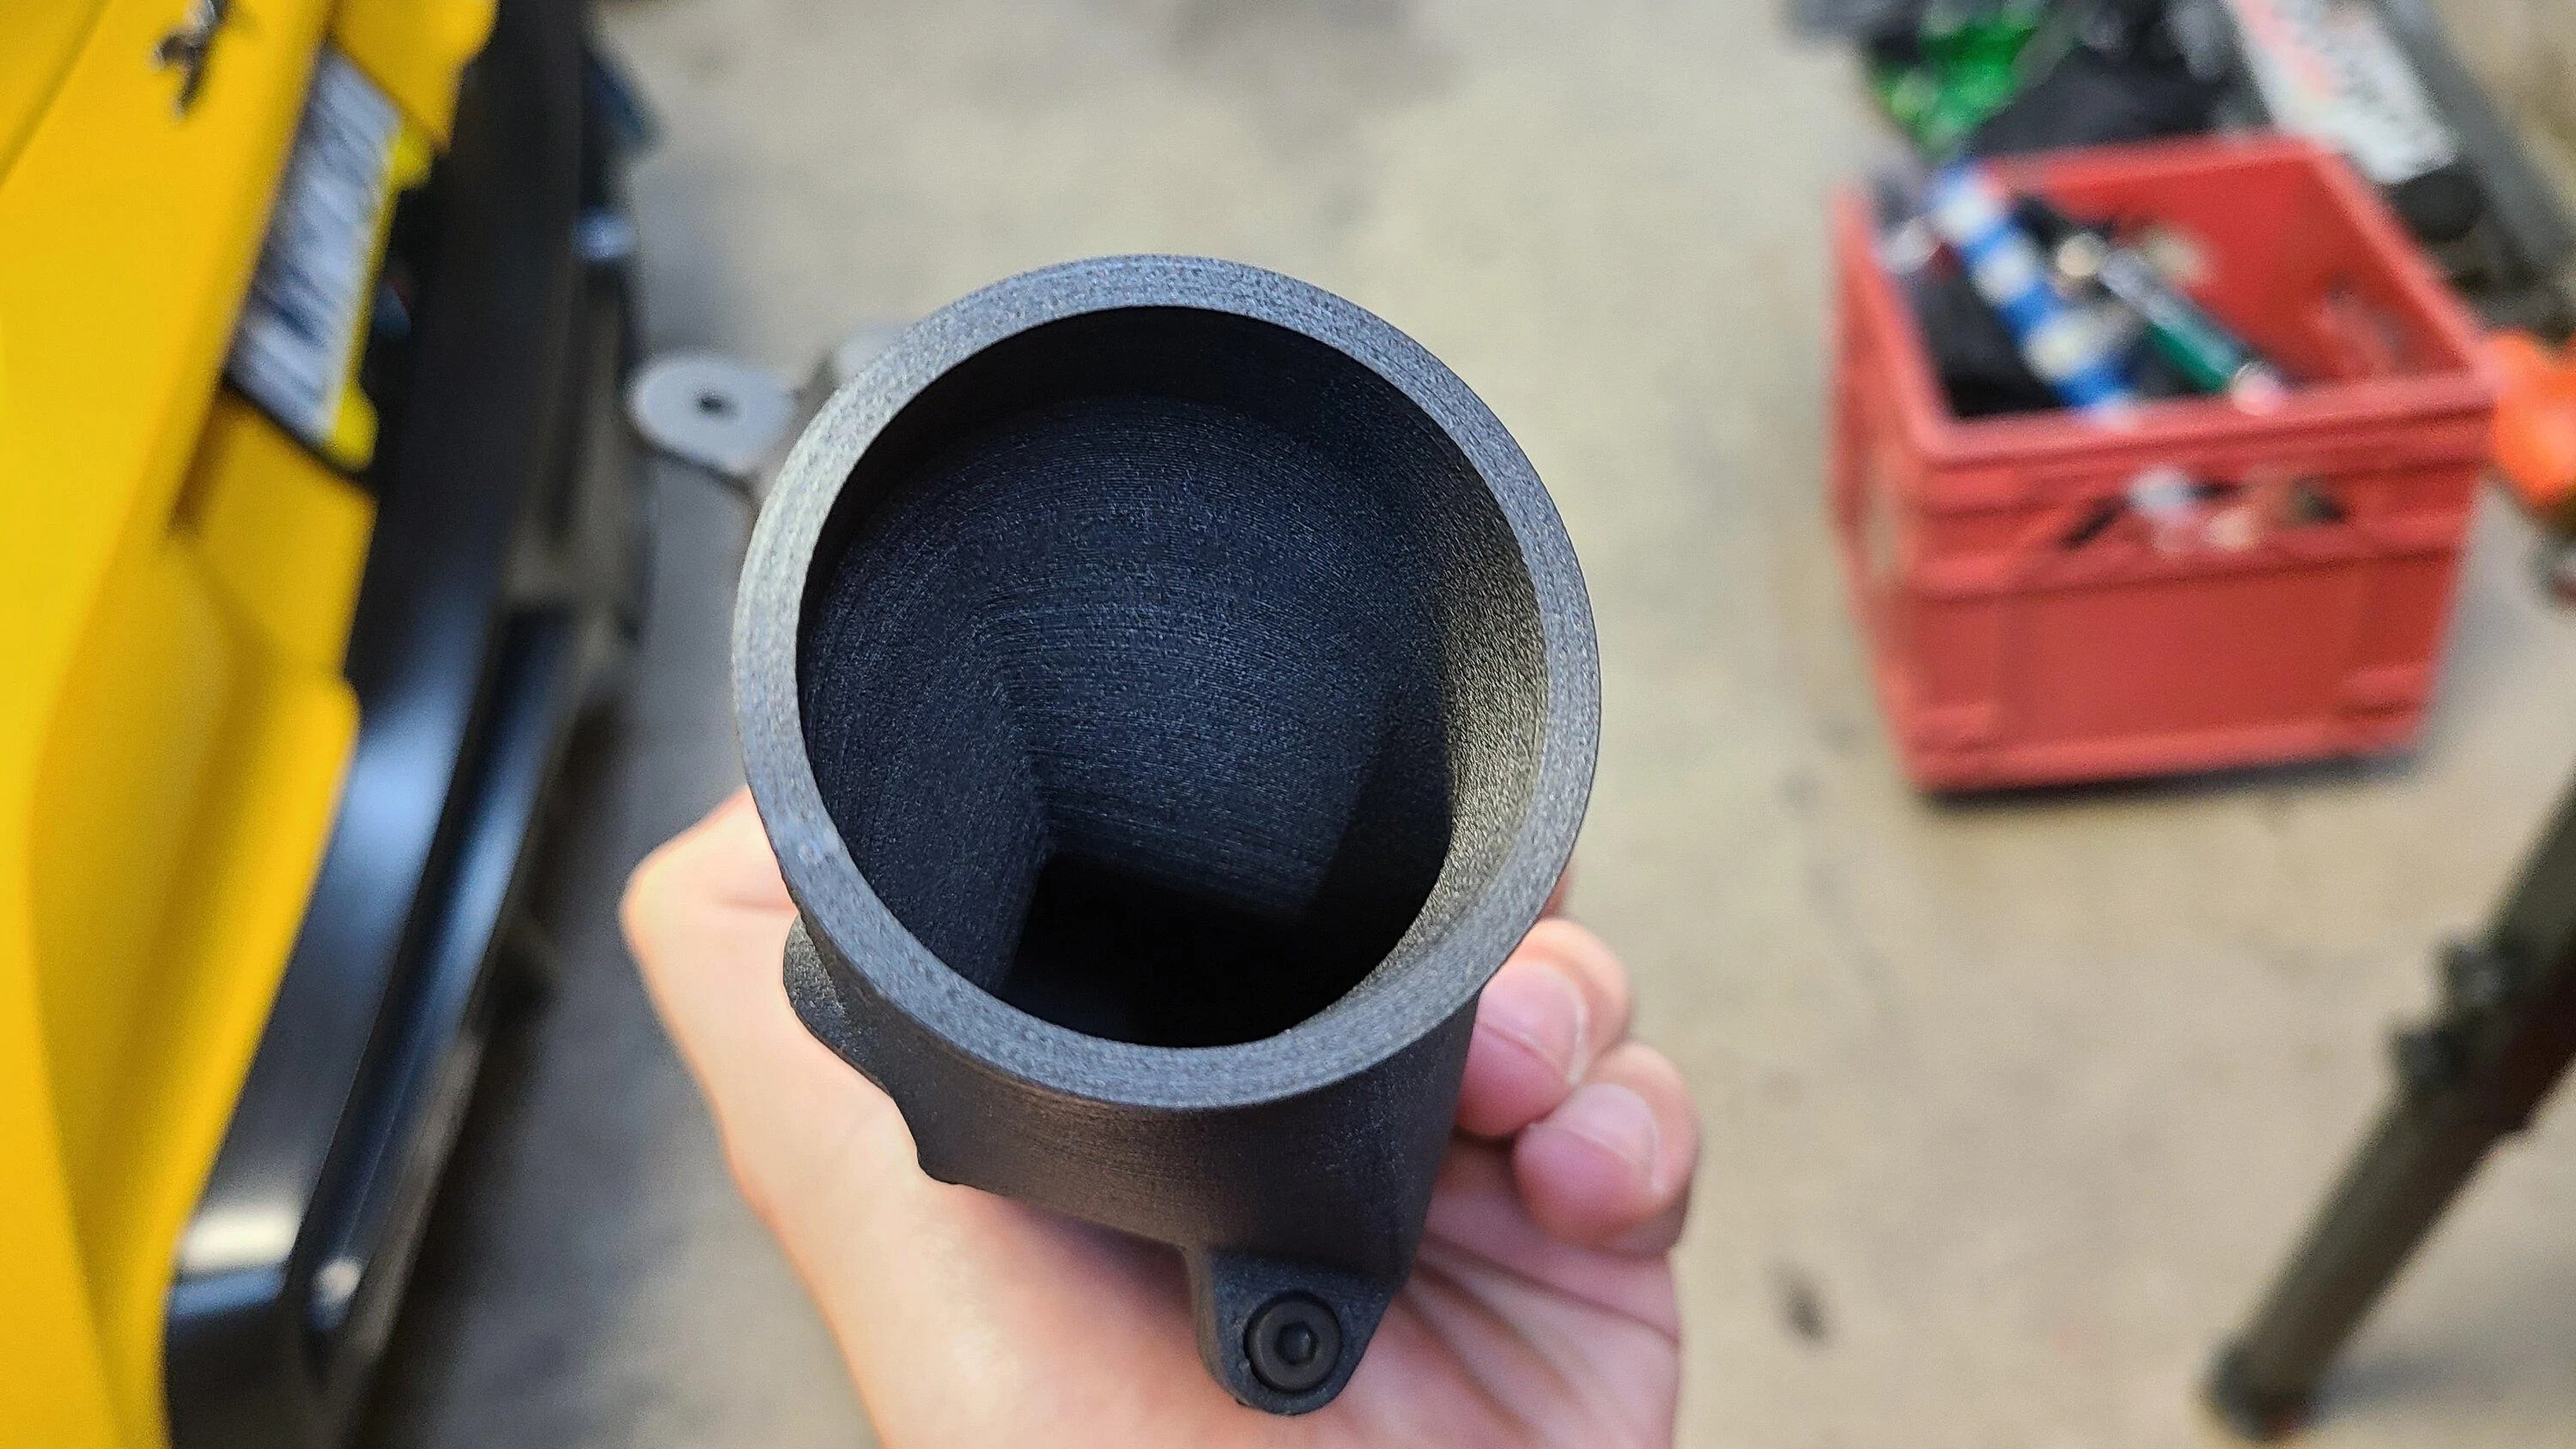
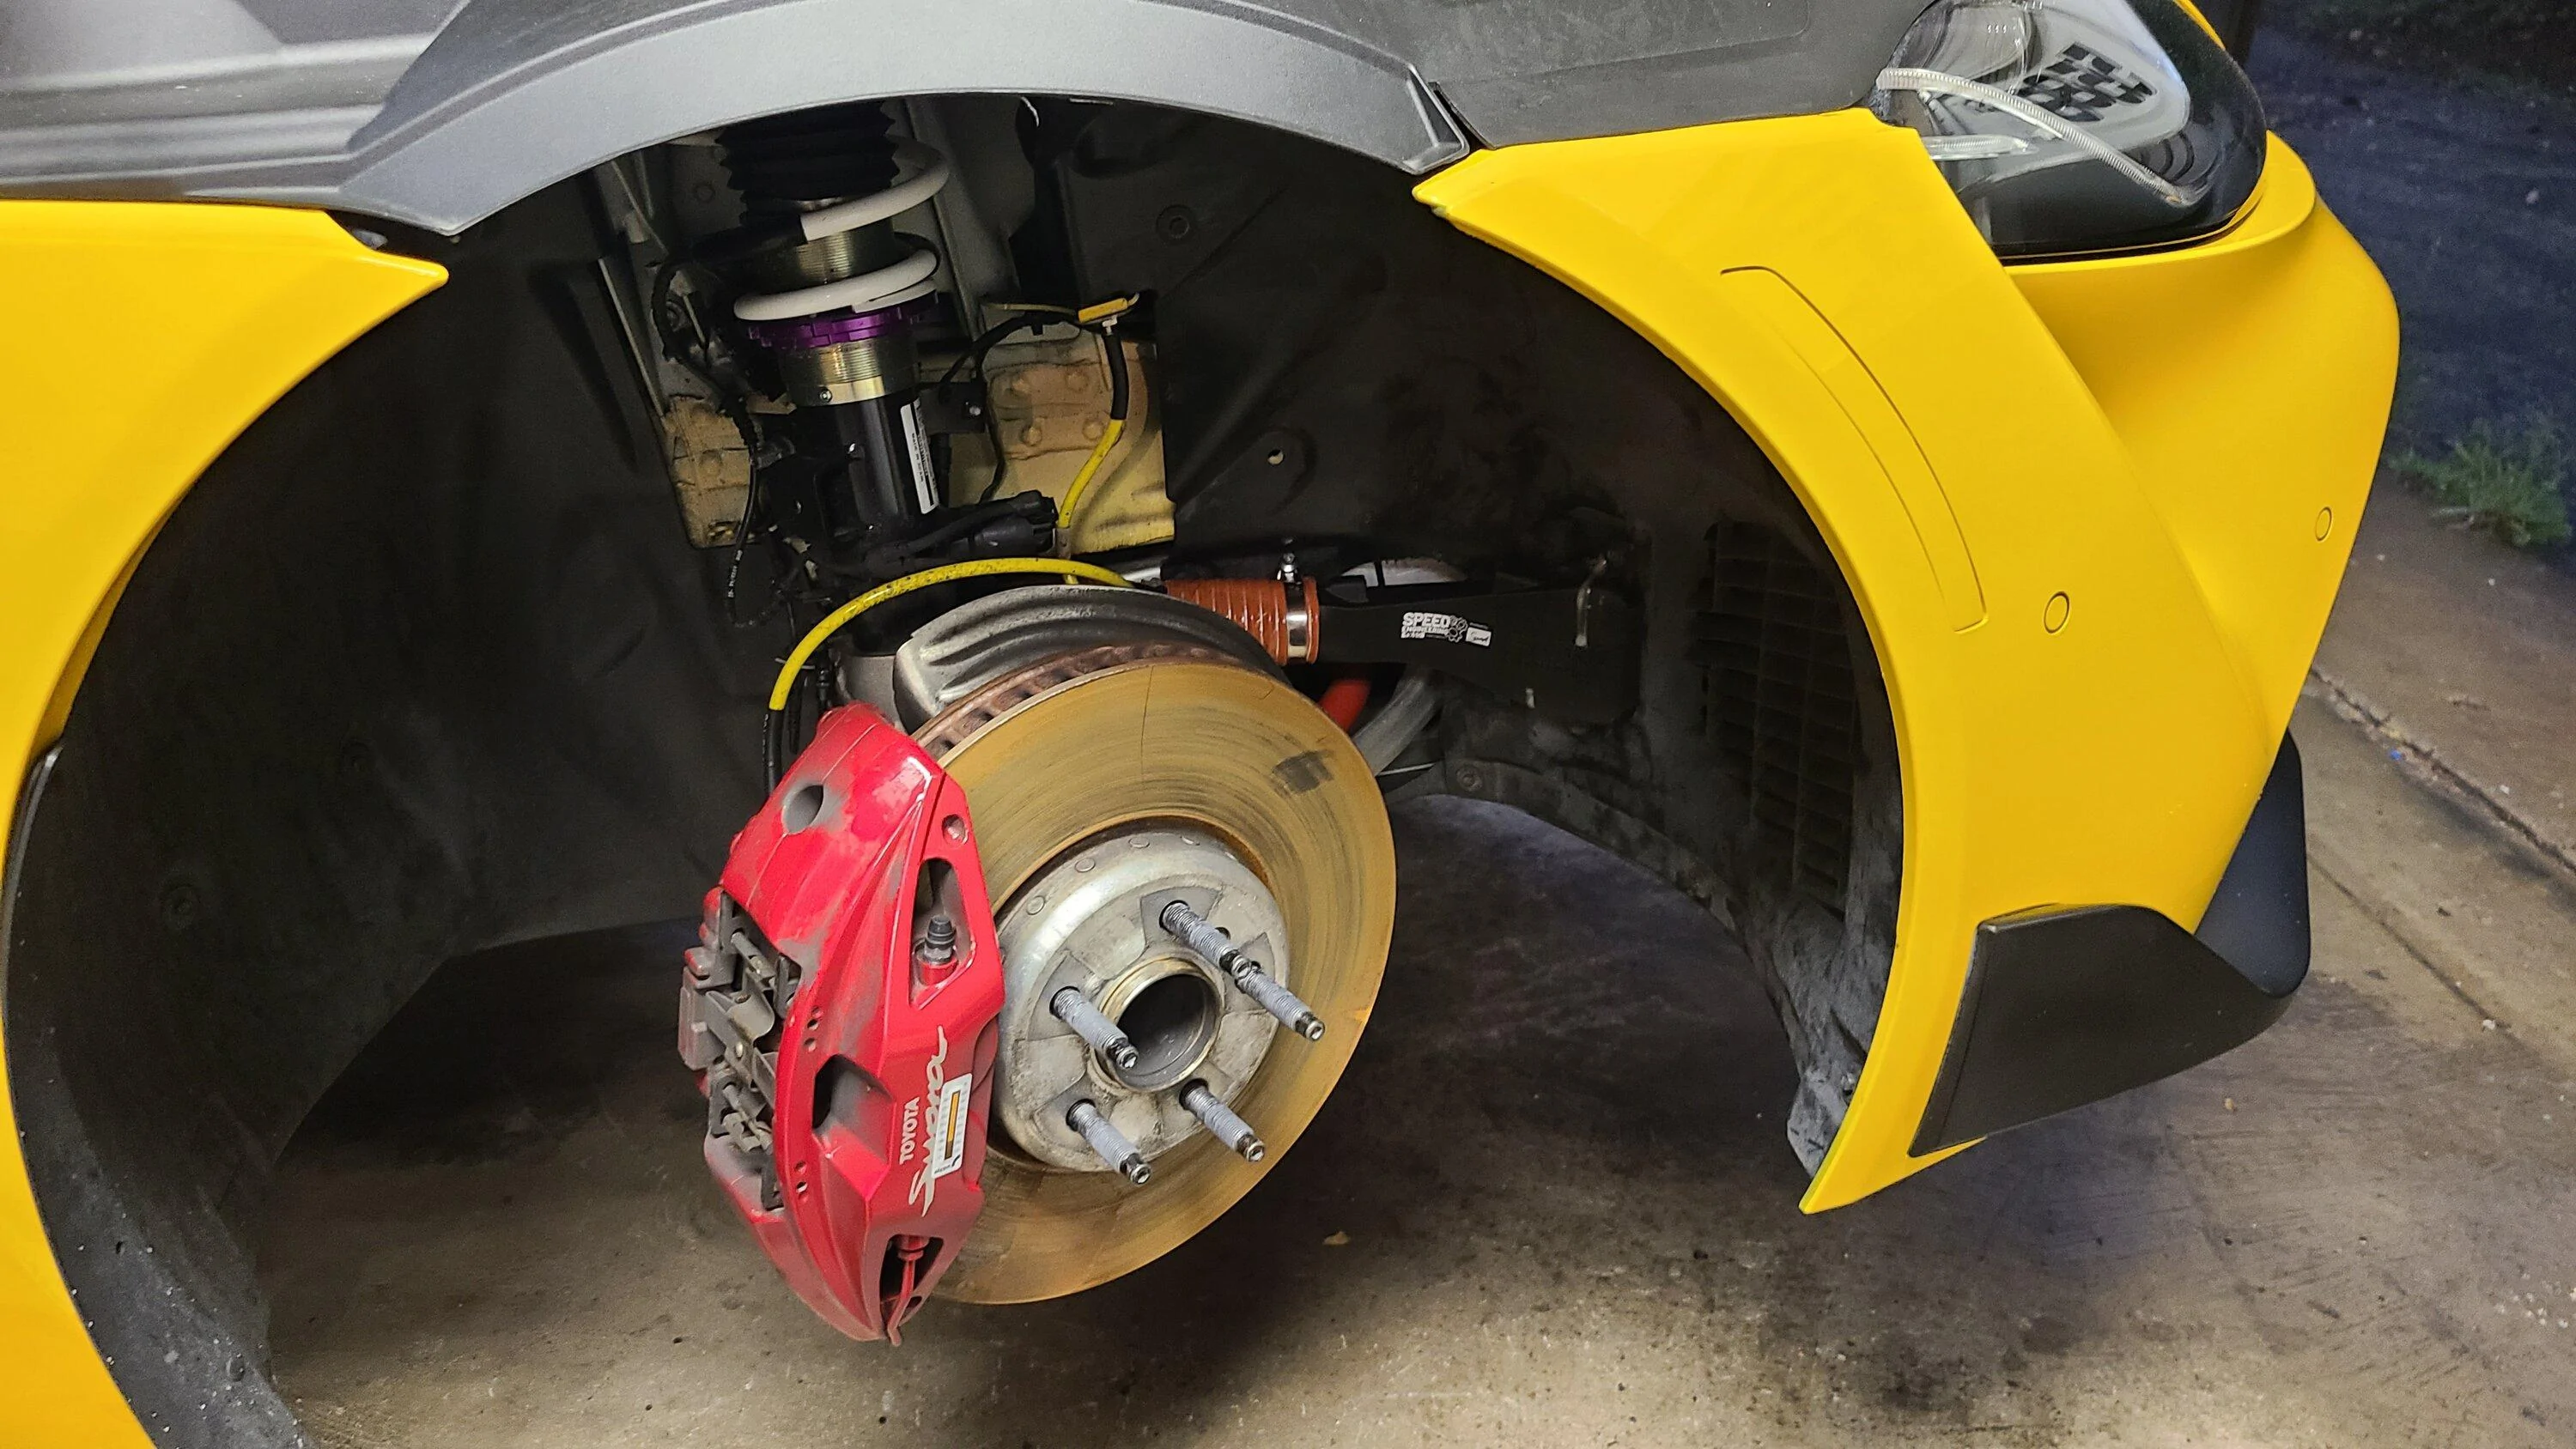
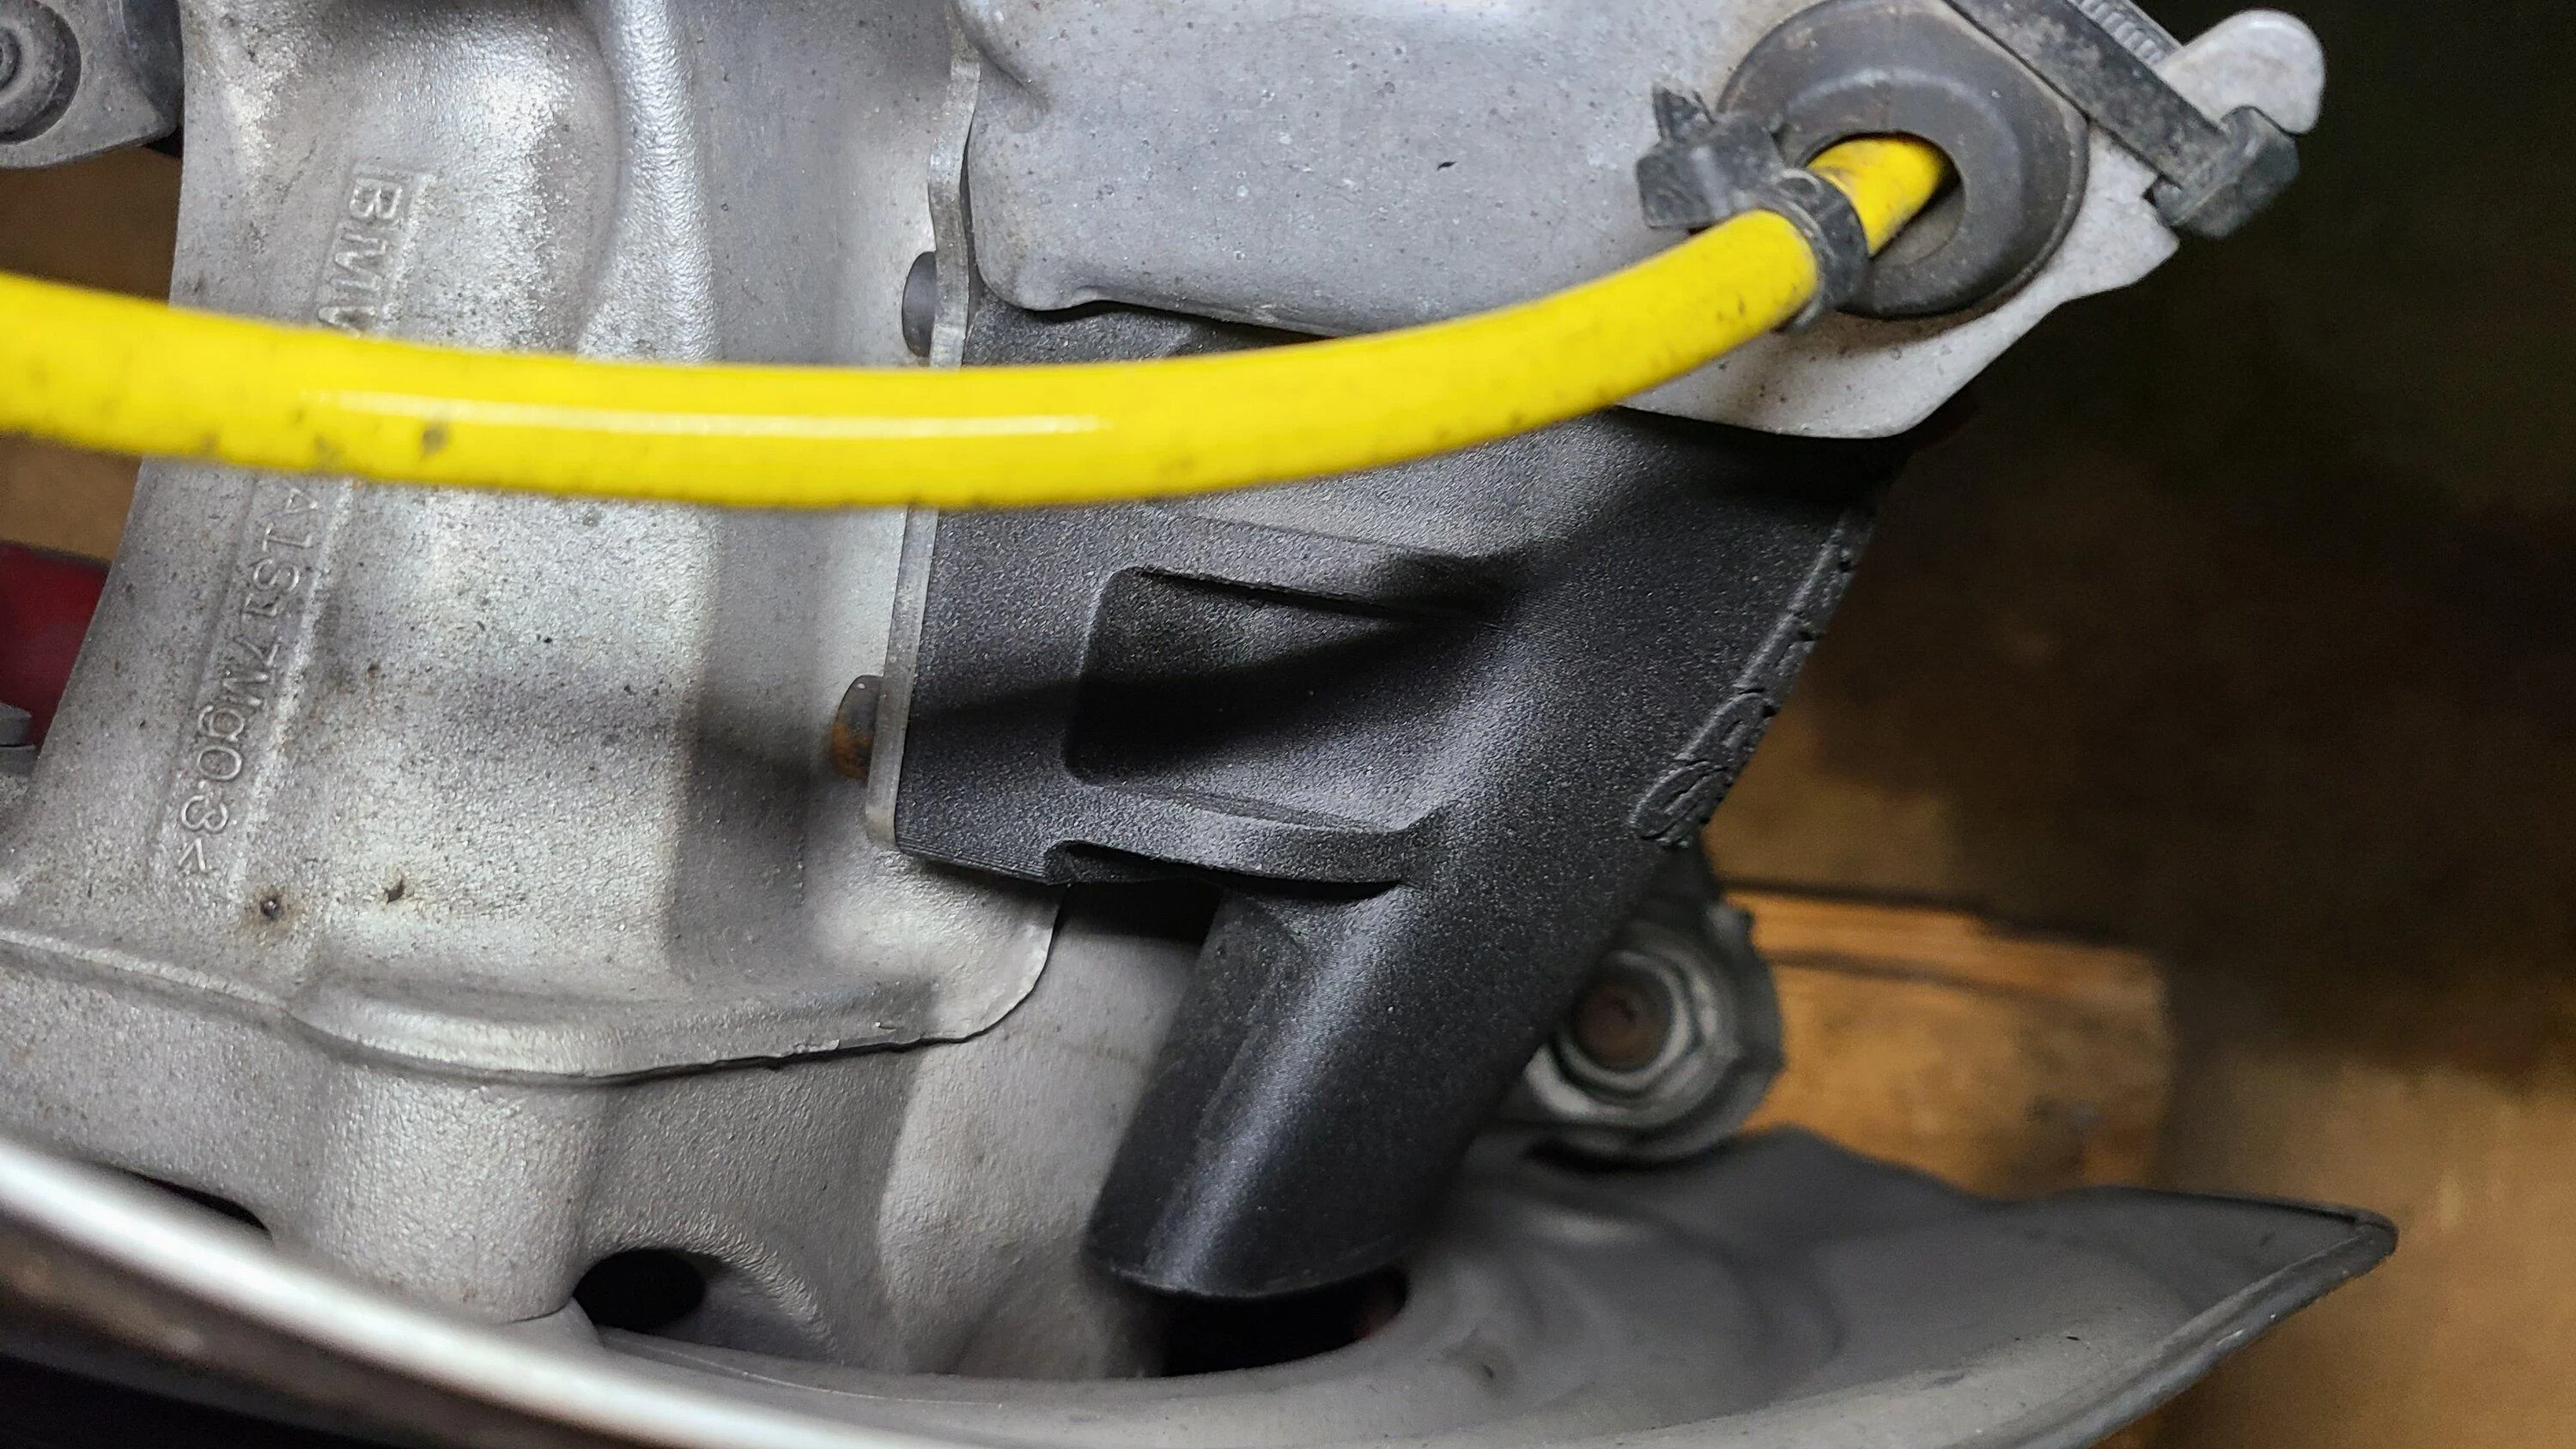
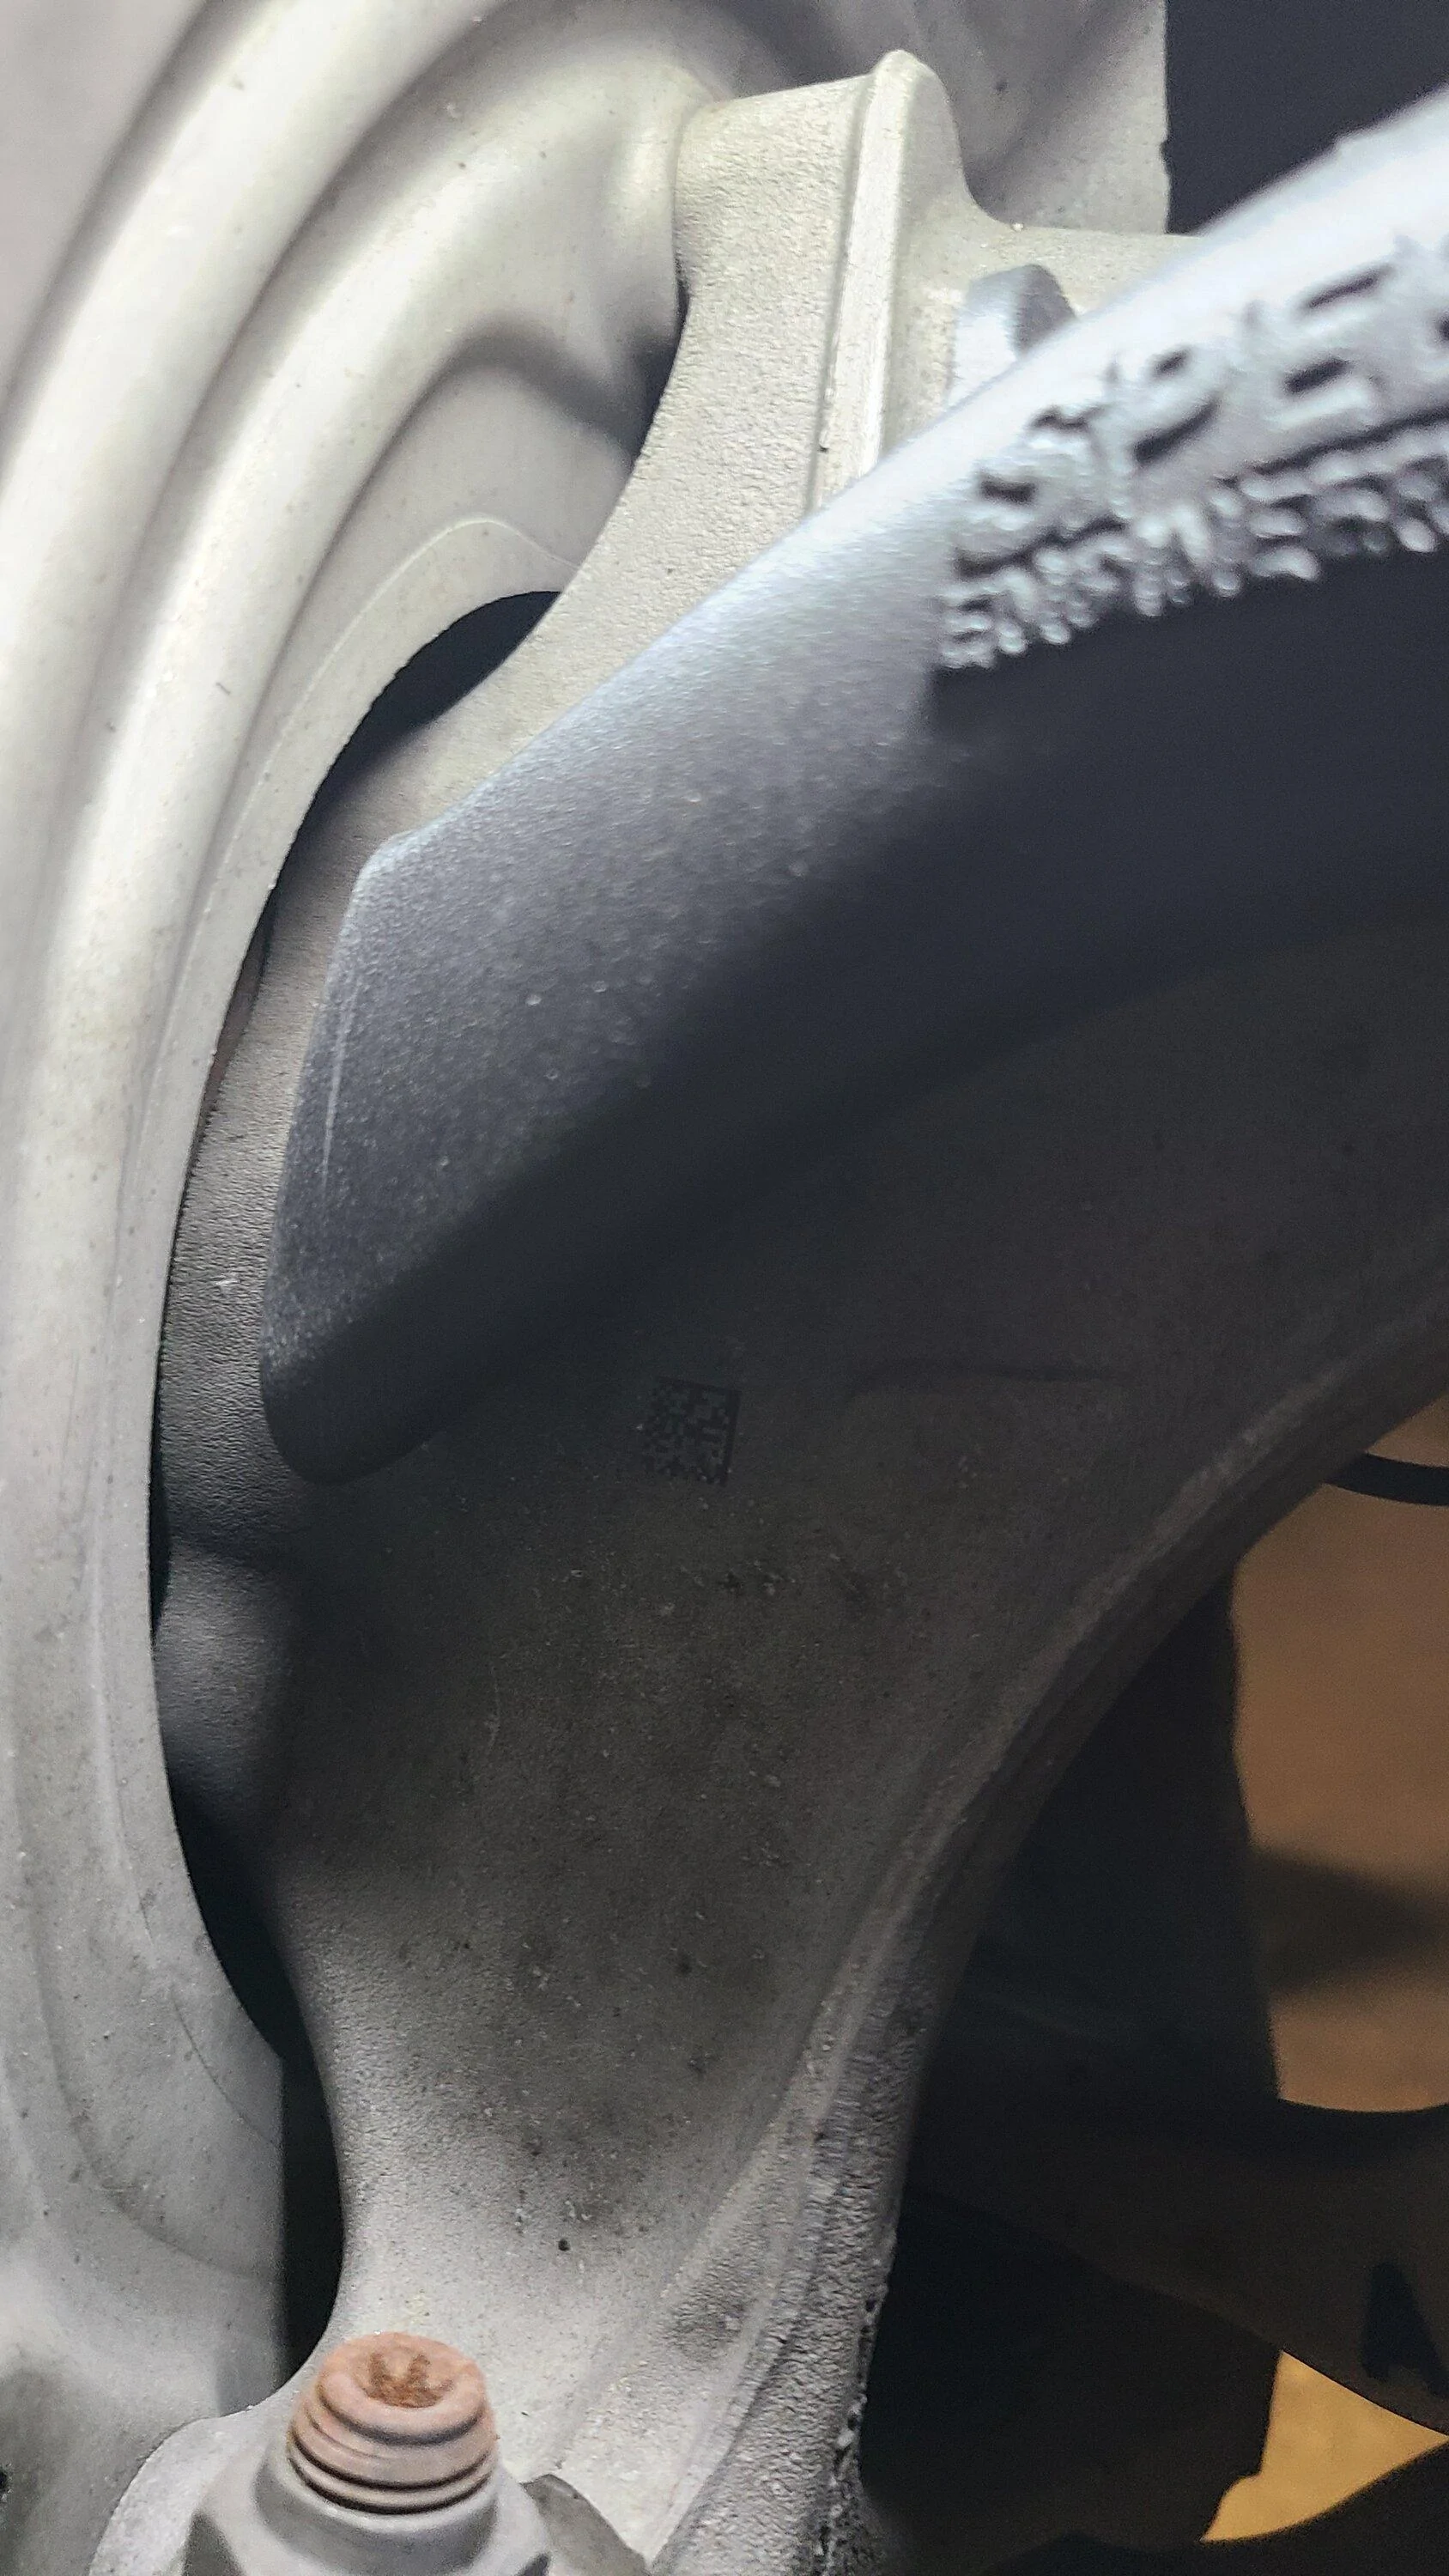
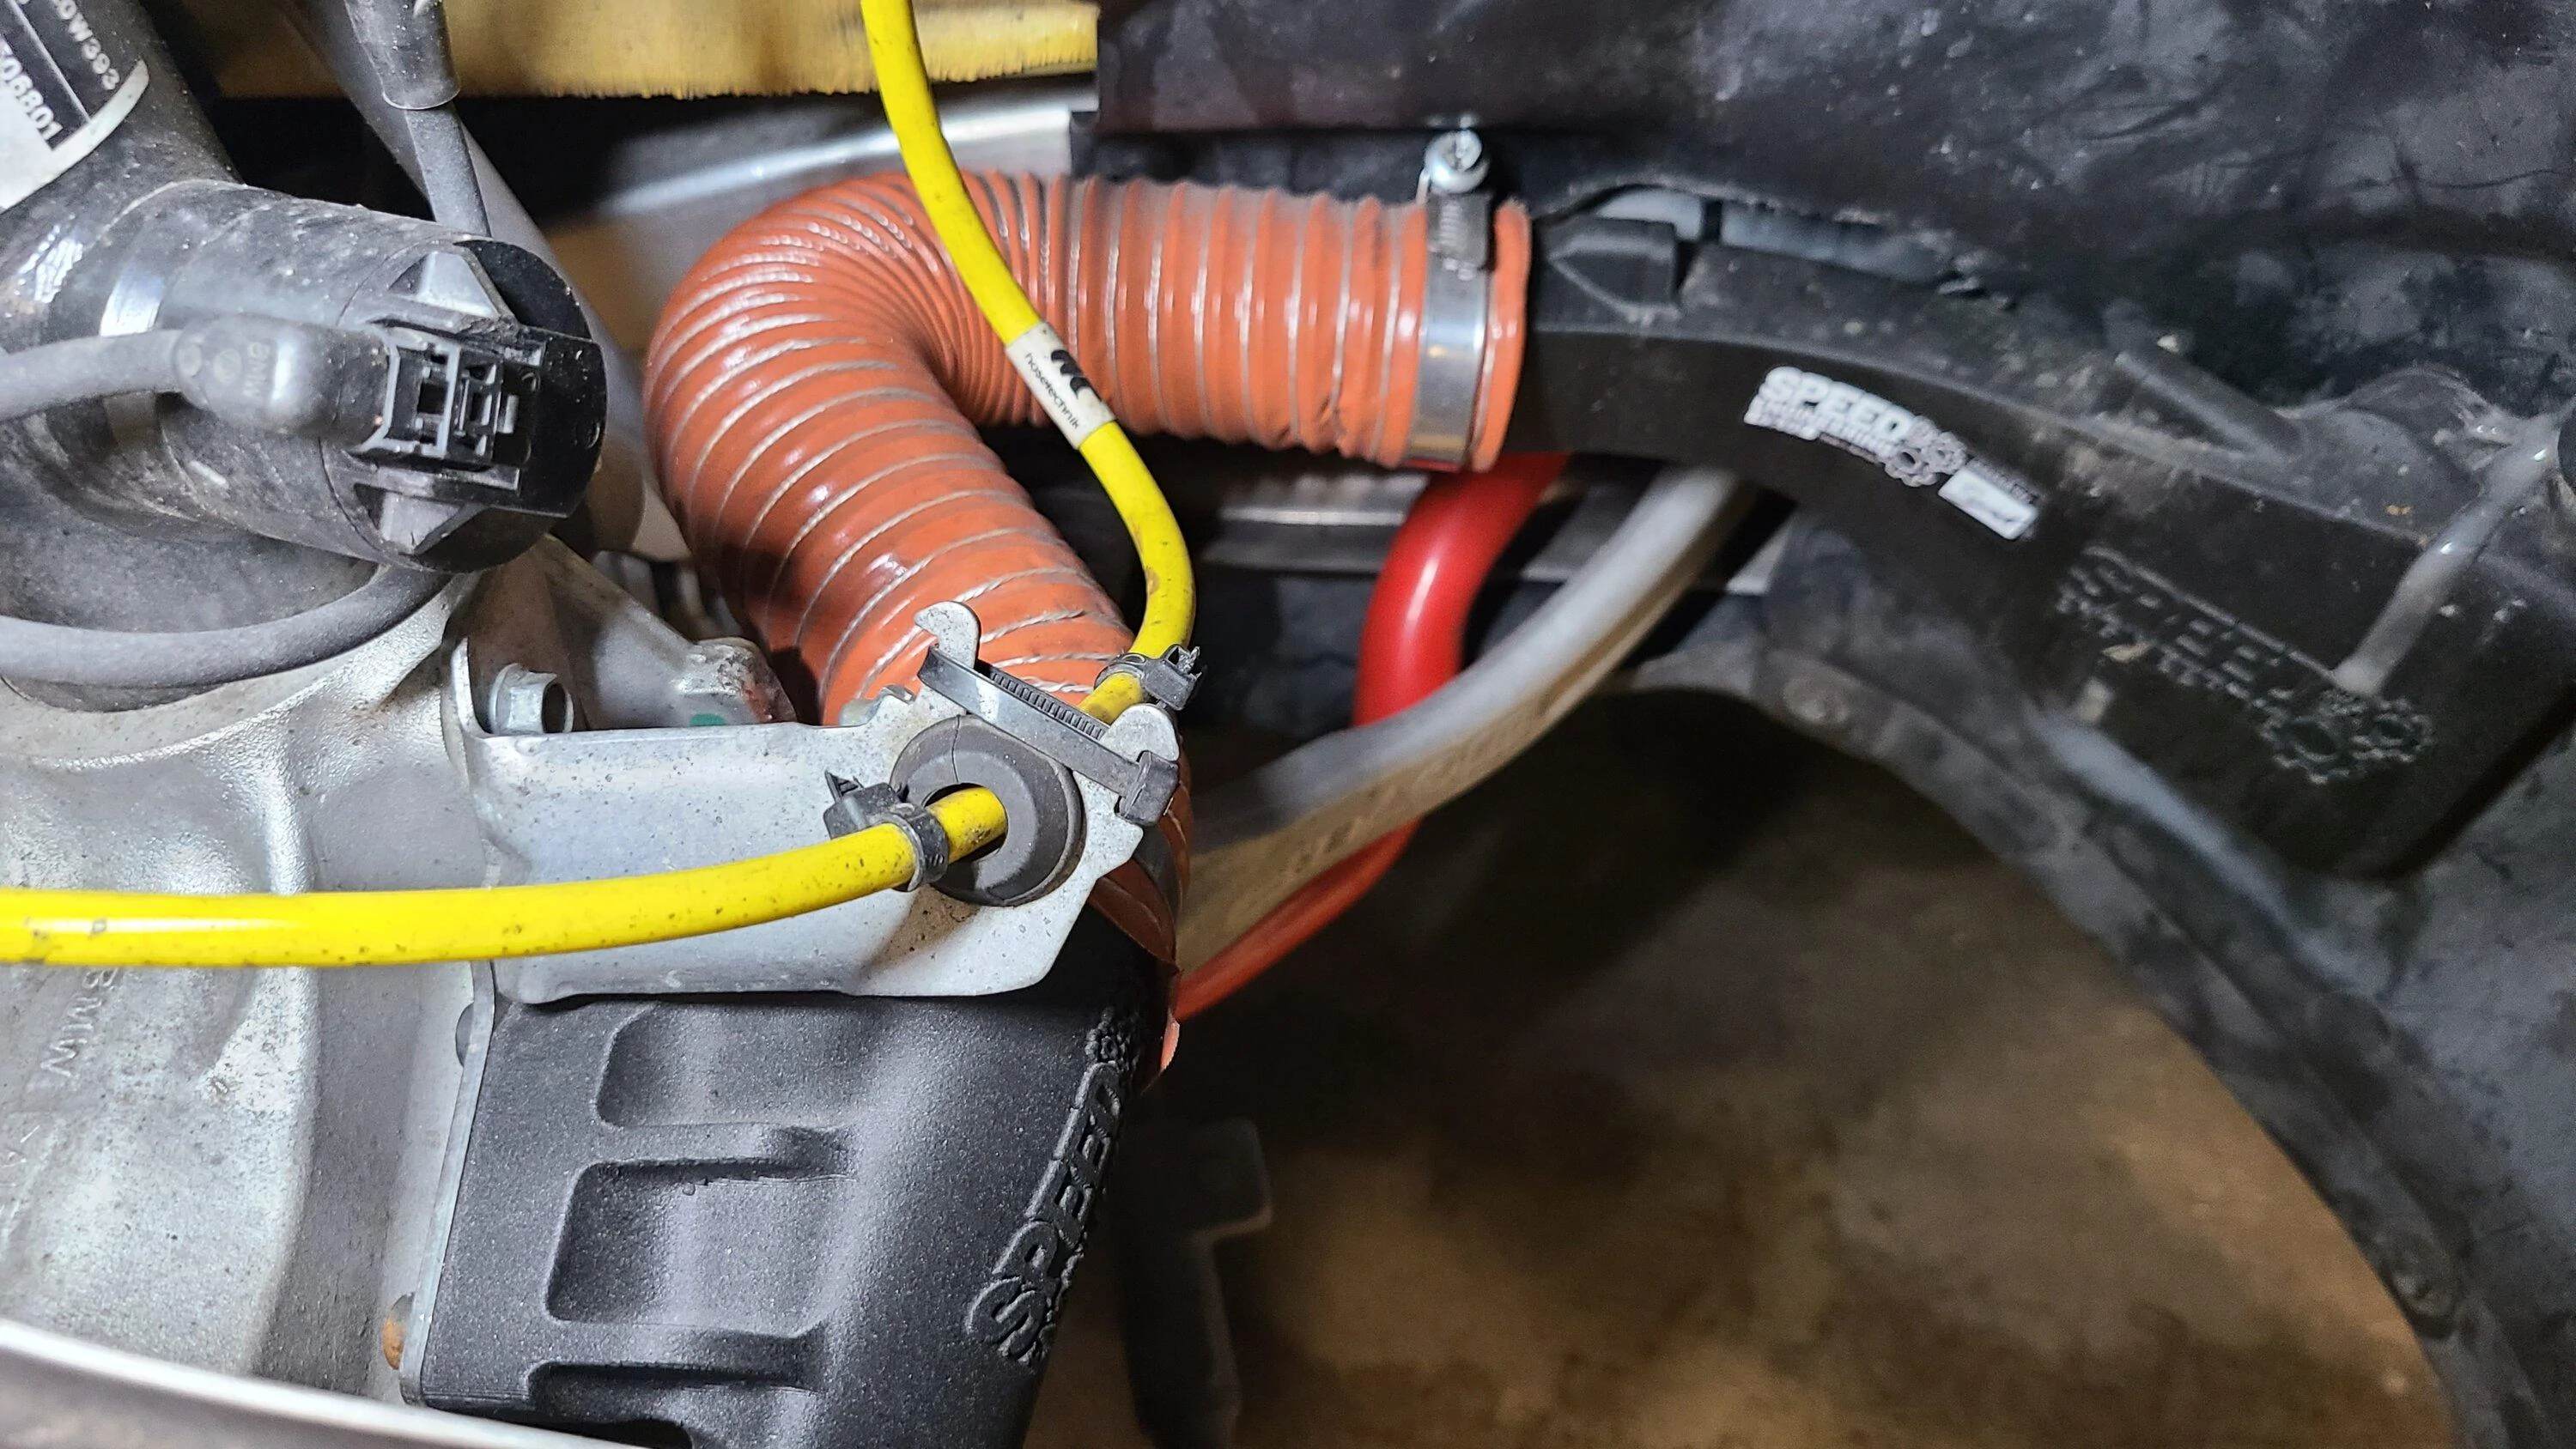
Now that the elbow was attached to the OEM ducting it was just a matter of cutting the included ducting to meet up with the nozzle. The nozzle mounts under the arm holding the brake line on the knuckle and directs air directly in the center of the brake disk, which then gets sucked through the vanes providing the cooling effect.
Once that was plumbed I moved the suspension back and forth to check for binding or anywhere that might snag and was good to go!
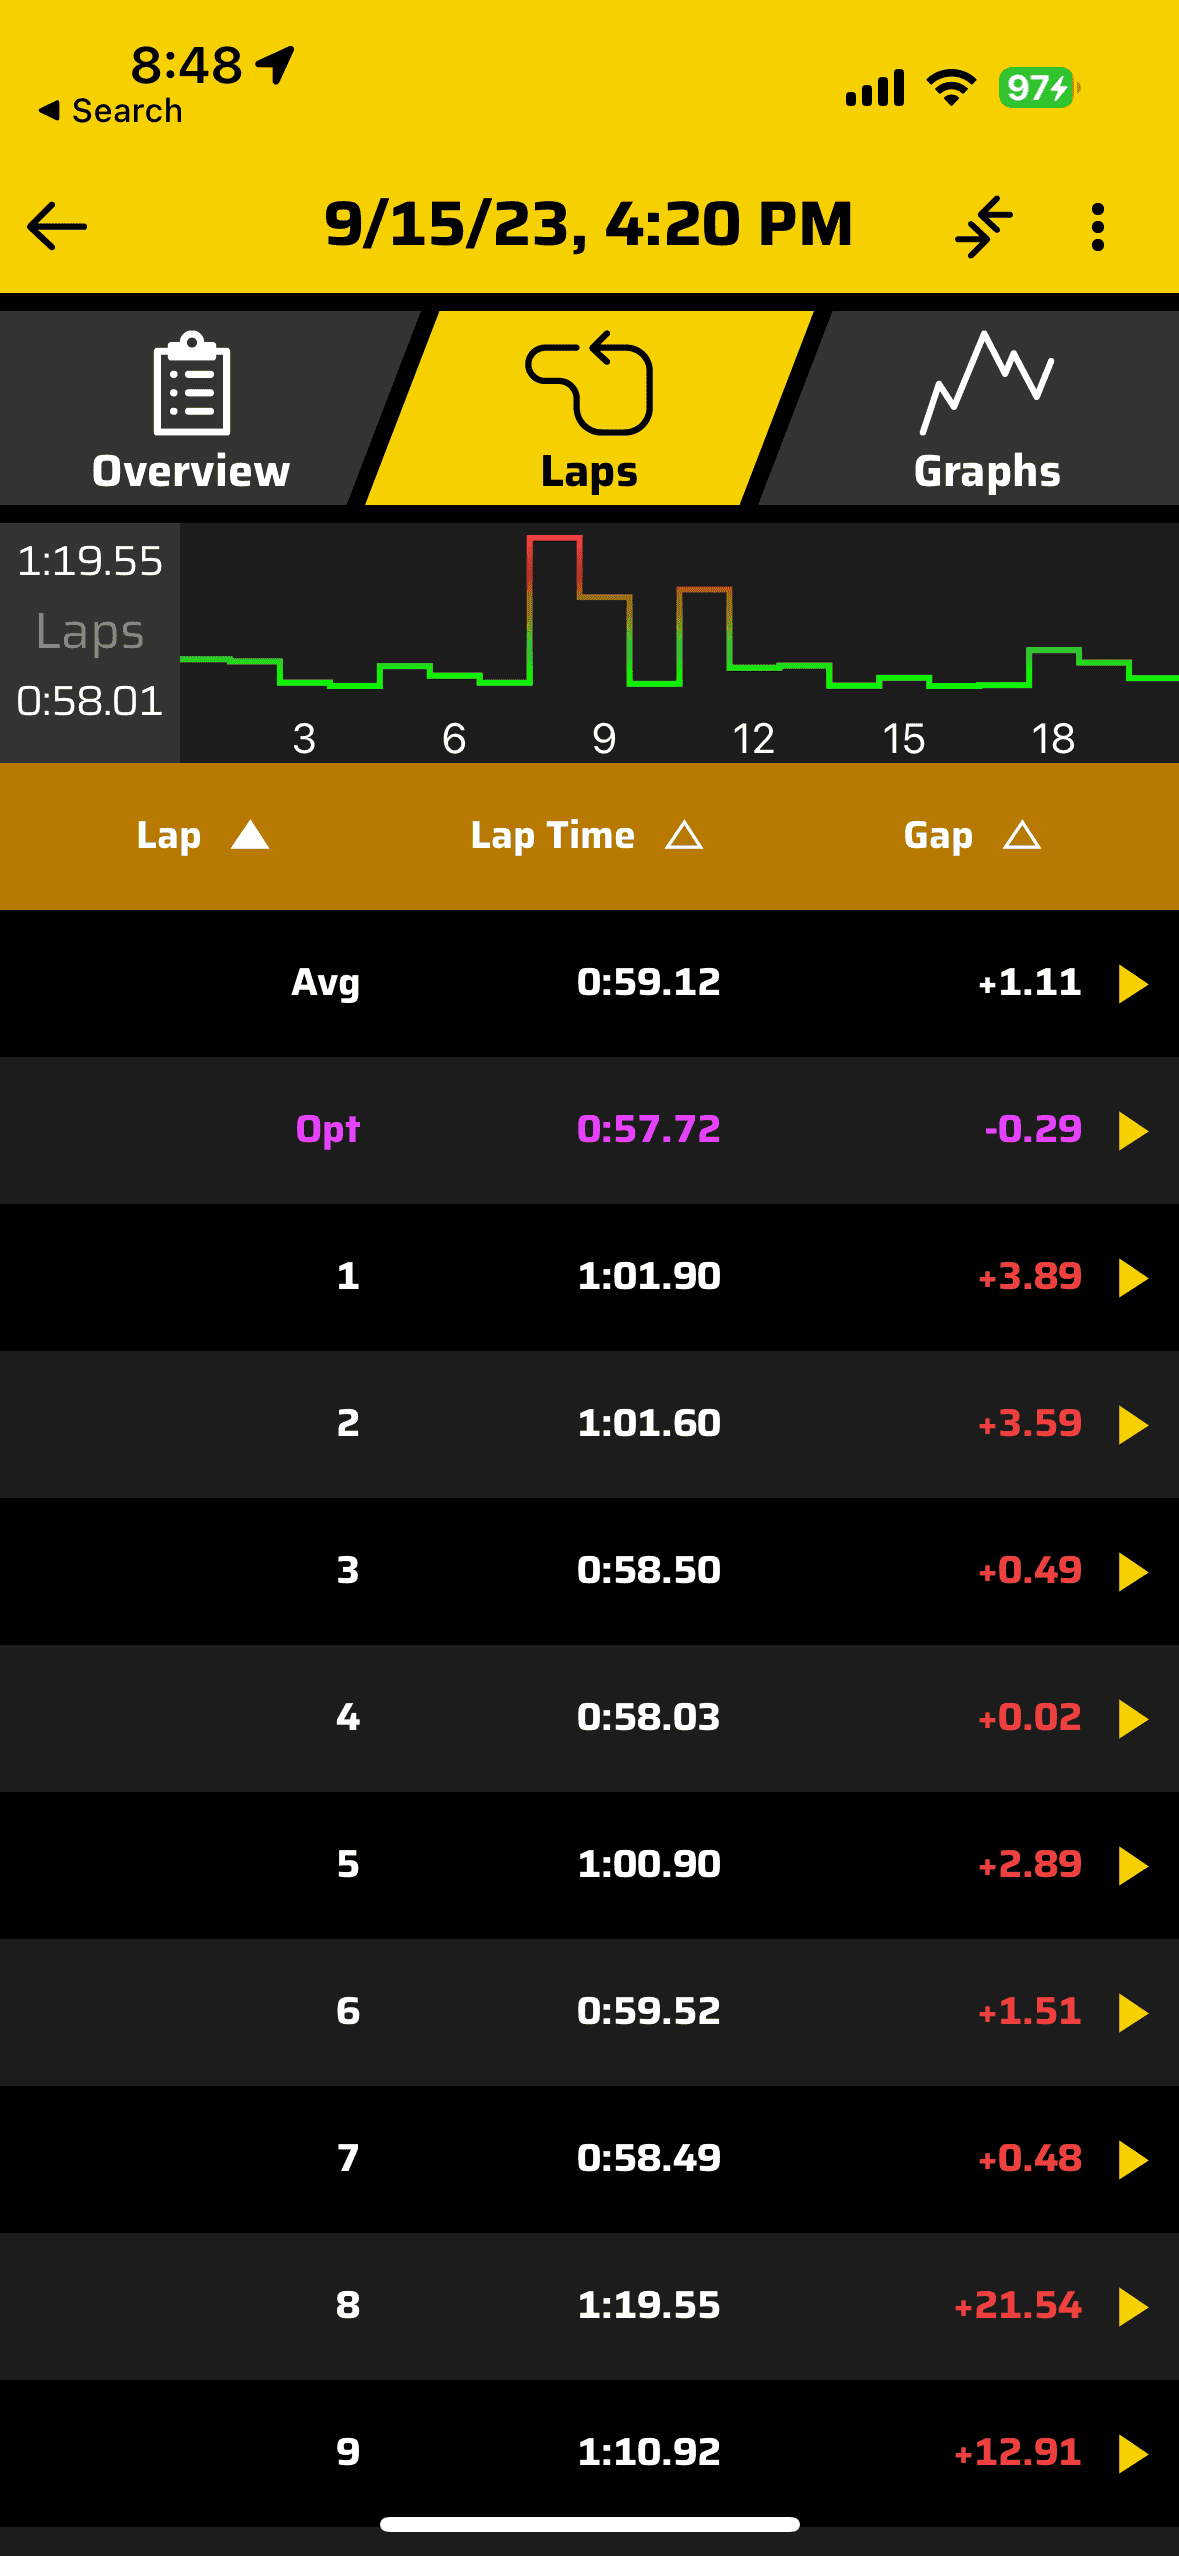
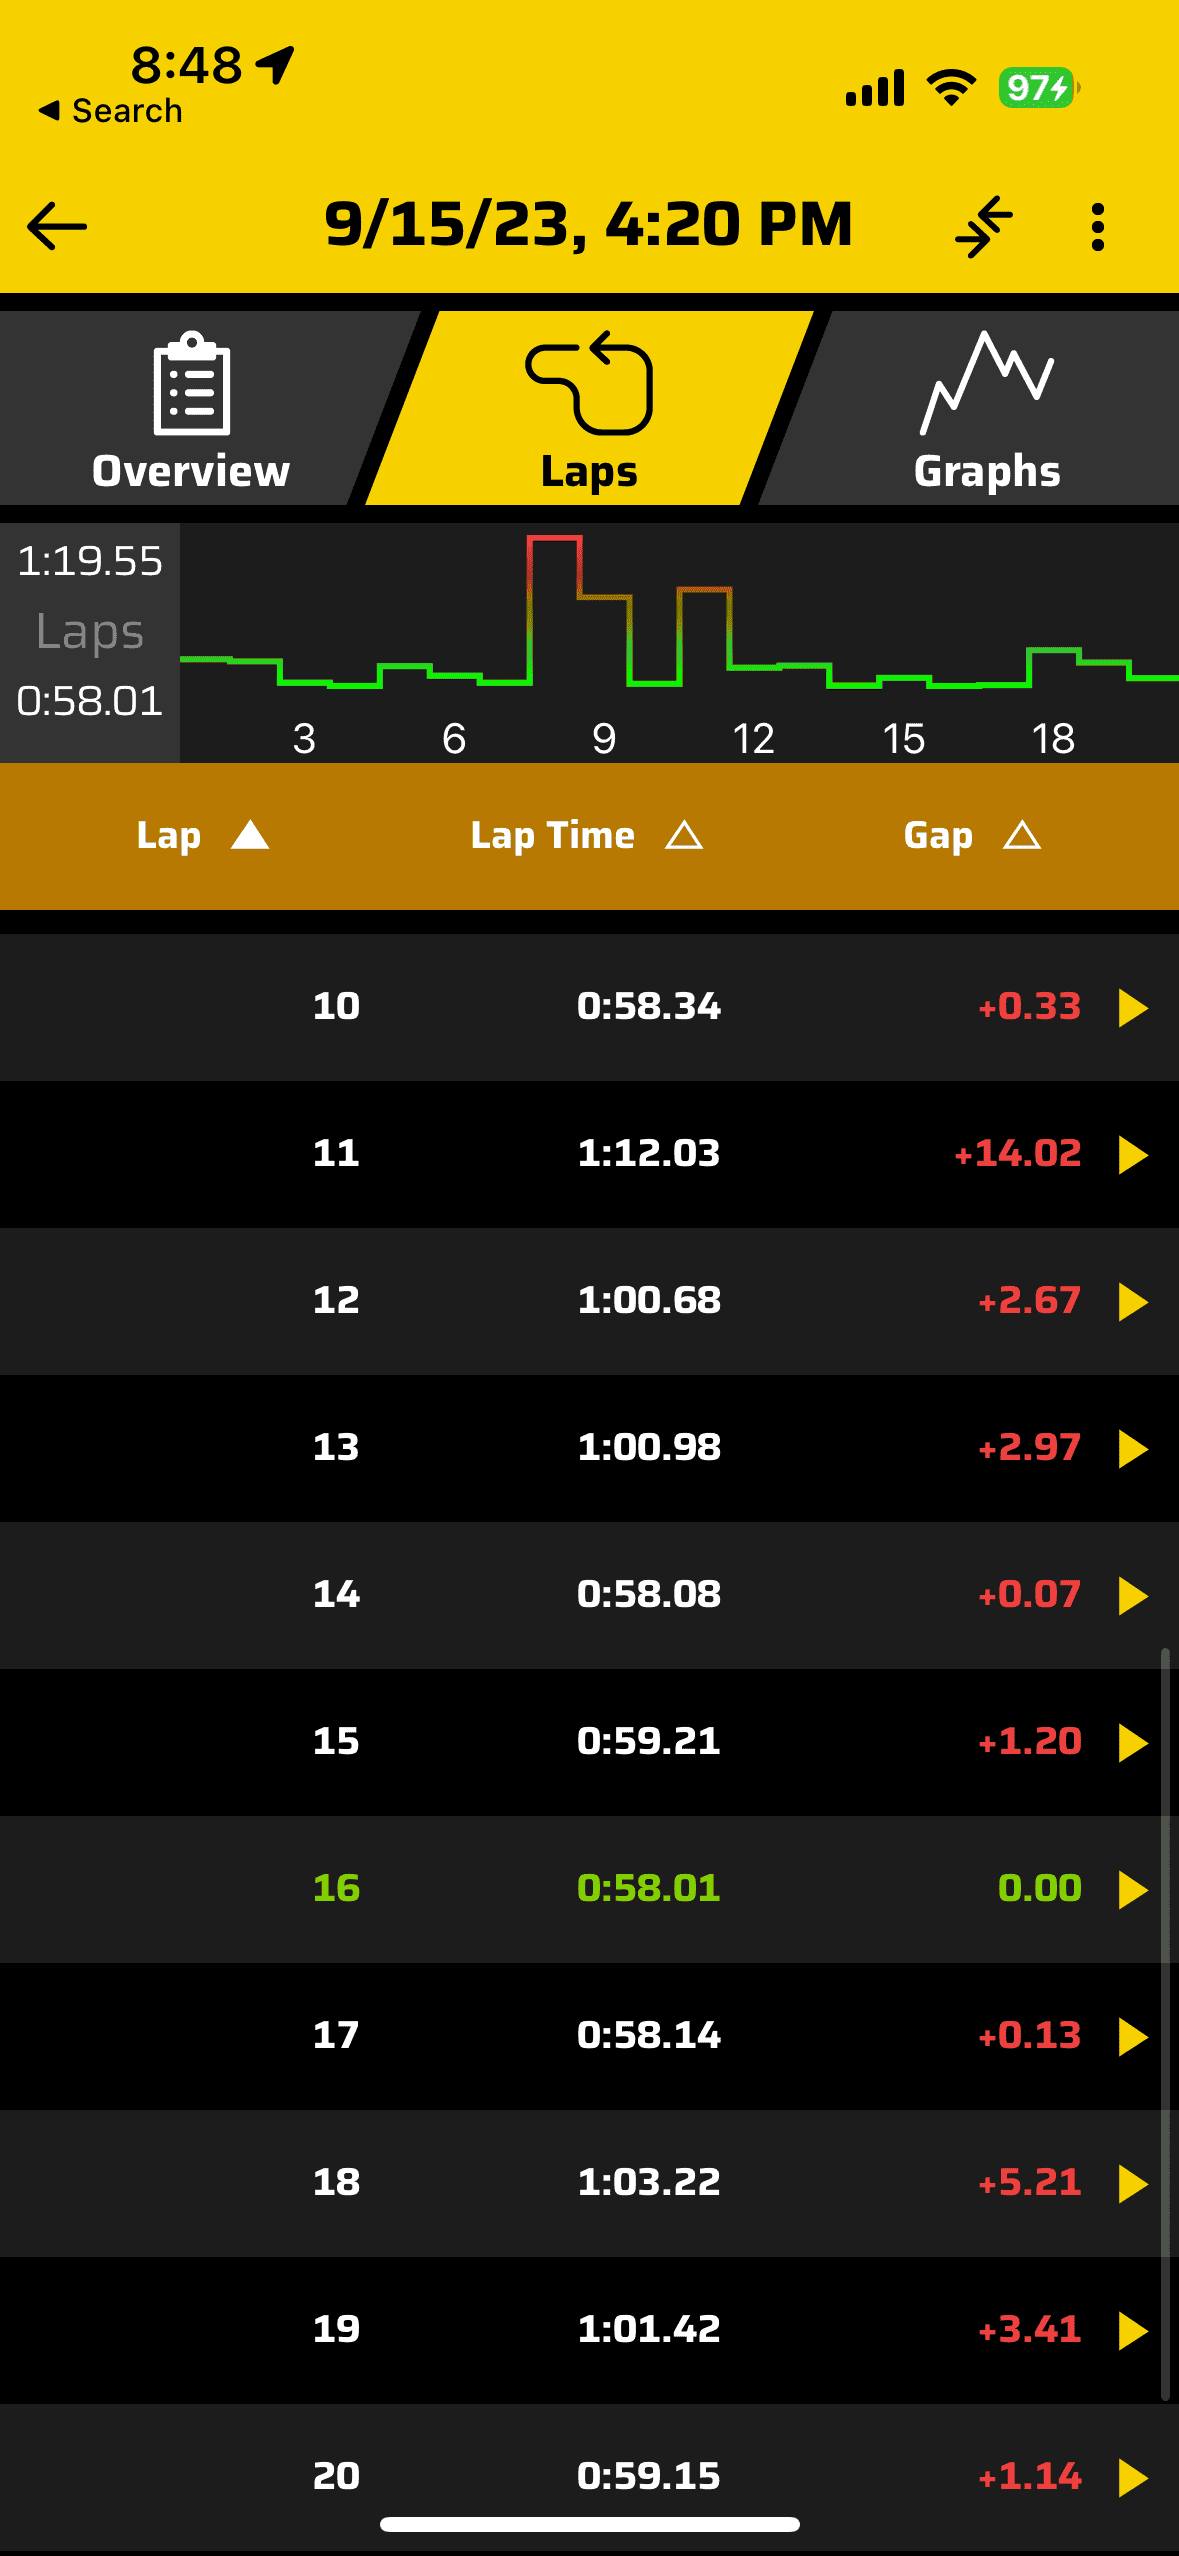
Fast forward a week or so and I had my first event with the brake ducts. I have SS lines, Hawk DTC60s, and RBF700 which is normally a solid combo for 2 hotlaps before I notice the pedal starting to get a bit soft so that was my benchmark. This event was an SCCA Track Night in America event at Pitt Race. I was registered as work/run so I only could do one session but at the end of it I can confidently say the ducts made a difference.
Typically, braking at the end of the long front and rear straight involves speeds of 130 ish down to 50-70 depending on the lap. I was able to put down 3 hotlaps in a row with very minimal pedal fade and in general a more consistent feel during and after those 3 laps. Unfortunately I don't have empirical data to back up my claims but subjectively speaking they made a difference.
I was also happy to see that despite a couple small marks from some earlier street driving, the ducts themselves were in near pristine shape!
With all that being said, I can confidently recommend the Speed Engineering brake ducts for anyone running a similar/less aggressive setup. At around $360 shipped from Germany its a great cost effective option!
Thanks for reading!
*NOTE: if you're running an even more aggressive setup or have a lot of added caster I can imagine this setup WILL NOT work for you*

As a bit of background I am currently running HKS HAS set to the HKS factory height along with 18x10.7 titan 7 TD6e wrapped in Nankang CRS 275/40/18 tires. I'm sitting at about -2.25-2.5° camber as well. I reached out to see if this setup would be compatible and they told me their development car is running a set A052s in 265 and due to that tire running wide there is a chance mine would fit. (Not sure of the diameter but I'd imagine 19").
With that said, I ordered the kit! Upon receiving the box was fairly decent condition and the parts were packaged well. You can see that the ducts themselves are printed out of a carbon/nylon filament and generally have great print quality. However I was a bit confused as one nozzle looked a fair bit different from the other nozzle and the rest of the 3d printed parts. As someone who prints things regularly I noticed the glossy nozzle was printed in a completely different orientation from the other and either was printed in a different material/brand of material, or had a significant change in settings which owes to the glossy-ness. Regardless it still seemed fine.

Once I got the chance I began the install on the driver's side without a problem. Before moving to the other side I tried moving the wheel to full lock and jacking the wheel up and down through the stroke of the suspension. You can see that it is VERY close:
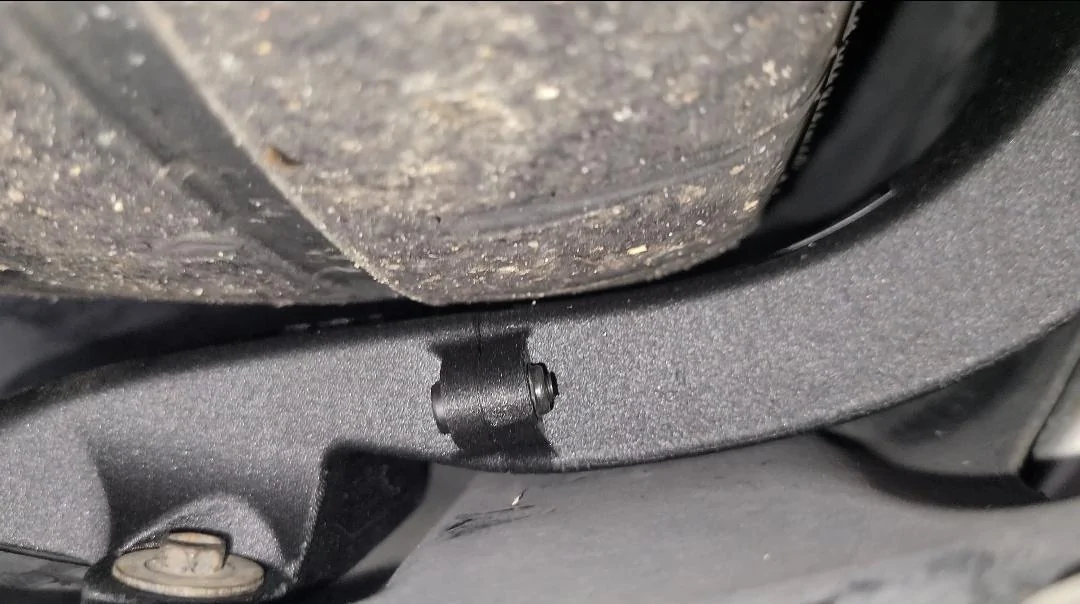

However there wasn't any contact!
I was a bit concerned with the tire picking up pebbles and essentially sand blasting the duct but figured I would just have to wait and see how it fares.
Anyway, I moved on to the passenger side.....and that's where I had my first issue. In the passenger side wheel well. There is a bulge in the fender liner that covers a bundle of wires. I'm not exactly sure what these wires go to but needless to say it made the installation impossible. I decided to try and install the duct and see if I could cinch it down to see if that would press the bulge in enough. Well, being 3d printed and applying a decent amount of stress, I managed to crack the duct along a few layer lines ?
.I ran to advanced auto and grabbed some plastic weld to fix the duct and reinforce the mounting ears which seemed to work out just fine. You can see the color of the epoxy in some of the pictures. At this point I reached out to Speed Engineering and asked if maybe there was a difference in the US cars vs the EU cars. They told me the cars are the same and that the bulge needs to be cut and wires need to be relocated and will be specified in their instructions.....which were still in progress. I'll admit I was a little peeved since it would have been nice to know they were working on install instructions but then again, this is modifying so no hard feelings.
Anyway, I went back and looked at the wires, determined where I could move them (more toward the front of the car) using zip ties and removed the plastic elbow that held them prior. At that point, with a quick trim using my dremel, I cut out the bulge and was on the home stretch! You can see the area I cut out as well as the wires being tucked below:
Now that the elbow was attached to the OEM ducting it was just a matter of cutting the included ducting to meet up with the nozzle. The nozzle mounts under the arm holding the brake line on the knuckle and directs air directly in the center of the brake disk, which then gets sucked through the vanes providing the cooling effect.
Once that was plumbed I moved the suspension back and forth to check for binding or anywhere that might snag and was good to go!
Fast forward a week or so and I had my first event with the brake ducts. I have SS lines, Hawk DTC60s, and RBF700 which is normally a solid combo for 2 hotlaps before I notice the pedal starting to get a bit soft so that was my benchmark. This event was an SCCA Track Night in America event at Pitt Race. I was registered as work/run so I only could do one session but at the end of it I can confidently say the ducts made a difference.
Typically, braking at the end of the long front and rear straight involves speeds of 130 ish down to 50-70 depending on the lap. I was able to put down 3 hotlaps in a row with very minimal pedal fade and in general a more consistent feel during and after those 3 laps. Unfortunately I don't have empirical data to back up my claims but subjectively speaking they made a difference.
I was also happy to see that despite a couple small marks from some earlier street driving, the ducts themselves were in near pristine shape!
With all that being said, I can confidently recommend the Speed Engineering brake ducts for anyone running a similar/less aggressive setup. At around $360 shipped from Germany its a great cost effective option!
Thanks for reading!
*NOTE: if you're running an even more aggressive setup or have a lot of added caster I can imagine this setup WILL NOT work for you*
Sponsored


")
