BlackVue DR900S-2CH Install DIY

Hai

Well-Known Member
Joined
Jun 7, 2020
Threads
6
Messages
58
Reaction score
55
Location
WA, USA
Website
www.haihoangtran.com
Car(s)
2020 Toyota Supra GR Premium
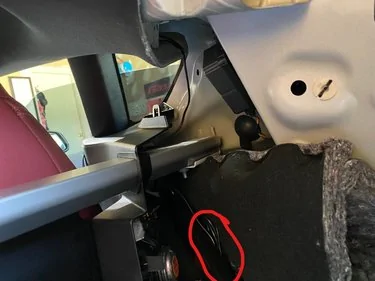
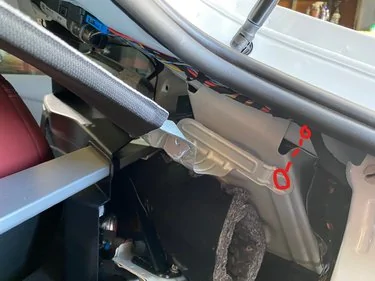
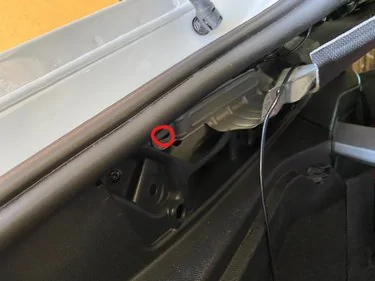
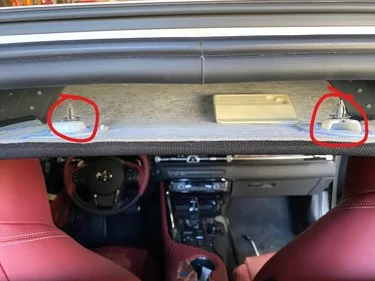
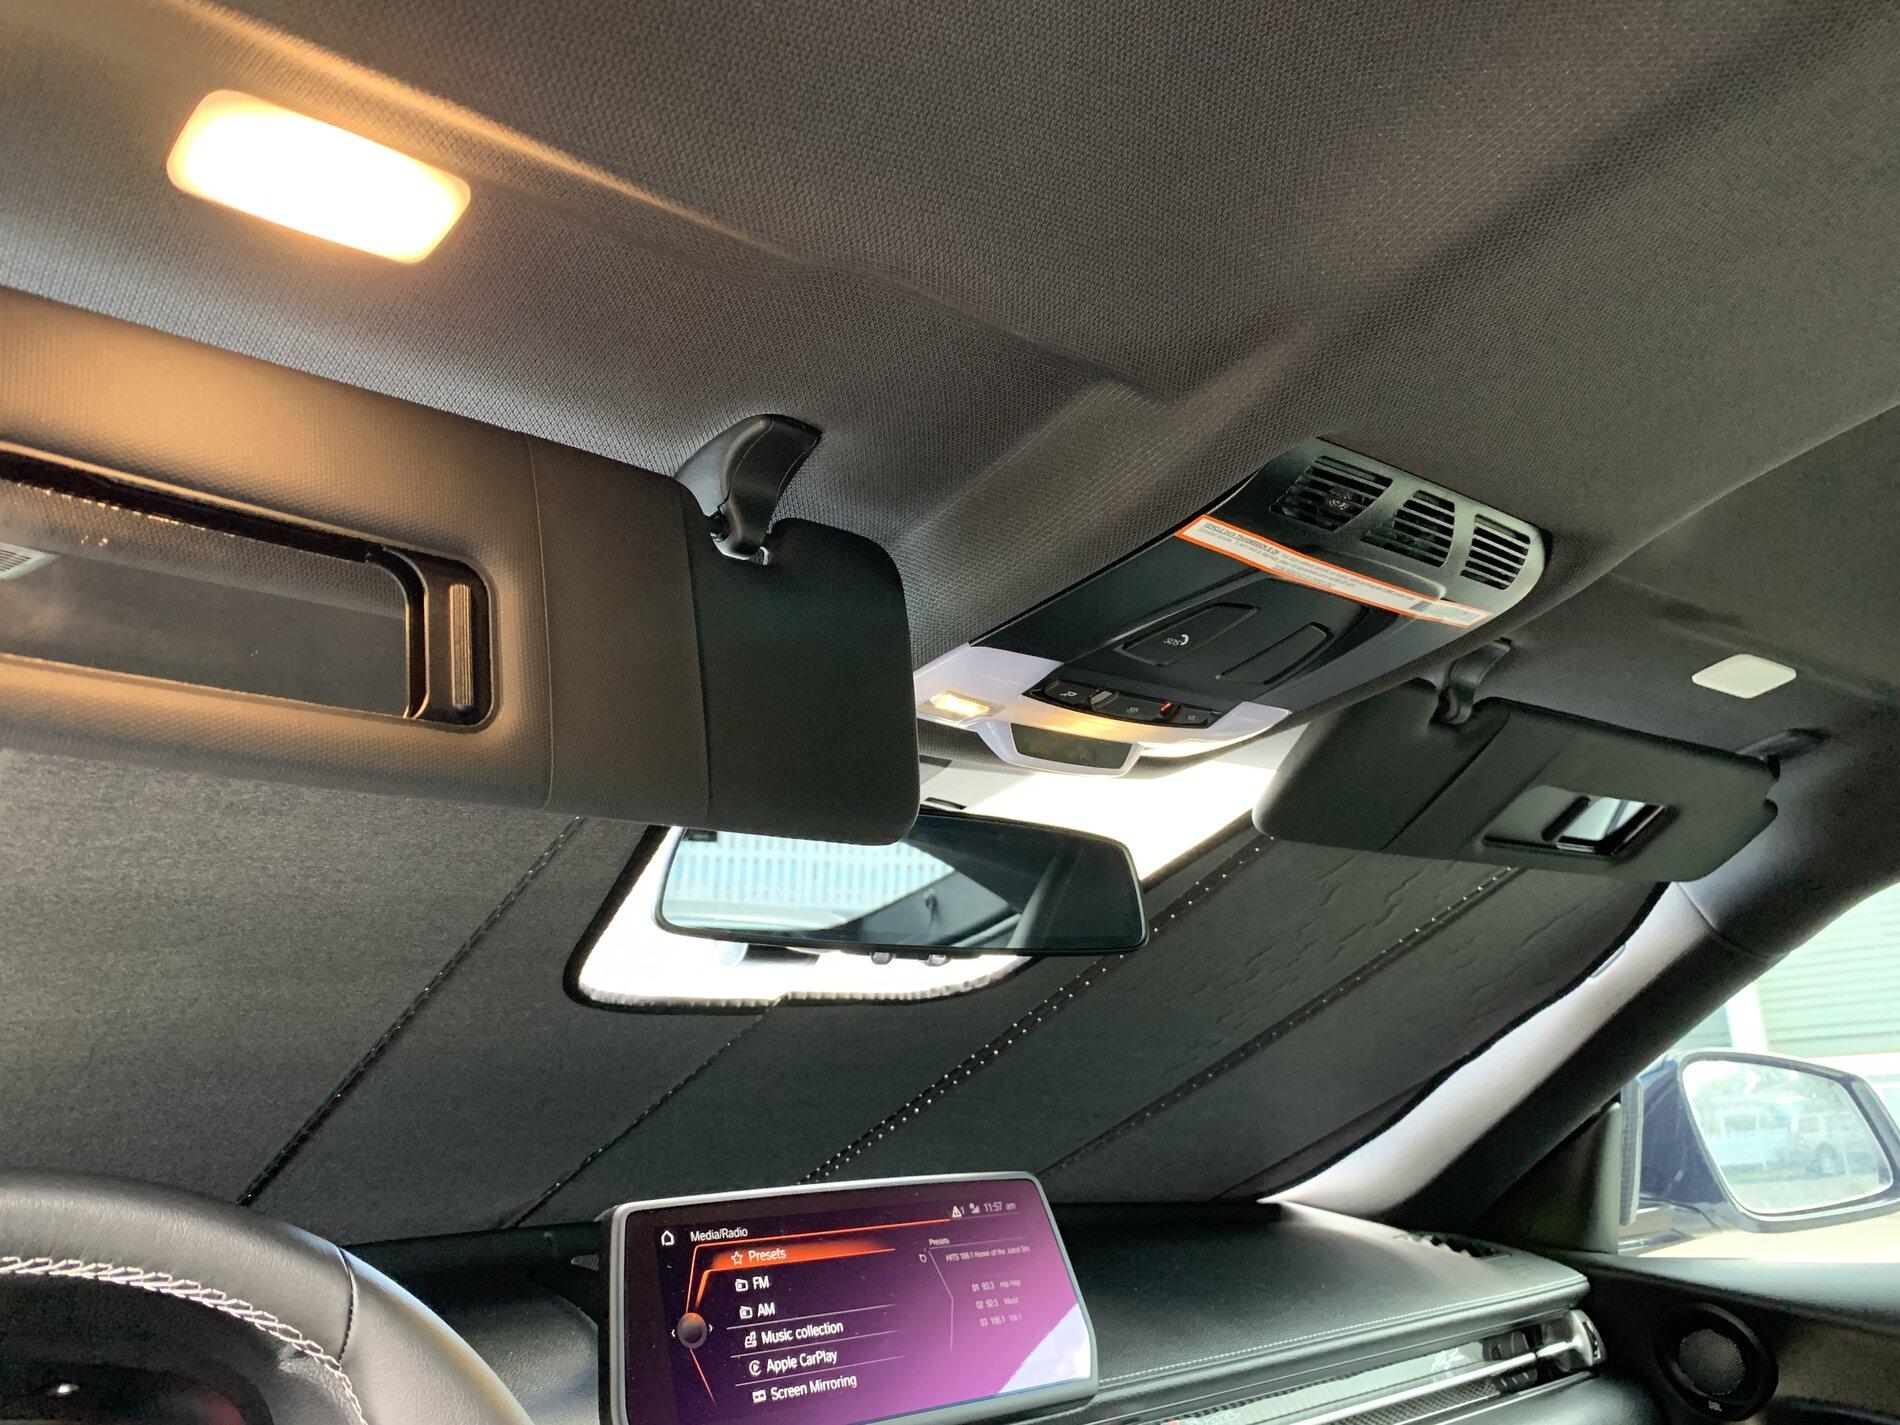
Okay, I’ve solved the problem. It seems like the visor lights have a position sensor. The lights will only function at certain angles. I had my visors fully cocked forward to hold my sunshade and that’s why the lights wouldn’t come on.
73044BE2-B102-4703-982E-A6D14C7D6211.jpeg
 

TexasMKV

Member
First Name
Dan
Joined
Oct 26, 2020
Threads
1
Messages
23
Reaction score
14
Location
GA
Car(s)
2021 GR Supra Premium
Thank you for the DIY! It helped me installed the 2CH BlackVue 900X. You weren’t kidding about the headliner bolts. I had to heat it up to loosen the loctite and it screw off like butter.
 

zoltiz

Member
First Name
Andrew
Joined
Dec 23, 2020
Threads
1
Messages
5
Reaction score
2
Location
ATL
Car(s)
2021 Supra
Amazing writeup. I managed to shortcut some stuff and ended up with very similar implementation, but would've been 1000x harder without this thread. Thank you!
 

Retrocade

Well-Known Member
Joined
Dec 12, 2020
Threads
8
Messages
63
Reaction score
64
Location
NC
Car(s)
2021 Supra 3.0 premium
Holy crap just read through some of this stuff and man do people like to over complicate stuff. not downing yall but gezz.. I got a lcd mirror with dash cam built in and with a rear camera. all I did was run a wire to the correct fuse with a tap and done. didn't take any thing apart didn't take any panels off didn't do any of this stuff yall doing. I been running it 3 months it records 24/7 with motion or bumping of car in 4k no problems. Never had a battery issue.
 
Last edited:

Retrocade

Well-Known Member
Joined
Dec 12, 2020
Threads
8
Messages
63
Reaction score
64
Location
NC
Car(s)
2021 Supra 3.0 premium
Yes it will work when you have the car running but you cannot leave anything plugged into the obd2 and try to lock the car the alarm will go off.
why do you say this? i have a jb4 plugged in to my obd2 24/7 my alarm and all work just fine.
 

0xBADC0FFE

Active Member
First Name
Rob
Joined
Jul 7, 2020
Threads
2
Messages
27
Reaction score
12
Location
Los Angeles
Car(s)
2020 Toyota GR Supra 3.0 Premium
Vehicle Showcase
1
Thanks for the great write up! Very helpful. I made one change in my install and that was using fuse F267. I’ll also say that the rubber tube to the trunk lid was a pain to get off/on on the chassis side, otherwise it was a breeze.
 

Motorknut

Well-Known Member
Joined
Jul 26, 2020
Threads
3
Messages
212
Reaction score
102
Location
NA
Car(s)
2020 GR Supra RZ, BMW G20 gone:BMW F30, E85, E46
We'll see as I take delivery today. I've been leaving my OBDII MX+ module plugged into the OBD port 24/7 with no drain or alarm issues.
why do you say this? i have a jb4 plugged in to my obd2 24/7 my alarm and all work just fine.
Not sure about the JB4, but leaving my OBDLink CX plugged in before locking the door does set off the car alarm if I have an active app connection. Bimmerlink is always the culprit for me cos I forget to disconnect my iphone, and the CX Bluetooth range is too damn good.

if you use the OBDLink free app, it auto disconnects once it detects the englne is shut off.
 

d0xic

Member
First Name
Eugene
Joined
Sep 7, 2021
Threads
0
Messages
19
Reaction score
19
Location
Phoenix, AZ
Car(s)
'22 Supra A91-CF Nitro Yellow
Last edited:

RedMK5

Member
Joined
Sep 30, 2021
Threads
0
Messages
7
Reaction score
1
Location
Virginia Beach, VA
Car(s)
2022 Red Supra
Step 20: Mounting the front camera. I placed mine directly under the mirror so the camera lens was in the center of the car. Be sure to clean the inside of your window with alcohol to ensure good adhesion. Now is a good time to install the SD card into the camera so you don't forget.
23686-def544fe822f1db14222204c13566057.jpg


Step 21: Camera Power Wire: Take the wire you started to route in step 15 and continue to follow the factory harness forward to the B pillar area on the passenger side. You want it to go under the cross bar. Do not go up to the headliner area yet.
23687-e93089d82d31fc2c8c628edc639d591e.jpg


Step 22: Take the lose end of the camera power cable and plug it into the camera. Be sure to straighten out any kinks in the wire before you do this. Then route the wire behind the mirror mount cover, then under the edge of the headliner all the way to the A pillar. There is enough of a gap to get it in there using the plastic pry tool gently.
23688-82e1e711636a432cfadd4c85d3f5dcc4.jpg


Step 23: Route the power wire under the edge of the A pillar and headliner, then under the door seal down the edge of the headliner all the way back to the B pillar. This can also be done using the plastic pry tool gently.
23689-0688c5d01c4b811041840613b28c0298.jpg


Step 24: If you routed the power wire correctly you will now have all your excess by the B pillar and cross bar. I coiled mine up and zip tied it then stuck it where the insulation is at. You cannot cut this wire, if you do it voids the warranty on the BlackVue Camera.
23690-175e9fe7ed611bfdfab9ba3329ffc936.jpg


Step 25: Rear Camera Wire: Plug in the supplied rear camera cable into the camera using the 90 deg end. Once again route the wire around the mirror mount cover but this time to the drivers side. Power and signal should not be ran on the same side of the car. If you do there is a high change you will get interference and might have issues with the rear camera.

Step 25: When you get to the B pillar area, you will need to remove the same small panel on the drivers side as you did in step 3 to get the wire through.

Step 26: There is 1 T30 screw on each side of the headliner brackets. Remove these, they were very tight and put in with loctite so be careful not to strip them. Bolts already removed in the photos.
23694-c9b5d58089cfb6c54ac193540e24da16.jpg

23695-9e2345e069e74fe1ad03aa2fba31b92a.jpg


Step 27: Carefully use the plastic pry tool to pop out the 2 clips holding up the back of the headliner. This will drop it down just enough without having to remove it all the way.
23693-28f185022d9f4acb37bf694401239d05.jpg


Step 28: I routed through the factory hatch harness bundle. If you don't want to do that you don't have to but here is how I did it. Unhook the center clip on the rubber tubing, then remove the rubber boots from the hatch side and roof side.
23696-a87ce8868fffc174ac0ec4ae7cb252de.jpg


Step 29: Route your wire under the headliner and out the hole where the roof side boot was removed.
23697-159d874d34f197e84fca57af9d246ef2.jpg


Step 30: Use a coat hanger straightened out, spray it with some kind of lube and work it through the rubber tube from hatch side to roof side. I then used electrical tape to attach the end of the wire to the hanger and pulled the wire back through. Don't forget the lube or its never going to go through. I used white lithium spray. If all went as planed your wire will be here now.
23698-39caa668f3ff1cf30f362ab7d28fe173.jpg


Step 31: Remove this plug (pops right out) and this cover under the third brake light (pry up at the window edge, there is 2 pop clips then slide it out of the hooks on the bottom).
23699-cb0dba0915adc65986f416cd4d41cd00.jpg

23700-26b94fb26729aeeab20cfc91d5074834.jpg


Step 32: Route the wire from the hatch rubber boot hole to the hole where you removed the circle cap. I was able to fish it through without the coat hanger.
23701-cef8271514bd61b679042a42dead8d59.jpg


Step 33: Back to the coat hanger to make it the last length. Same as before, slide it from the third brake light area till it comes out the hole from step 32. Attach your wire with electrical tape, then slowly pull it through. It was a tight fit for the connector when first going in so i used the plastic pry tool to lift the cover enough to get it through.
23702-eba52f5c375b8ac1a7377d6751e58c0c.jpg


Step 34: Figure out where you want to mount your camera. I mounted mine to the bottom of the third brake light. You can also mount it on the window. Be sure to clean the area before mounting. Once mounted in the desired location finish routing the wire to the camera. I used one of the clips the came in the camera kit to secure the line as well.
23703-b5de7884502dba0ac0b86ec8f6a54b6e.jpg


Step 35: Once your camera is mounted pull any extra wire back through to the headliner area. Here you can wrap it up and zip tie it together. Place it under the headliner and pop the 2 rear clips back into place.
23704-805c30a4d95b2e88083726ea9841ae24.jpg


Step 36: Start putting everything back together. Be sure to turn the switch on the Power Magic Battery to Hard Wire setting. Start the car and let it idle while you put the plastics back in the charge up your Power Magic Battery.
23706-ab27e394ccb2ebe436e7a0975c5e0d42.jpg

23705-94cb0b074efb600afeddf022e4fcaaa6.jpg

23707-4550939741d15c31b5699a156a31102f.jpg


Follow the setup guide for the BlackVue App and Battery App. Login instructions for your camera are inside the box.

Hope this helps everyone. If there are any questions please ask and enjoy.
Thanks for the write up. Just did mine, works perfectly.
 

Jaxness

Well-Known Member
First Name
Jax
Joined
Mar 5, 2020
Threads
9
Messages
173
Reaction score
248
Location
Jacksonville FL
Website
www.jaxness.com
Car(s)
2020 Toyota Supra LE #1292, 2012 Yamaha R6

d0xic

Member
First Name
Eugene
Joined
Sep 7, 2021
Threads
0
Messages
19
Reaction score
19
Location
Phoenix, AZ
Car(s)
'22 Supra A91-CF Nitro Yellow

Thanks man!

I've been wanting to work on this using the writeup but was VERY overwhelmed by what to buy when I went to go look it up. Had a similar experience looking at bundles when looking at cameras lol.

Will update when I get the items in and work on this install~

Glad the writeup worked for you, gives me confidence!
 

Jaxness

Well-Known Member
First Name
Jax
Joined
Mar 5, 2020
Threads
9
Messages
173
Reaction score
248
Location
Jacksonville FL
Website
www.jaxness.com
Car(s)
2020 Toyota Supra LE #1292, 2012 Yamaha R6
Thanks man!

I've been wanting to work on this using the writeup but was VERY overwhelmed by what to buy when I went to go look it up. Had a similar experience looking at bundles when looking at cameras lol.

Will update when I get the items in and work on this install~

Glad the writeup worked for you, gives me confidence!
My husband did the write-up, he's been my personal auto electrician for 10 years, haha.
 

d0xic

Member
First Name
Eugene
Joined
Sep 7, 2021
Threads
0
Messages
19
Reaction score
19
Location
Phoenix, AZ
Car(s)
'22 Supra A91-CF Nitro Yellow
My husband did the write-up, he's been my personal auto electrician for 10 years, haha.
Shit my bad, I thought the guy above my post replied to me~ but it's actually OP!!


Thanks in advance! Hope I don't screw something up~~
 
 
Top