Funkjaw
Well-Known Member
- Thread starter
- #1
Twisted Tuning has released a product that attempts to address some of the rear-end instability and reliability issues the A90 has from factory.
Thread on the product: https://www.supramkv.com/threads/twisted-tuning-a90-a90-z4-differential-lockdown-brace-kit.12714/
Store page for the product: https://twistedtuning.com/products/twisted-tuning-a90-a90-z4-differential-lockdown-brace-kit
I purchased the kit (front and rear) and installed it yesterday followed by driving the car aggressively on some back roads, along with some power slides and straight line acceleration tests.
BACKROUND
I have a 2023 MT bone stock and I've always had the following complaints:
"
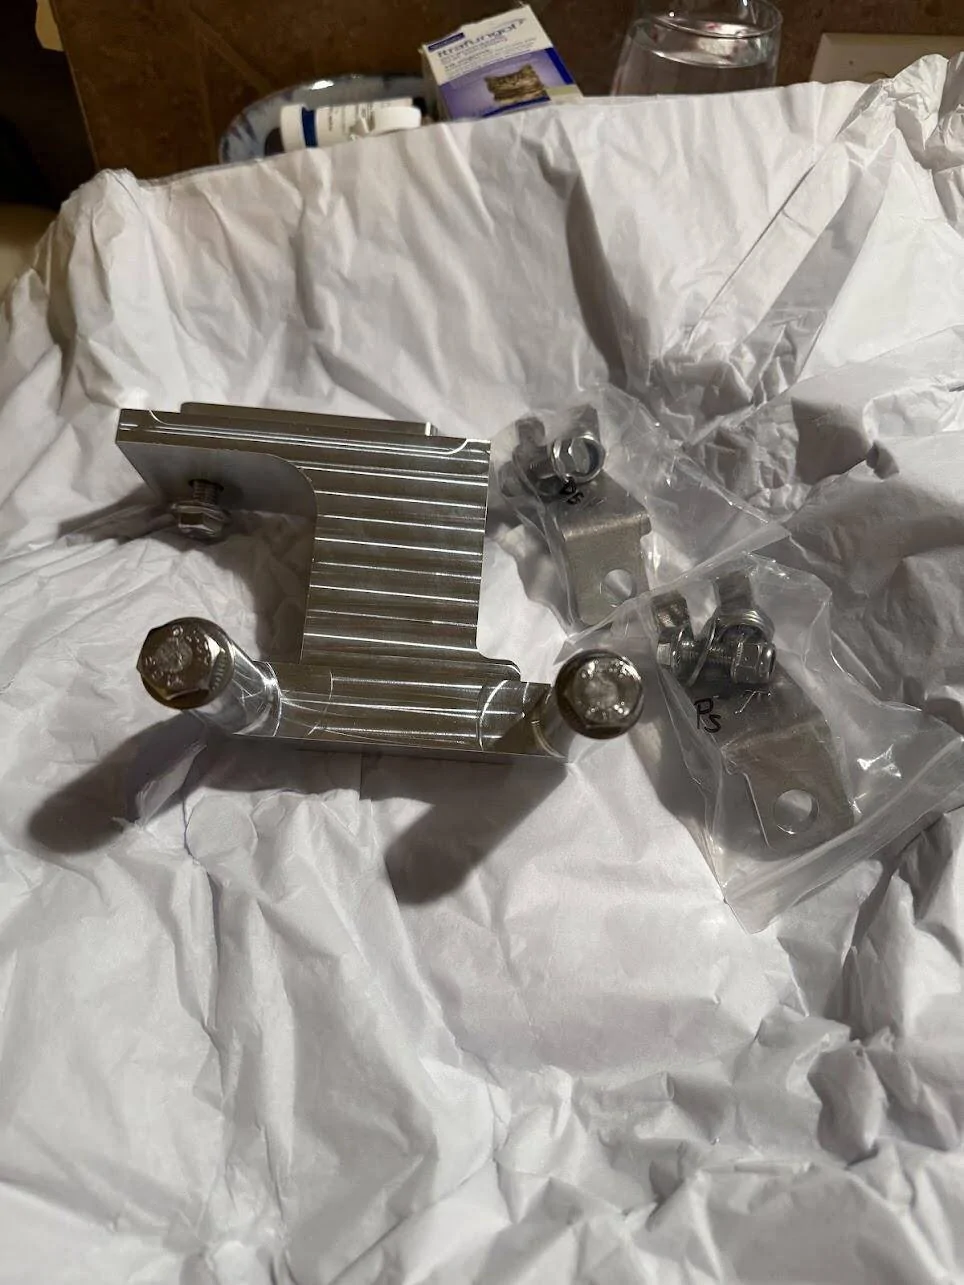
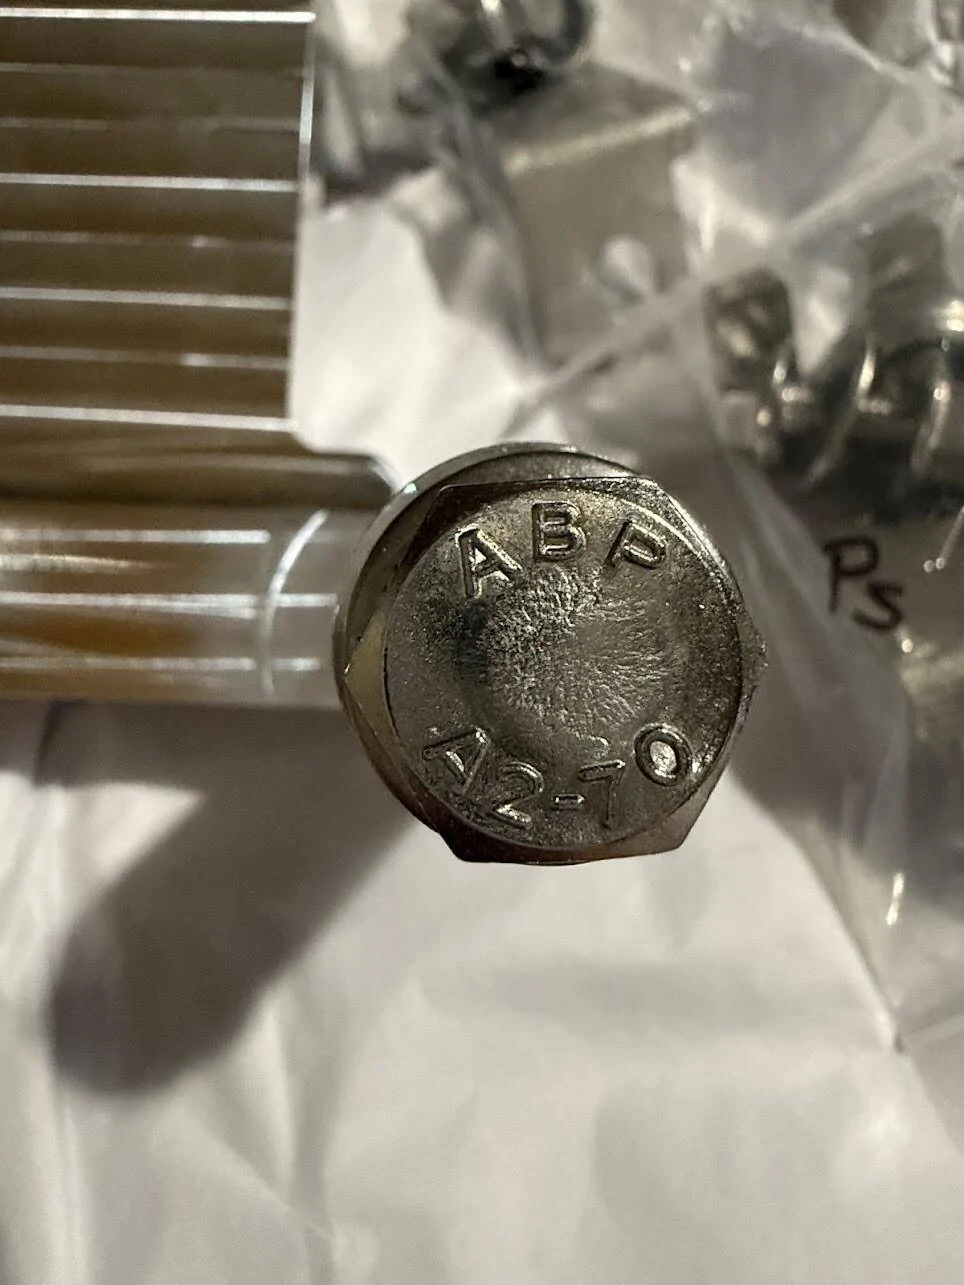
PRODUCT
The kit and machining work seems very nice, and the hardware they include is A2-70 grade which boasts high tensile strength and really good corrosion resistance. I would expect nothing less for the cost of the kit.

VERDICT
From the ~100 miles I put on the car yesterday, I can say that it seems every claim Twisted Tuning makes about this product is true. Results for my specifics complaints:
The product page doesn't state if the kit causes any increase to NVH in the car, but I can say it DOES NOT increase NVH in any way") - Twisted Tuning, maybe consider putting this statement in your product page as it's a huge plus.
- Twisted Tuning, maybe consider putting this statement in your product page as it's a huge plus.
All in all I am pleased with the kit, even if it did fall slightly short of expectations (maybe I just set my expectations too high). Is it worth the $473.96 USD shipped I paid for the kit? Hmmm that's a tough one, especially since I worked at a machine shop for a few years and am familiar with the labor and materials costs on these types of products. I am leaning yes, primarily because there are no competing kits out there and the kit did in fact live up to all their claims.
Installation - ~2 hours
NOTE: I could not find installation instructions anywhere on the product page or the product thread. I was able to figure out what I needed to do by just looking at the pictures on the product page so it's no big deal, as described below.
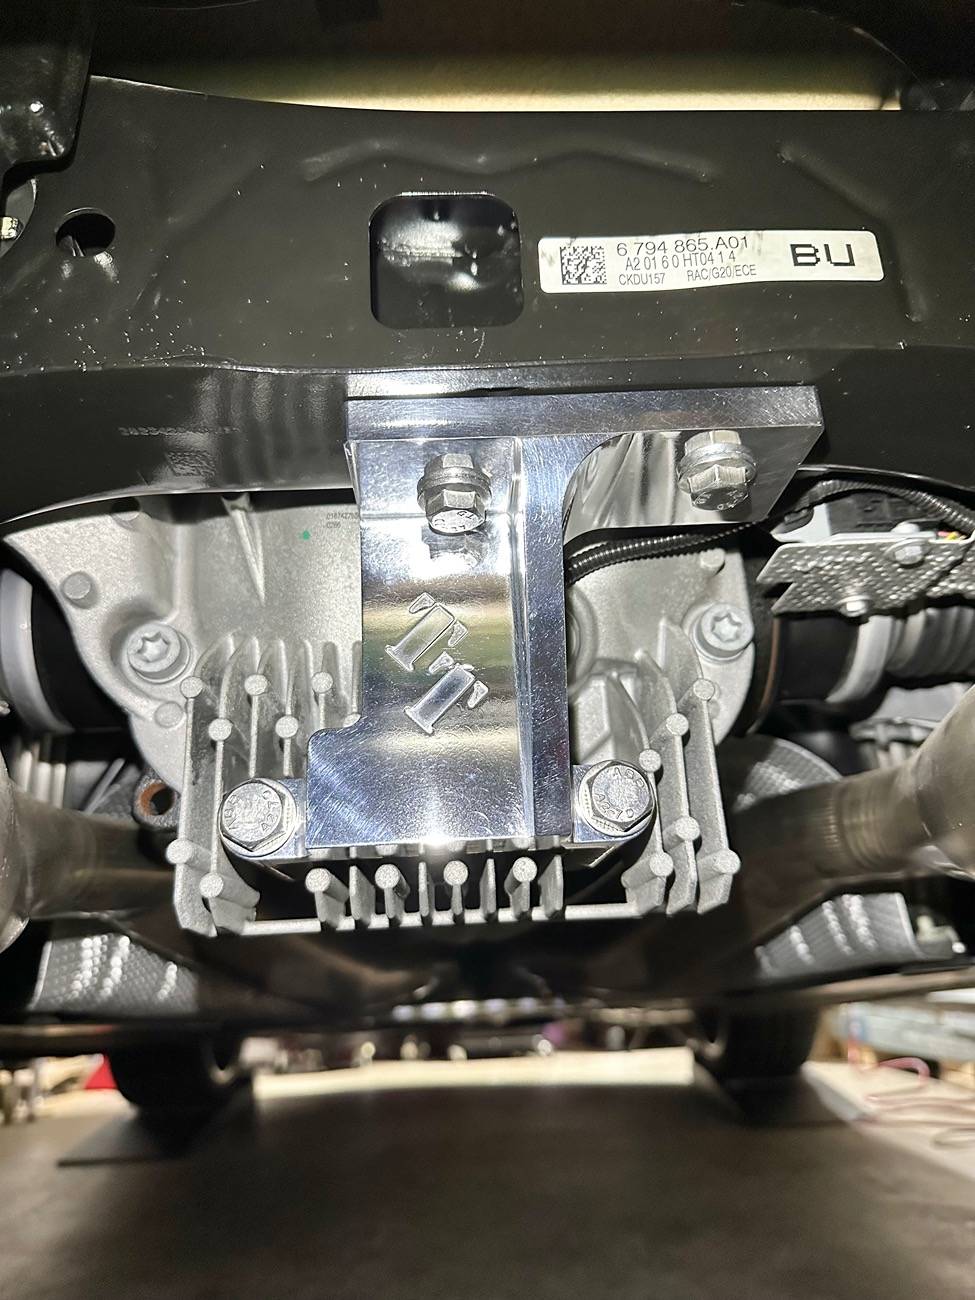
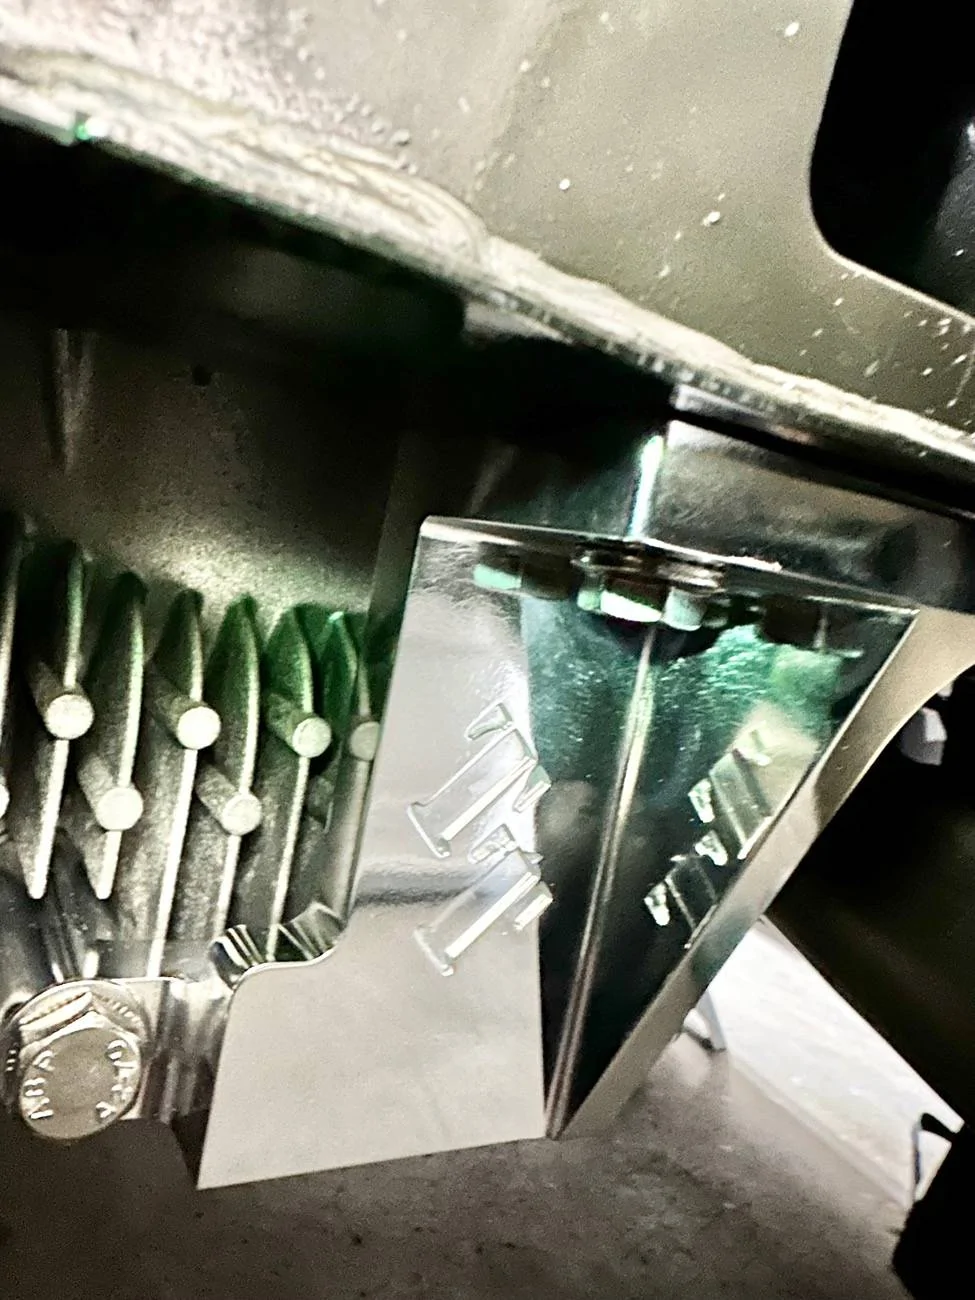
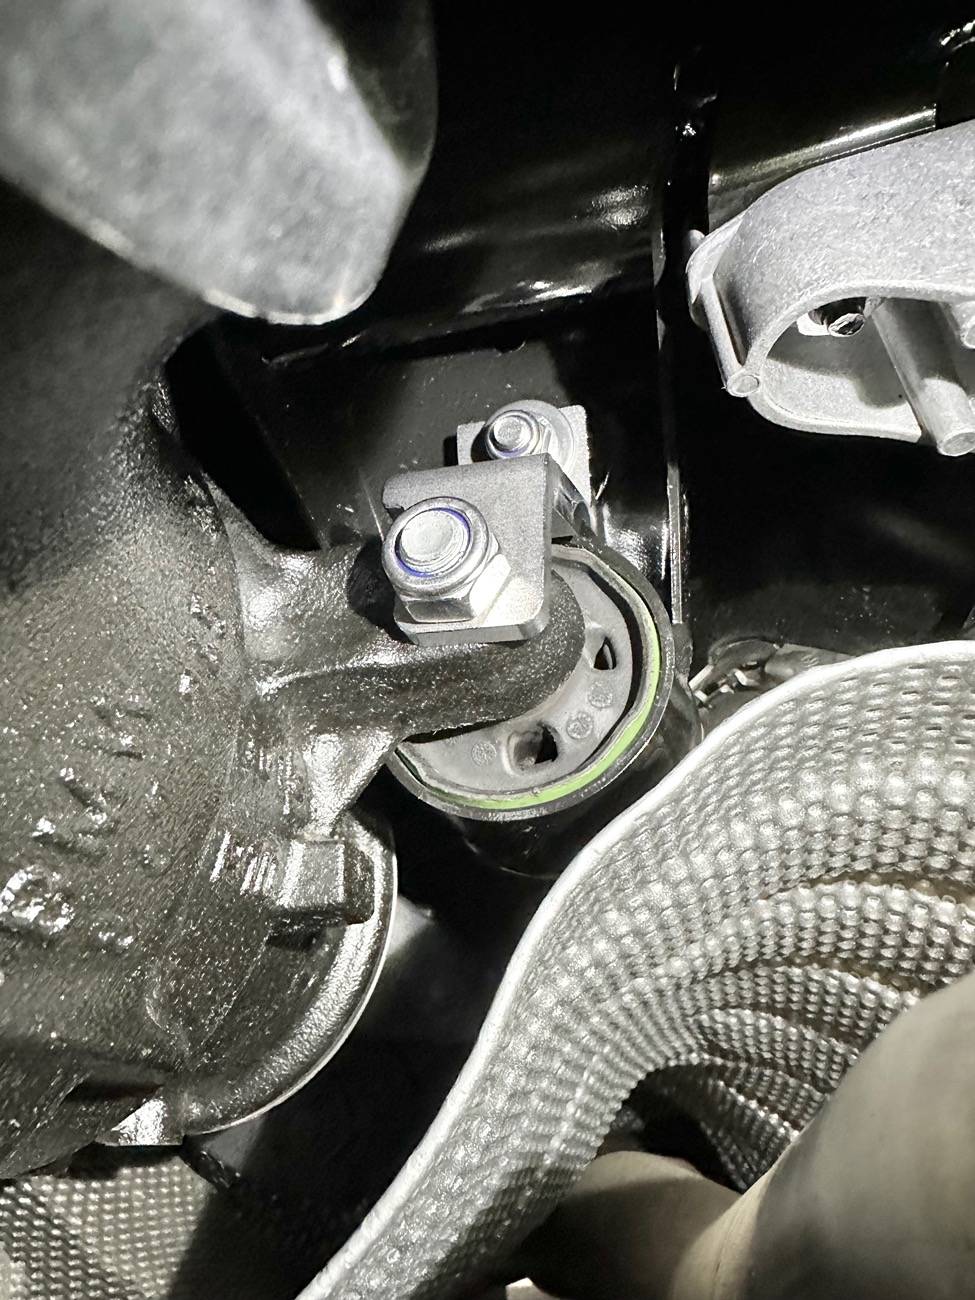
Front Diff Mount Braces
This was straight forward but also a complete PITA - I was able to get it done in about an hour because I have tiny little girl hands. If you have bigger hands than a 10 year old, you might not be able to do this without removing the exhaust and heat shields or some creative use of tools. The space where you need to install the bolts is incredibly tight, my hands were pretty beat up after this install.
Tools I used:

Instructions (same for both sides):
REAR DIFF CASE BRACE
Really straight forward and a complete breeze compared to the front braces.
Tools I used:
Instructions:
Thread on the product: https://www.supramkv.com/threads/twisted-tuning-a90-a90-z4-differential-lockdown-brace-kit.12714/
Store page for the product: https://twistedtuning.com/products/twisted-tuning-a90-a90-z4-differential-lockdown-brace-kit
I purchased the kit (front and rear) and installed it yesterday followed by driving the car aggressively on some back roads, along with some power slides and straight line acceleration tests.
BACKROUND
I have a 2023 MT bone stock and I've always had the following complaints:
- Poor straight line traction
- Excessive wheel hop
- Rear tire bump steer
- Differential clunk and movement when dropping the clutch or rowing through the gears aggressively
- ALL THESE ISSUES CAUSE INSTABILITY WHEN PUSHING THE CAR HARD IN BOTH GRIP AND DRIFT SCENARIOS
"
- Reduced Wheel Hop
- Reduced Differential Bearing Load
- Reduced Differential Twisting and Torquing under heavy acceleration and launching
PRODUCT
The kit and machining work seems very nice, and the hardware they include is A2-70 grade which boasts high tensile strength and really good corrosion resistance. I would expect nothing less for the cost of the kit.
VERDICT
From the ~100 miles I put on the car yesterday, I can say that it seems every claim Twisted Tuning makes about this product is true. Results for my specifics complaints:
- Poor straight line traction - Moderately Improved
- Excessive wheel hop - Moderately Improved
- Rear tire bump steer - Moderately Improved
- Differential clunk and movement when dropping the clutch or rowing through the gears aggressively - Slightly improved
The product page doesn't state if the kit causes any increase to NVH in the car, but I can say it DOES NOT increase NVH in any way
- Twisted Tuning, maybe consider putting this statement in your product page as it's a huge plus.All in all I am pleased with the kit, even if it did fall slightly short of expectations (maybe I just set my expectations too high). Is it worth the $473.96 USD shipped I paid for the kit? Hmmm that's a tough one, especially since I worked at a machine shop for a few years and am familiar with the labor and materials costs on these types of products. I am leaning yes, primarily because there are no competing kits out there and the kit did in fact live up to all their claims.
Installation - ~2 hours
NOTE: I could not find installation instructions anywhere on the product page or the product thread. I was able to figure out what I needed to do by just looking at the pictures on the product page so it's no big deal, as described below.
Front Diff Mount Braces
This was straight forward but also a complete PITA - I was able to get it done in about an hour because I have tiny little girl hands. If you have bigger hands than a 10 year old, you might not be able to do this without removing the exhaust and heat shields or some creative use of tools. The space where you need to install the bolts is incredibly tight, my hands were pretty beat up after this install.
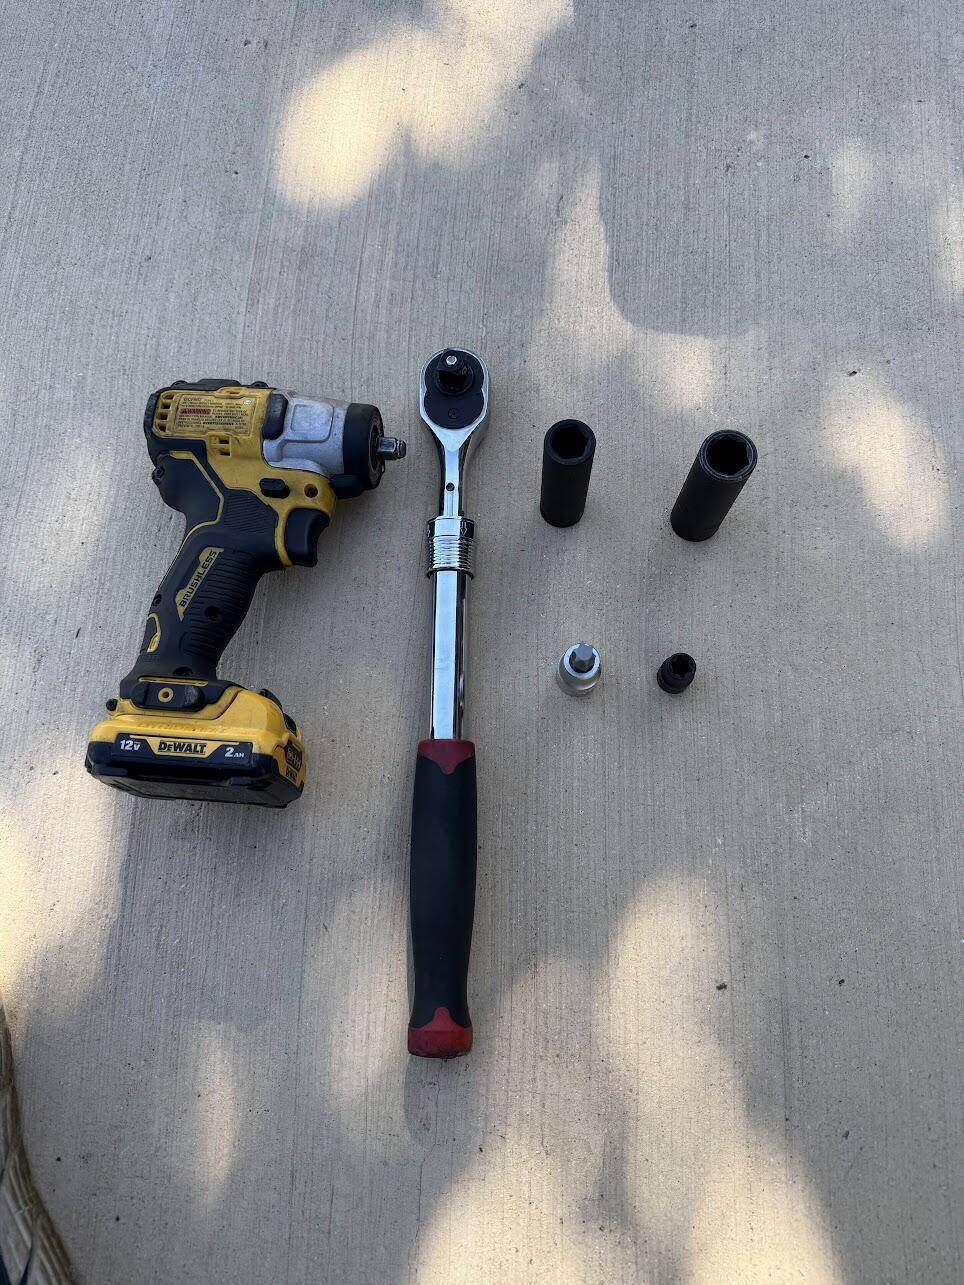
Tools I used:
- 3/8" drive impact gun
- 9" 3/8" extension
- 13MM 3/8" swivel socket
- 13MM ratcheting swivel wrench
- 19MM wrench
Instructions (same for both sides):
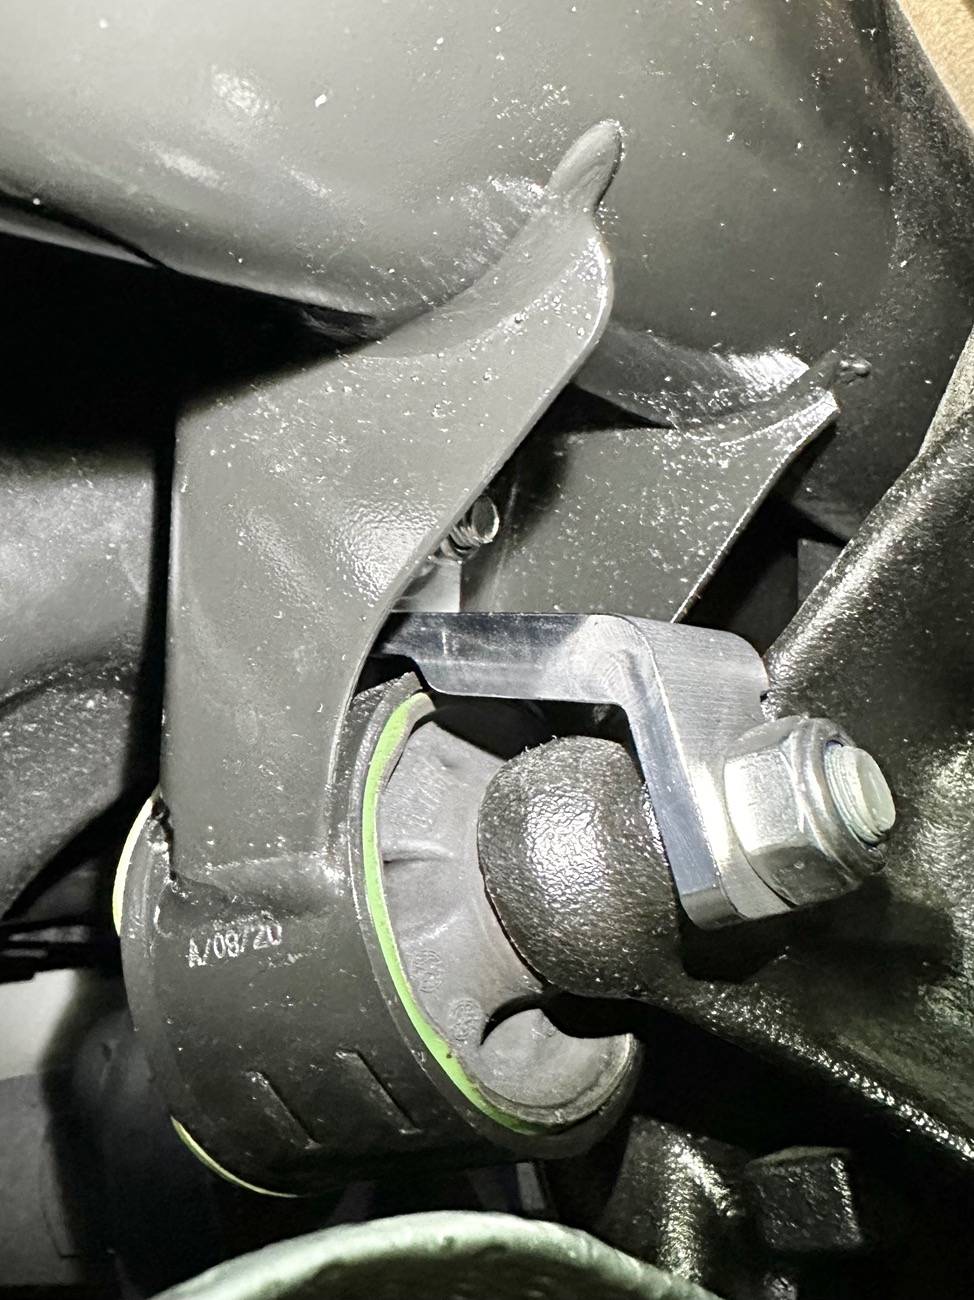
- Locate where you need to install the brackets and bolts
- Get the top bolt located into the hole - this is tough, very little space to do this
- Get the bracket located onto the new bolt and the existing diff bushing bolt
- Secure the bottom of the bracket in place using the included 19MM nut onto the diff bushing bolt, don't tighten all the way to allow for some movement in the bracket
- Secure the top of the bracket in place using the included 13MM washer/nut onto the bolt you inserted in step 3. To do this I put the swivel wrench on the head of the bolt (this was very difficult), then used the 3/8 impact extension setup to tighten it down. Again this part took the longest and was painful on my hands but I made it work
- Finish tightening the 19MM nut using the 19MM wrench.
- Rinse and repeat for the other side.
Driver Side Front Bracket
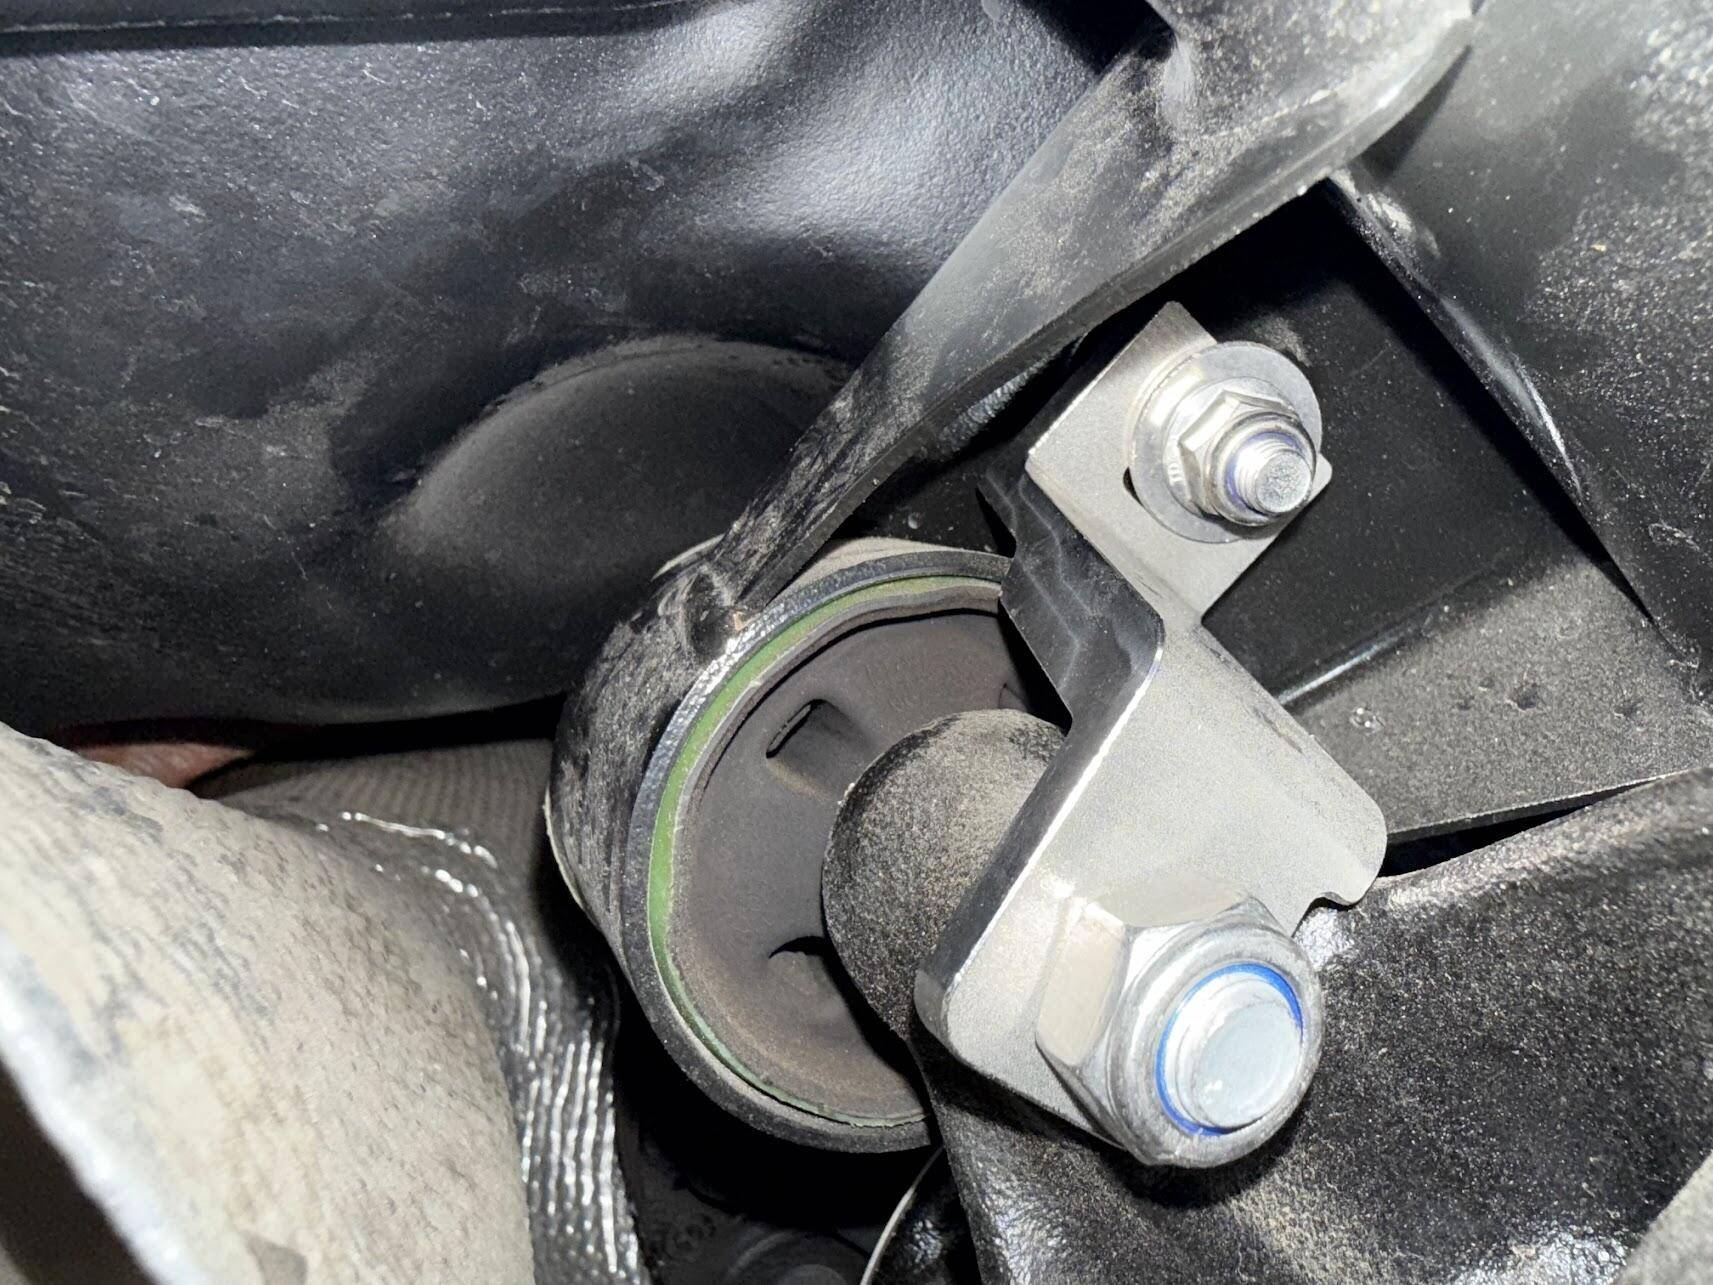
Passenger Side Front Bracket
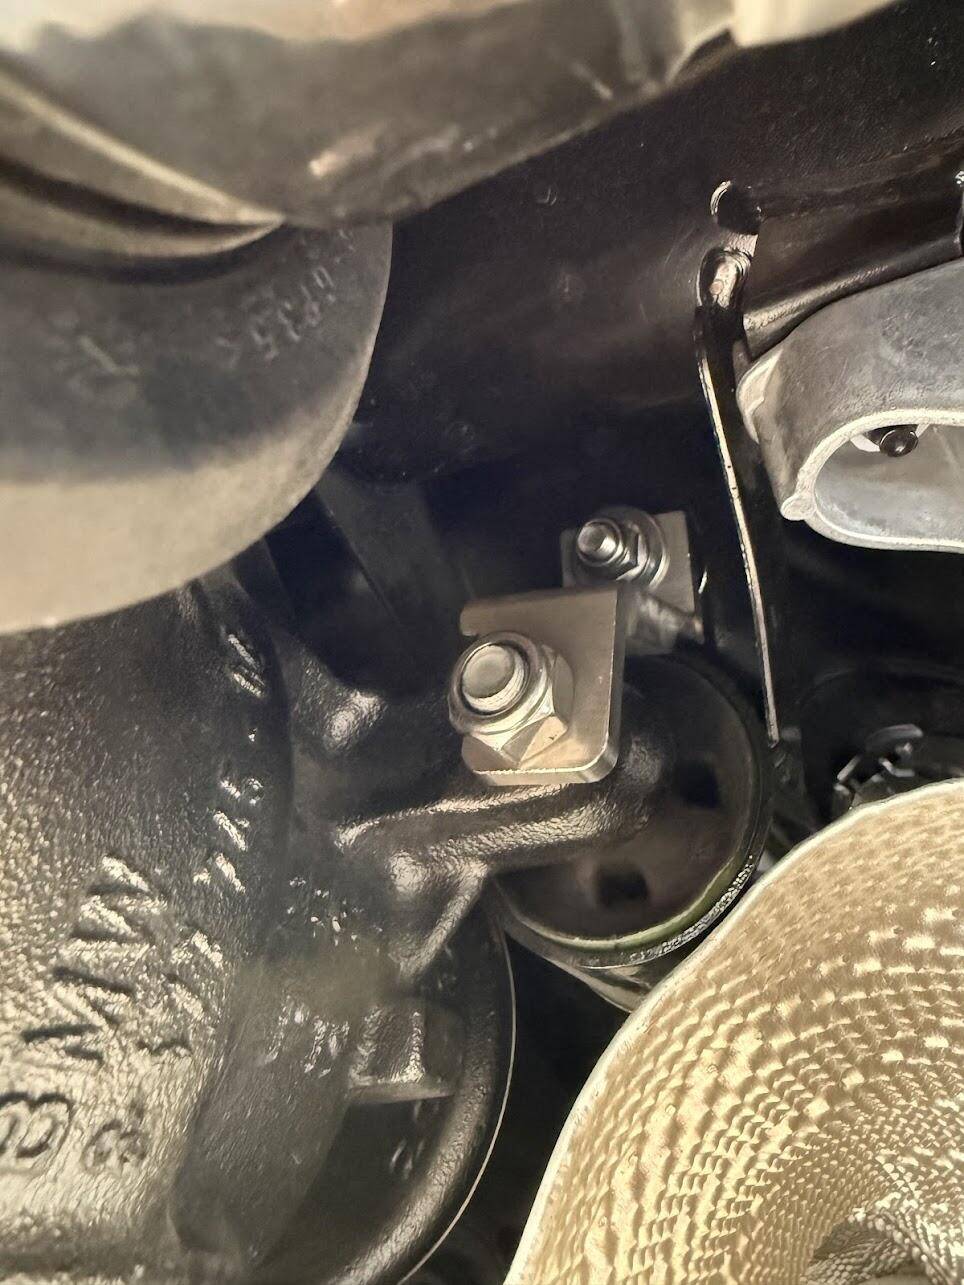
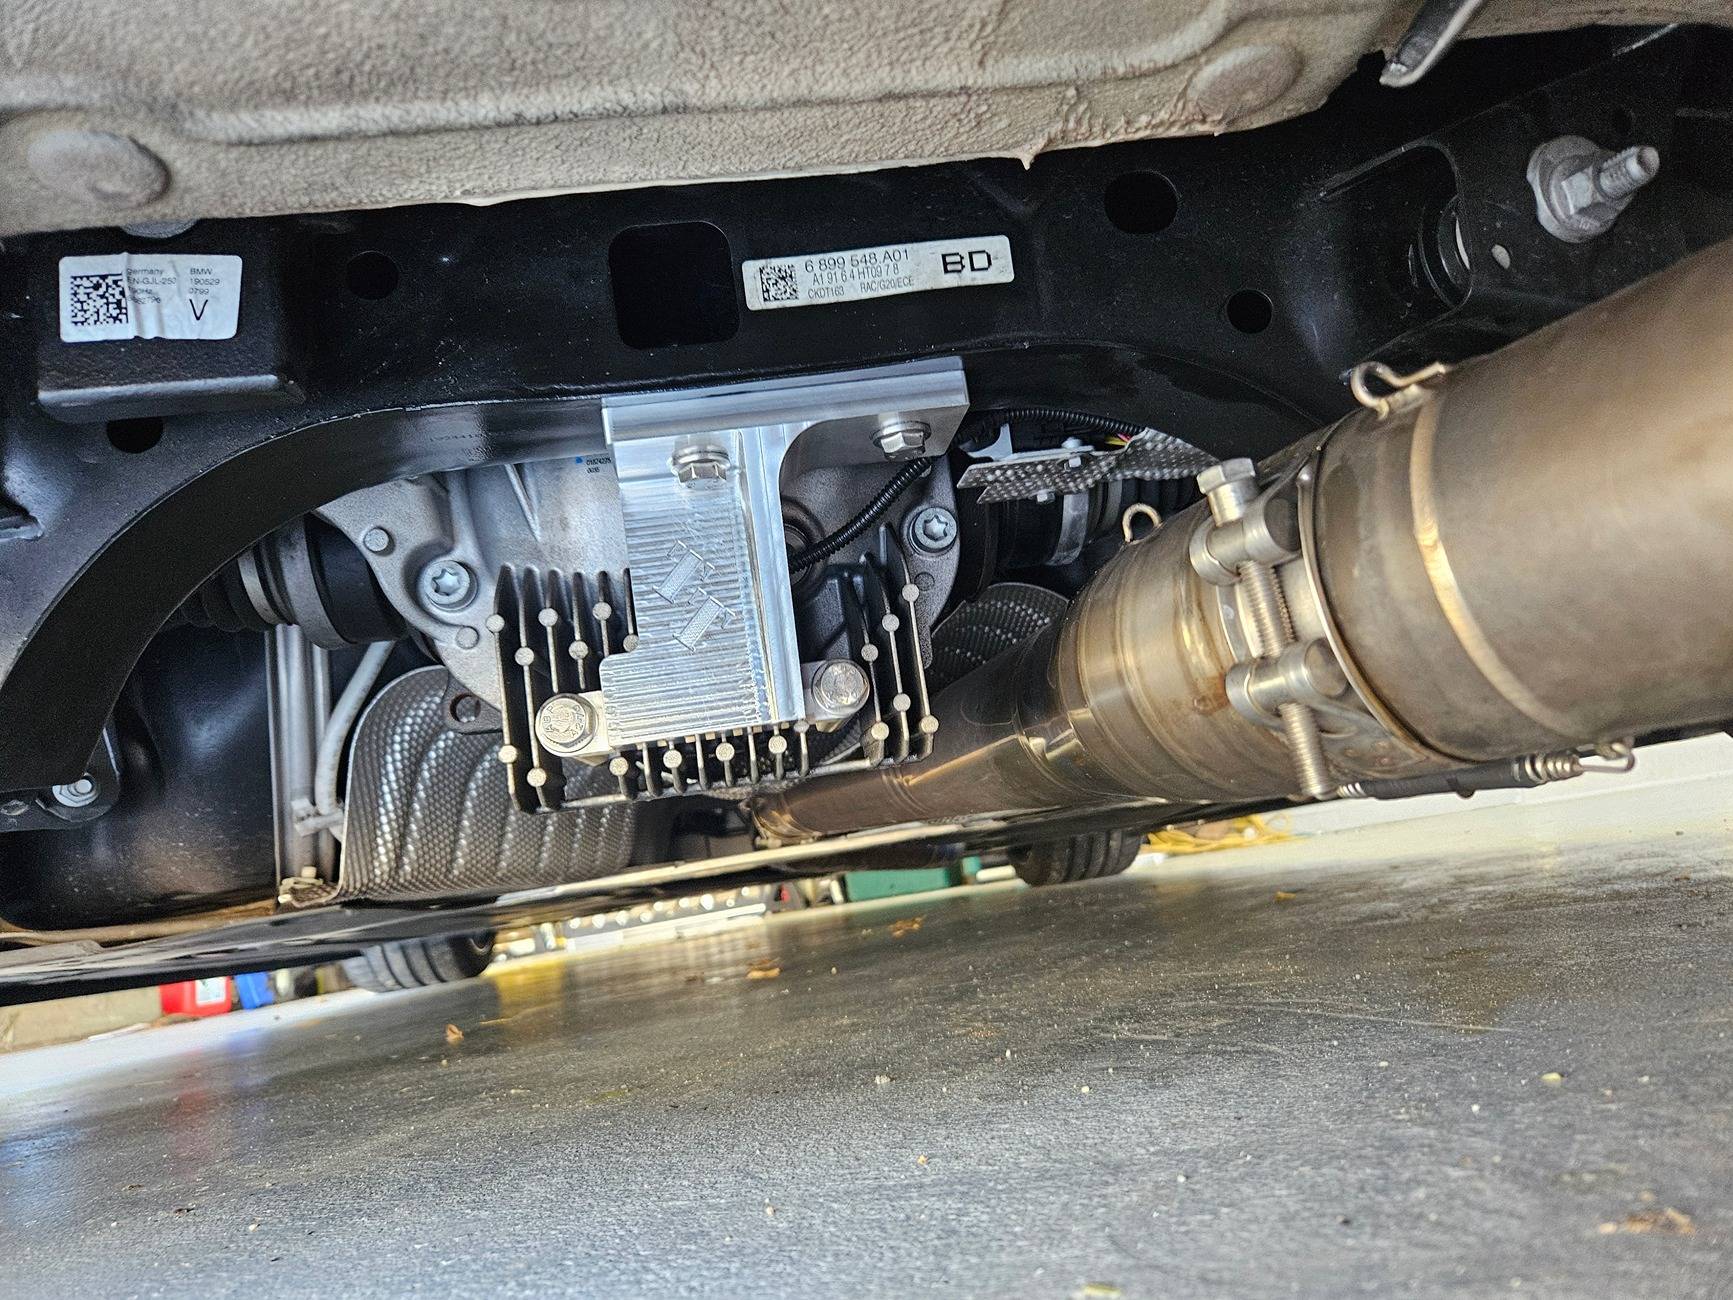
REAR DIFF CASE BRACE
Really straight forward and a complete breeze compared to the front braces.
Tools I used:
- 1/2" ratchet
- 3/8" impact gun
- 17MM 1/2" socket
- 15MM 1/2" socket
- E12 3/8" socket
- T55 1/2" socket
Instructions:
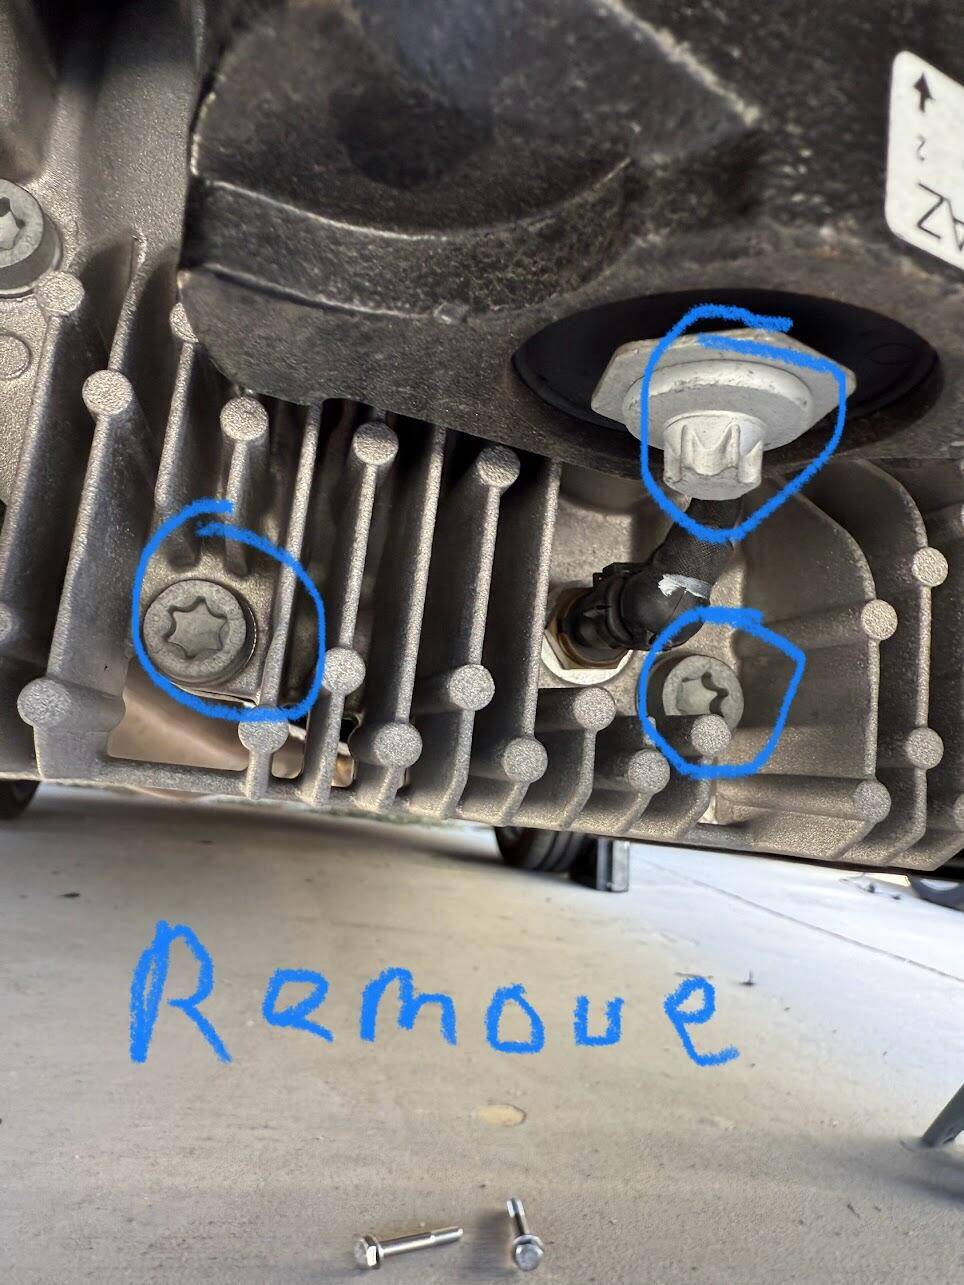
- Remove the OEM pinion snub and retaining clip using an E12 socket.
- FUN FACT: The OEM pinion snub weighs 5lbs (I actually weighed it)!!! Nice little weight savings with this kit
- FUN FACT: The OEM pinion snub weighs 5lbs (I actually weighed it)!!! Nice little weight savings with this kit
- Remove the two bottom most diff cover bolts using a T55 socket on the 1/2" ratchet
- Don't worry about diff fluid potentially leaking it did not happen on my car
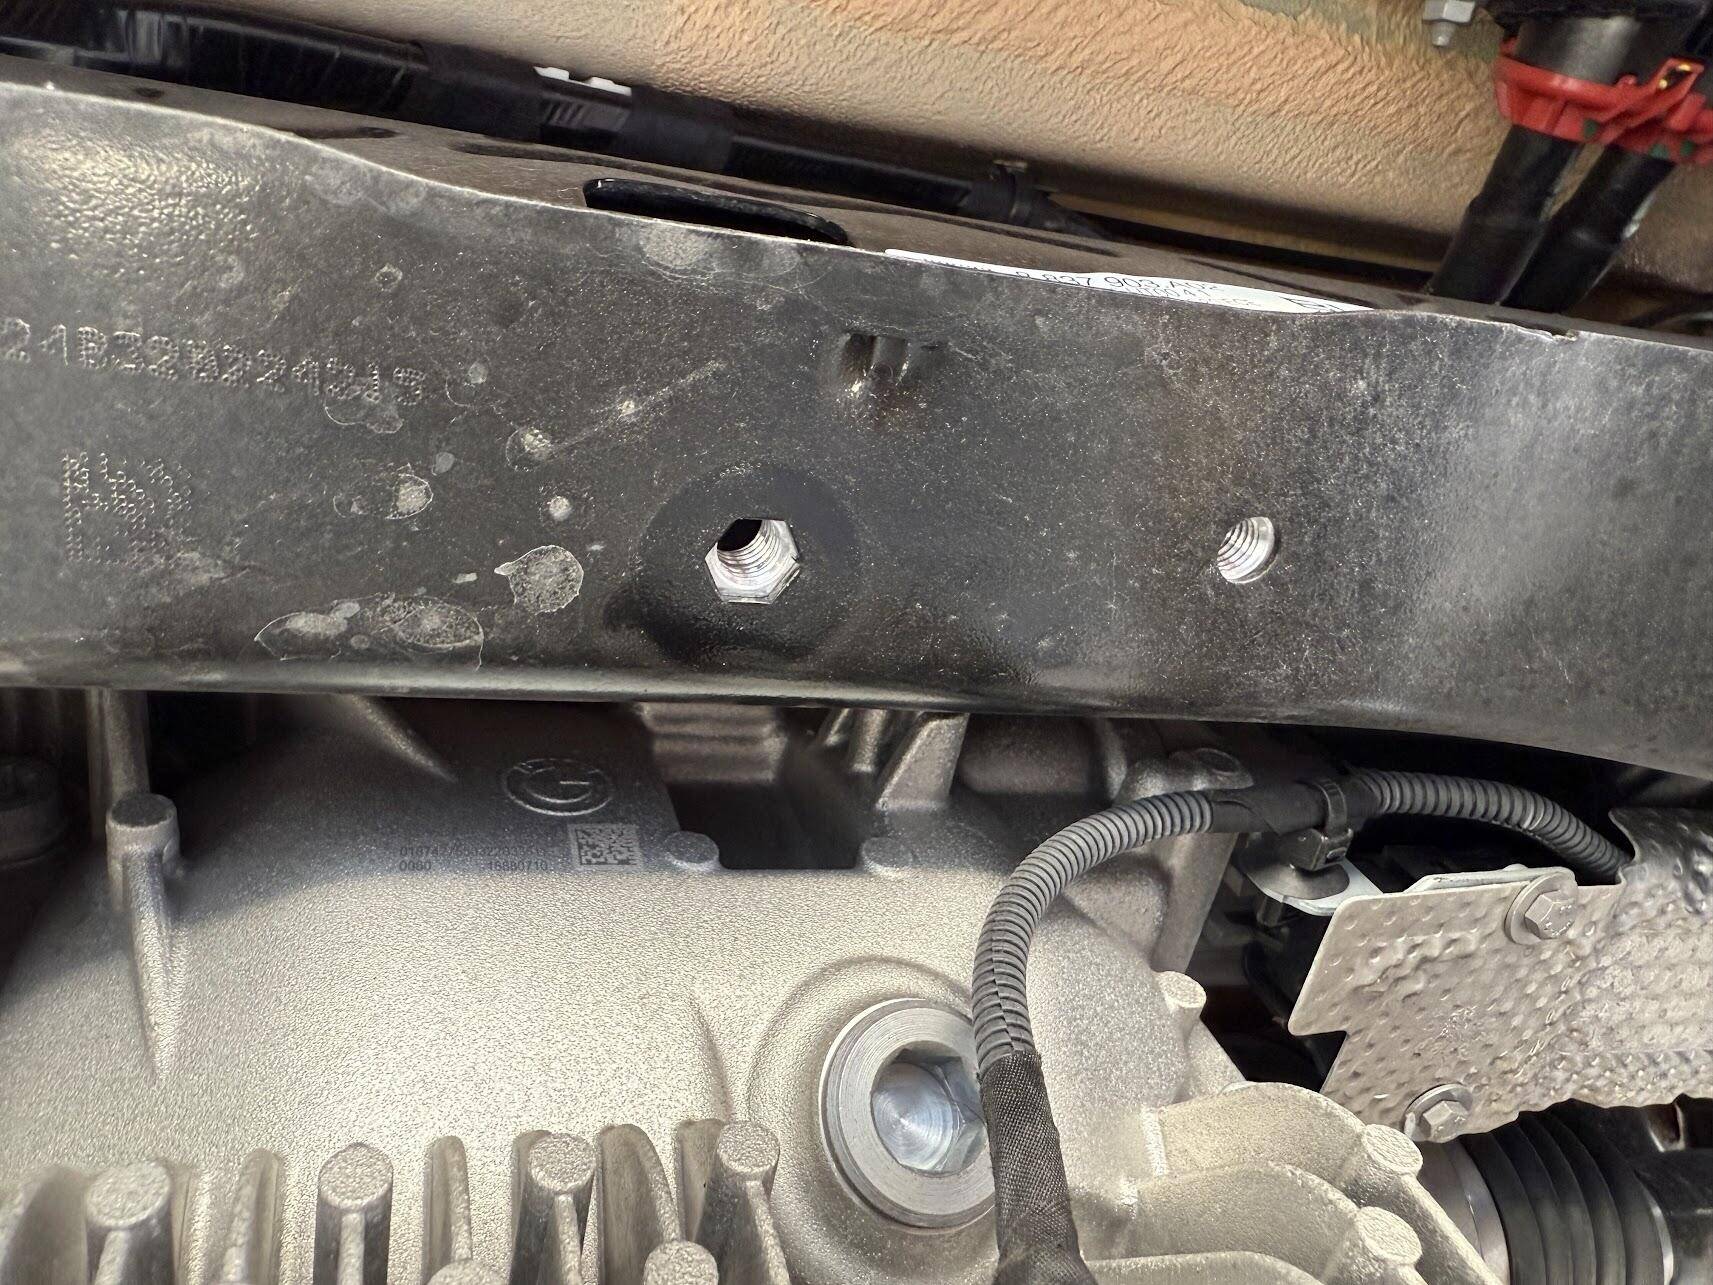
- Insert the small rectangle retaining block into the now vacant hole in the subframe where the pinion snub retaining clip used to reside
- It has to go in a specific way so make sure you line the two threaded holes up to the two holes in the subframe
- Align the rear diff brace to the two holes up top and the two holes in the bottom of the diff cover
- Start hand threading into the two bottom diff cover holes using the provided 17MM bolts
- Doing the bottom bolts first helps with aligning the top bolts
- Start hand threading in the top bolts using the provided 15MM bolts
- Tighten all 4 bolts down fully, that's it!
Bolts that need to be removed
Retaining block threaded holes need to be lined up with holes in subframe
Final assembly of rear diff brace

Sponsored
Last edited: