JRedMKV
Well-Known Member
- Joined
- Jul 1, 2020
- Threads
- 43
- Messages
- 683
- Reaction score
- 670
- Location
- Reno, Nevada
- Car(s)
- 2020 Supra 3.0 Premium
- Vehicle Showcase
- 1
- Thread starter
- #1
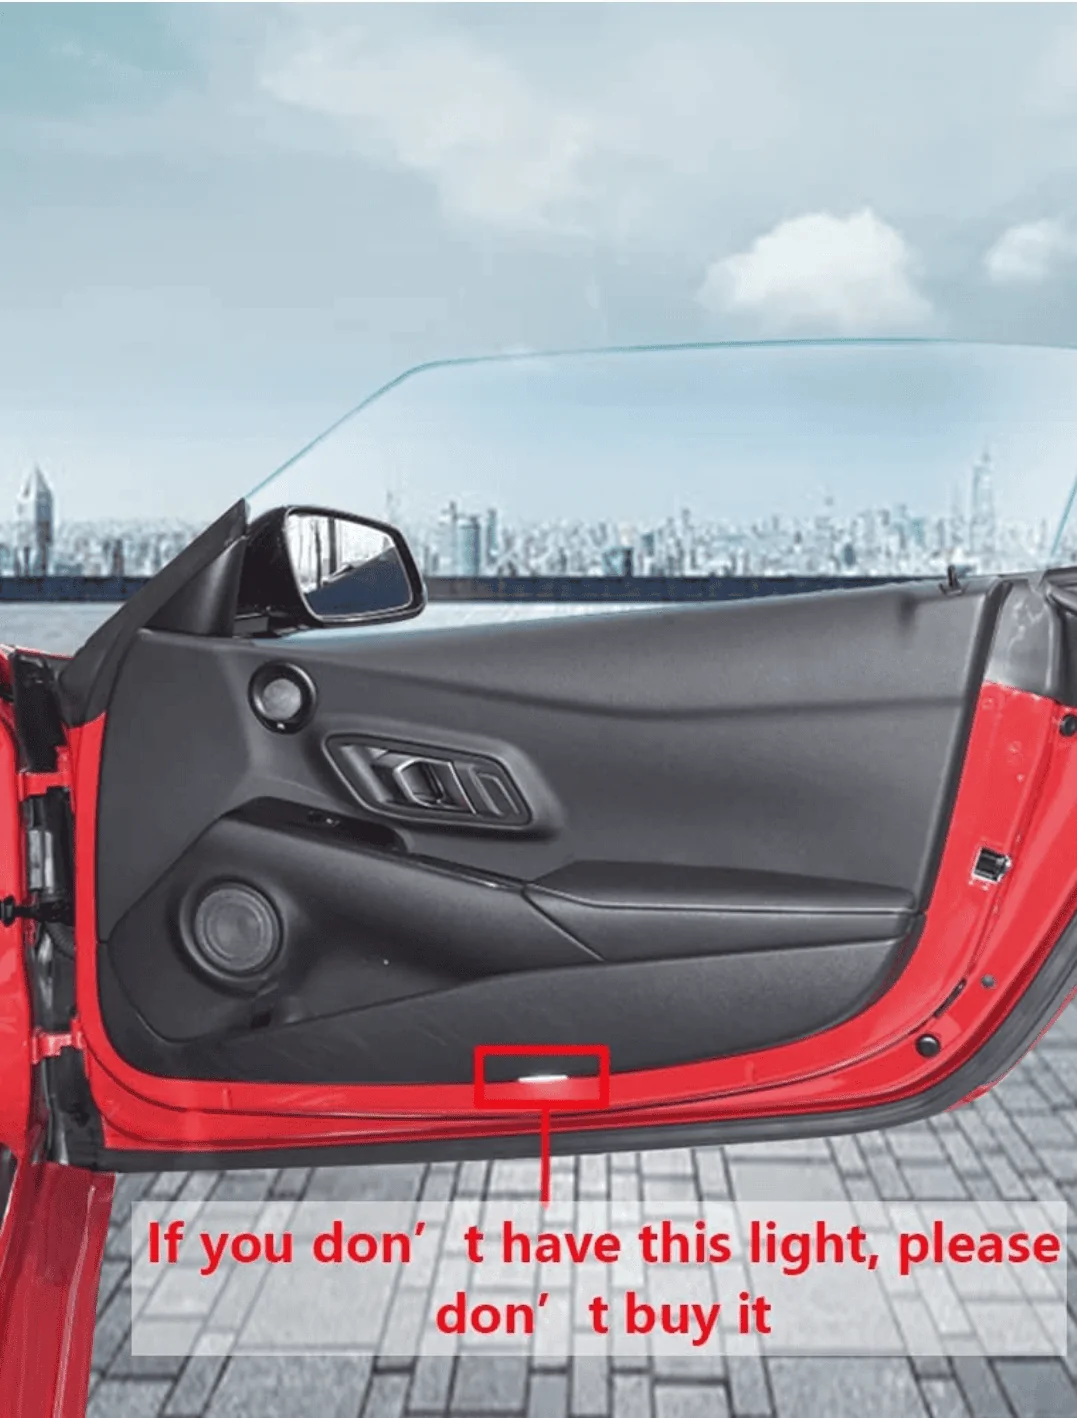
Here’s an overview of how to install these Puddle Lights that I bought from Amazon.
Edit: Im sure it’s understood, but I’m just putting a disclaimer that you do these mods at your own risk and I hold no responsibility if something goes wrong and you screw up your car. ? With that said, here’s what you need:
Car Door Lights Puddle lamp for Supra (supraGR) Fifth Generation (J29/DB; 2019-2021) https://www.amazon.com/dp/B08PYV6NQ...abc_TPTKYQE4Y1W8Z635APNK?_encoding=UTF8&psc=1
Futaba RC servo connectors:
10 PCS JST Female to JR Futaba Male Servo Connector Plug Adapter Cable 22AWG Silicone Wire for RC Lipo Battery https://www.amazon.com/dp/B07ZLX9ZRT/ref=cm_sw_r_cp_api_glt_fabc_8BW3MTJM2R8HT8NFH4QD
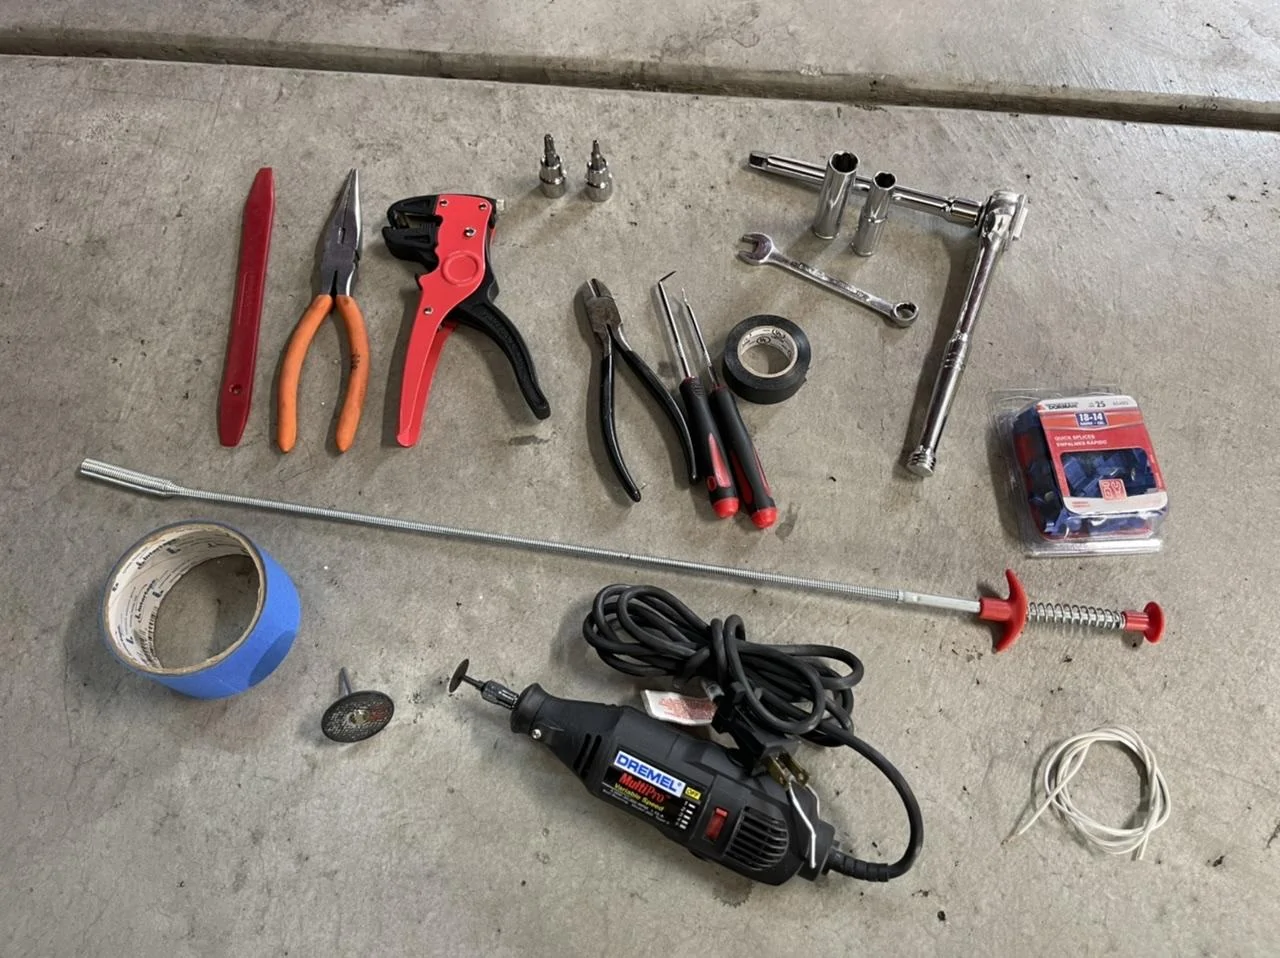
Tools you’ll need:

Ratchet w/10mm and 13mm sockets
T30 and T20 Torx bits
10mm Crescent wrench
Plastic door panel pry tool
Pliers
Wire stripper
Wire Cutters
Pick Tools
Electrical Tape
Wire taps - preferably the smaller red 22-18 gauge ones instead of the 18-14 gauge ones I used
Futaba RC servo connectors
Masking tape
Dremel with some cut off discs
A few feet of wire
Grab tool
First you’ll need to remove the door panel. There are videos on YouTube that show how to do this if you need a video. Remove the trim pieces using the pick tools that hide these 3 T20 torx screws.

Once those screws are are out, then use the 10mm crescent wrench to rotate the white hex nuts on the bottom edge of the door panel. If you apply outwards pressure on the door panel while you are rotating the hex you’ll feel it pop loose. Do this to both of the hexes on the bottom edge of the door. Next, slowly and carefully begin pulling the door panel off the door, starting at the bottom. Once the panel is free you might get hung up on the top corner near the door lock. There is a yellowish plastic clip that you’ll need to apply some UPWARDS force to the door panel in order to slide the door panel free from the clip, unless it already popped off while you were removing the door panel from the rest of the clips.

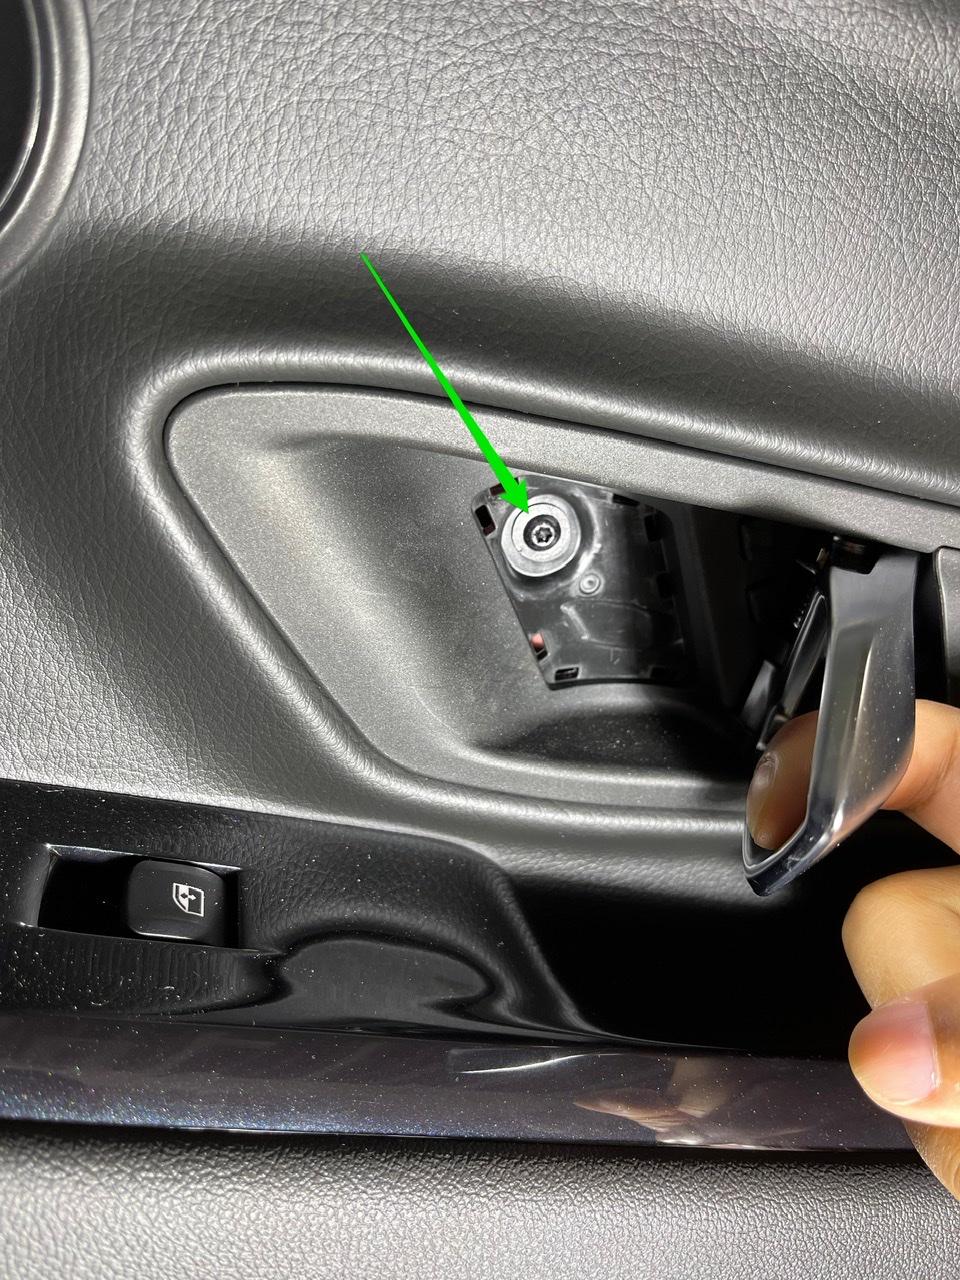
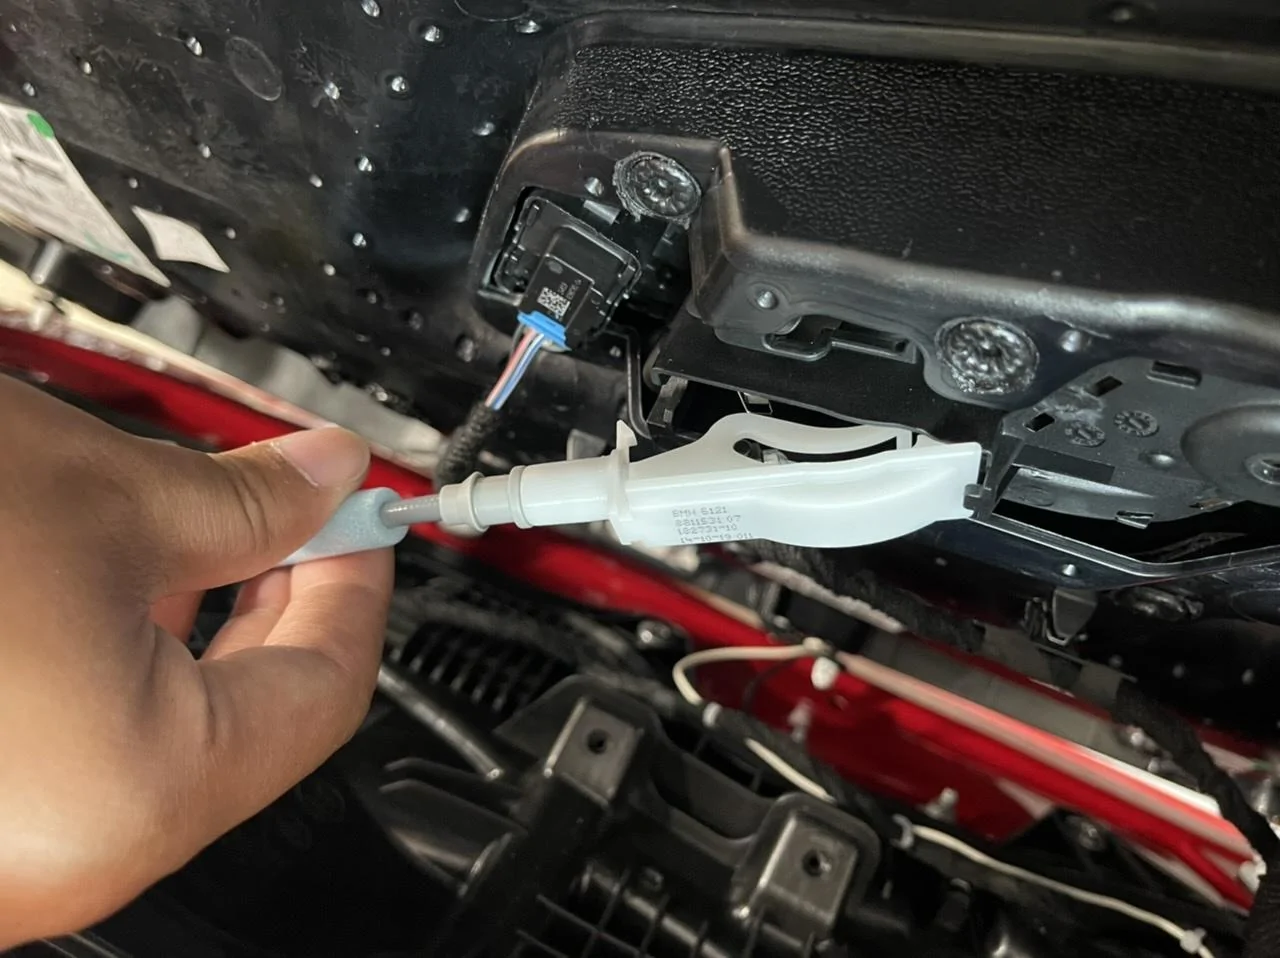
With the door panel free, remove the various plugs for the window switch, speakers, door locks, etc. Remove the connection for the door handle by simply prying it up and outwards.
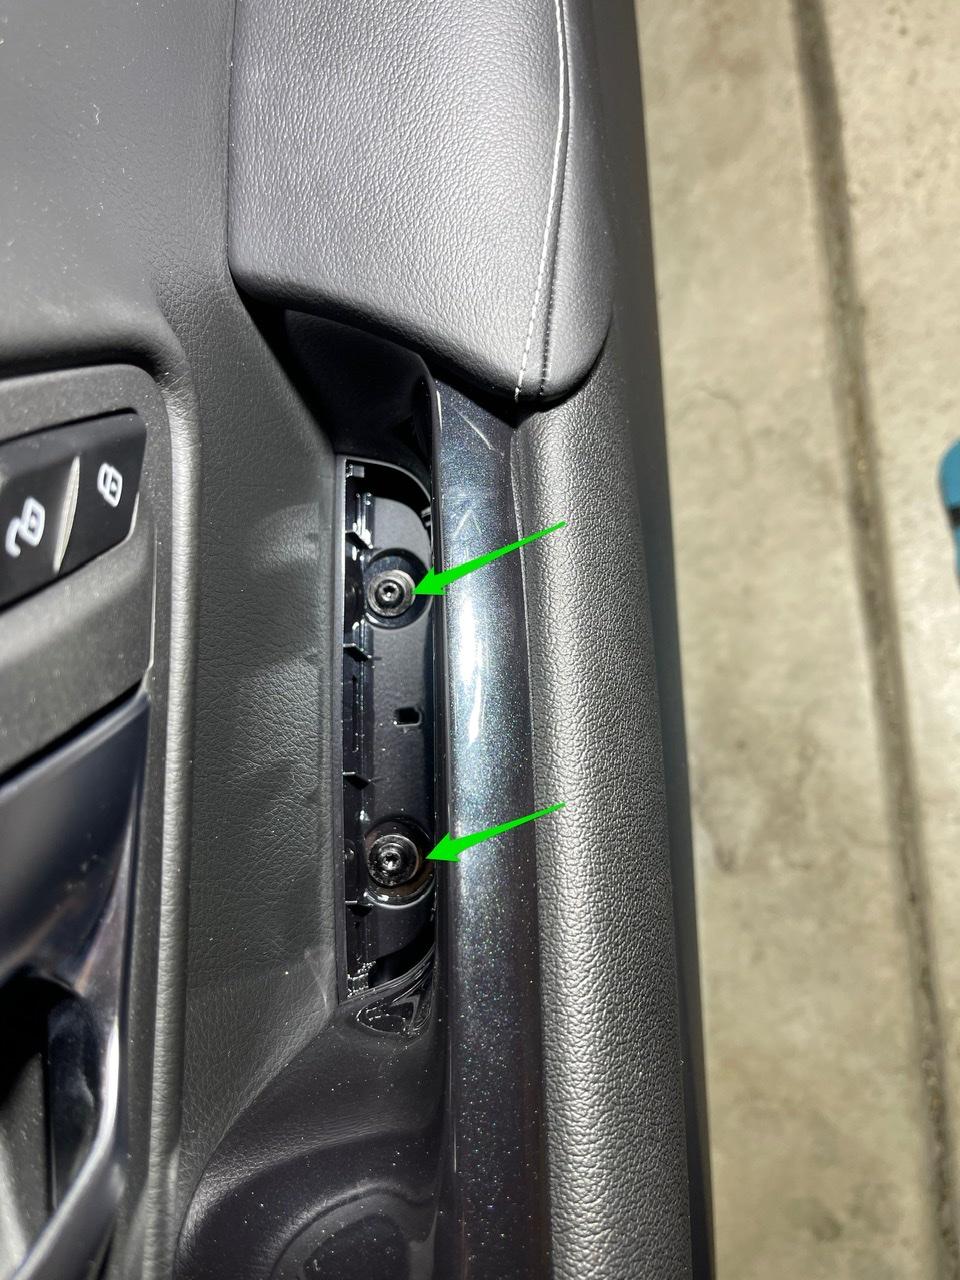
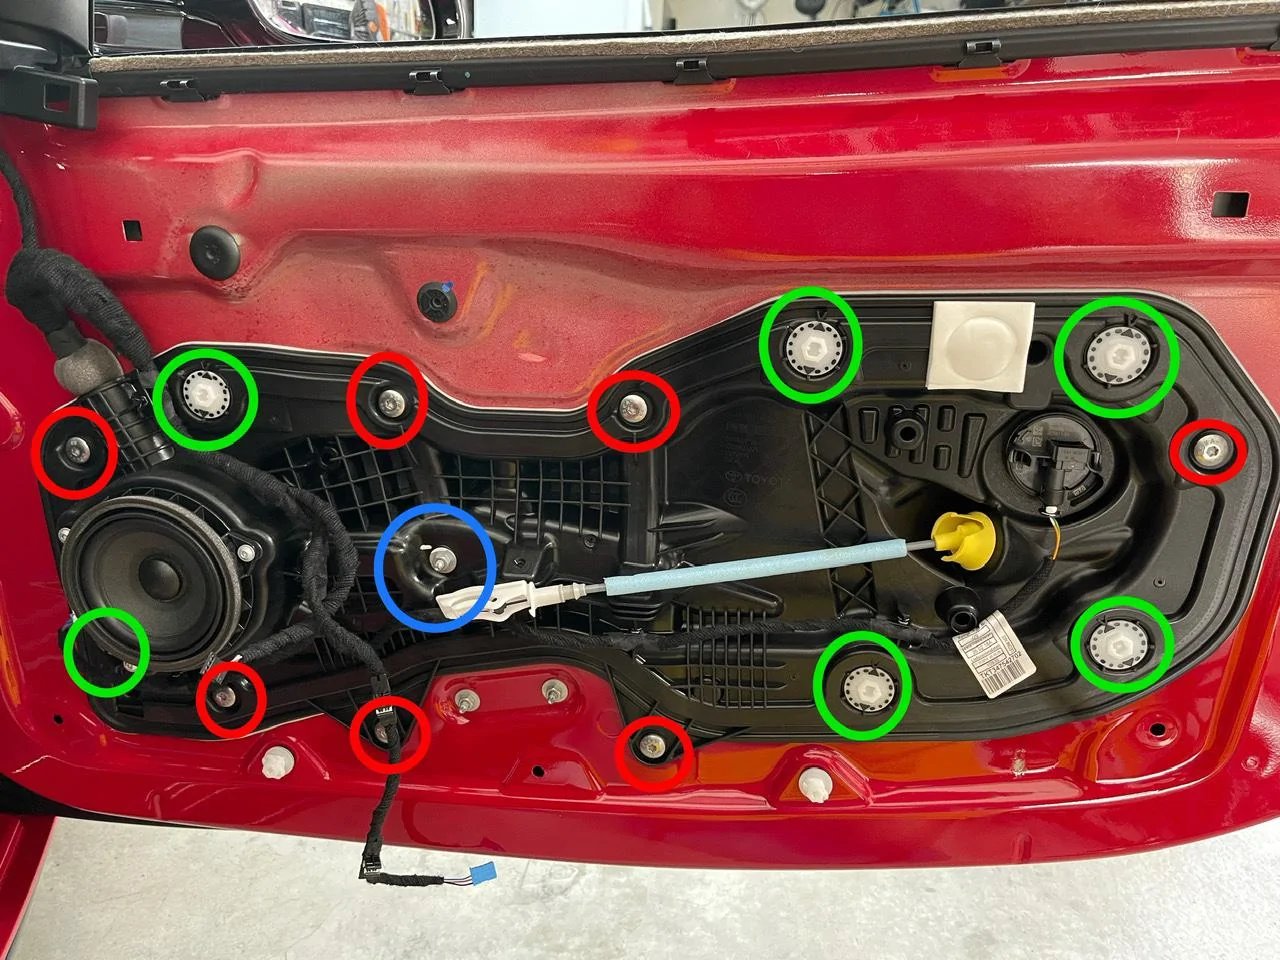
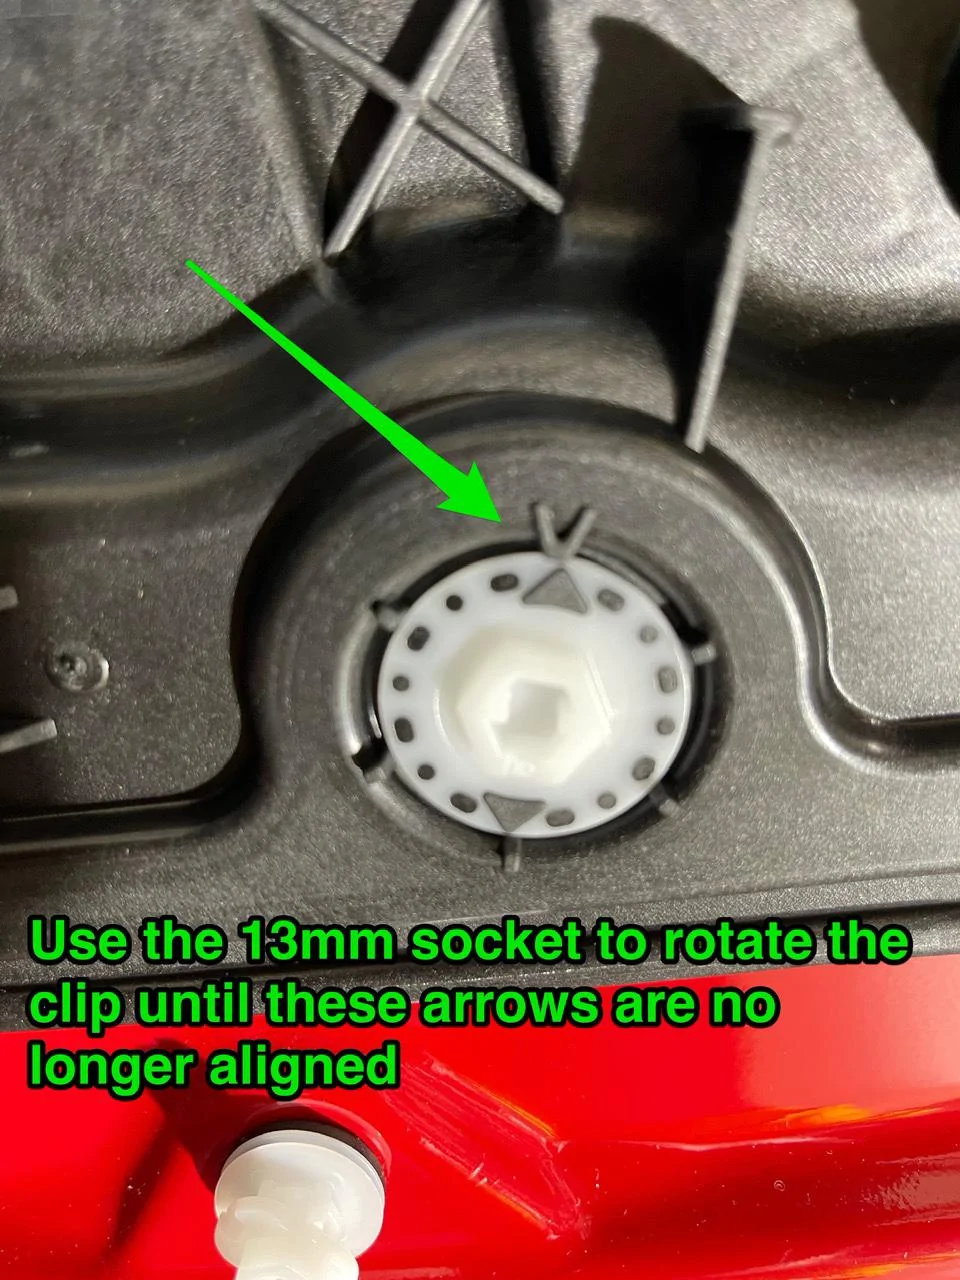
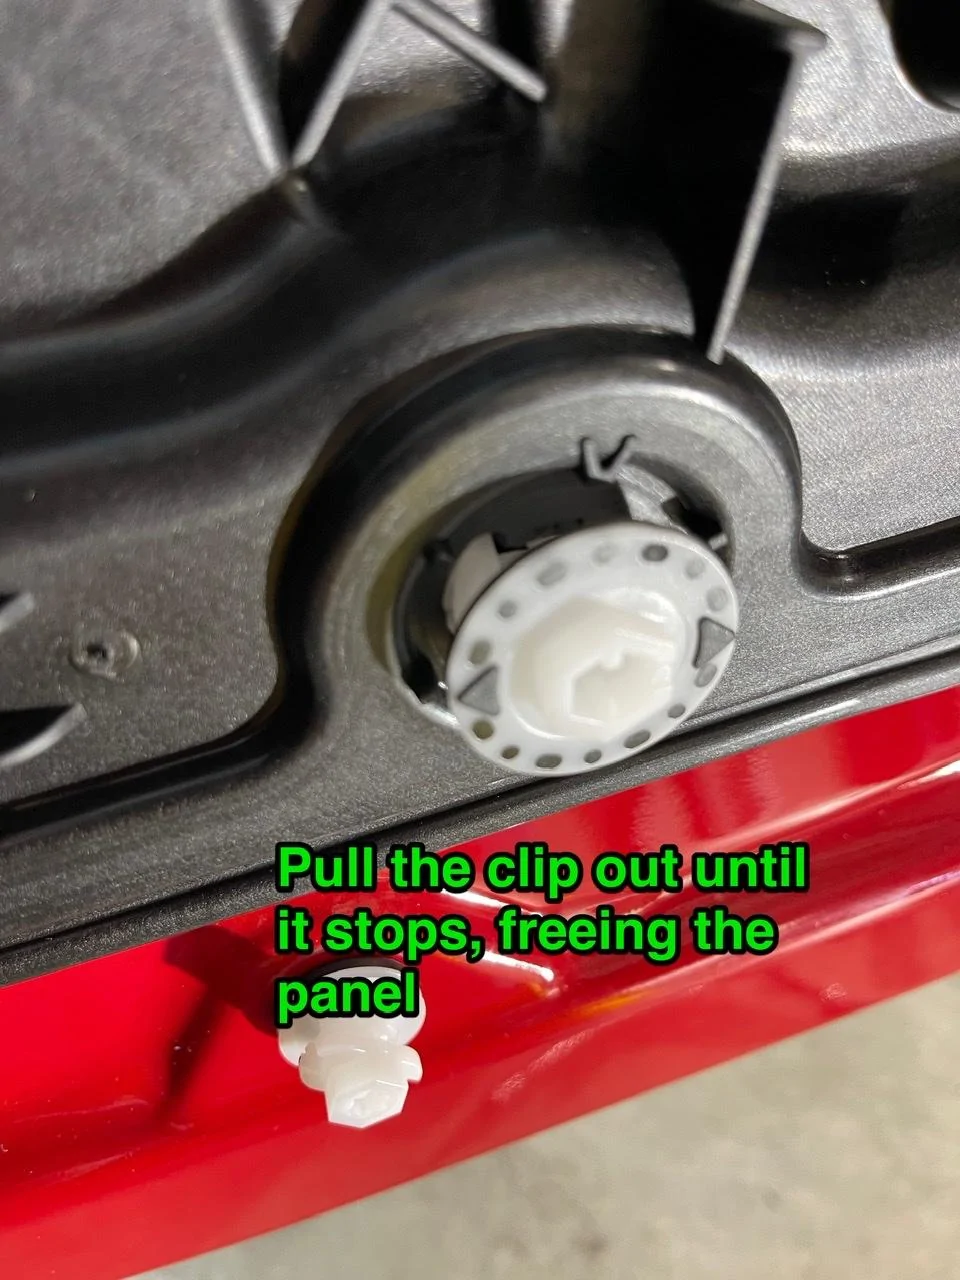
Unclip the wiring harnesses so you can completely set aside the door panel for now. Next you’ll want to use the T30 torx bit to remove the screws marked in red. Next, you’ll see the rotating clips that I marked in green on the doors. Use the 13mm socket to rotate the clip about a quarter turn until the arrows are not lined up any more. This will free up the clip mechanism and then you can just pull out the clip until it stops. There is also one 13mm nut marked in blue) to remove in the middle of this cover panel. Once all the clips are free and screws are out you should be able to remove this plastic cover from the door.
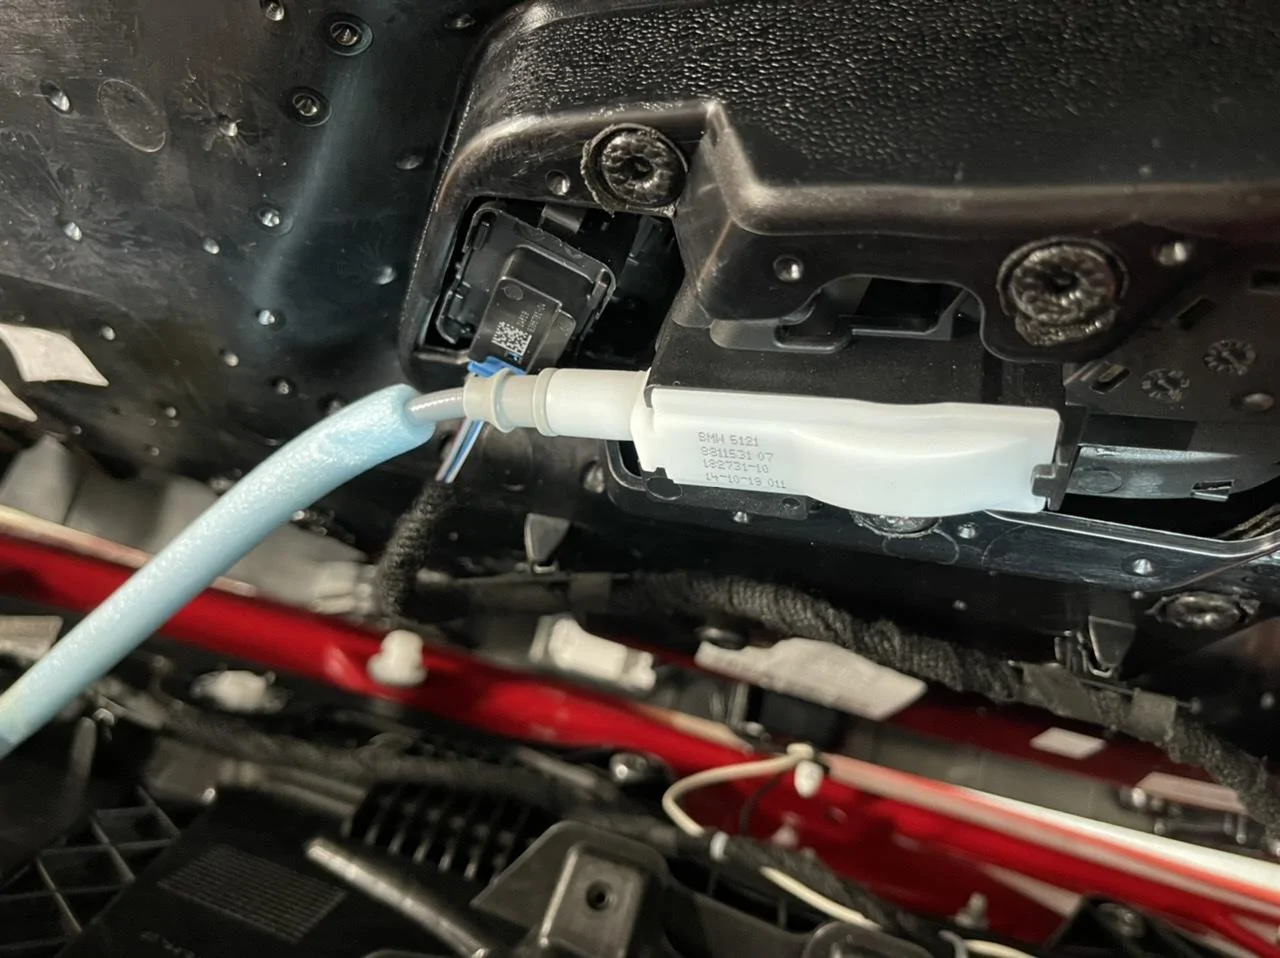
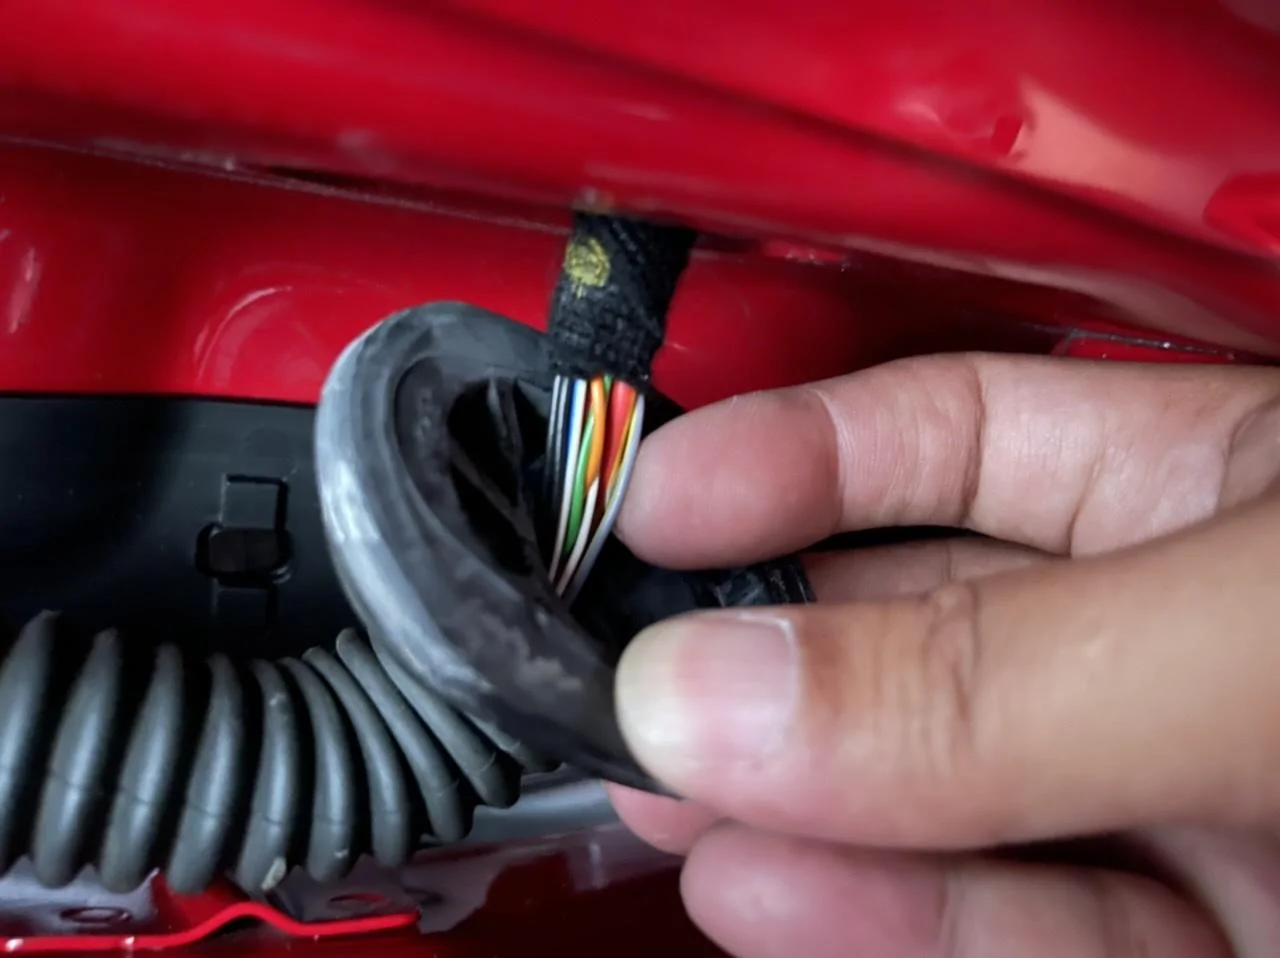
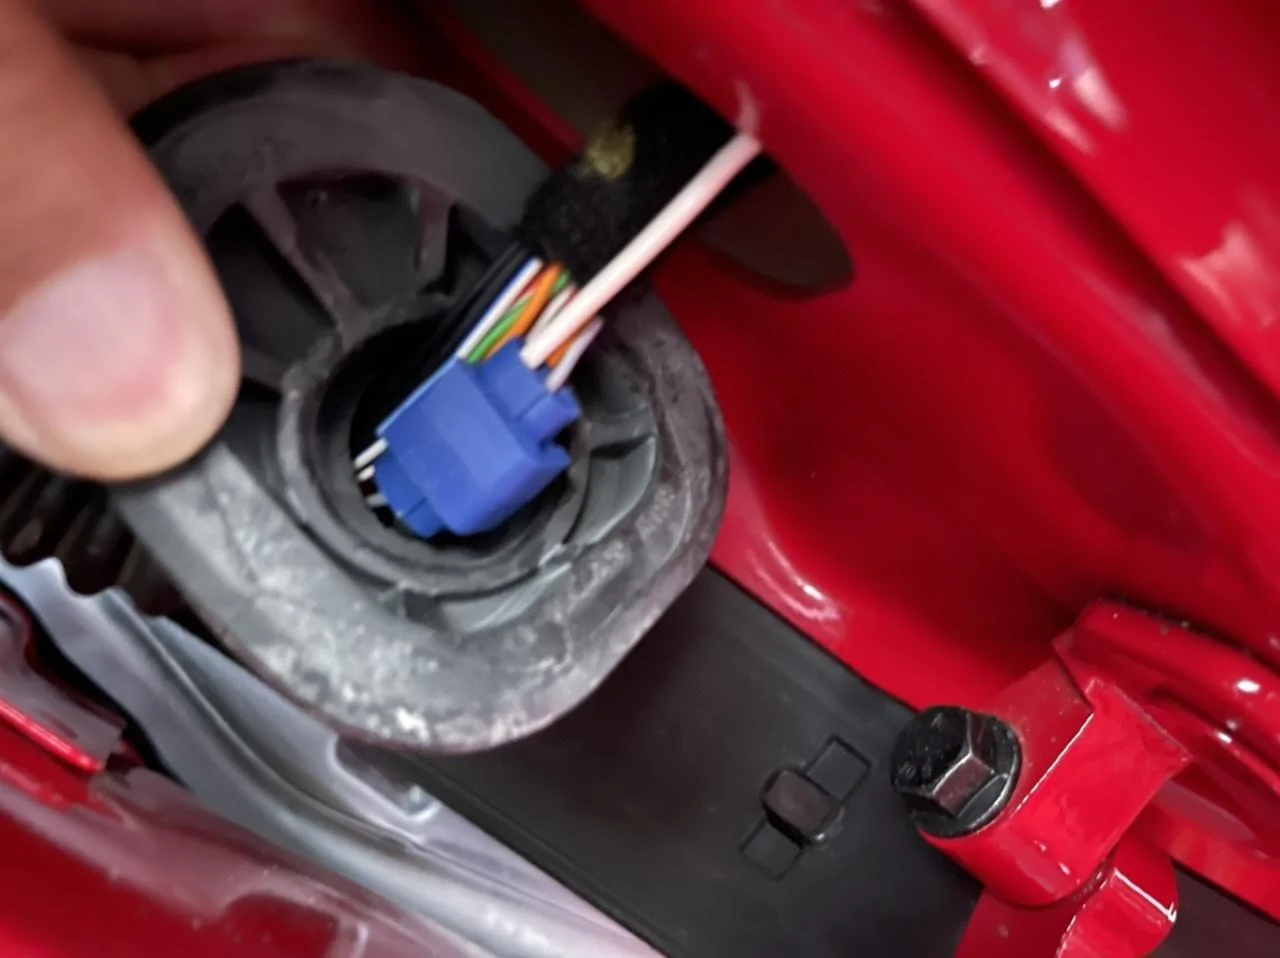
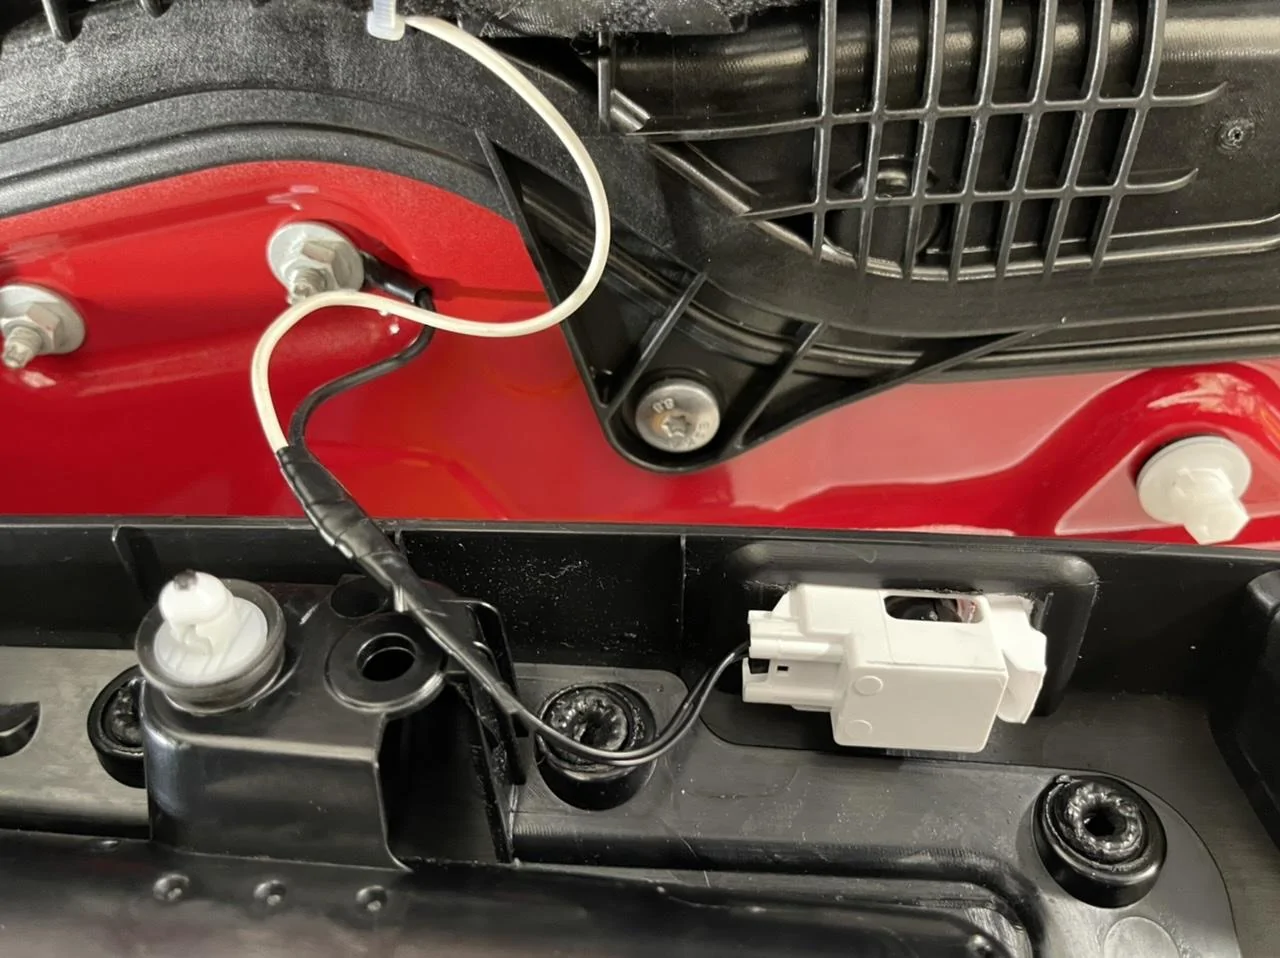
Next use the plastic pry tool to remove the rubber boot covering the wires in the door jam. Locate the GREY wire with the yellow stripe. It’s easy to find since it’s the only grey wire in the bunch. I used blue wire taps but I recommend you use the smaller gauge red ones because the gauge of the wires coming from the boot are really small and at first my blue wire taps didn’t make contact until I squeezed the metal tabs that cut into the wires closer together. Use your wire tap to tap this grey wire and then you’ll run the new wire through the opening for the boot and into the door. Pull it up through the opening and just make sure the wire won’t catch on the sliding window mechanisms. I used the grabber tool to grab the wire while I was fishing it through the opening and I also used it to push the wire down so it wouldn’t catch on anything.
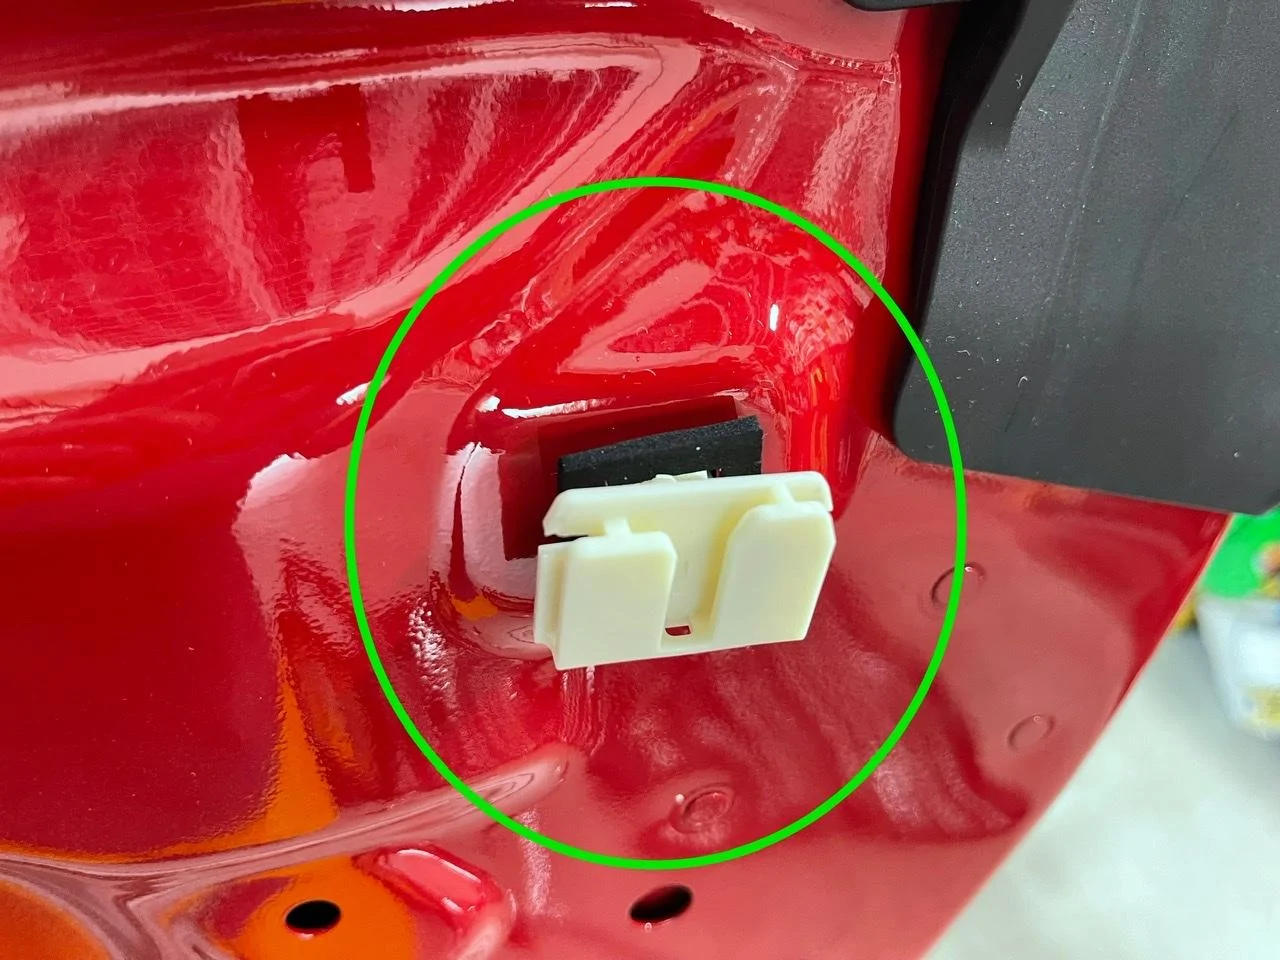
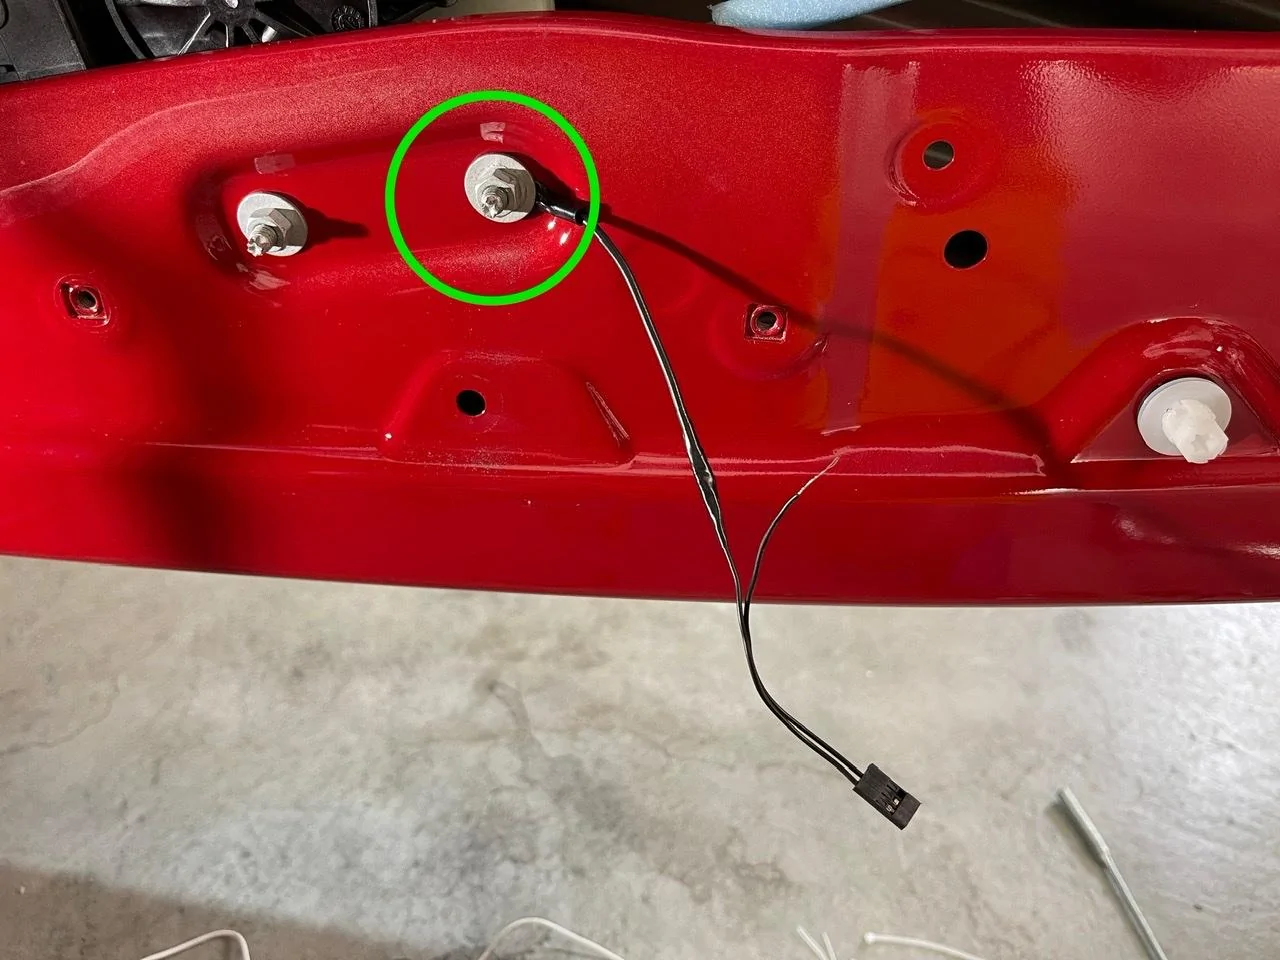
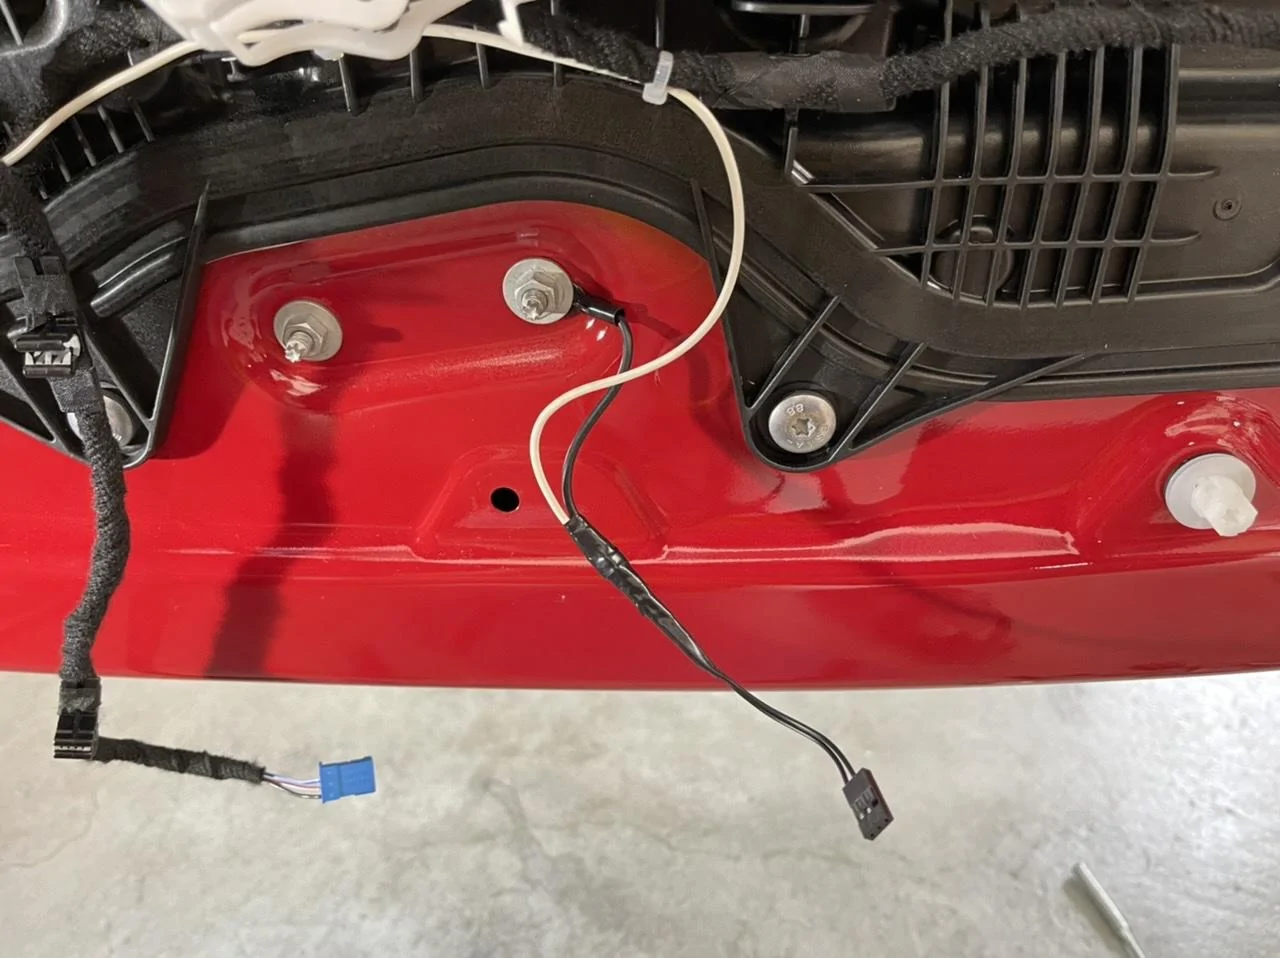
Next I used some zip ties to attach the wire along the wiring harness for a nice clean install. Use a ring terminal to ground the lights to the nut I circled in the pic.
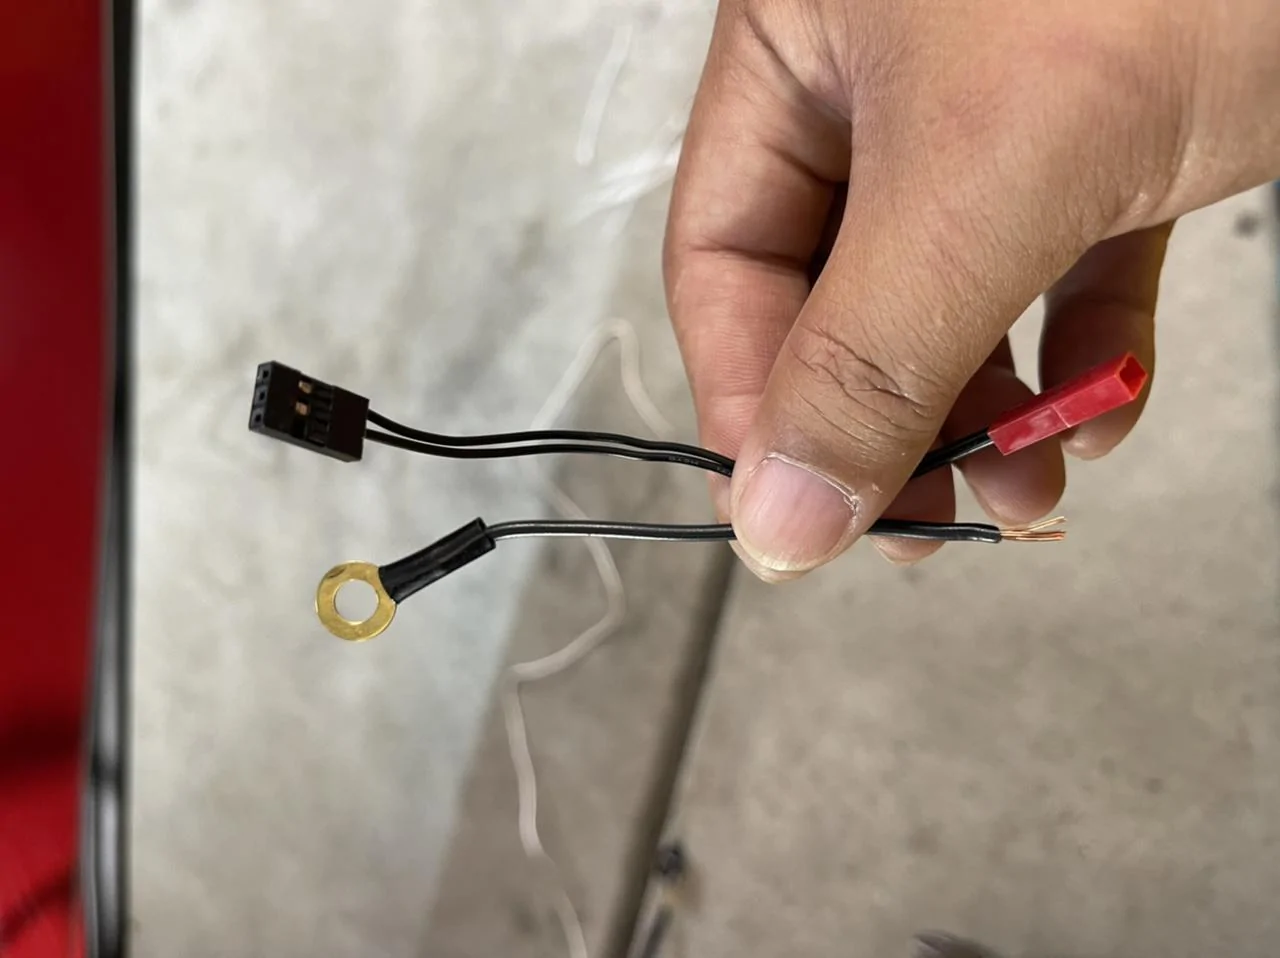
For my install I used these Futaba RC servo connectors that have the 2 pin connectors. You can find them on Amazon also and I have the link posted above with the lights.
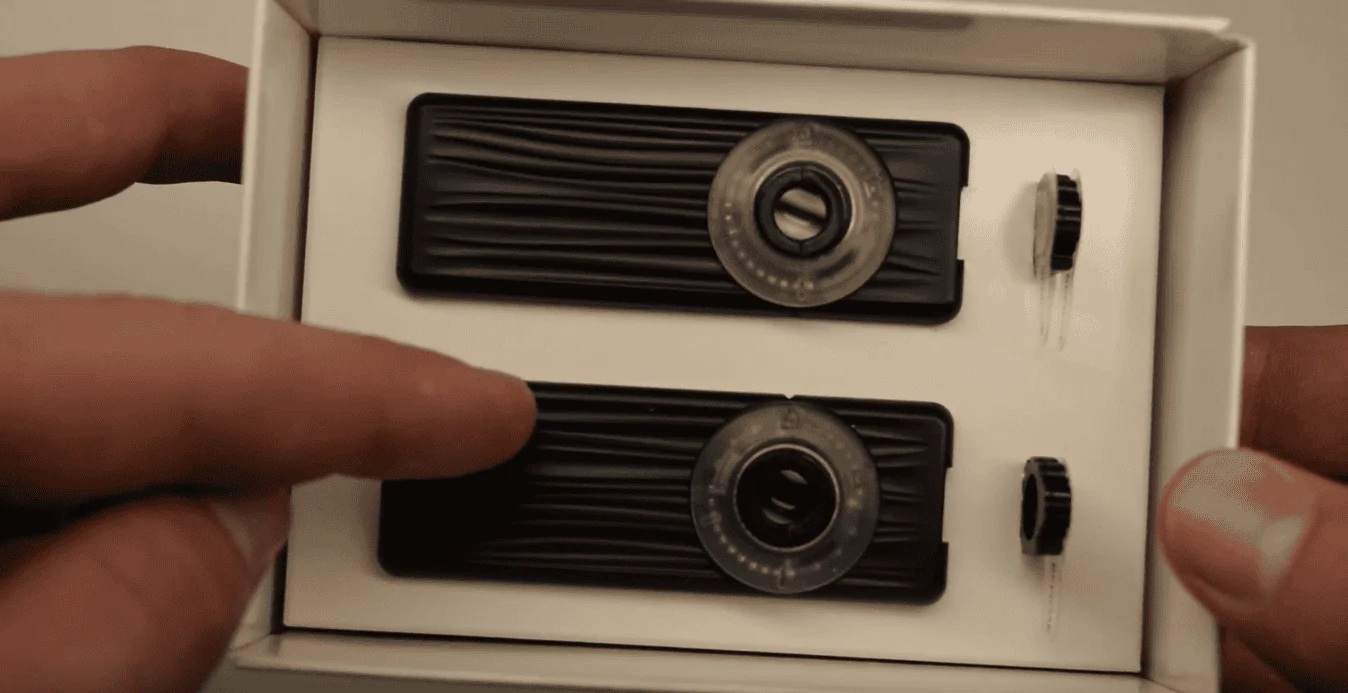
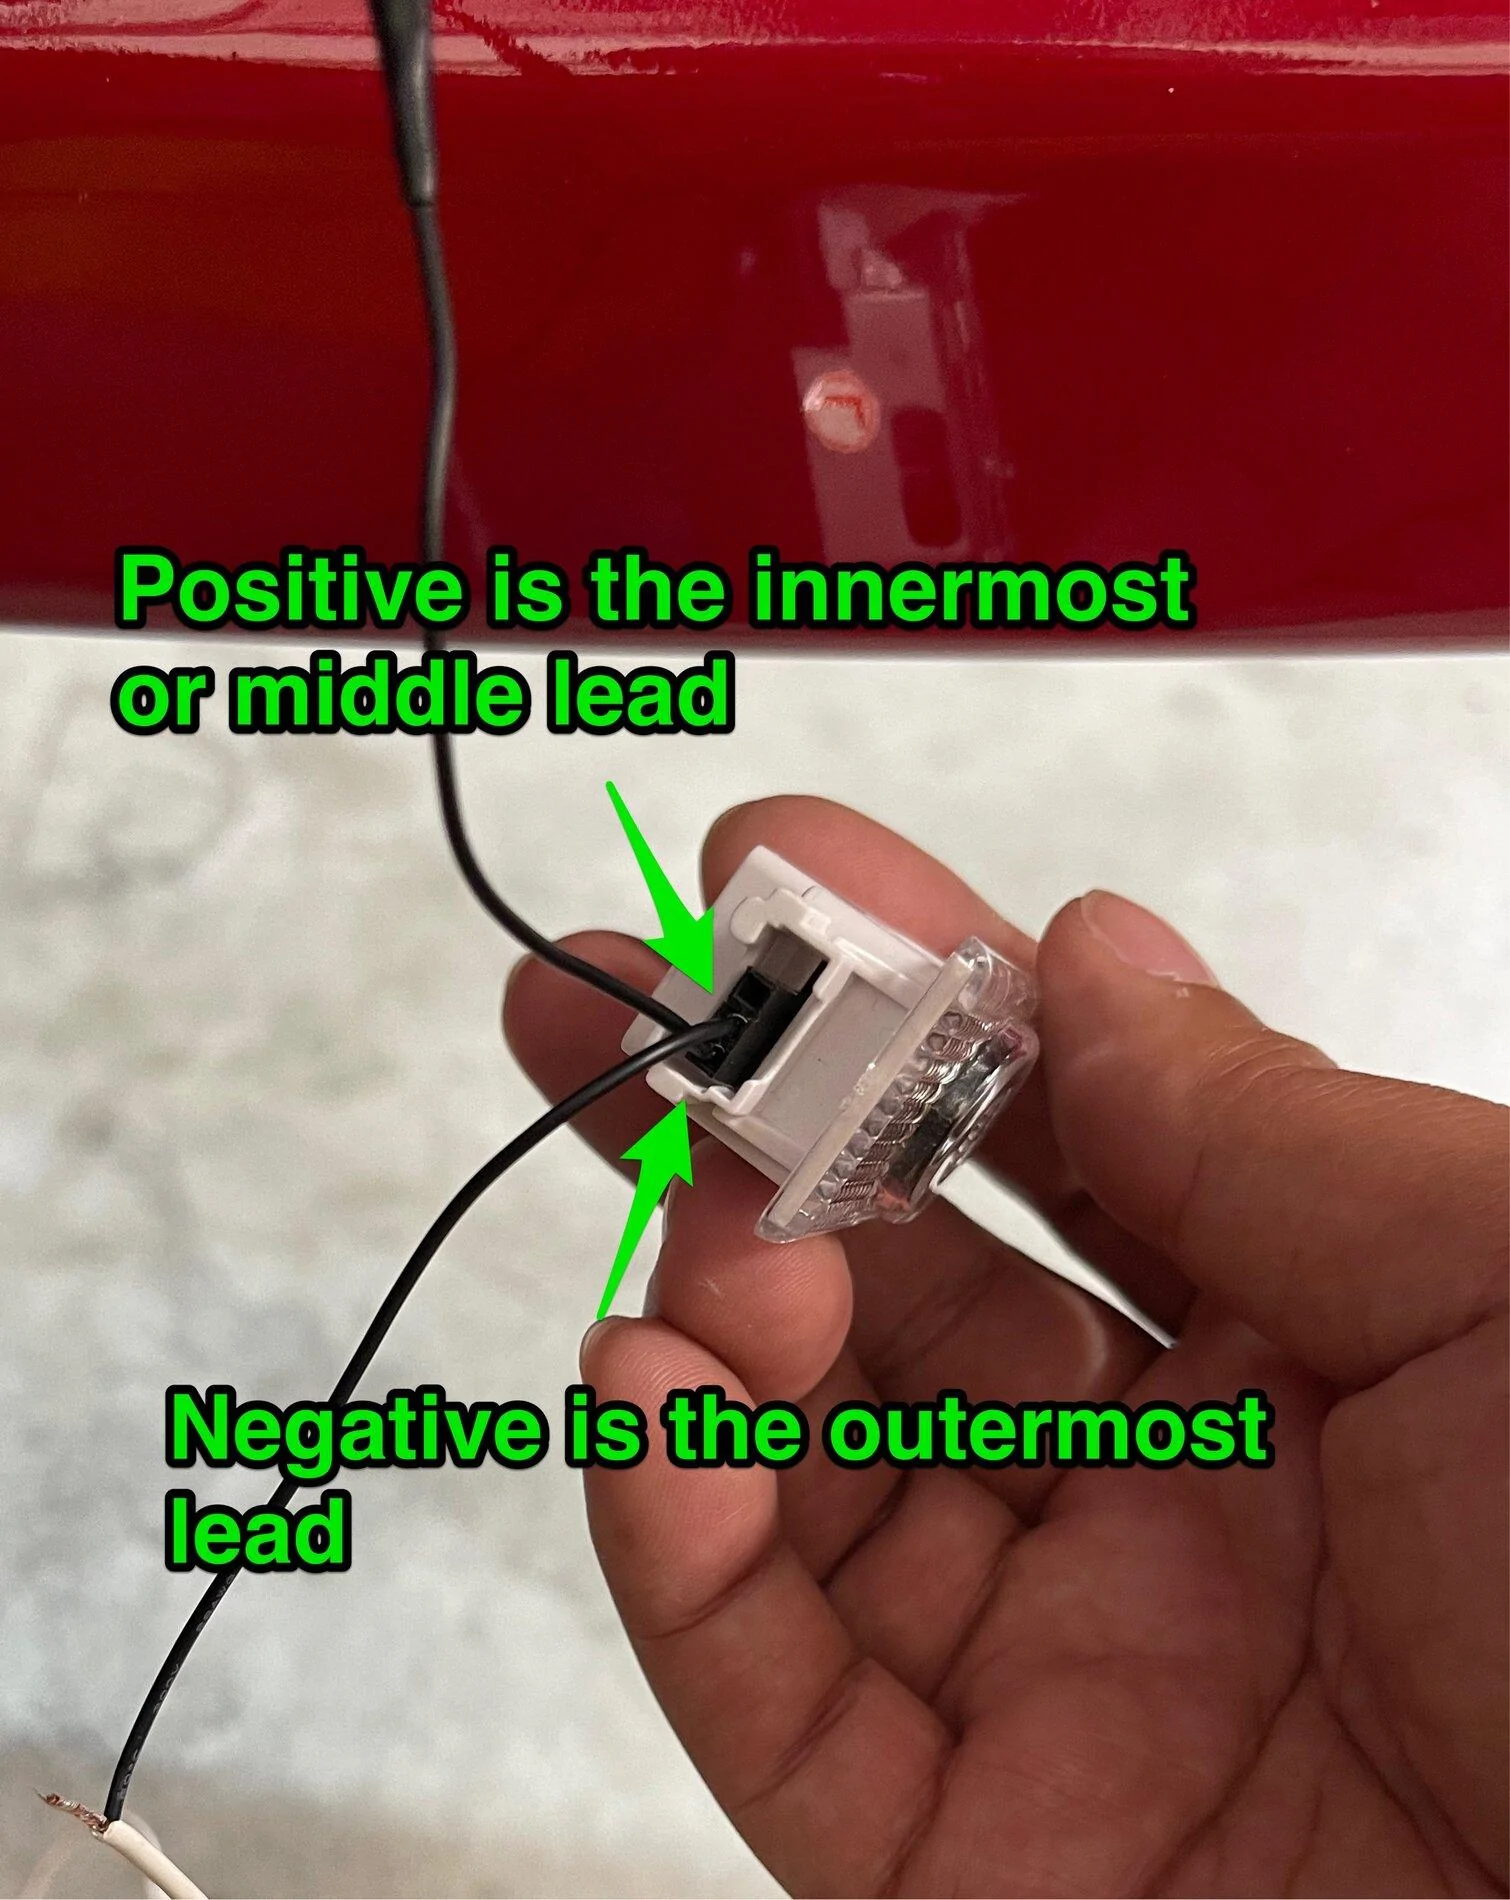
On the lights the POSITIVE connector is the one closest to the center of the light, then the outside lead is NEGATIVE.

Connect your positive and negative leads and TEST that the lights work by pressing your UNLOCK button on your remote. If it works then you’re golden! I just used electrical tape to secure my connections but you can use whatever you want.
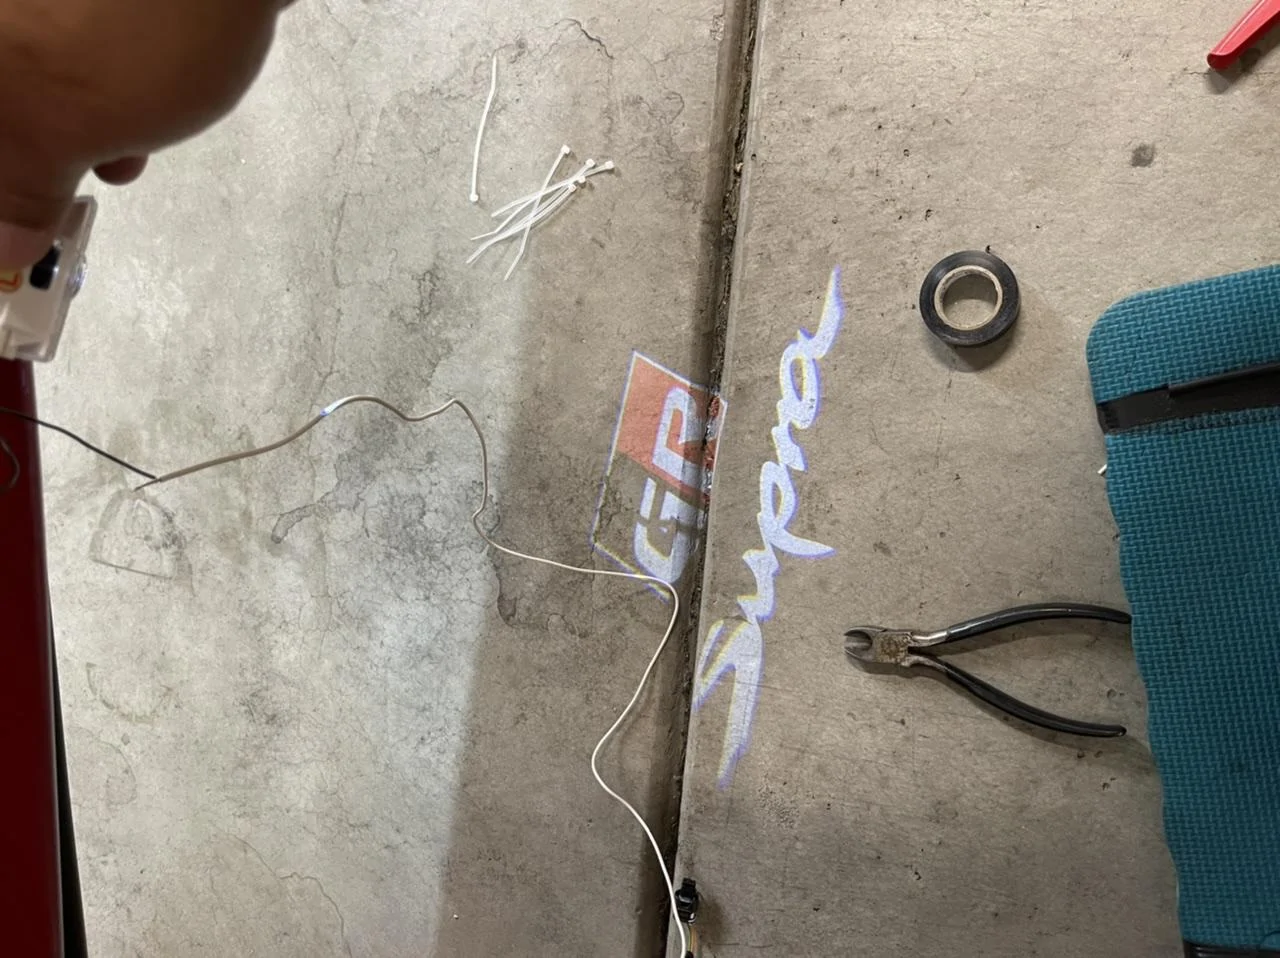
Here is what my finished harness looks like. I would recommend maybe making it longer than I did just so you have more length to play around with but mine worked just fine.
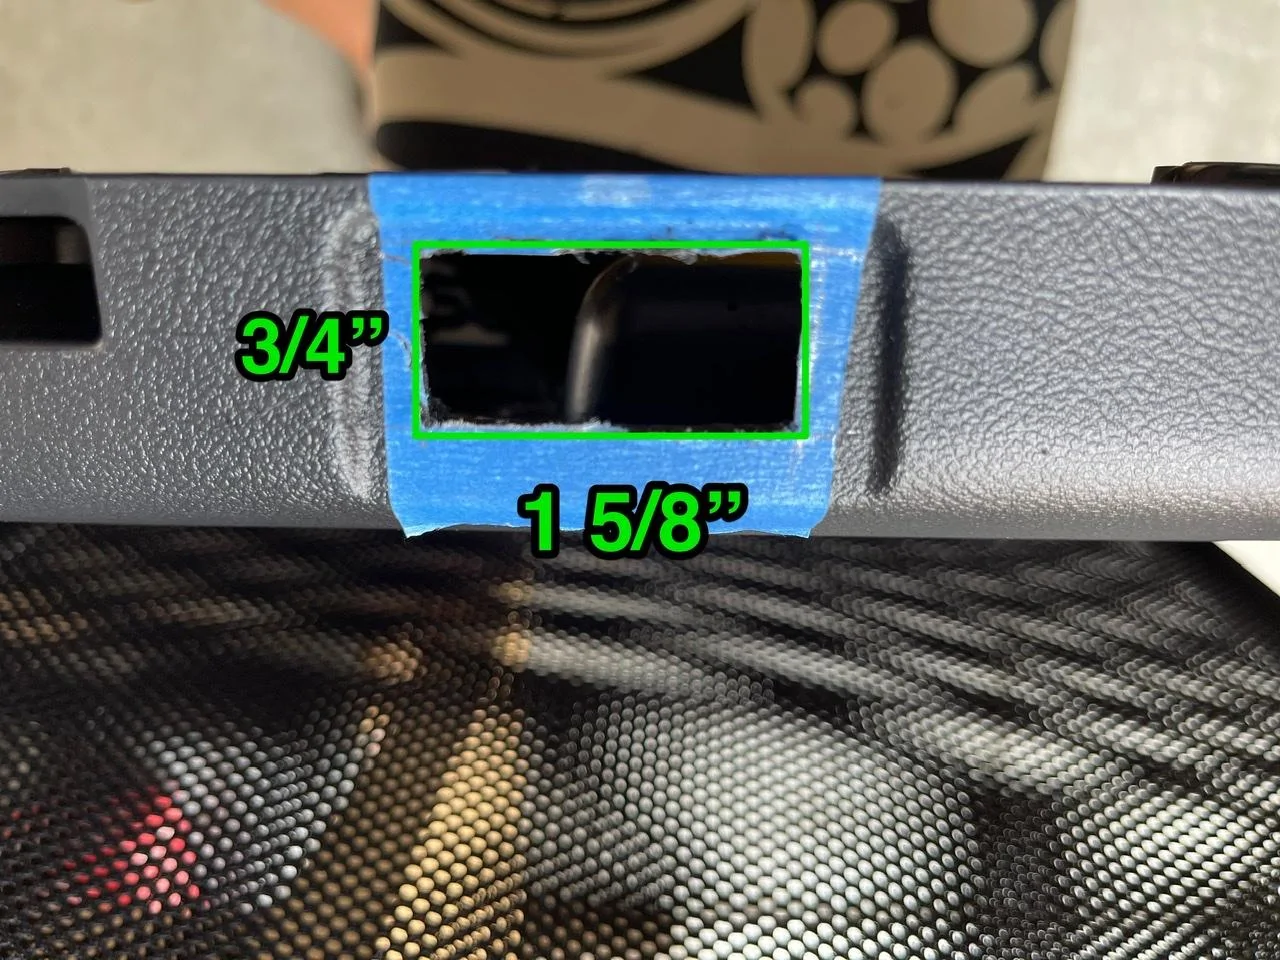
Next you need to cut the hole in the door panel to mount the light. The final size of the rectangular hole was about 1 5/8” x 3/4”. I HIGHLY RECOMMEND that you start with a slightly smaller hole just to make sure you don’t cut too big of a hole and then the light will be loose. I placed a piece of masking tape in the recessed area on the bottom edge of the door panel to make my measurements on and it also helps to protect the door while cutting with the Dremel tool.
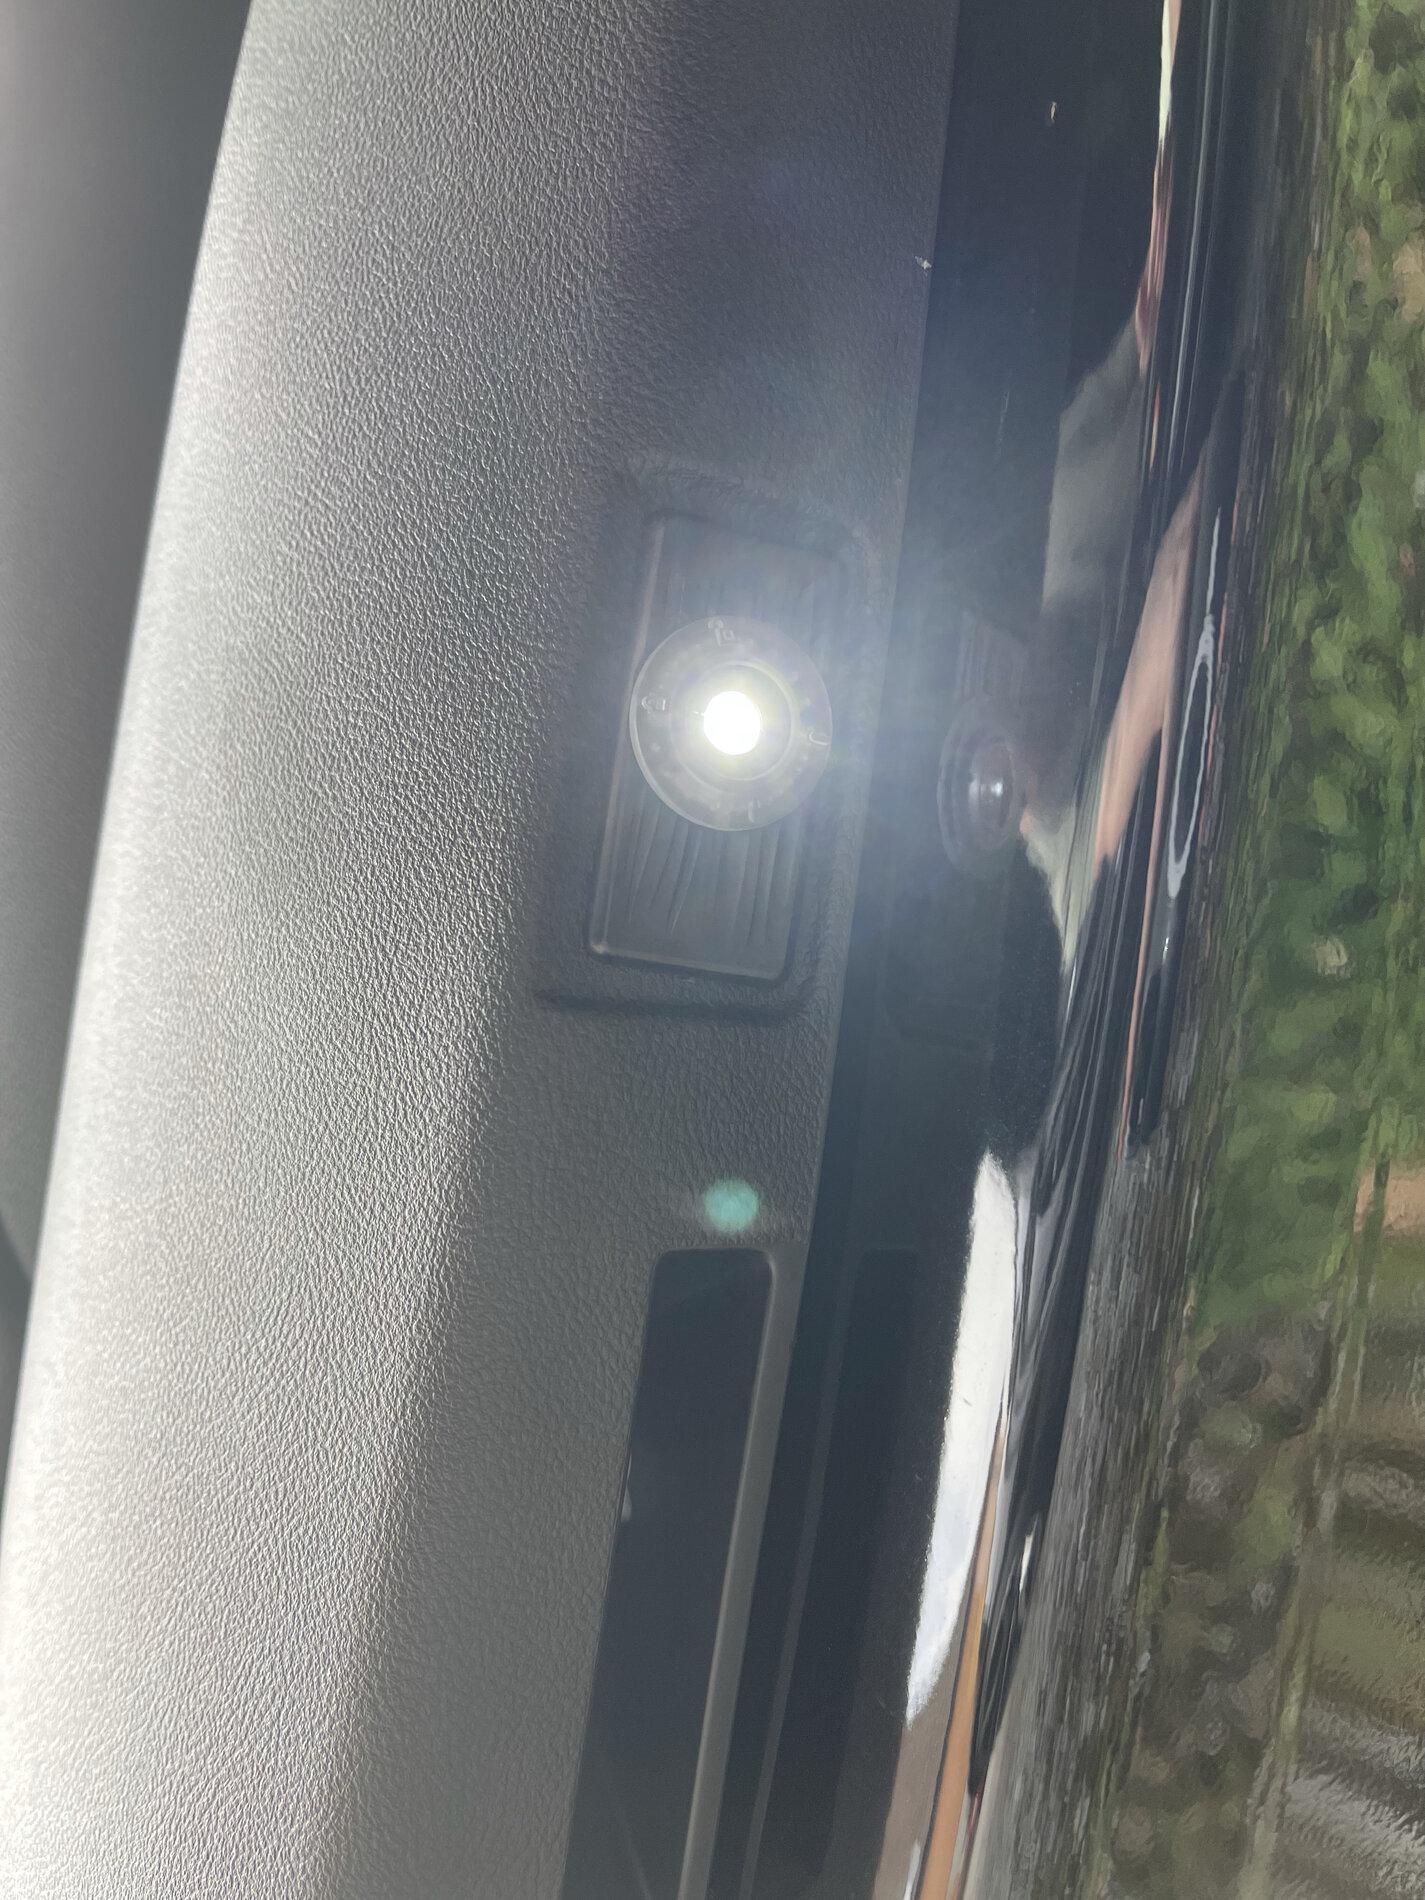
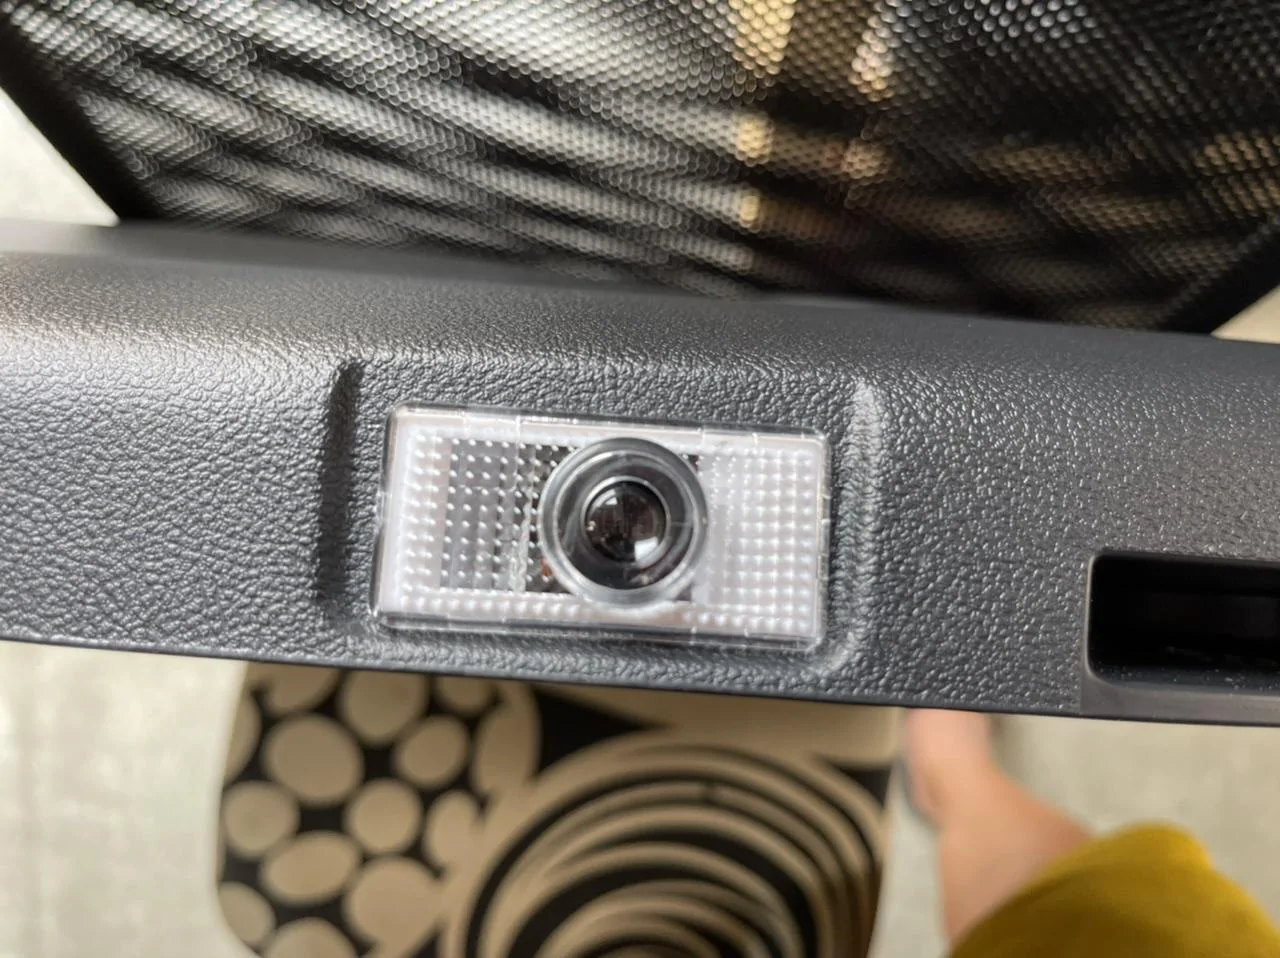
Once this is done and the light stays in place just make your connections and start putting it all back together. Also pay attention when you are testing the light to the orientation of the projected graphic on the ground so you mount it in the correct direction. The lights have a sticker on them designating which one is for the left or right door so pay attention to this when deciding how long to make your harness. Here’s how mine looked all in place with the harness hooked up.
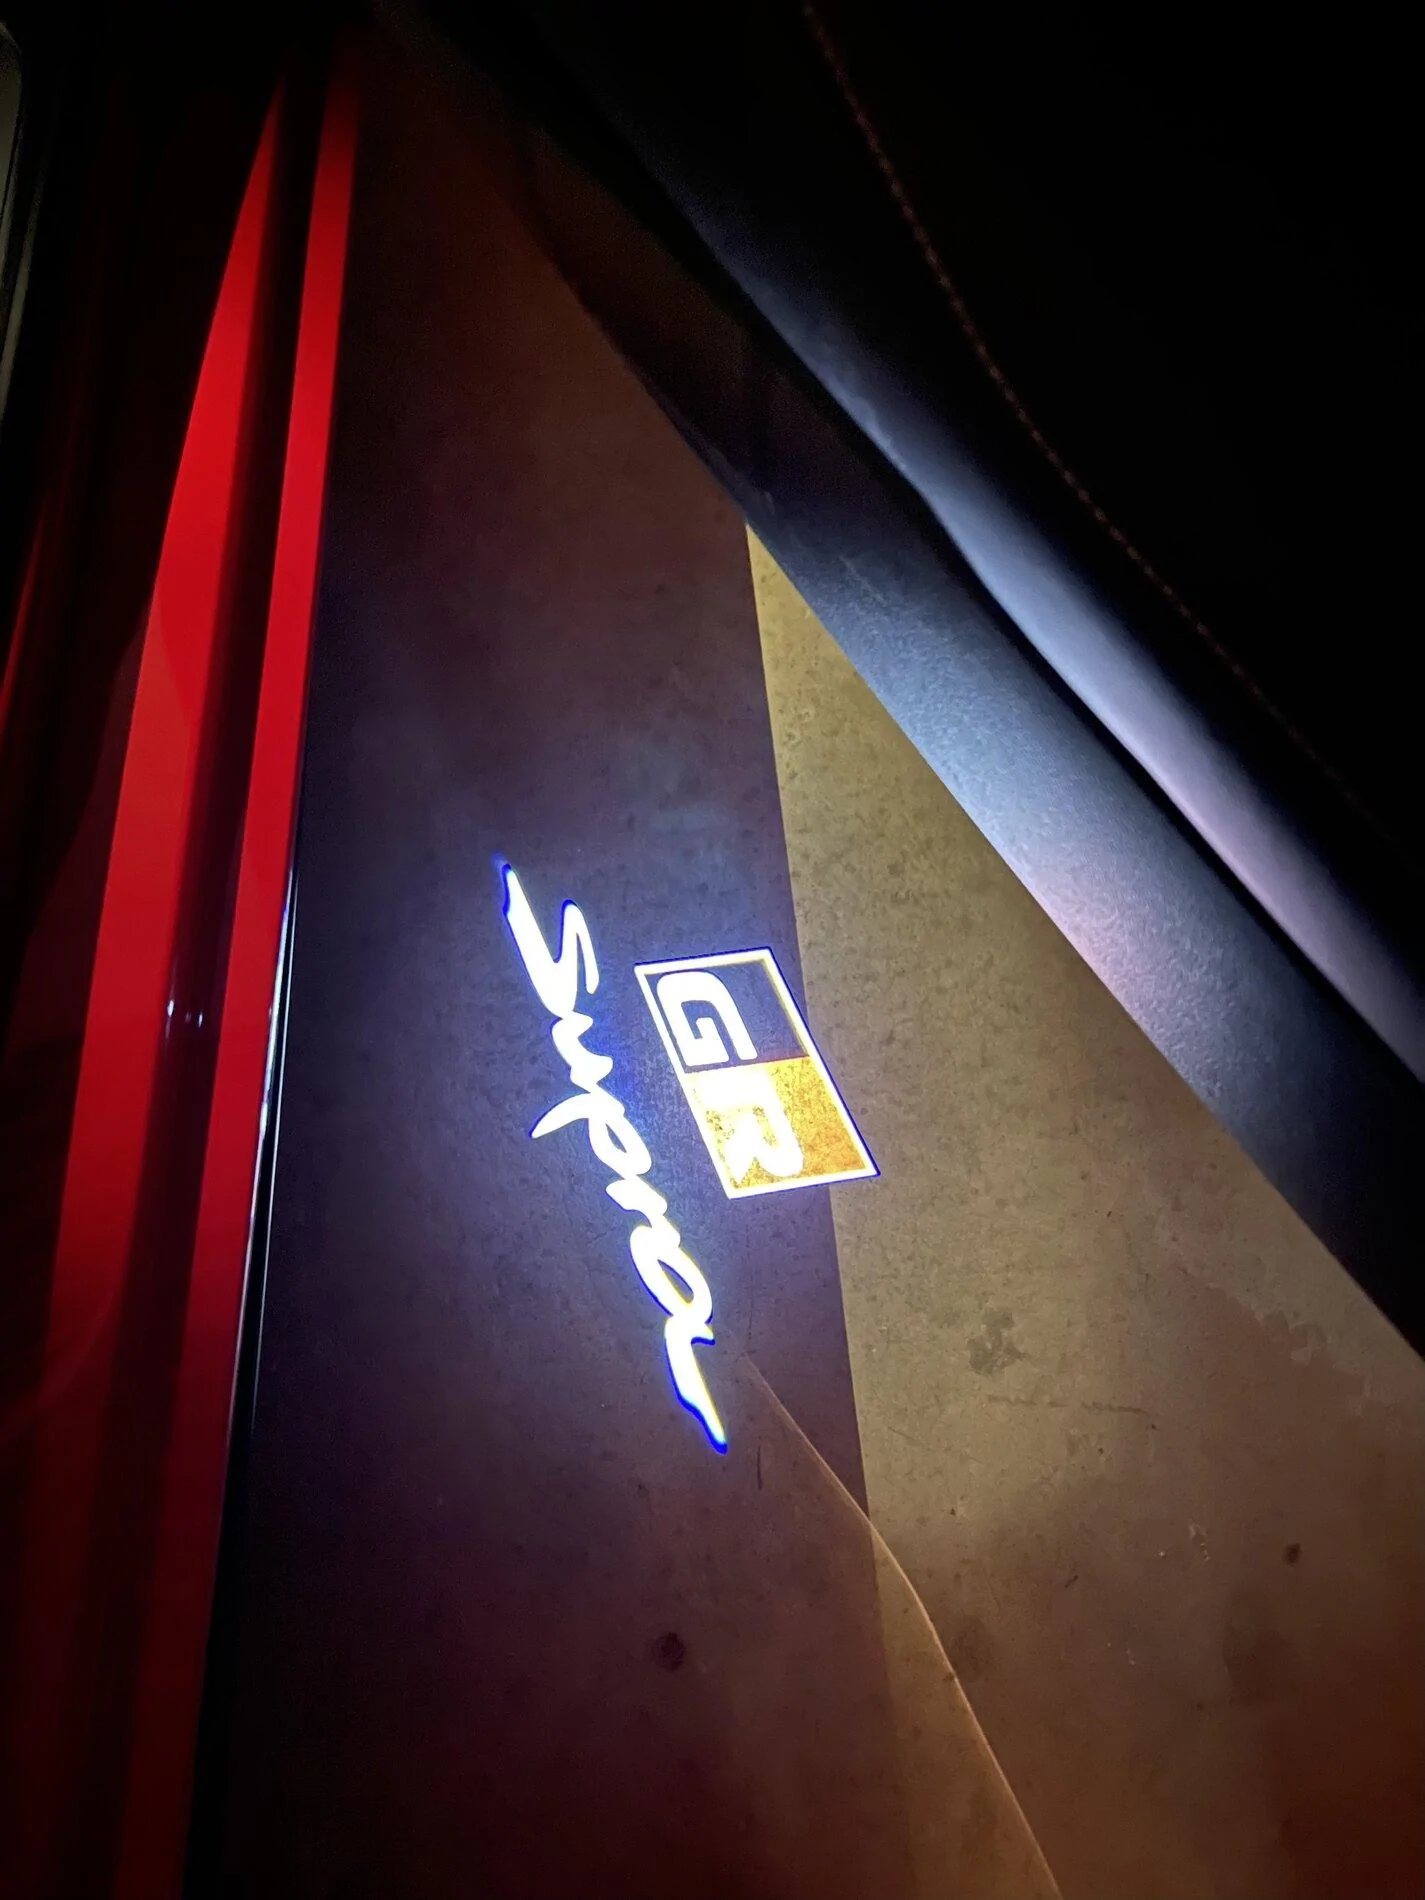
Here’s how it looks projecting in my dark garage. Looks pretty sweet to me!

Remember to TEST all your switches and the light before you completely button everything back up. I think this is a very cool mod and was definitely worth the time and effort and it’s pretty inexpensive as well! Good luck!
Edit: Im sure it’s understood, but I’m just putting a disclaimer that you do these mods at your own risk and I hold no responsibility if something goes wrong and you screw up your car. ? With that said, here’s what you need:
Car Door Lights Puddle lamp for Supra (supraGR) Fifth Generation (J29/DB; 2019-2021) https://www.amazon.com/dp/B08PYV6NQ...abc_TPTKYQE4Y1W8Z635APNK?_encoding=UTF8&psc=1
Futaba RC servo connectors:
10 PCS JST Female to JR Futaba Male Servo Connector Plug Adapter Cable 22AWG Silicone Wire for RC Lipo Battery https://www.amazon.com/dp/B07ZLX9ZRT/ref=cm_sw_r_cp_api_glt_fabc_8BW3MTJM2R8HT8NFH4QD
Tools you’ll need:
Ratchet w/10mm and 13mm sockets
T30 and T20 Torx bits
10mm Crescent wrench
Plastic door panel pry tool
Pliers
Wire stripper
Wire Cutters
Pick Tools
Electrical Tape
Wire taps - preferably the smaller red 22-18 gauge ones instead of the 18-14 gauge ones I used
Futaba RC servo connectors
Masking tape
Dremel with some cut off discs
A few feet of wire
Grab tool
First you’ll need to remove the door panel. There are videos on YouTube that show how to do this if you need a video. Remove the trim pieces using the pick tools that hide these 3 T20 torx screws.
Once those screws are are out, then use the 10mm crescent wrench to rotate the white hex nuts on the bottom edge of the door panel. If you apply outwards pressure on the door panel while you are rotating the hex you’ll feel it pop loose. Do this to both of the hexes on the bottom edge of the door. Next, slowly and carefully begin pulling the door panel off the door, starting at the bottom. Once the panel is free you might get hung up on the top corner near the door lock. There is a yellowish plastic clip that you’ll need to apply some UPWARDS force to the door panel in order to slide the door panel free from the clip, unless it already popped off while you were removing the door panel from the rest of the clips.
With the door panel free, remove the various plugs for the window switch, speakers, door locks, etc. Remove the connection for the door handle by simply prying it up and outwards.
Next use the plastic pry tool to remove the rubber boot covering the wires in the door jam. Locate the GREY wire with the yellow stripe. It’s easy to find since it’s the only grey wire in the bunch. I used blue wire taps but I recommend you use the smaller gauge red ones because the gauge of the wires coming from the boot are really small and at first my blue wire taps didn’t make contact until I squeezed the metal tabs that cut into the wires closer together. Use your wire tap to tap this grey wire and then you’ll run the new wire through the opening for the boot and into the door. Pull it up through the opening and just make sure the wire won’t catch on the sliding window mechanisms. I used the grabber tool to grab the wire while I was fishing it through the opening and I also used it to push the wire down so it wouldn’t catch on anything.
On the lights the POSITIVE connector is the one closest to the center of the light, then the outside lead is NEGATIVE.
Connect your positive and negative leads and TEST that the lights work by pressing your UNLOCK button on your remote. If it works then you’re golden! I just used electrical tape to secure my connections but you can use whatever you want.
Here is what my finished harness looks like. I would recommend maybe making it longer than I did just so you have more length to play around with but mine worked just fine.
Next you need to cut the hole in the door panel to mount the light. The final size of the rectangular hole was about 1 5/8” x 3/4”. I HIGHLY RECOMMEND that you start with a slightly smaller hole just to make sure you don’t cut too big of a hole and then the light will be loose. I placed a piece of masking tape in the recessed area on the bottom edge of the door panel to make my measurements on and it also helps to protect the door while cutting with the Dremel tool.
Here’s how it looks projecting in my dark garage. Looks pretty sweet to me!

Sponsored
Last edited:
")