a90.faz
Well-Known Member
- Thread starter
- #1
Hello everyone! This is a follow up to my post about SSH access on the supra (here).
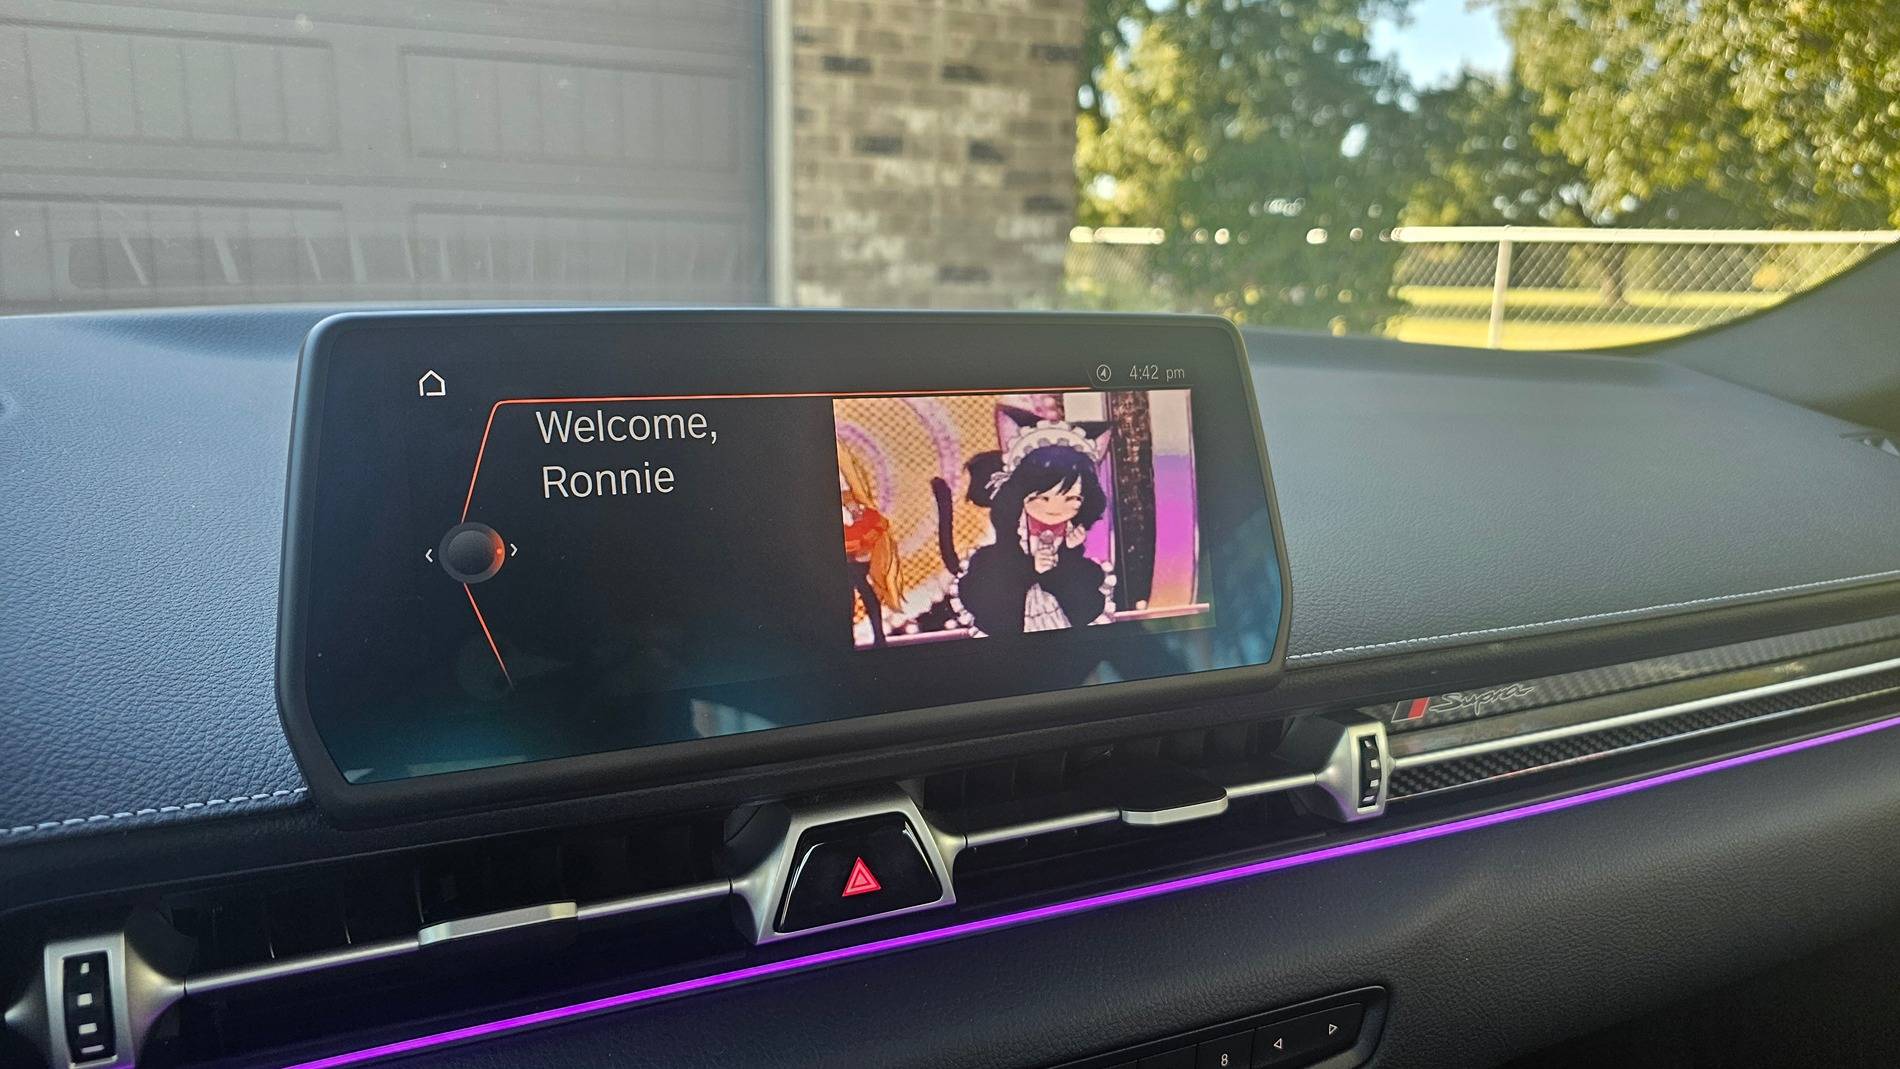
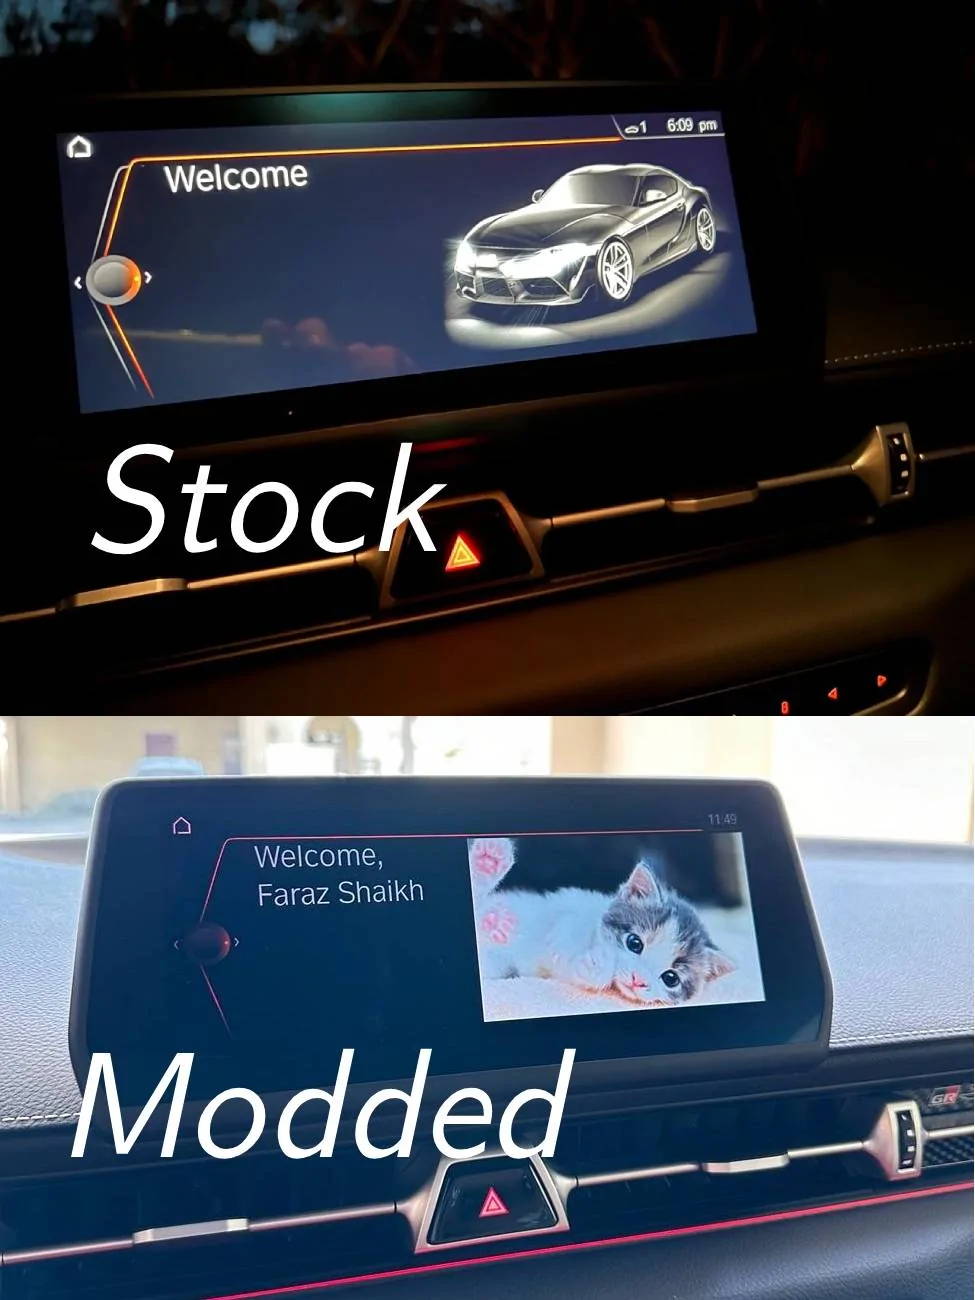
I was successfully able to swap the welcome screen black Supra image for a custom image (kitty here, image below). This is a guide on how to do the same. The method in this guide can be applied to any UI asset in iDrive. This way you can in theory fully customize the UI the way you want it.
My promary goal for this and the future is to swap out all the default black Supra UI to match my current build.
Huge thanks and shoutout to @nanaisu for the guidance and assistance with this project. He is working on some very cool stuff too like running custom code on the Supra's headunit.
WARNINGS:
Requirments

I was successfully able to swap the welcome screen black Supra image for a custom image (kitty here, image below). This is a guide on how to do the same. The method in this guide can be applied to any UI asset in iDrive. This way you can in theory fully customize the UI the way you want it.
My promary goal for this and the future is to swap out all the default black Supra UI to match my current build.
Huge thanks and shoutout to @nanaisu for the guidance and assistance with this project. He is working on some very cool stuff too like running custom code on the Supra's headunit.
WARNINGS:
- Risk of bricking your headunit is real.
- You should have basic technical knowlage about Unix filesystem and the command line to make use of this. DO NOT RUN ANY COMMANDS YOU DONT KNOW. YOU CAN AND WILL END UP BRICKING YOUR HEADUNIT.
- Make sure to back up your file system if you intend to muck around in there. If you delete/replace files, there is no "undo".
- I have only tried this method with the welcome image. I am currnetly unsure if it is OK to swap any other assets. Probably is, but I would'nt be surprised if they implimented some check to discourage this.
Requirments
- Obtain SSH access to the Supra's headunit (Guide here)
- You should do this process with the car on or in diagnostic mode (tripple press ignition without brake)
- Insert a USB stick
- Reformat to Fat32
- Create a blank text new file with a unique filename. Henceforth refered to as <filename>.txt
- We will search for this file to find the path to the USB on the car
- Eject the stick.
- Active SSH and log in as root
- Navigate to the root directory
- Command:
cd /
- Command:
- Insert a Fat32 formatted USB drive into the USB slot.
- Find the path to your USB drive. Henceforth refered to as <usb_path>
- Command
find / -name <filename>.txt - The path will be the one starting with
/net/hu-omap/mnt/. Mine was/net/hu-omap/mnt/umass01200t12/but it might not be the same. Let me know if its the same for you
- Command
- Copy over existing image to your USB
- Command
cp /net/hu-omap/fs/sda0/opt/hmi/ID5/data/ro/j29/id6l/widgetasset/welcome/home.png <usb_path>/home.png
- Command
- Remove the USB stick
- Insert the USB stick
- Open up the image in Photoshop or Photopea
- Modify the image however you want
- Export with the same dimensions as the source file and with metadata included.
- Save this as home_new.png on the USB stick
- Eject the USB
- Plug in the USB stick
- If you disconnected from SSH...
- Reconnect and log in as root
- Navigate to the root directory
- Command:
cd /
- Command:
- Remount the filesystem as read/write
- Command:
mount -o remount rw /net/hu-omap/fs/sda0
- Command:
- Copy the new image to the car
- Command:
cp <usb_path>/home_new.png /net/hu-omap/fs/sda0/opt/hmi/ID5/data/ro/j29/id6l/widgetasset/welcome/home_new.png
- Command:
- Make sure the new image is there
- Command:
ls /net/hu-omap/fs/sda0/opt/hmi/ID5/data/ro/j29/id6l/widgetasset/welcome/ - You should see the home_new.png listed in the console
- Command:
- Rename old image as backup
- Command:
Code:mv /net/hu-omap/fs/sda0/opt/hmi/ID5/data/ro/j29/id6l/widgetasset/welcome/home.png /net/hu-omap/fs/sda0/opt/hmi/ID5/data/ro/j29/id6l/widgetasset/welcome/home_old.png
- Command:
- Rename new image to replce original one
- Command:
Code:mv /net/hu-omap/fs/sda0/opt/hmi/ID5/data/ro/j29/id6l/widgetasset/welcome/home_new.png /net/hu-omap/fs/sda0/opt/hmi/ID5/data/ro/j29/id6l/widgetasset/welcome/home.png
- Command:
- Make sure the new image is there
- Command:
ls /net/hu-omap/fs/sda0/opt/hmi/ID5/data/ro/j29/id6l/widgetasset/welcome/ - You should see the home.png listed in the console along with the _old and _new varients.
- Command:
- Done!
- Disconnect from SSH (ctrl+d) in the Putty console.
- Remove the OBD cable and USB
- Restart your headunit
- Turn off the car or diagnostic mode
- Hold down the volume knob for 30s.
- You might see the screen go black but keep holding for 30s
- Close thedoor and lock the car.
- Wait for the screen to go black and car to turn off
- Unlock the car
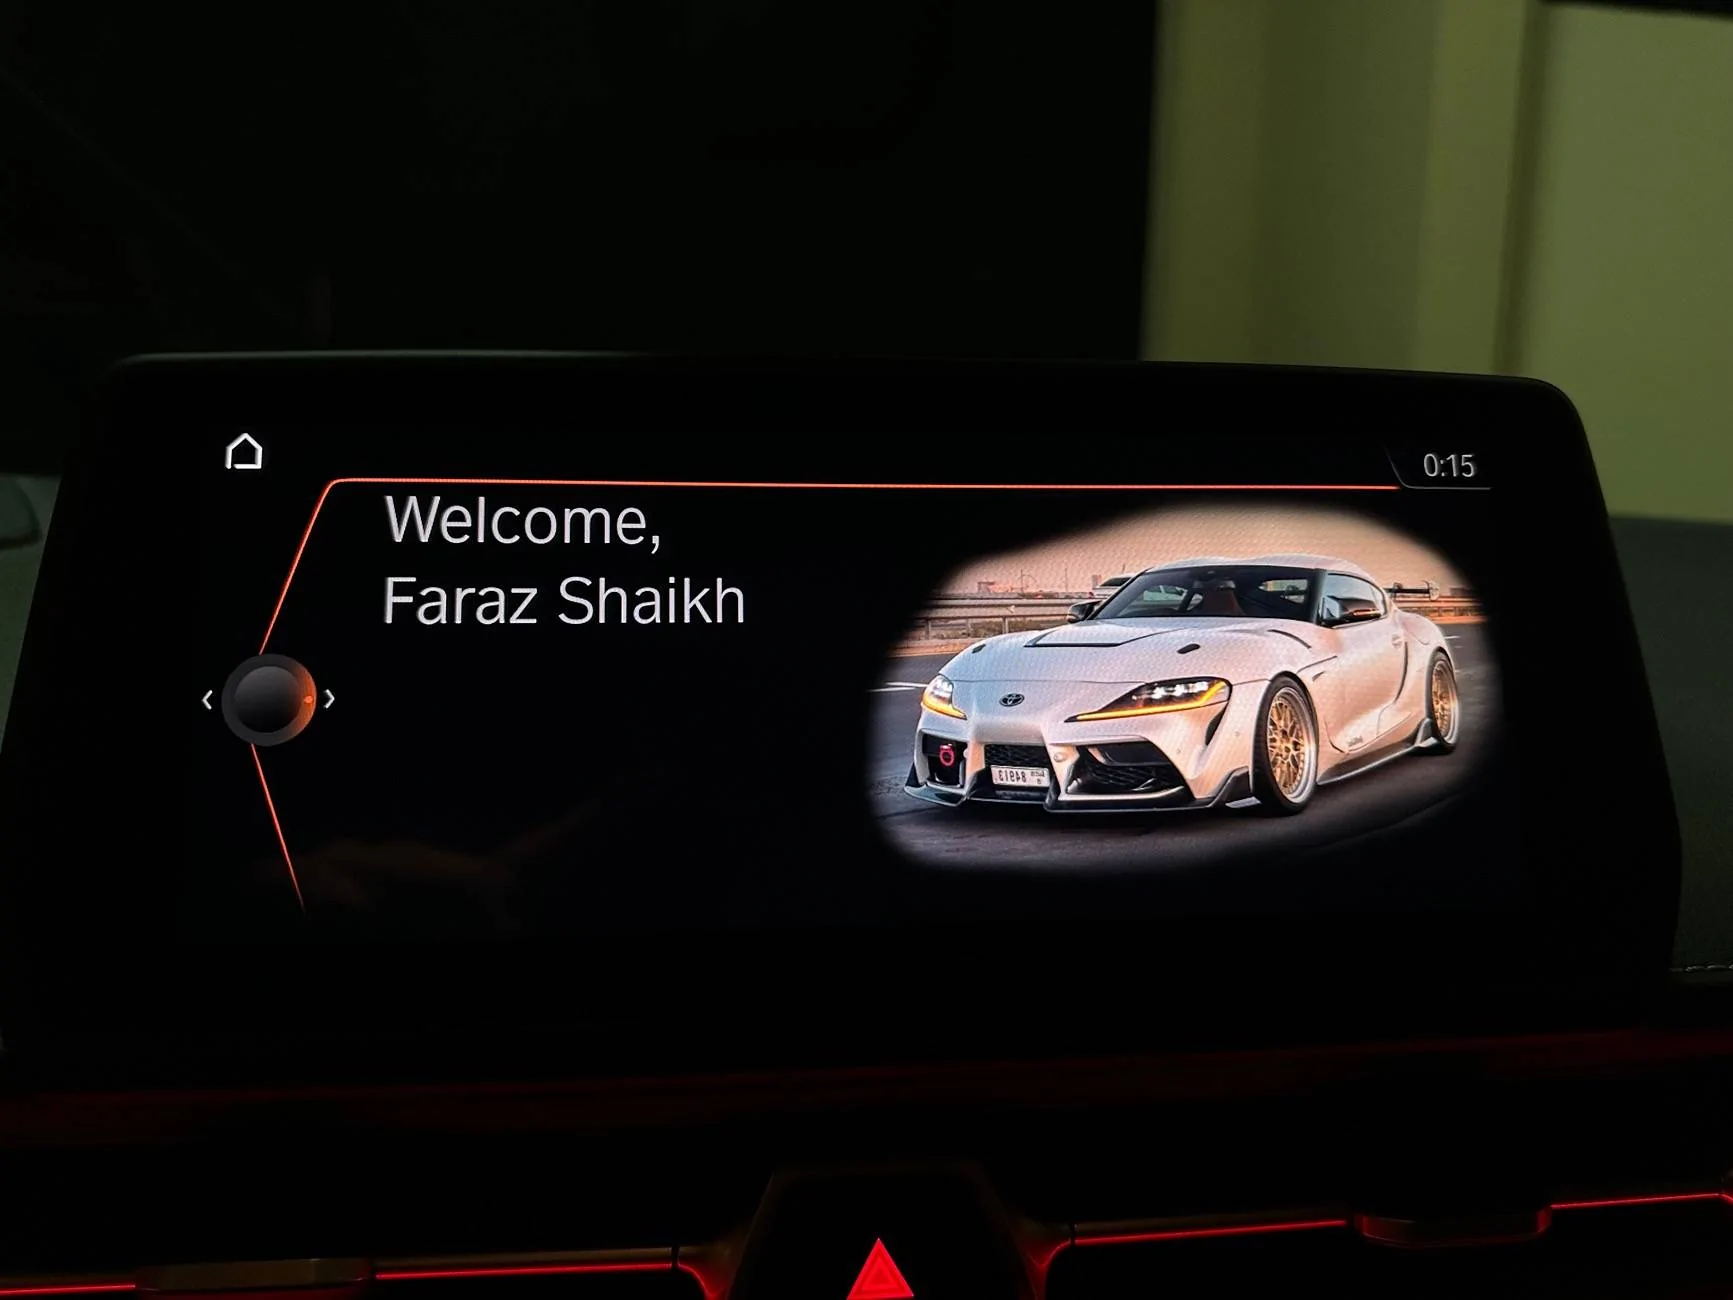
- You should see the new Welcome screen image!
Sponsored