i3igpete
Well-Known Member
- Thread starter
- #1
supplemental tool notes:
-10mm drill bit (dont screw around with a step bit)
-14mm drill bit (ditto, I'll explain later)
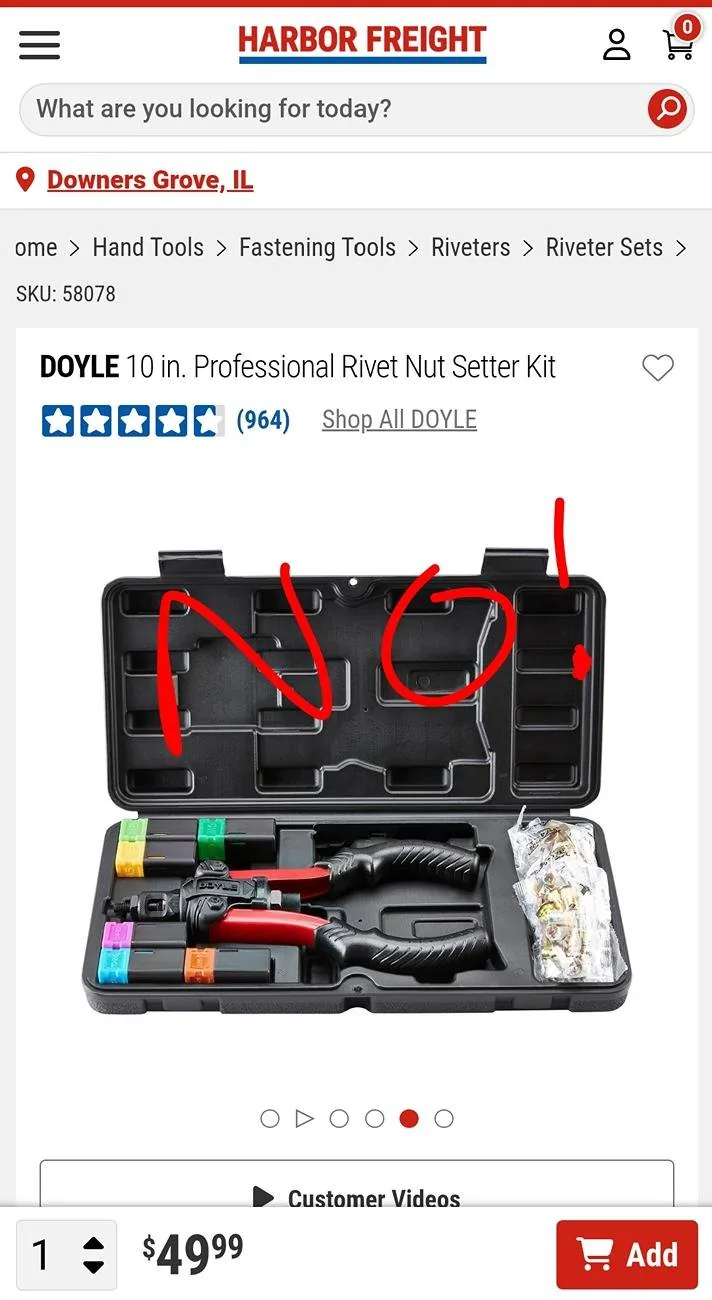
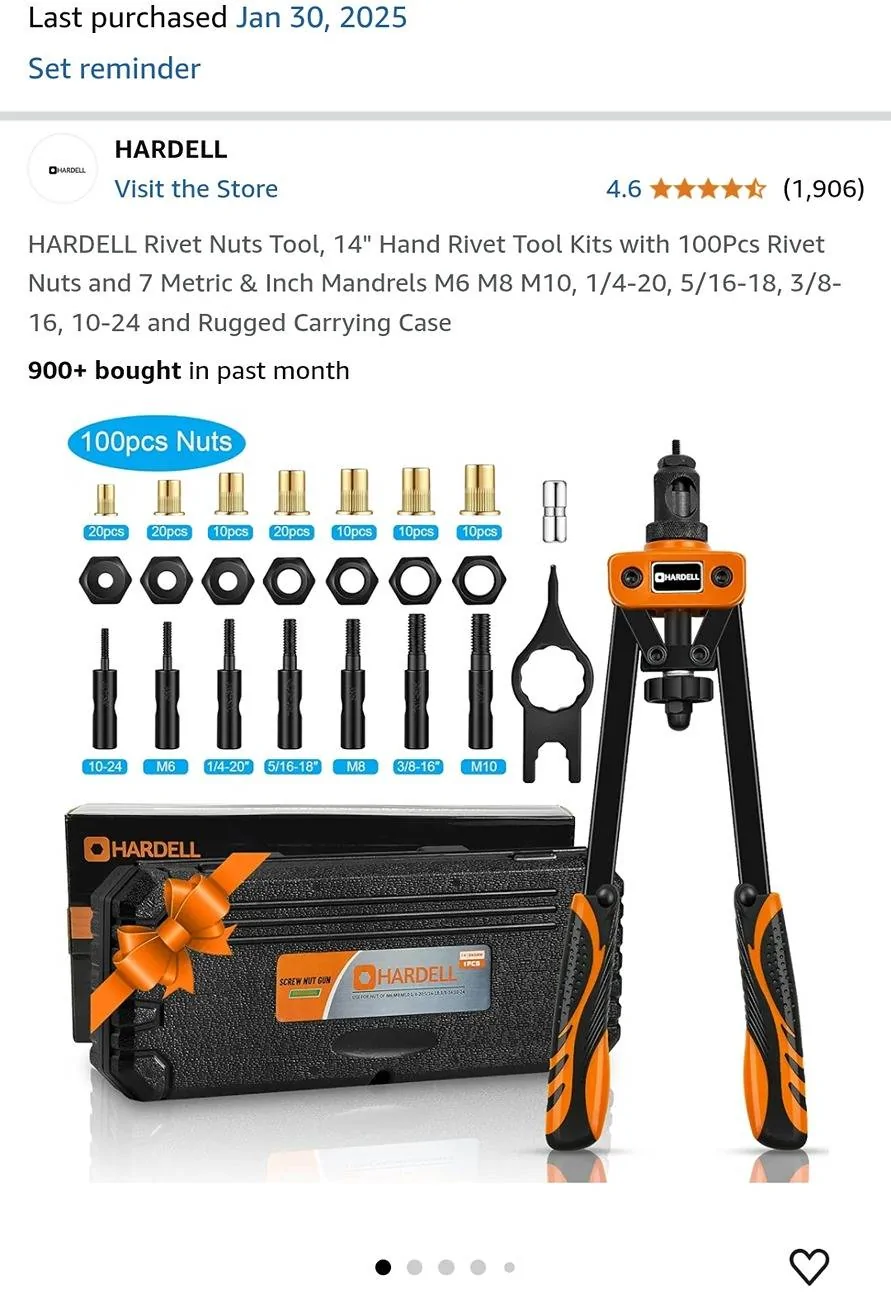
-harbor freight rivnut/nutsert tool doesnt have the required m10 head. Gotta get one from amazon. this is the one I bought.


Notes based on step (see pdf)
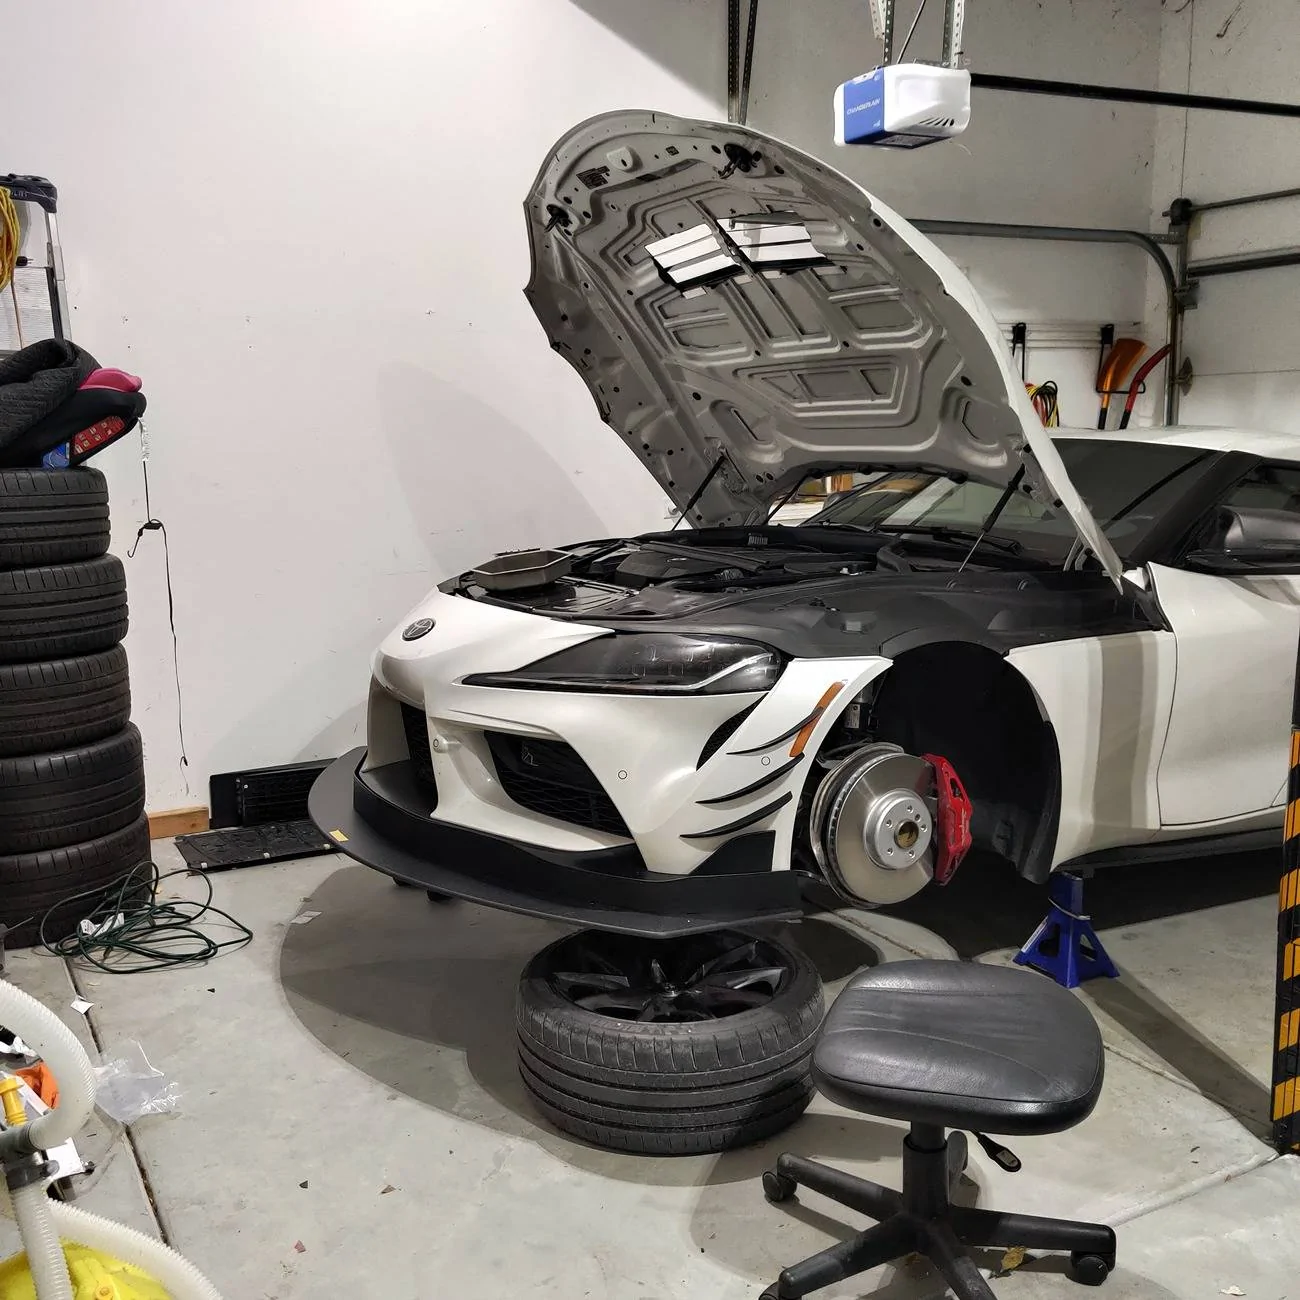
1. you will toss all 3 undertray plastics. no need to set the bolts aside. watch the verus youtube video for bumper removal.
2. the grill shroud is gonna suck to remove. remove these tabs by inserting flathead and twisting. you may snap some tabs. i got lucky on removal but not on re-install.

4. friendship ended with dremels. now oscillating multi-tool is my best friend. make sure you have a narrow plunger and a half-circle and you can do all the cuts on this install without a tiny disc shattering and flying off at your face.
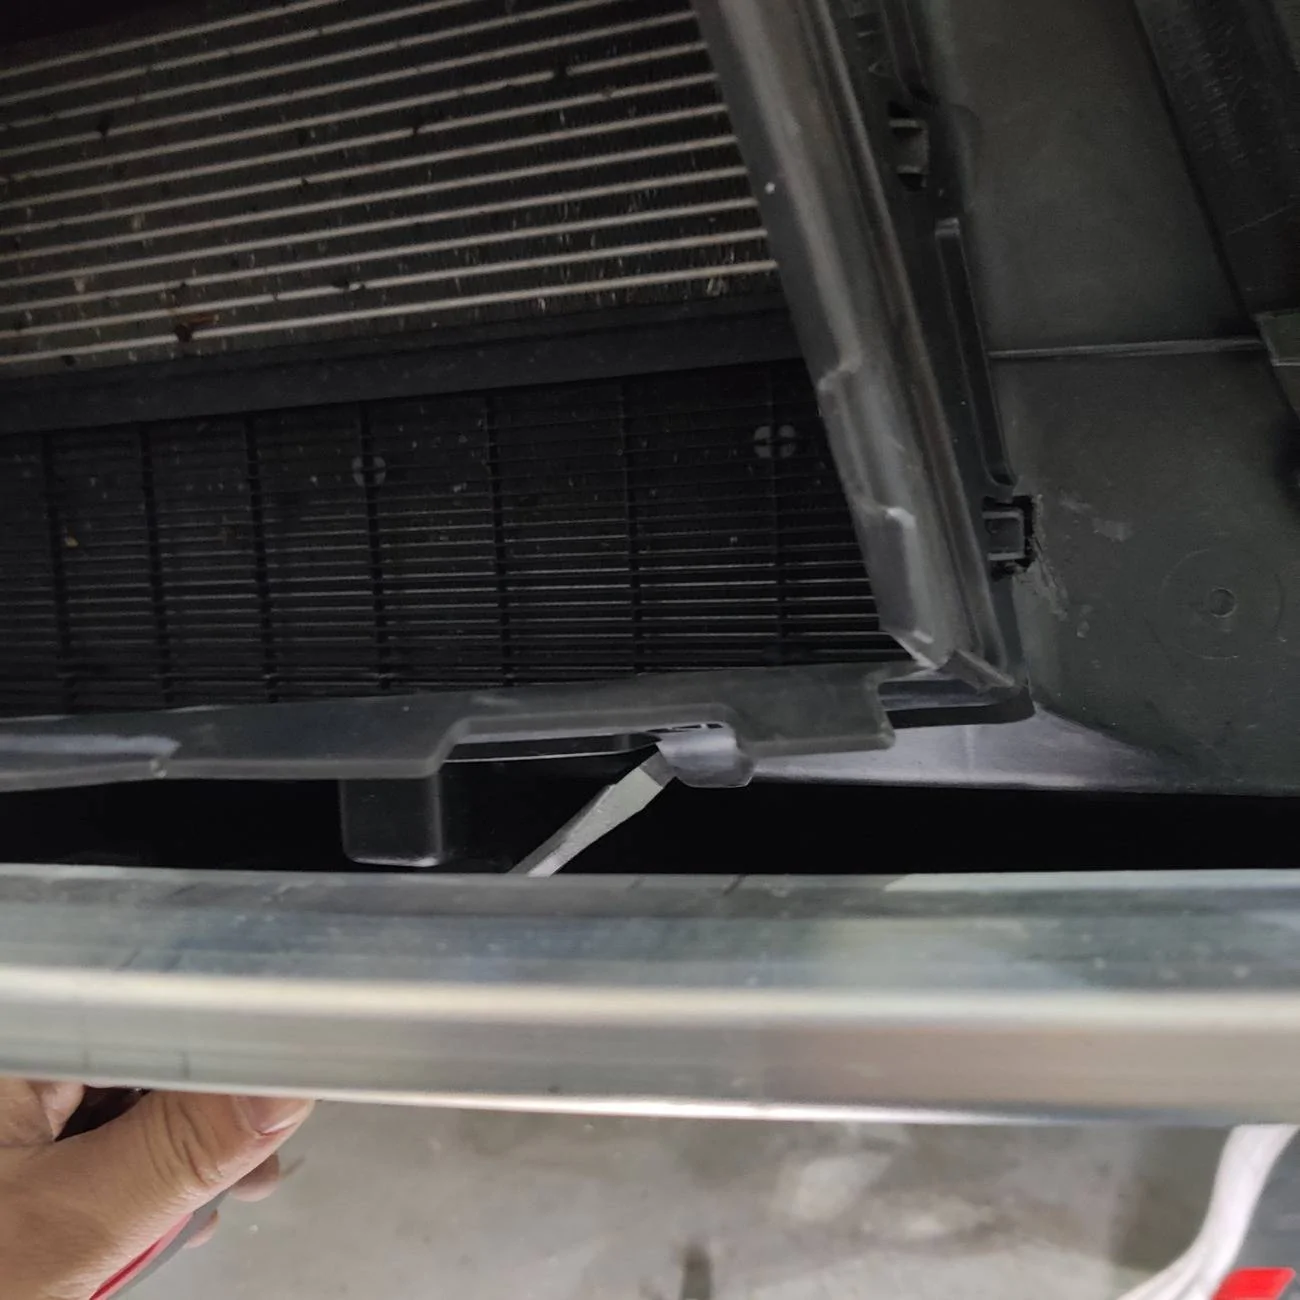
10. brake duct tabs suck. you will need to shove your hand into the duct and press outward.
also be aware of a coolant hose clip on the passenger side.
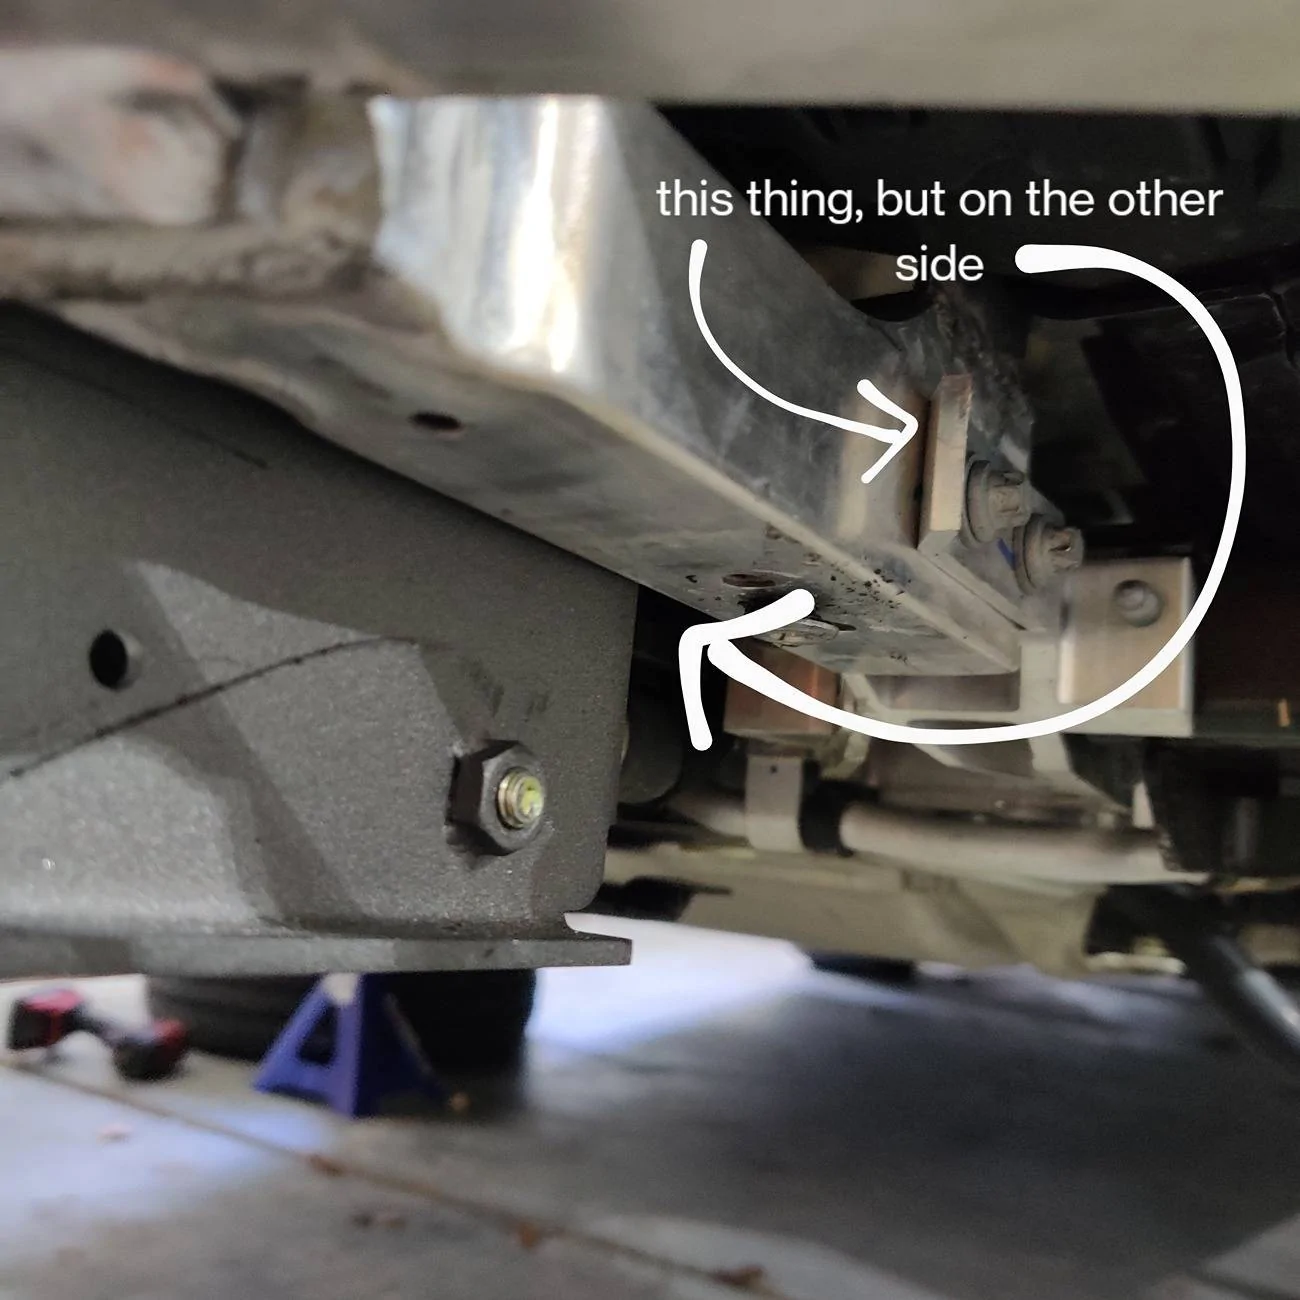
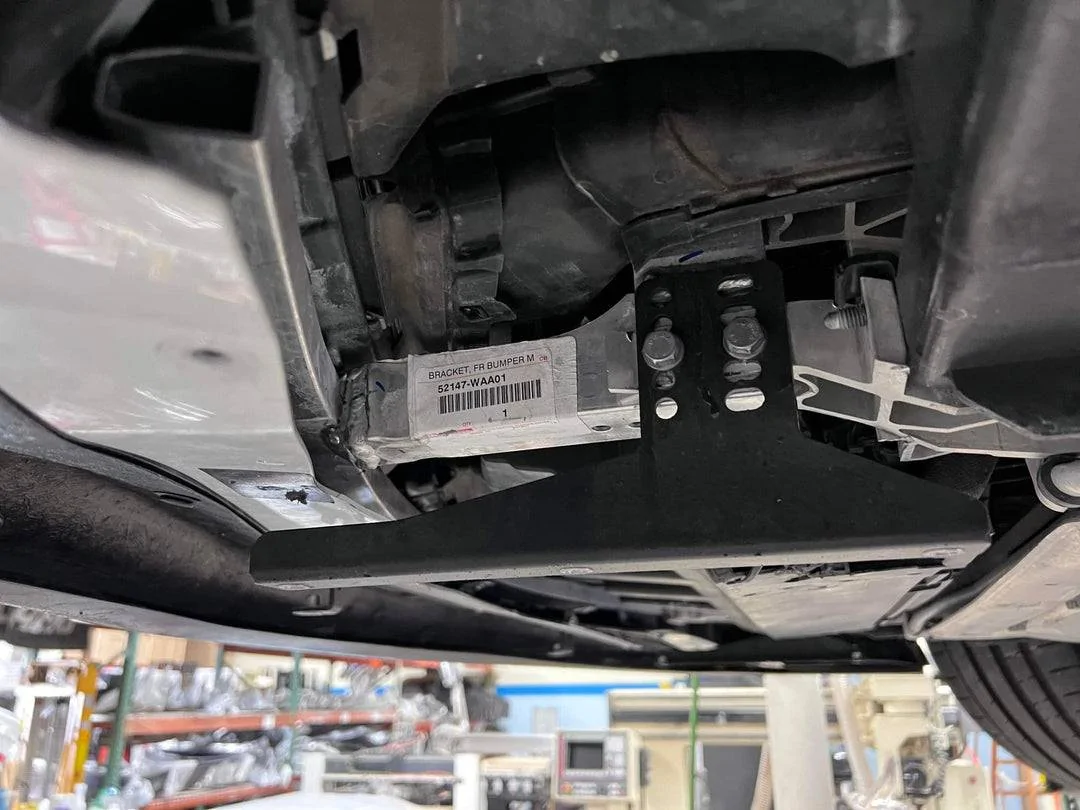
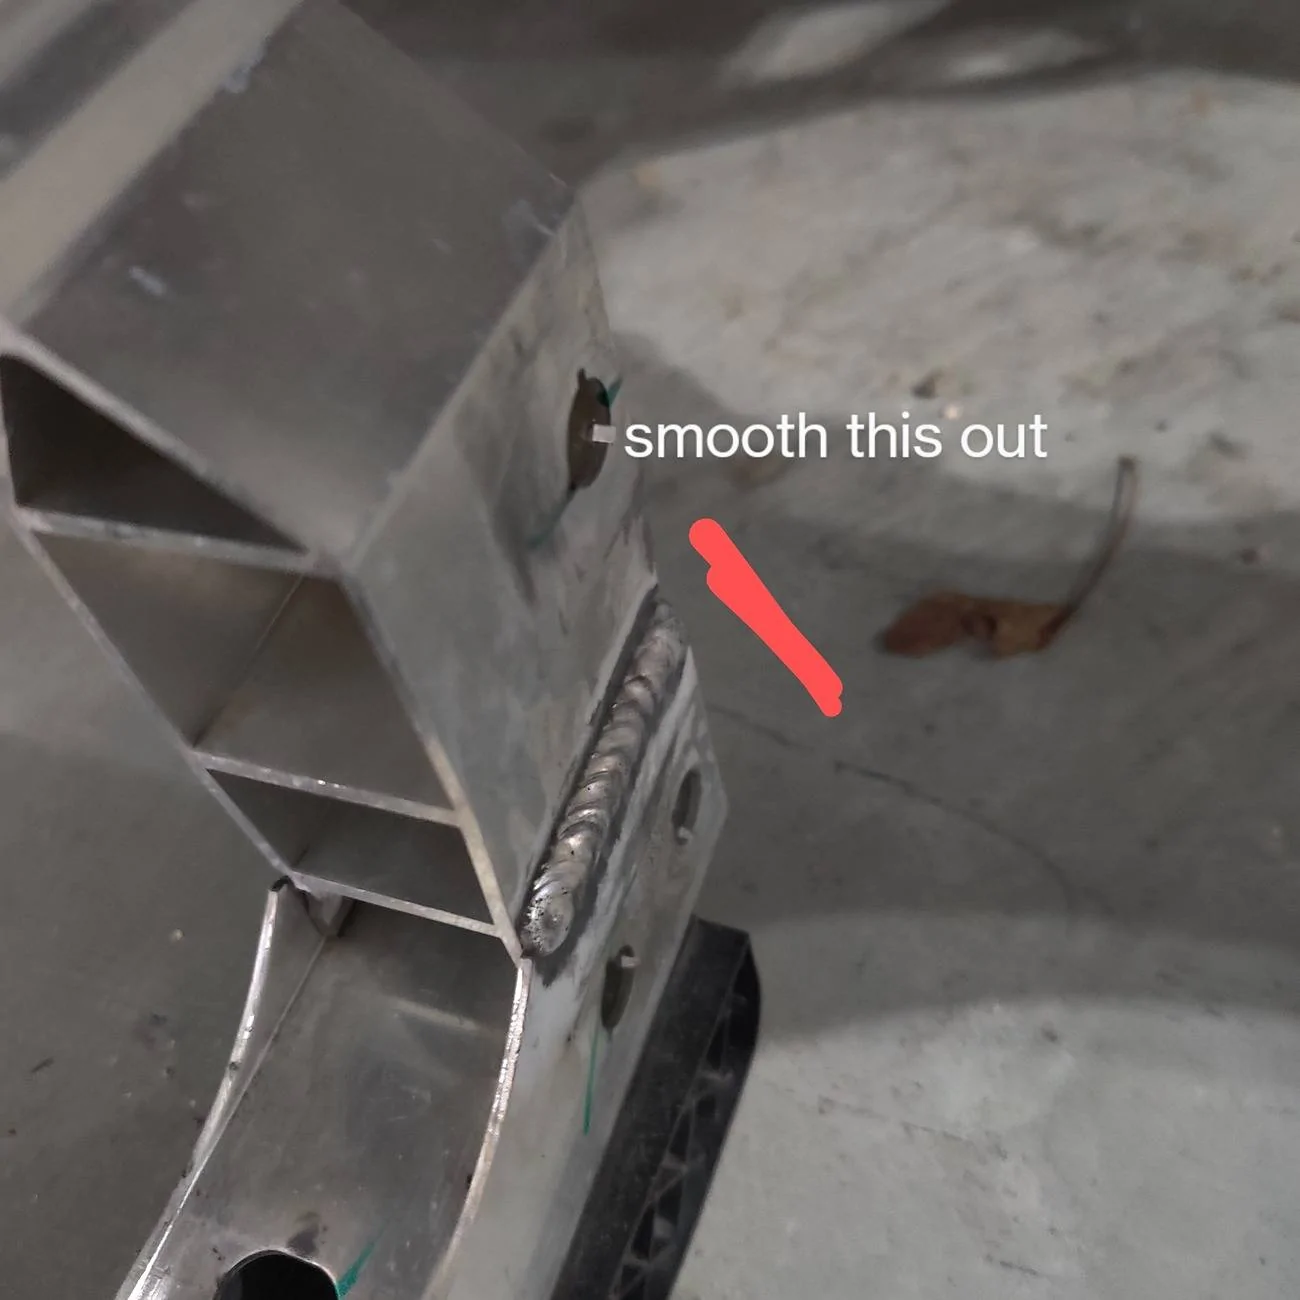
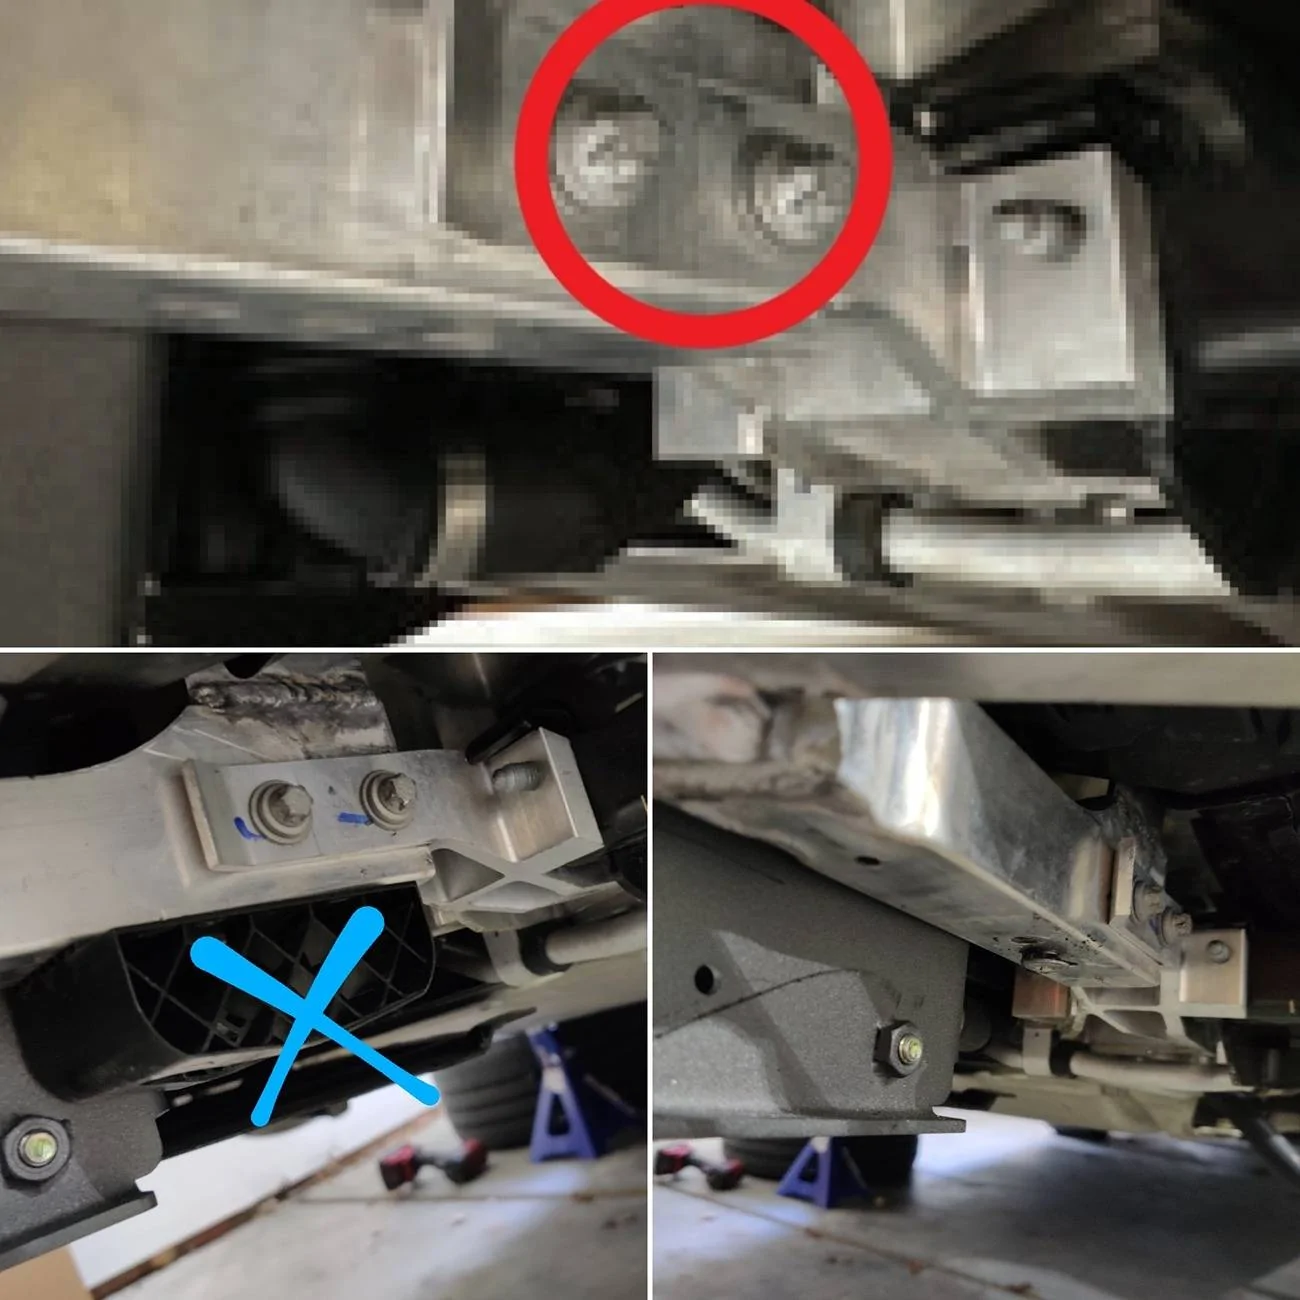
11. lower bumper support may not come out without a fight, depending on the weld thickness. it needs to come straight down, since there is a vertical peg and the duct in the way of pulling it forward. i filed the weld smoother so that going back in went smoother.
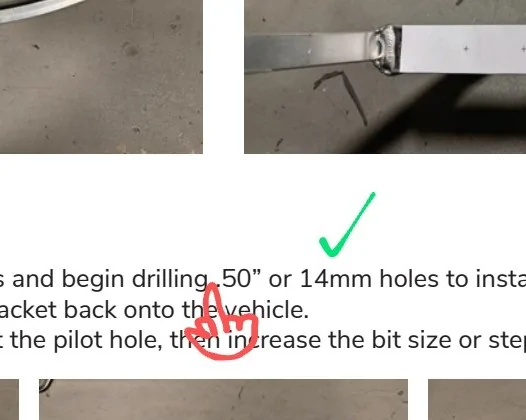
12. step drill bit failed me. if you have step bit like this, it is too long and will bottom out before reaching the required diameter. Just go buy a 10mm bit.
14. despite what it says in the instructions, 1/2 inch is nowhere near large enough to fit the m10 rivnut. go buy a 14mm bit (note, my home depot does not carry this size).

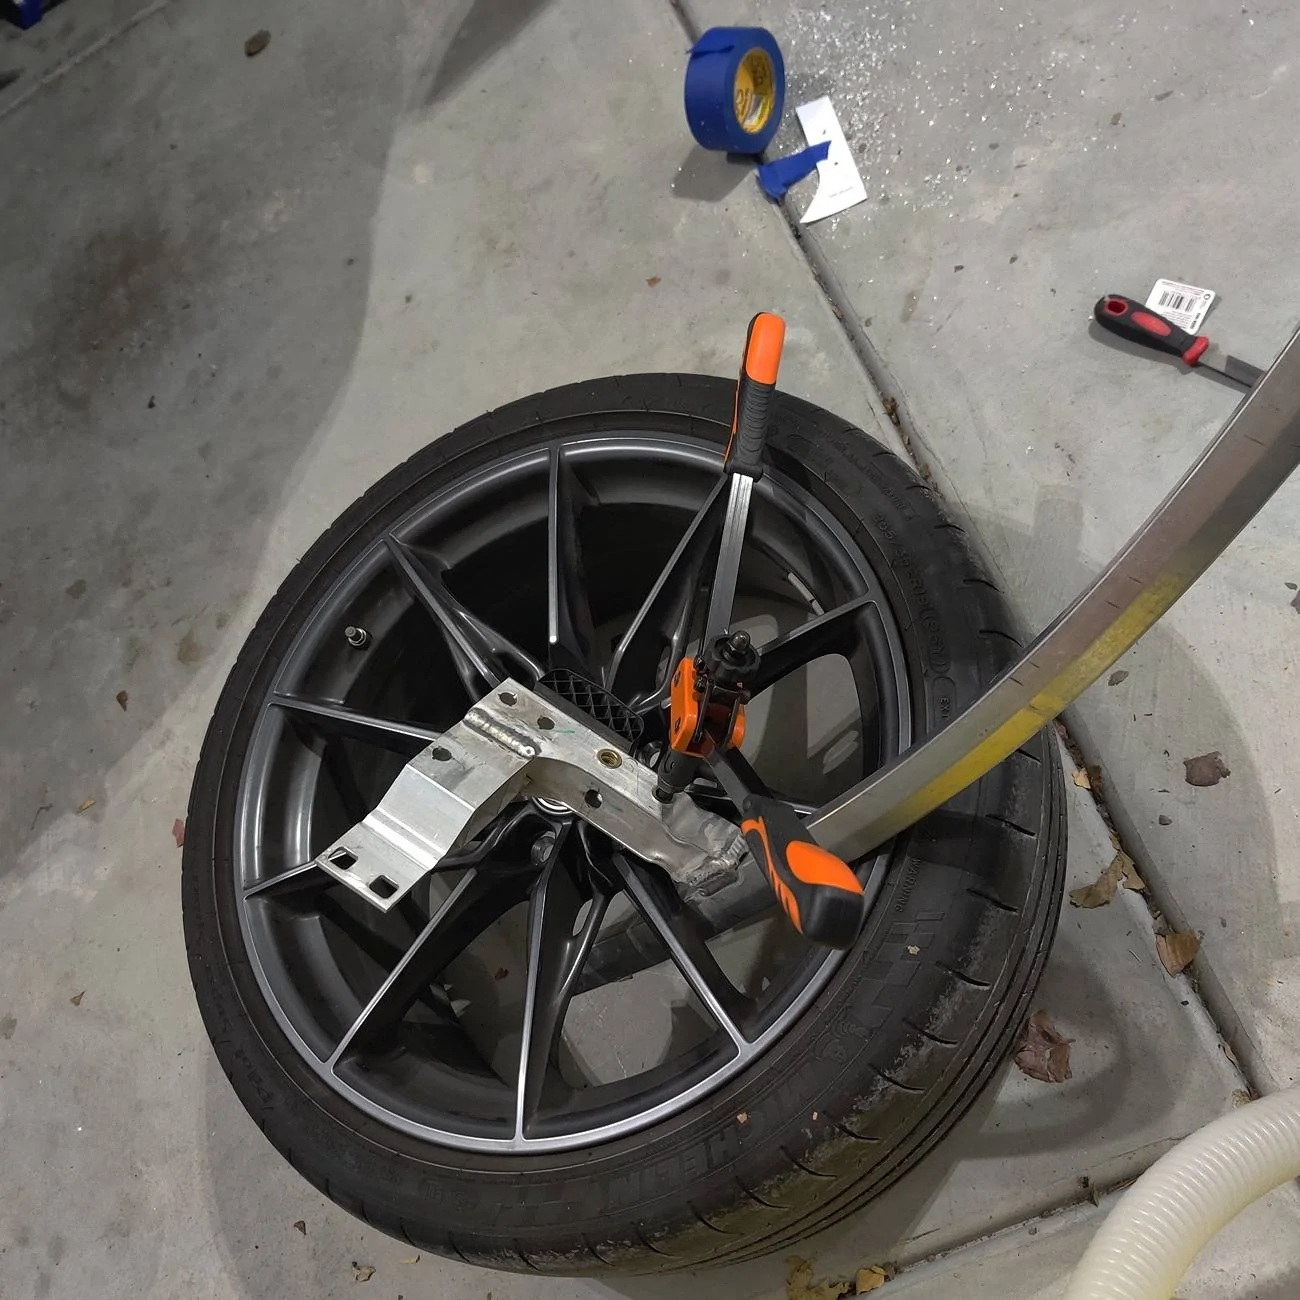
if you are struggling to hold the support and apply pressure to the tool, you can get creative with your wheel like this. or don't be lazy fuck like me and get your sawhorse and properly clamp it.
17. later year mkv's have this plastic bumper thing that's not in the pictures. luckily it's made out of that same shitty brittle plastic that will snap off.
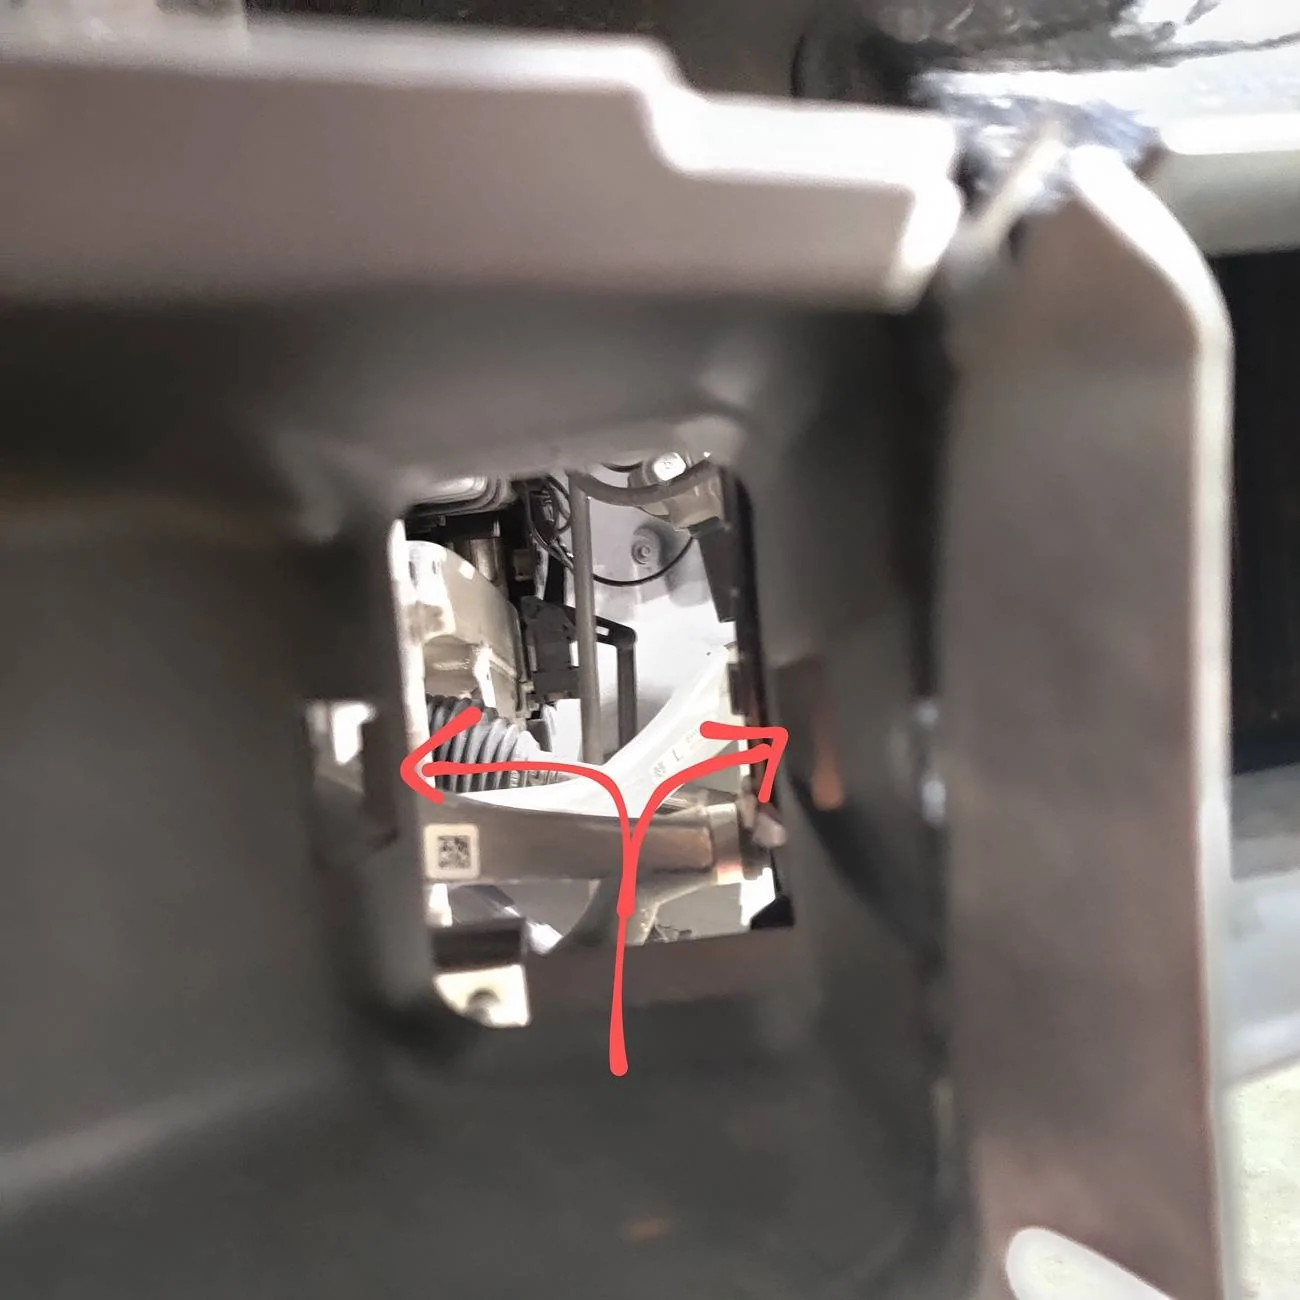
23. the best way i found to do this is shorten the cable juuust enough so the cotter pin hole is half-exposed. then push up on the splitter and shove the pin thru.
24. i didnt like how the cables rubbed the outer duct, so i v-notched it.

-10mm drill bit (dont screw around with a step bit)
-14mm drill bit (ditto, I'll explain later)
-harbor freight rivnut/nutsert tool doesnt have the required m10 head. Gotta get one from amazon. this is the one I bought.
Notes based on step (see pdf)
1. you will toss all 3 undertray plastics. no need to set the bolts aside. watch the verus youtube video for bumper removal.
2. the grill shroud is gonna suck to remove. remove these tabs by inserting flathead and twisting. you may snap some tabs. i got lucky on removal but not on re-install.
4. friendship ended with dremels. now oscillating multi-tool is my best friend. make sure you have a narrow plunger and a half-circle and you can do all the cuts on this install without a tiny disc shattering and flying off at your face.
10. brake duct tabs suck. you will need to shove your hand into the duct and press outward.
also be aware of a coolant hose clip on the passenger side.

11. lower bumper support may not come out without a fight, depending on the weld thickness. it needs to come straight down, since there is a vertical peg and the duct in the way of pulling it forward. i filed the weld smoother so that going back in went smoother.
12. step drill bit failed me. if you have step bit like this, it is too long and will bottom out before reaching the required diameter. Just go buy a 10mm bit.
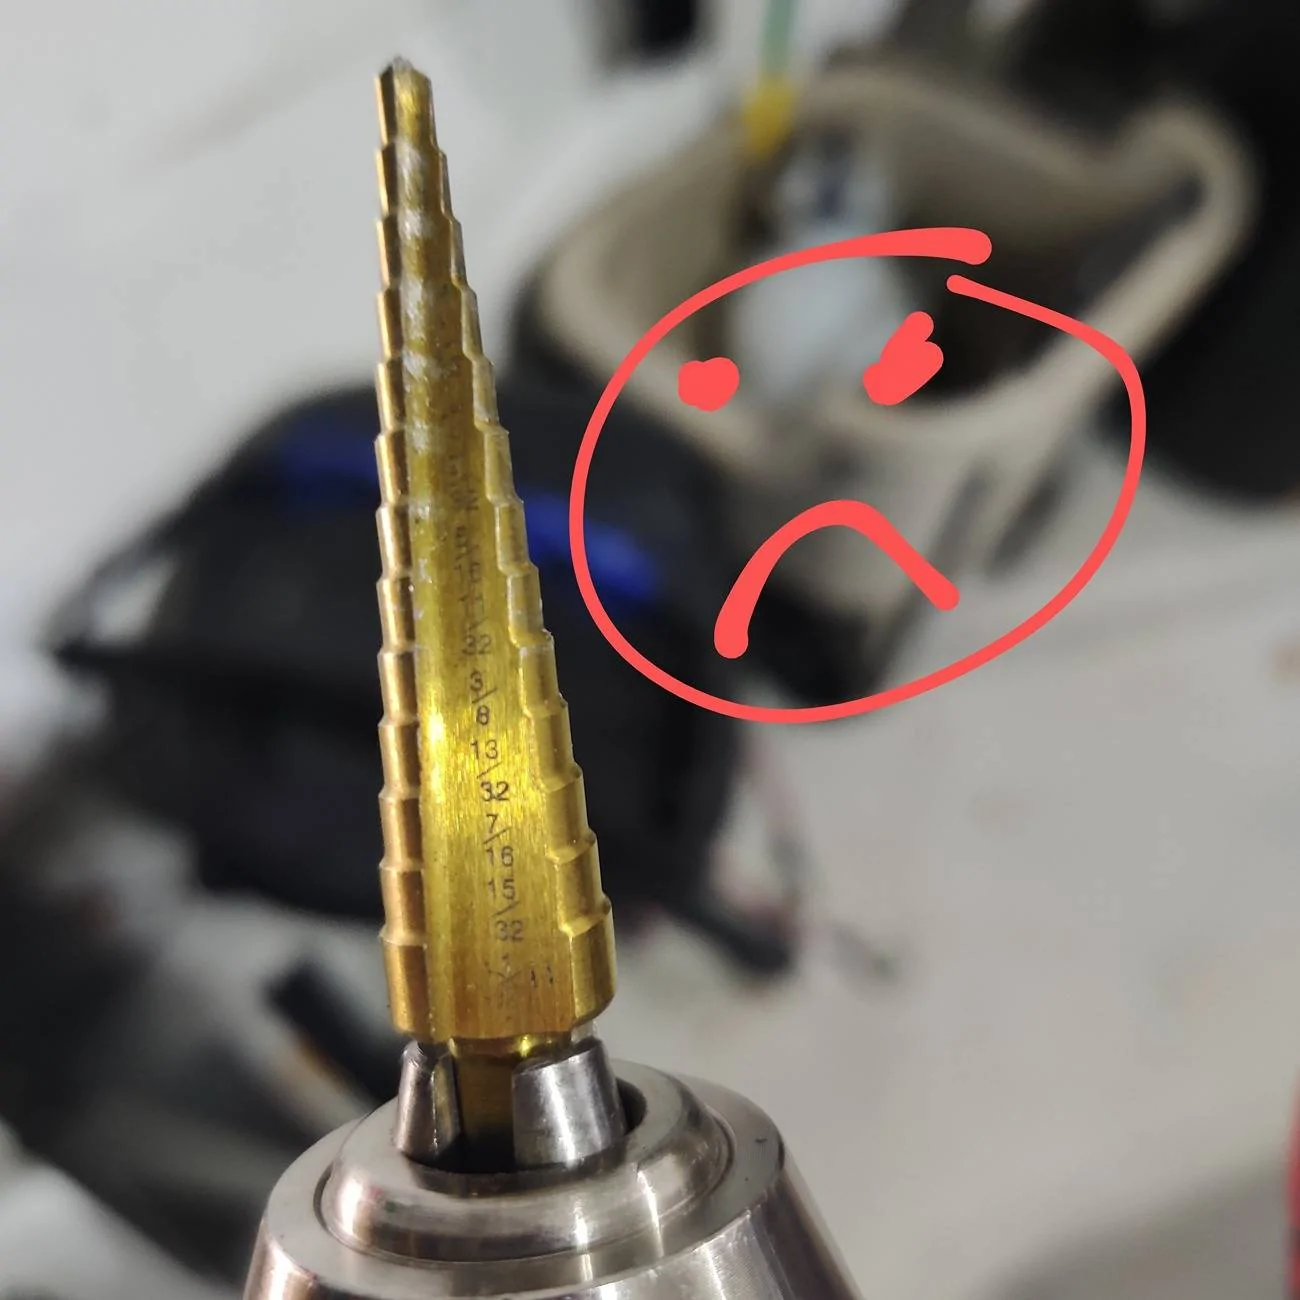
14. despite what it says in the instructions, 1/2 inch is nowhere near large enough to fit the m10 rivnut. go buy a 14mm bit (note, my home depot does not carry this size).
if you are struggling to hold the support and apply pressure to the tool, you can get creative with your wheel like this. or don't be lazy fuck like me and get your sawhorse and properly clamp it.
17. later year mkv's have this plastic bumper thing that's not in the pictures. luckily it's made out of that same shitty brittle plastic that will snap off.
23. the best way i found to do this is shorten the cable juuust enough so the cotter pin hole is half-exposed. then push up on the splitter and shove the pin thru.
24. i didnt like how the cables rubbed the outer duct, so i v-notched it.
Sponsored
Attachments
-
4.9 MB Views: 135
Last edited: