i3igpete
Well-Known Member
- Thread starter
- #1
Buy the lower Fender vent here:
https://www.circuitworx.com.au/products/toyota-86-brz-guard-vent-lower-behind-tyre
Tools needed:
Tape measure
Sharpie marker
Cutting tools (i used 4.5 inch angle grinder w/ cutoff wheel, and oscillating multi-tool with half-moon blade)
Pop rivet install tool
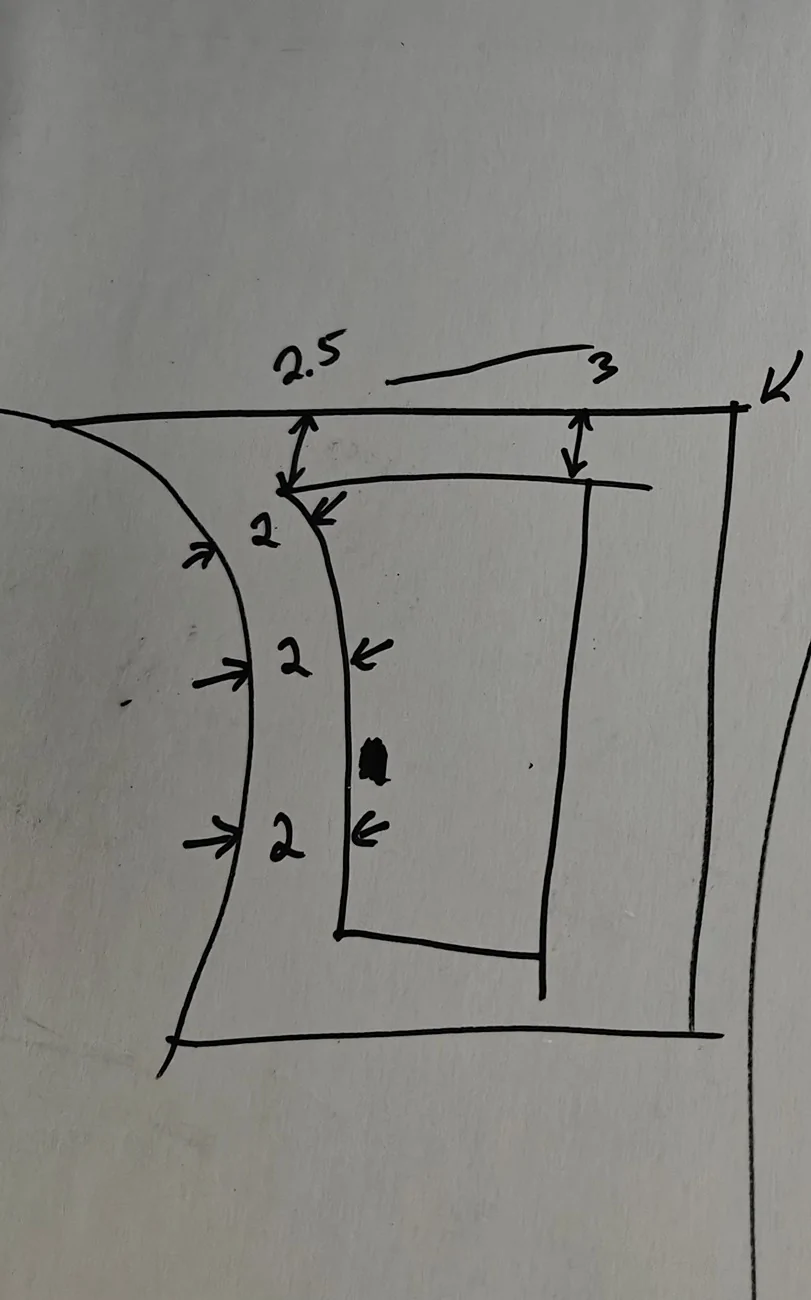
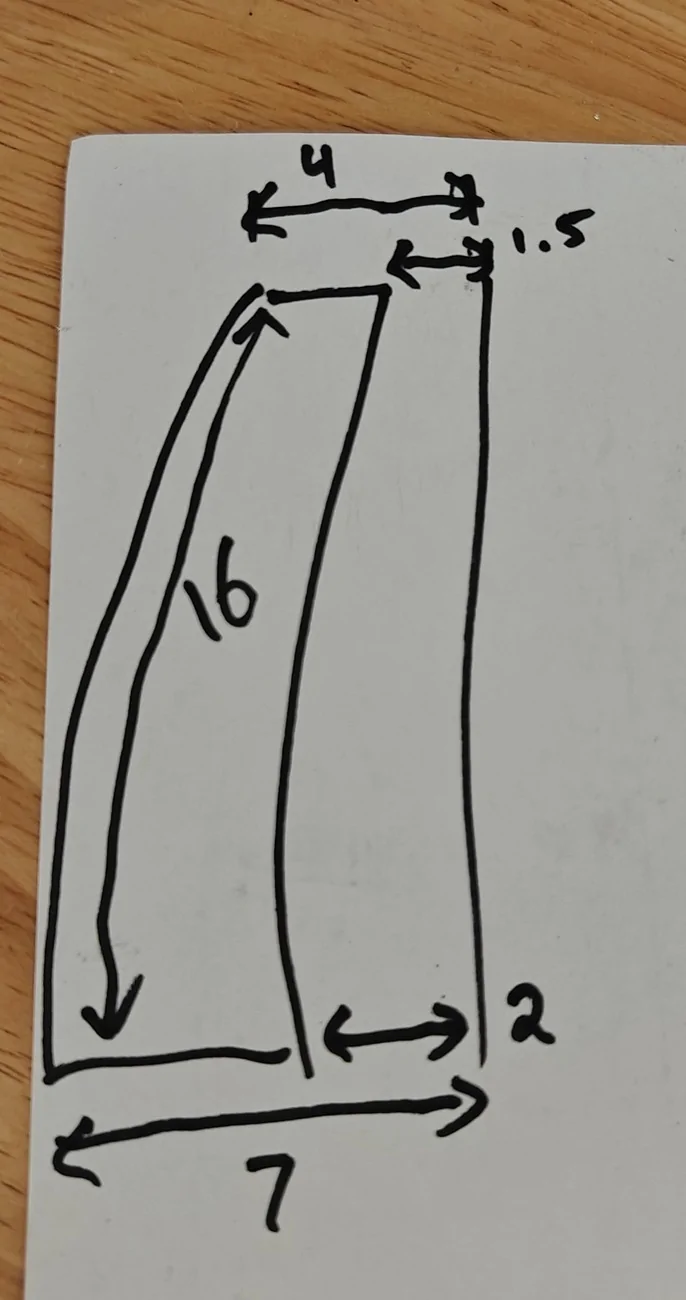
First, grab a tape measure and hook it on the edge of the fender. Create a mark at the desired offset, 2-4 inches is visually the sweet spot. I chose 2 inches. Repeat this at multiple locations on the wheel arch. Connect the dots to make an circular arc.
Line up the curved inner edge of the template with the arc you just made. Play with your angular orientation by sliding it up and down along the arc. Note that the top edge of the fender is not level with the ground (it's tilted nose down about 4 degrees), nor is it perpendicular with the rear edge. So you need to pick your battles on what to align it to.

I chose to position the top of the vent at 2 degrees nose down. This corresponds with the cut line 2.5 inches from top at front corner, 3 inches from top at rear corner.

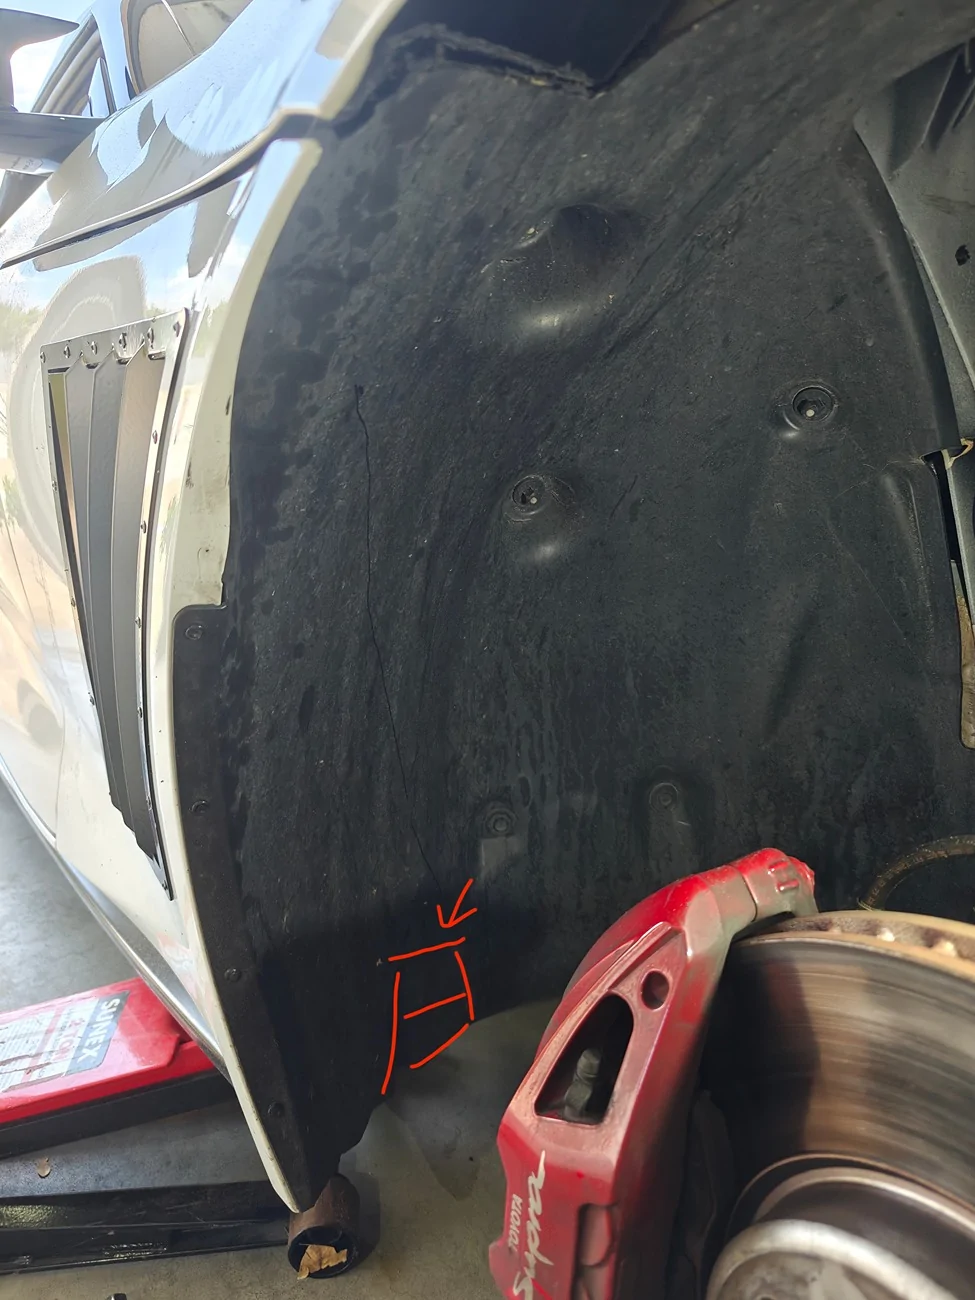
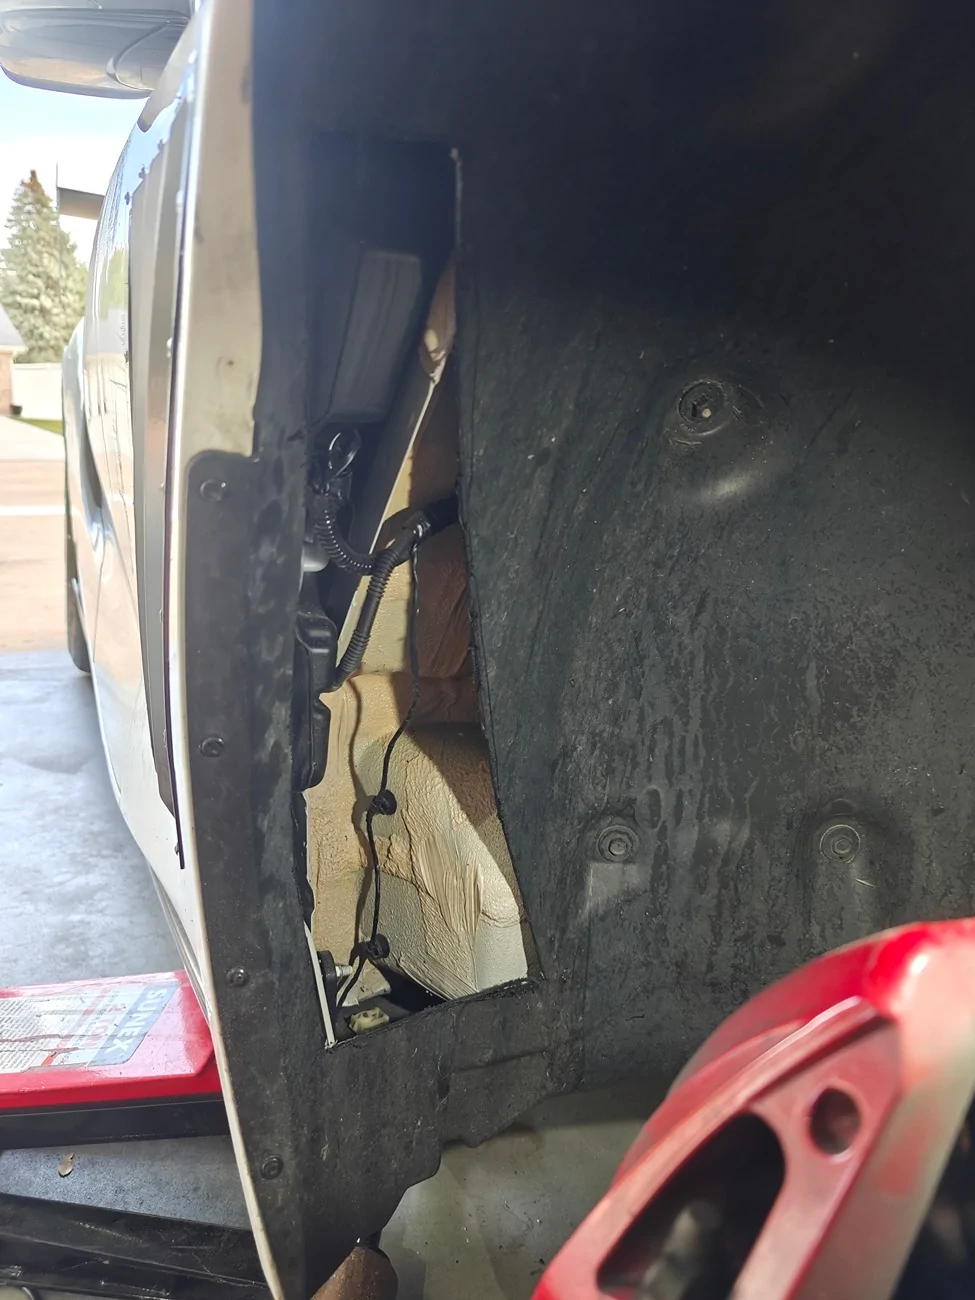
On the passenger side, the washer bottle sits about 3/4 inch behind the surface of the fender. This is mostly a concern on the top and rear edges. If you're concerned about it, you can mark your cutoff wheel with a paint pen with a depth of 1/2 inch, or use a Dremel wheel of one inch diameter or smaller. I used an angle grinder and IMO, the extra mass makes it a lot more stable than a Dremel.

Bend to shape and drill the holes by taping the vent all the way around the edge, and drill all the holes through the vent itself. Insert placeholder rivets as you go to keep things aligned, but don't install any rivets yet until all holes are drilled.
Some people recommend marking the holes with the Sharpie and taking it off the vent to drill, but I found that you rarely get all holes lined up perfect that way and some holes will need to be redrilled or hogged out.
From there, touch up the holes in the vent and the fender itself using some paint. Then install the pop rivets.
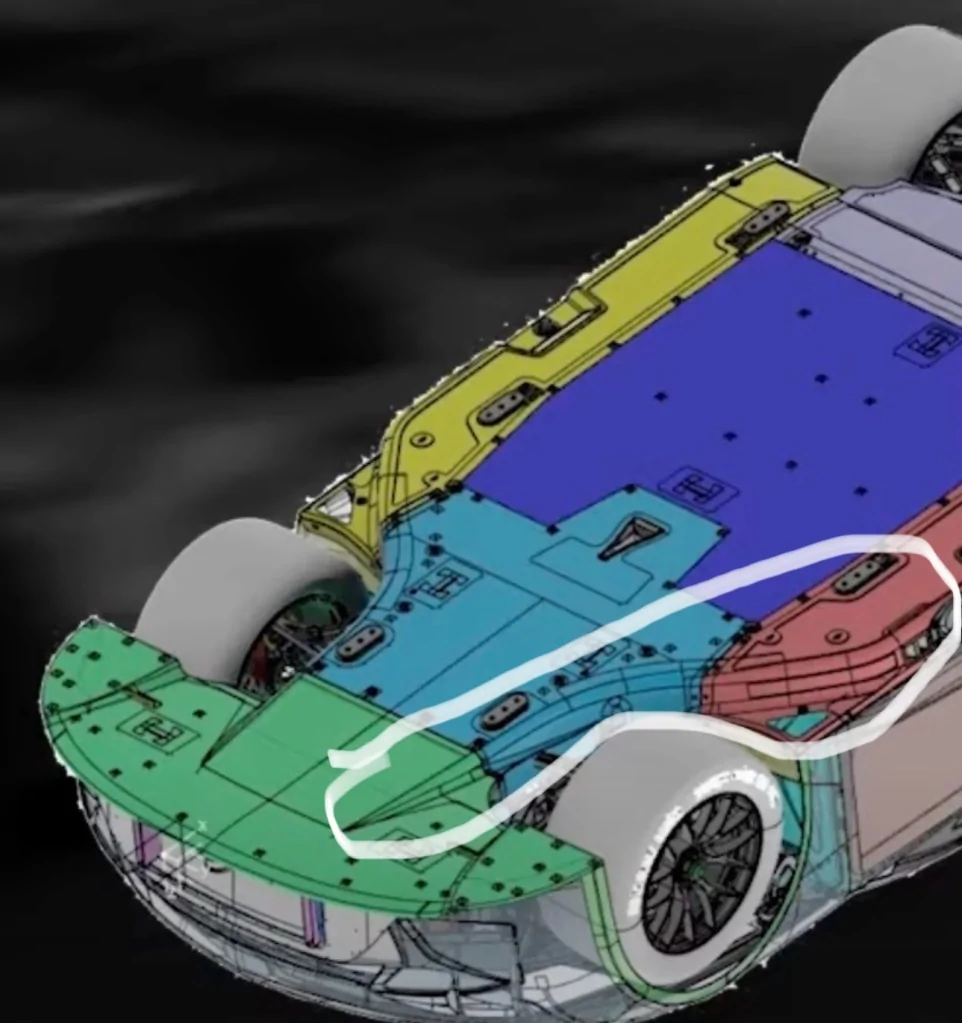
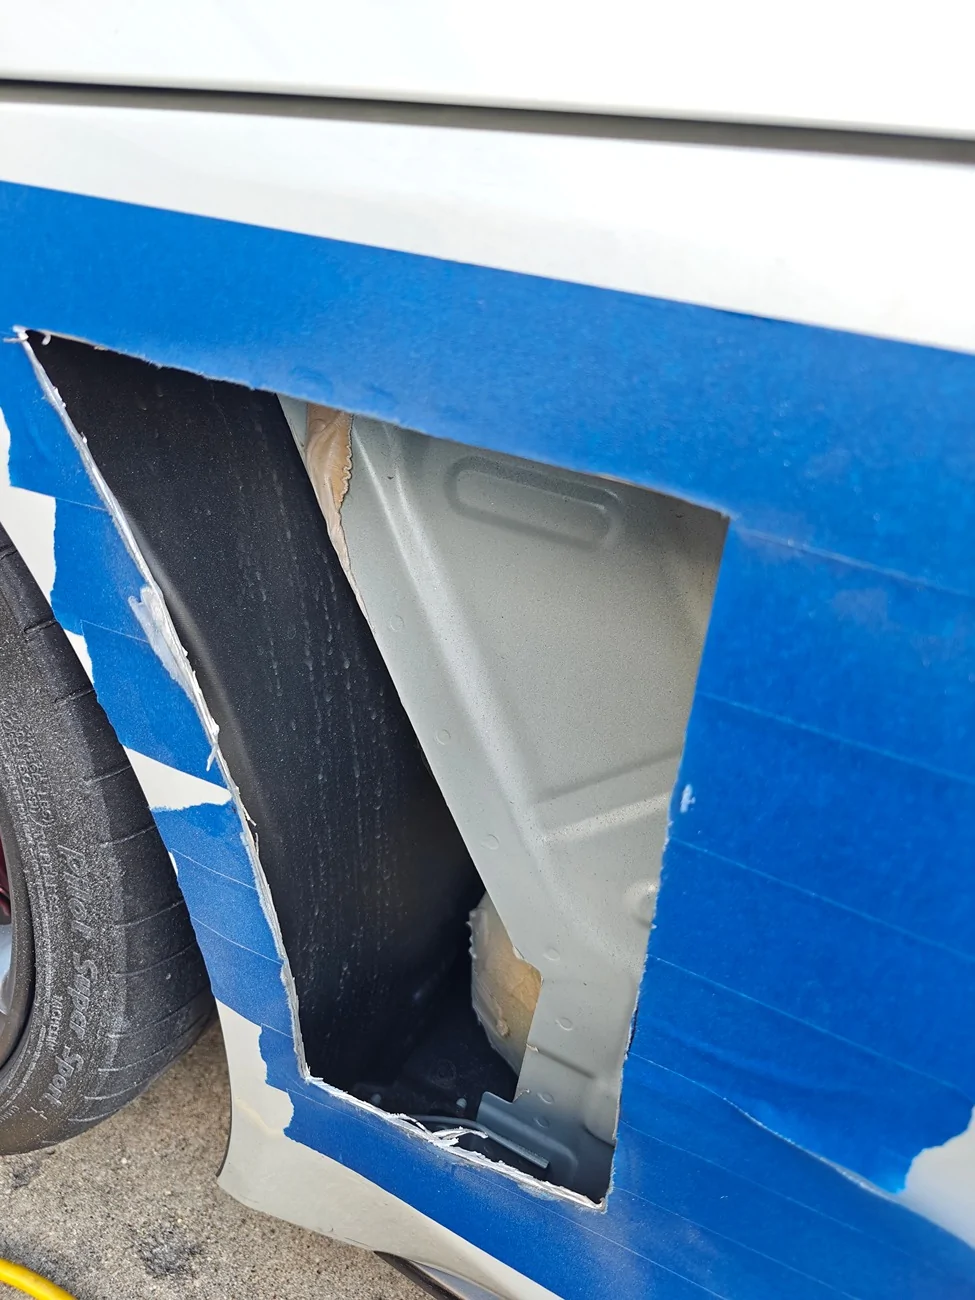
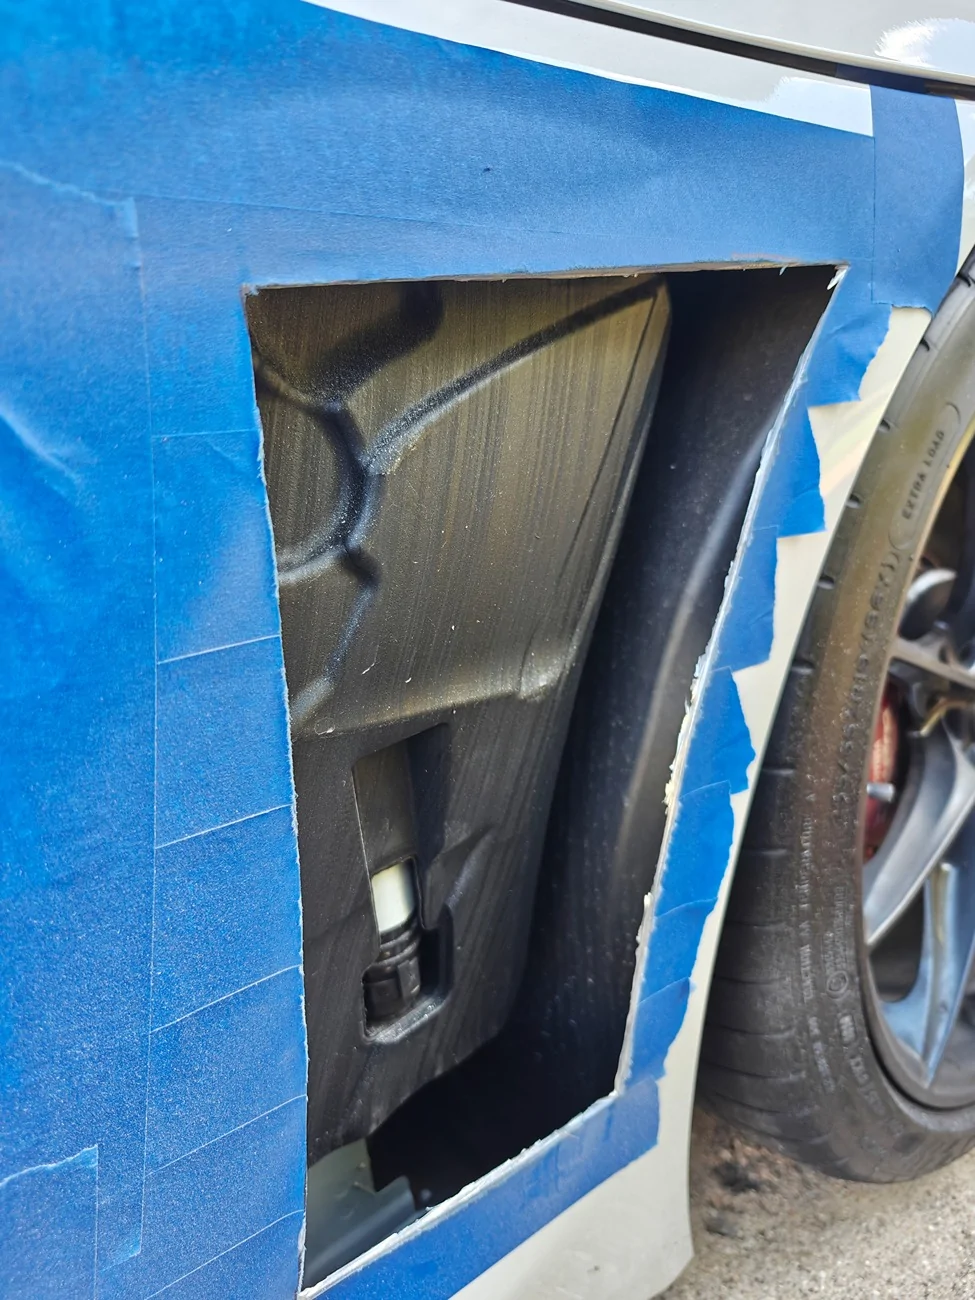
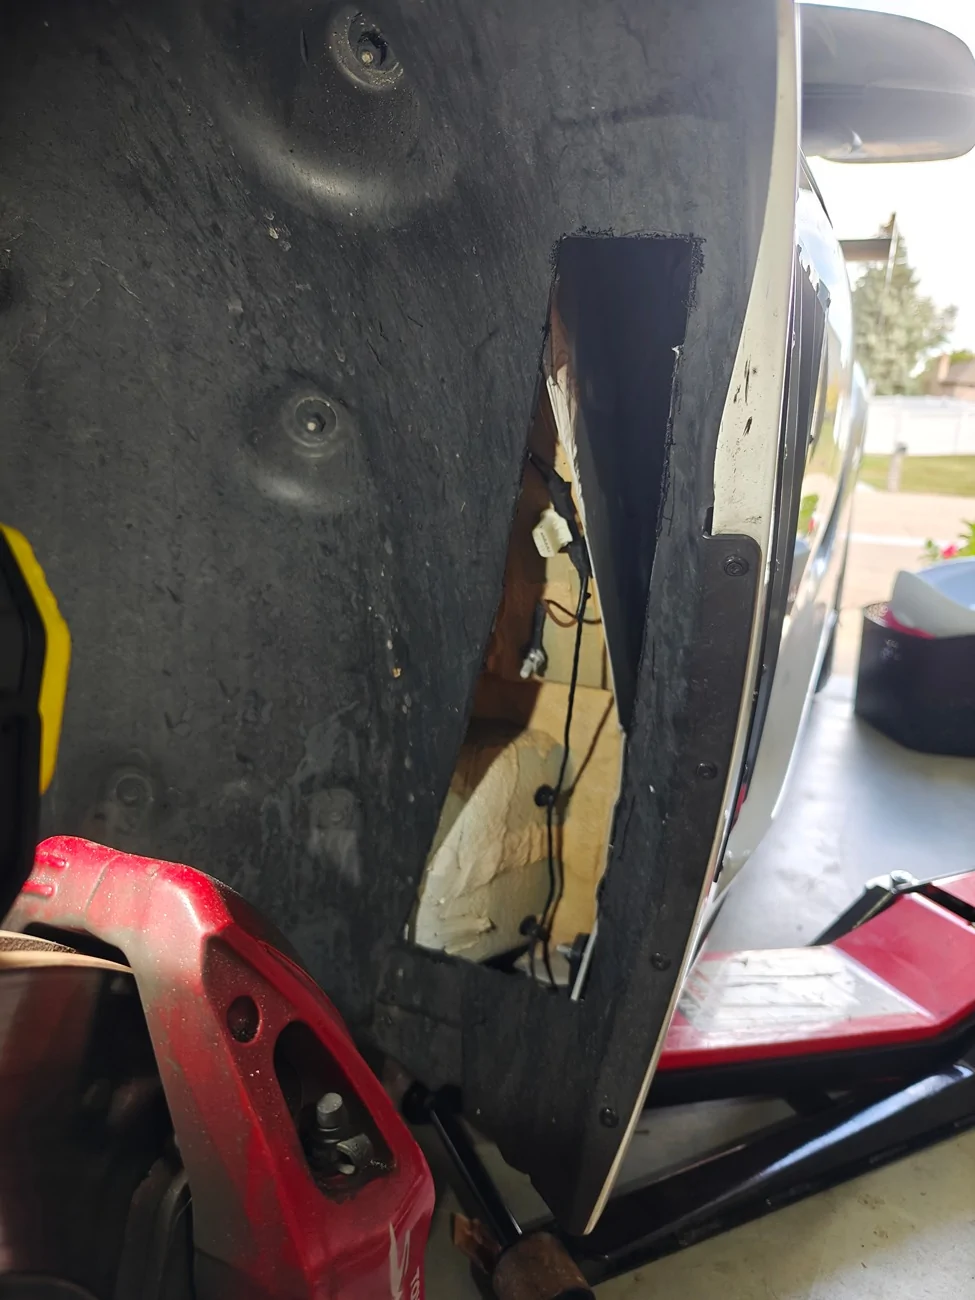
For the plastic inner liner cutout, it's sort of up you. Ideally you want the inner liner cut area to be equal to the vent area or larger. The drawn template here maximizes the useful area on the passenger side near the bottom, since so much of the upper side is blocked by the washer bottle. The outer vertical edge will have a concave Groove that you can use, and the bottom line i traced a trapezoid shape in the longer.
 .
.
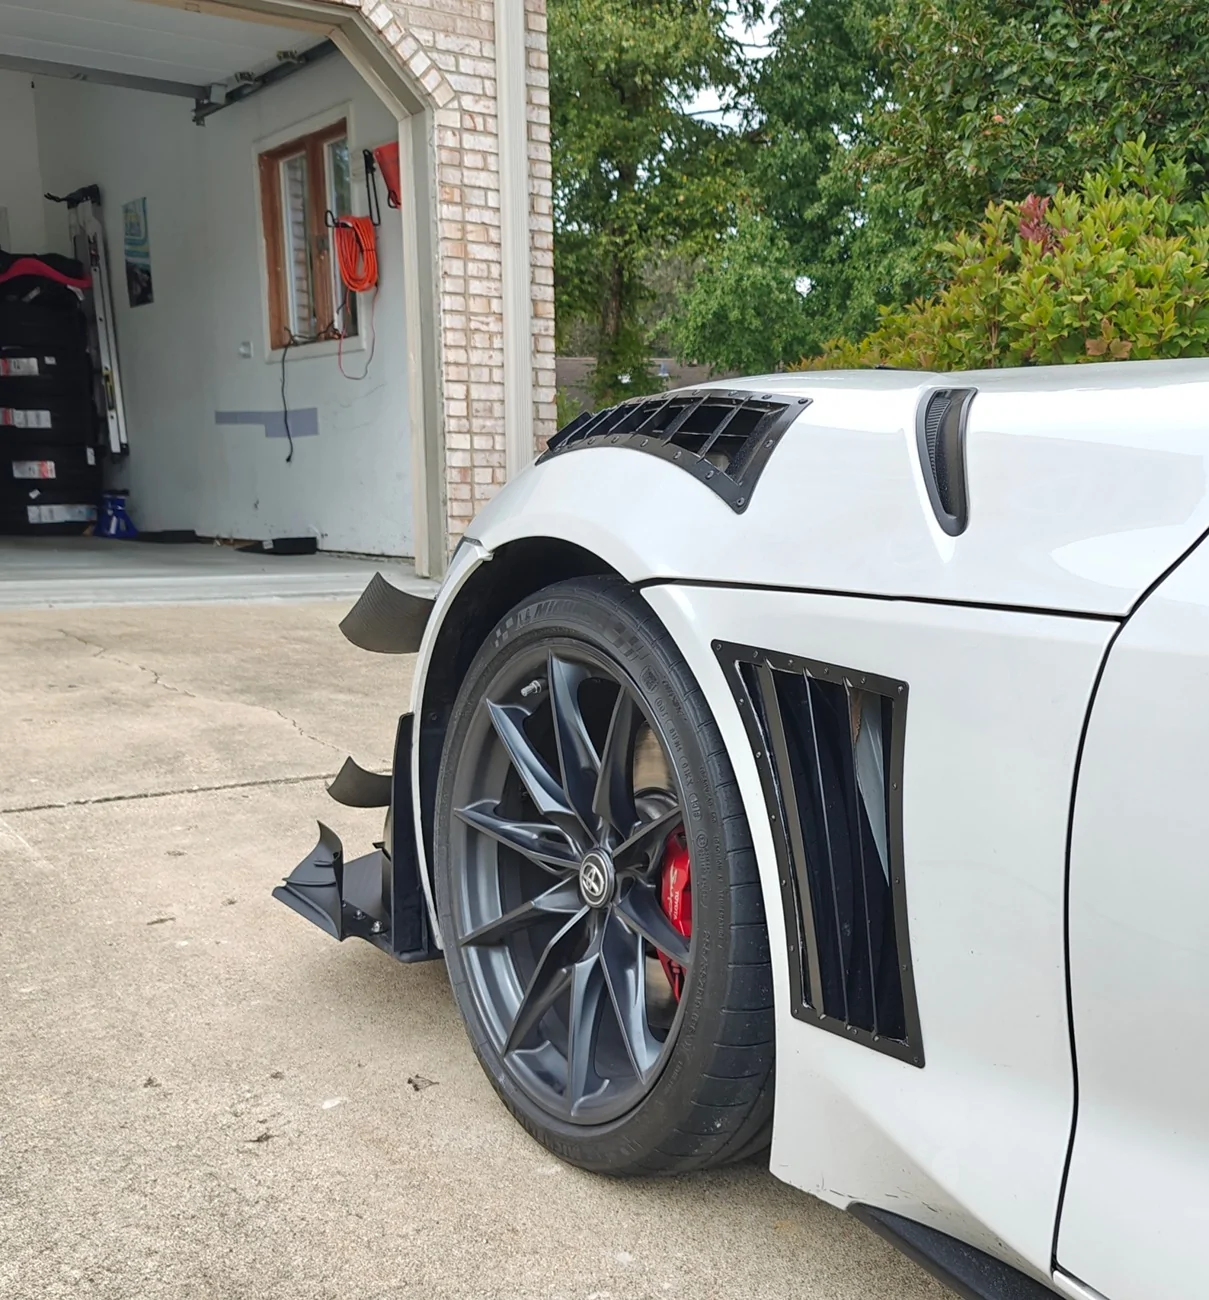
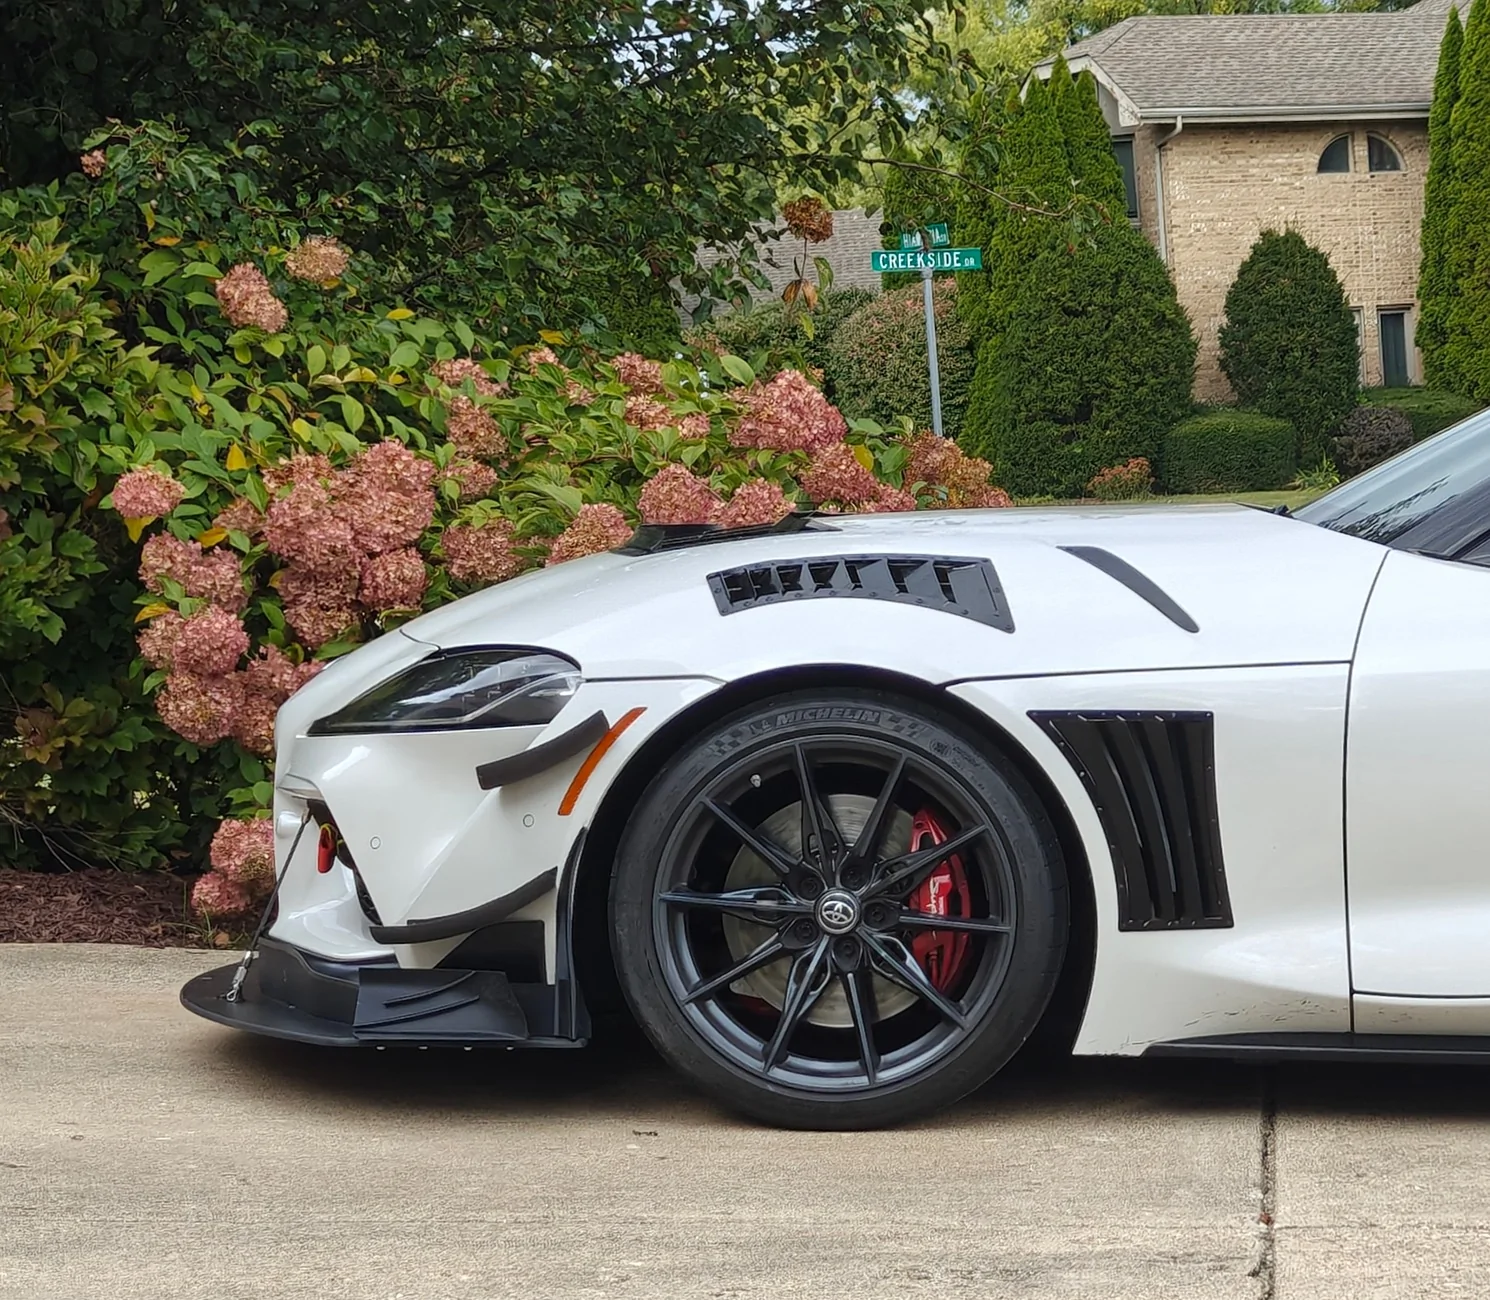
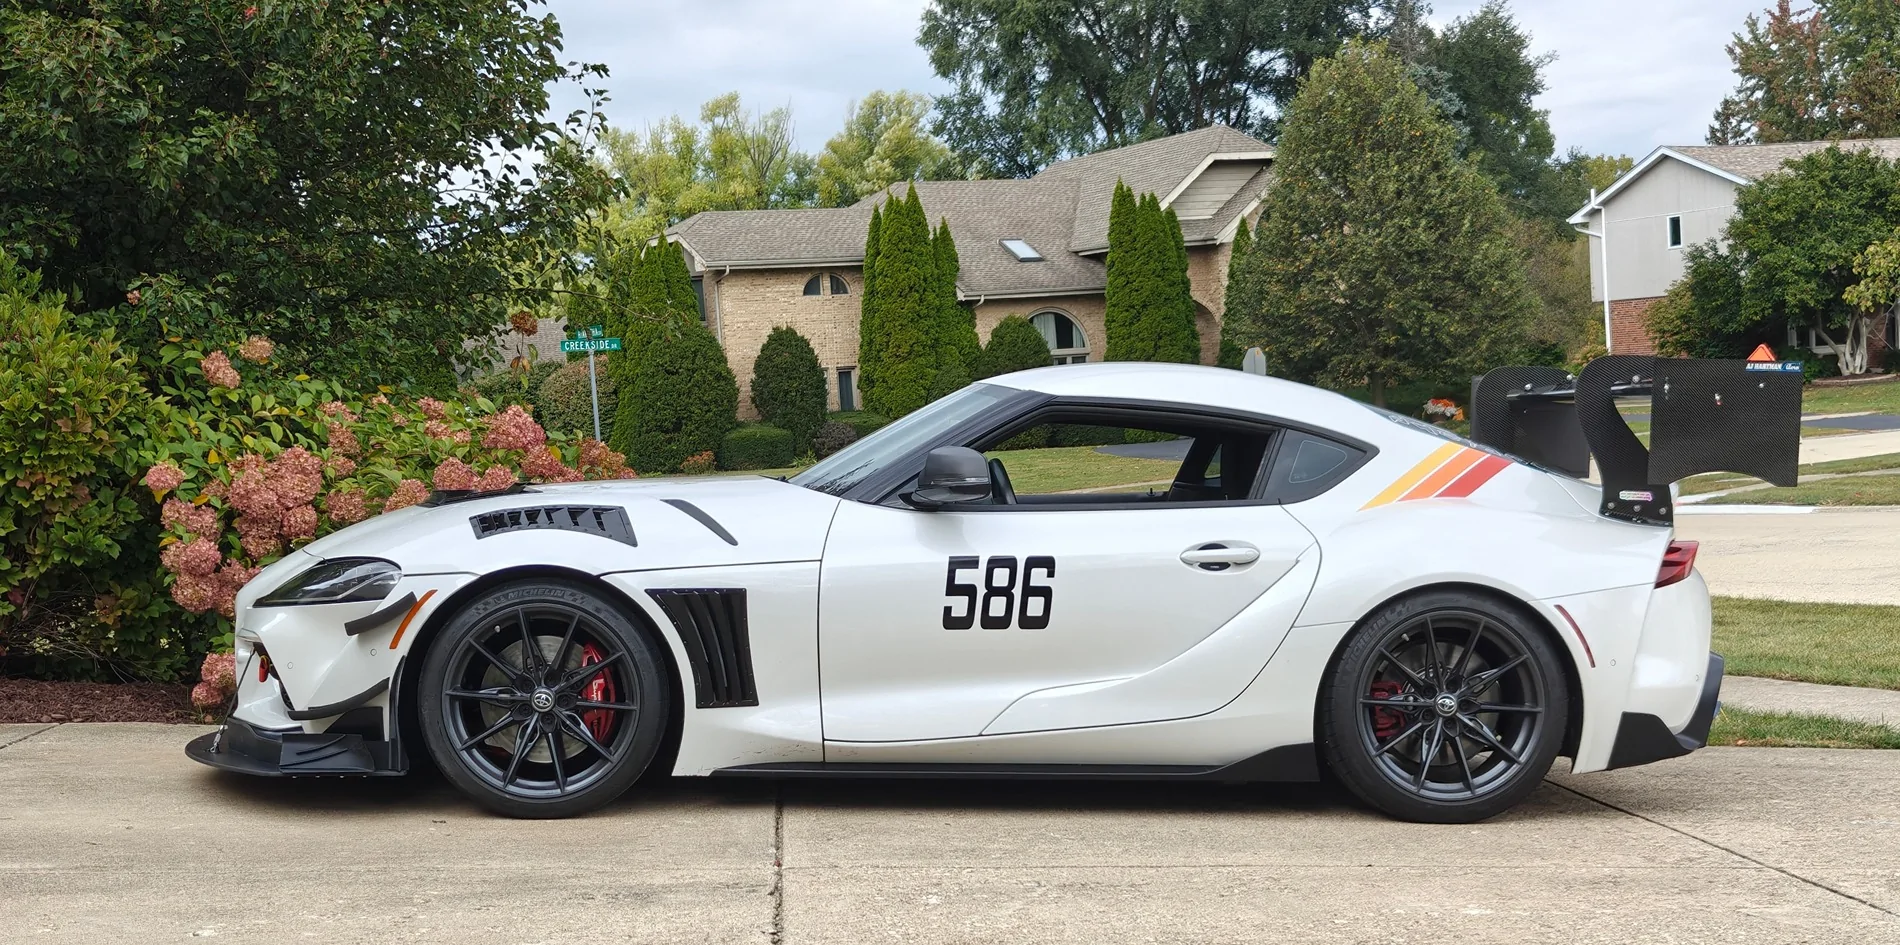
Installed pictures


https://www.circuitworx.com.au/products/toyota-86-brz-guard-vent-lower-behind-tyre
Tools needed:
Tape measure
Sharpie marker
Cutting tools (i used 4.5 inch angle grinder w/ cutoff wheel, and oscillating multi-tool with half-moon blade)
Pop rivet install tool
First, grab a tape measure and hook it on the edge of the fender. Create a mark at the desired offset, 2-4 inches is visually the sweet spot. I chose 2 inches. Repeat this at multiple locations on the wheel arch. Connect the dots to make an circular arc.
Line up the curved inner edge of the template with the arc you just made. Play with your angular orientation by sliding it up and down along the arc. Note that the top edge of the fender is not level with the ground (it's tilted nose down about 4 degrees), nor is it perpendicular with the rear edge. So you need to pick your battles on what to align it to.
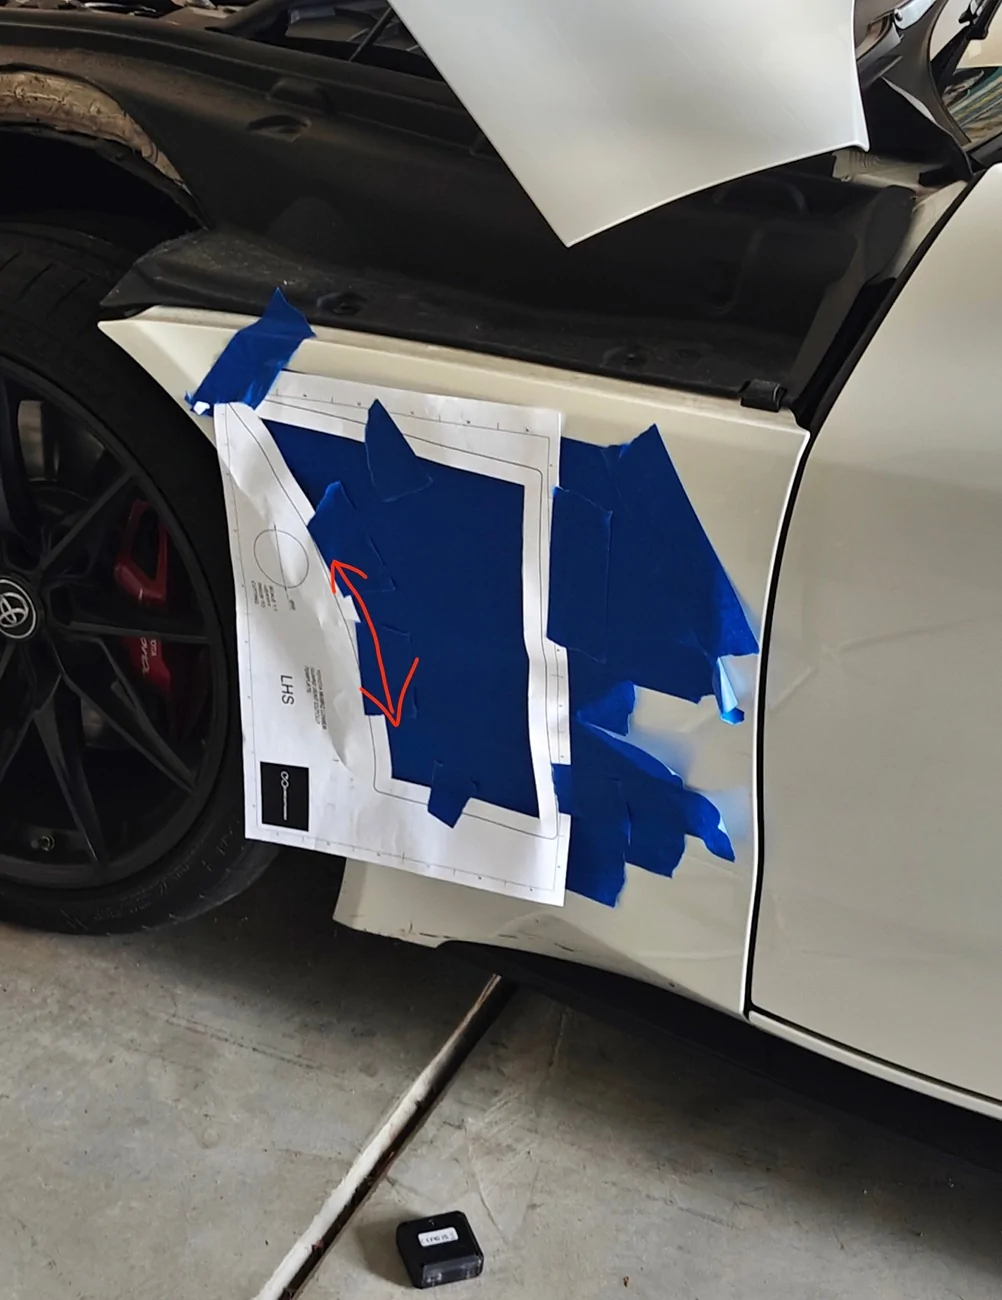
I chose to position the top of the vent at 2 degrees nose down. This corresponds with the cut line 2.5 inches from top at front corner, 3 inches from top at rear corner.
On the passenger side, the washer bottle sits about 3/4 inch behind the surface of the fender. This is mostly a concern on the top and rear edges. If you're concerned about it, you can mark your cutoff wheel with a paint pen with a depth of 1/2 inch, or use a Dremel wheel of one inch diameter or smaller. I used an angle grinder and IMO, the extra mass makes it a lot more stable than a Dremel.
Bend to shape and drill the holes by taping the vent all the way around the edge, and drill all the holes through the vent itself. Insert placeholder rivets as you go to keep things aligned, but don't install any rivets yet until all holes are drilled.
Some people recommend marking the holes with the Sharpie and taking it off the vent to drill, but I found that you rarely get all holes lined up perfect that way and some holes will need to be redrilled or hogged out.
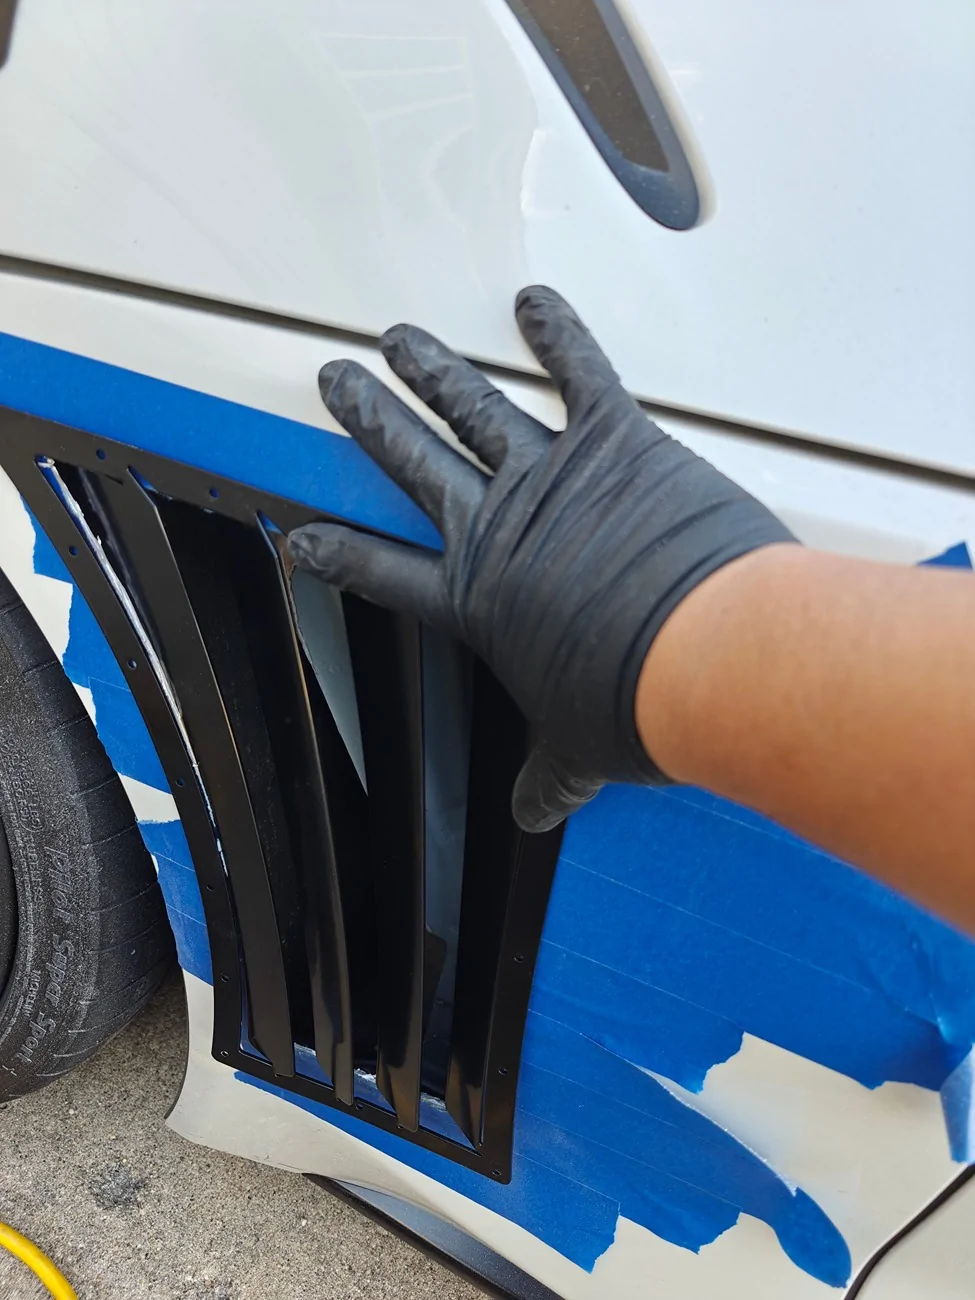
From there, touch up the holes in the vent and the fender itself using some paint. Then install the pop rivets.
For the plastic inner liner cutout, it's sort of up you. Ideally you want the inner liner cut area to be equal to the vent area or larger. The drawn template here maximizes the useful area on the passenger side near the bottom, since so much of the upper side is blocked by the washer bottle. The outer vertical edge will have a concave Groove that you can use, and the bottom line i traced a trapezoid shape in the longer.
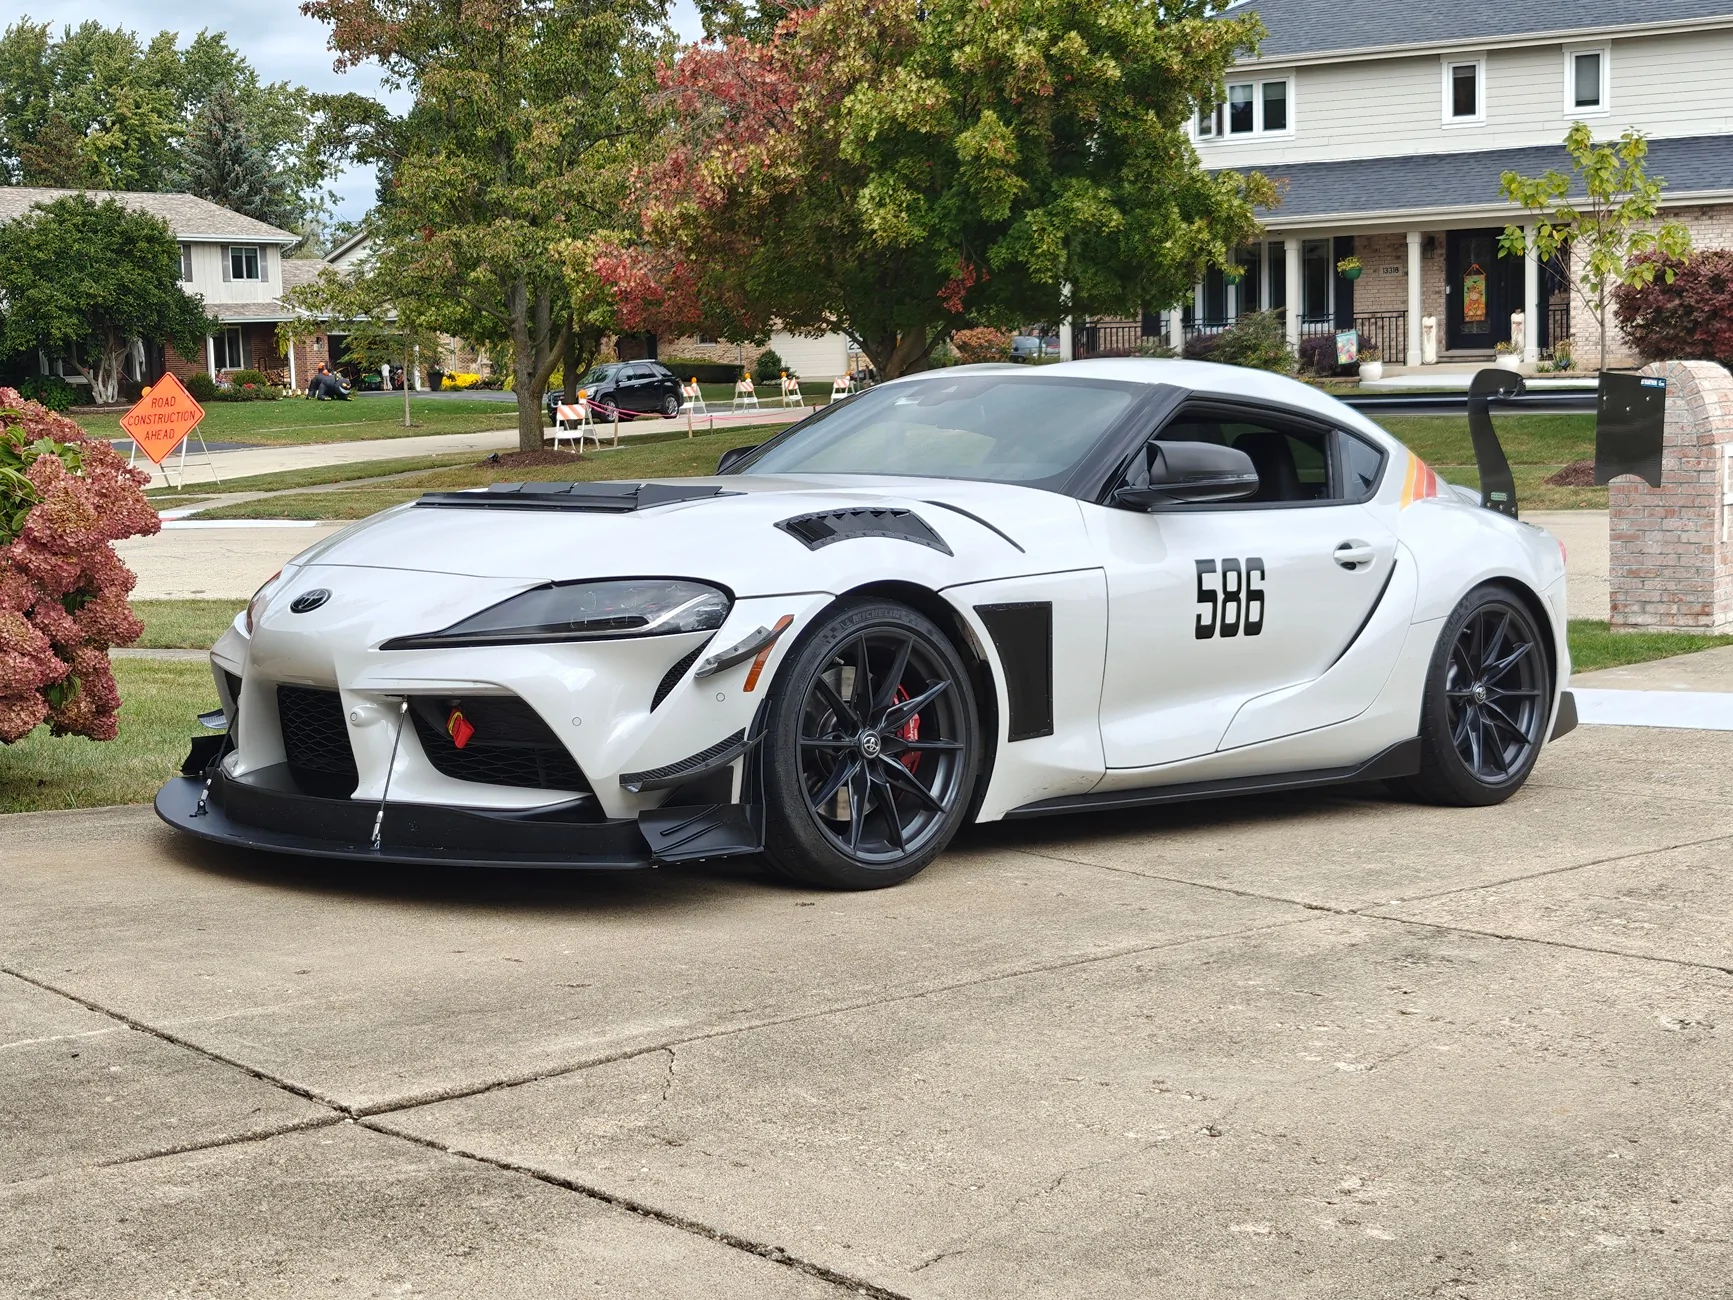
Installed pictures
Sponsored
Last edited: